No-Bake Chocolate Peanut Butter Oat Bars Delight

WANT TO SAVE THIS RECIPE?

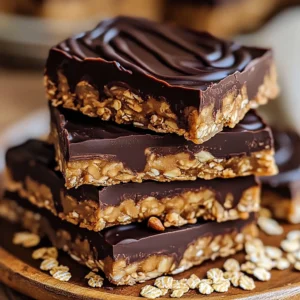
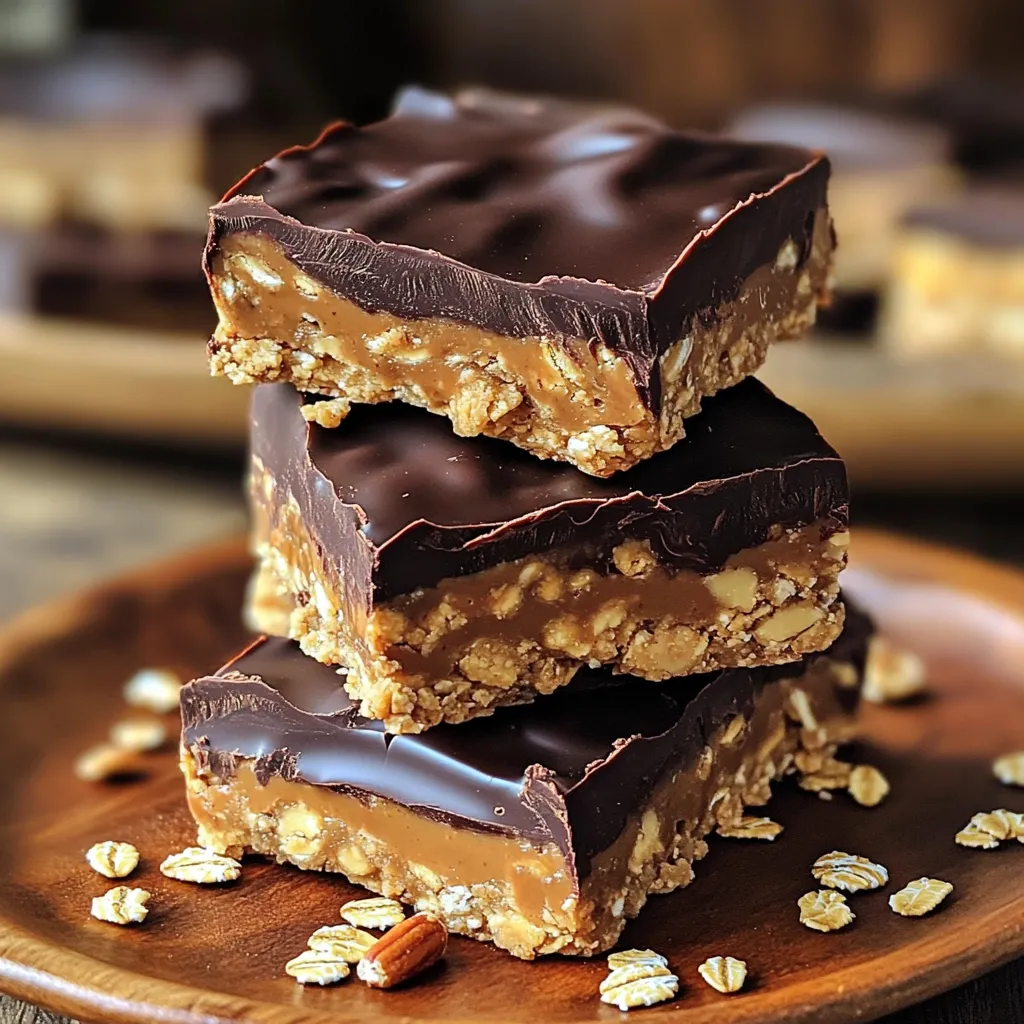
Are you ready for a sweet treat that’s easy and fun to make? You’ll love these No-Bake Chocolate Peanut Butter Oat Bars! With just a few simple ingredients like creamy peanut butter and dark chocolate chips, you can whip up a delicious snack in no time. Join me as I share step-by-step instructions, tips, and fun variations to customize your bars. Let’s dive in and satisfy that sweet tooth!

- 2 cups rolled oats - 1 cup creamy peanut butter - 1/2 cup honey or maple syrup - 1/2 cup dark chocolate chips - 1/4 cup unsweetened cocoa powder - 1 teaspoon vanilla extract - Pinch of salt I love using rolled oats in these bars. They add great texture and fiber. Creamy peanut butter gives the bars a smooth and rich taste. Honey or maple syrup adds natural sweetness. Dark chocolate chips bring a delicious chocolate flavor. Cocoa powder gives it a deeper chocolate taste. Vanilla extract adds warmth, while a pinch of salt enhances all the flavors. - 1/2 cup chopped nuts (almonds or walnuts) - Additional toppings (coconut, seeds) Chopped nuts add a nice crunch to the bars. You can use almonds or walnuts, depending on what you like. Additional toppings like coconut or seeds can also make your bars more fun and tasty. They add flavor and extra nutrients. Feel free to get creative with your choices! - Mixing dry ingredients: In a large bowl, add 2 cups of rolled oats, 1/4 cup of unsweetened cocoa powder, and a pinch of salt. Stir well to combine them. This step ensures an even flavor in every bite. - Melting peanut butter and sweetener: In a microwave-safe bowl, mix 1 cup of creamy peanut butter with 1/2 cup of honey or maple syrup. Heat for 30 to 45 seconds until warm. Stir until smooth and combined. - Combining mixtures: Add 1 teaspoon of vanilla extract to the peanut butter mixture. Pour this blend over the dry ingredients. Stir until all oats are coated. If you want, fold in 1/2 cup of chopped nuts for extra crunch. - Pressing into the baking dish: Line an 8x8 inch baking dish with parchment paper. Transfer the oat mixture into this dish and press it down firmly with your fingers or a spatula, making it even and compact. - Melting dark chocolate: In another microwave-safe bowl, add 1/2 cup of dark chocolate chips. Heat in 30-second increments, stirring well until smooth and fully melted. - Drizzling chocolate over oat mixture: Drizzle the melted chocolate over the pressed oats. Use a spatula to spread it evenly across the top. This adds a rich layer of flavor. - Refrigeration time: Place the dish into the refrigerator. Let it chill for at least 1 to 2 hours until the mixture sets. - Cutting and serving tips: Once set, lift out the bars using the overhanging parchment paper. Cut them into squares or rectangles for serving. For a nice touch, drizzle more melted chocolate on top and sprinkle with oats or chopped nuts. To get the best texture, pressing the mixture is key. Use your fingers or a spatula to push it down firmly. This keeps the bars from crumbling. The oat mix needs to be compact to hold its shape. Make sure the chocolate is fully melted before you drizzle it on top. Melt it in small bursts in the microwave. Stir between each burst to avoid burning. When serving, arrange the bars neatly on a plate. A clean look makes them more inviting. Drizzle a little melted chocolate on top for a fancy touch. You can also sprinkle chopped nuts or oats to make them pop. Pair these bars with a glass of cold milk or a warm cup of coffee. Fresh fruits like bananas or apples on the side also make a nice addition. Feel free to swap peanut butter for almond or cashew butter. This gives a fun twist to the flavor. You can also add flavor variations, like a dash of cinnamon or a scoop of protein powder. These small changes can transform the bars into something new and exciting! {{image_4}} You can easily change the flavor of your no-bake bars. For a salted caramel twist, add a swirl of caramel sauce on top before chilling. This adds a sweet, salty taste that pairs well with chocolate. You can also make them nut-free by using sunflower seed butter instead of peanut butter. This option keeps the bars creamy and delicious while being safe for those with nut allergies. If you follow a vegan diet, use maple syrup instead of honey. This simple swap keeps the bars plant-based. For gluten-free options, ensure you use certified gluten-free oats. This way, everyone can enjoy these tasty treats without worry. You can switch up your bars with seasonal flavors. In the fall, add some pumpkin spice to bring warmth and depth. Just mix a teaspoon of pumpkin spice into the dry ingredients. In summer, consider stirring in dried fruits like cranberries or apricots for a fruity burst. These additions keep the bars fresh and fun throughout the year. Store your no-bake chocolate peanut butter oat bars in a cool, dry place. Keep them away from heat and direct sunlight. Humidity can spoil their texture, so aim for a low-humidity environment. Use an airtight container to keep them fresh. This will help maintain their flavor and prevent them from drying out. These bars last up to one week in the fridge. You can enjoy them chilled or at room temperature. For longer storage, freeze them. They keep well for up to three months in the freezer. Just remember to wrap them tightly in plastic wrap or foil before freezing. There’s no need to heat these bars since they taste great cold. If frozen, thaw them in the fridge overnight. For a quick thaw, leave them at room temperature for about 30 minutes. Once thawed, serve them as a snack or dessert. Enjoy the rich flavors and crunchy texture! Yes, you can swap some ingredients. For oats, try quick oats. If you want nut-free, use sunflower seed butter. For sweeteners, agave syrup works too. You can use milk chocolate chips instead of dark chocolate. The bars need at least 1 to 2 hours in the fridge. They should feel firm to the touch. If you press gently, they should hold their shape. If they feel soft, give them more time. You can use agave syrup or brown rice syrup. Both add sweetness and stickiness. If you want less sugar, try mashed bananas. They will change the flavor a bit, but they work well. Yes, this recipe contains peanuts, oats, and chocolate. If you use nuts, be aware of allergies there too. Always check labels to ensure safety for you and your guests. Absolutely! These bars store well in the fridge for up to a week. You can also freeze them for longer storage. Just cut them beforehand and wrap them well. This blog post shared a simple recipe for delicious oat bars. You learned about the key ingredients like rolled oats, peanut butter, and chocolate. I provided clear steps for preparation and tips for a great texture. You can customize these bars and try different flavors to fit your taste. Remember to store them in a good place for freshness. Try making these oat bars for a healthy snack or treat. Enjoy experimenting with your own variations!

Ingredients

Main Ingredients

– 2 cups rolled oats

– 1 cup creamy peanut butter

– 1/2 cup honey or maple syrup

– 1/2 cup dark chocolate chips

– 1/4 cup unsweetened cocoa powder

– 1 teaspoon vanilla extract

– Pinch of salt

I love using rolled oats in these bars. They add great texture and fiber. Creamy peanut butter gives the bars a smooth and rich taste. Honey or maple syrup adds natural sweetness. Dark chocolate chips bring a delicious chocolate flavor. Cocoa powder gives it a deeper chocolate taste. Vanilla extract adds warmth, while a pinch of salt enhances all the flavors.

Optional Ingredients

– 1/2 cup chopped nuts (almonds or walnuts)

– Additional toppings (coconut, seeds)

Chopped nuts add a nice crunch to the bars. You can use almonds or walnuts, depending on what you like. Additional toppings like coconut or seeds can also make your bars more fun and tasty. They add flavor and extra nutrients. Feel free to get creative with your choices!

Step-by-Step Instructions

Preparation Steps

Mixing dry ingredients: In a large bowl, add 2 cups of rolled oats, 1/4 cup of unsweetened cocoa powder, and a pinch of salt. Stir well to combine them. This step ensures an even flavor in every bite.

Melting peanut butter and sweetener: In a microwave-safe bowl, mix 1 cup of creamy peanut butter with 1/2 cup of honey or maple syrup. Heat for 30 to 45 seconds until warm. Stir until smooth and combined.

Combining mixtures: Add 1 teaspoon of vanilla extract to the peanut butter mixture. Pour this blend over the dry ingredients. Stir until all oats are coated. If you want, fold in 1/2 cup of chopped nuts for extra crunch.

Pressing into the baking dish: Line an 8×8 inch baking dish with parchment paper. Transfer the oat mixture into this dish and press it down firmly with your fingers or a spatula, making it even and compact.

Chocolate Topping

Melting dark chocolate: In another microwave-safe bowl, add 1/2 cup of dark chocolate chips. Heat in 30-second increments, stirring well until smooth and fully melted.

Drizzling chocolate over oat mixture: Drizzle the melted chocolate over the pressed oats. Use a spatula to spread it evenly across the top. This adds a rich layer of flavor.

Setting the Bars

Refrigeration time: Place the dish into the refrigerator. Let it chill for at least 1 to 2 hours until the mixture sets.

Cutting and serving tips: Once set, lift out the bars using the overhanging parchment paper. Cut them into squares or rectangles for serving. For a nice touch, drizzle more melted chocolate on top and sprinkle with oats or chopped nuts.

Tips & Tricks

Perfecting the Texture

To get the best texture, pressing the mixture is key. Use your fingers or a spatula to push it down firmly. This keeps the bars from crumbling. The oat mix needs to be compact to hold its shape. Make sure the chocolate is fully melted before you drizzle it on top. Melt it in small bursts in the microwave. Stir between each burst to avoid burning.

Serving Suggestions

When serving, arrange the bars neatly on a plate. A clean look makes them more inviting. Drizzle a little melted chocolate on top for a fancy touch. You can also sprinkle chopped nuts or oats to make them pop. Pair these bars with a glass of cold milk or a warm cup of coffee. Fresh fruits like bananas or apples on the side also make a nice addition.

Customization Ideas

Feel free to swap peanut butter for almond or cashew butter. This gives a fun twist to the flavor. You can also add flavor variations, like a dash of cinnamon or a scoop of protein powder. These small changes can transform the bars into something new and exciting!

Variations

Flavor Variations

You can easily change the flavor of your no-bake bars. For a salted caramel twist, add a swirl of caramel sauce on top before chilling. This adds a sweet, salty taste that pairs well with chocolate. You can also make them nut-free by using sunflower seed butter instead of peanut butter. This option keeps the bars creamy and delicious while being safe for those with nut allergies.

Dietary Adaptations

If you follow a vegan diet, use maple syrup instead of honey. This simple swap keeps the bars plant-based. For gluten-free options, ensure you use certified gluten-free oats. This way, everyone can enjoy these tasty treats without worry.

Seasonal Additions

You can switch up your bars with seasonal flavors. In the fall, add some pumpkin spice to bring warmth and depth. Just mix a teaspoon of pumpkin spice into the dry ingredients. In summer, consider stirring in dried fruits like cranberries or apricots for a fruity burst. These additions keep the bars fresh and fun throughout the year.

Storage Info

Ideal Storage Conditions

Store your no-bake chocolate peanut butter oat bars in a cool, dry place. Keep them away from heat and direct sunlight. Humidity can spoil their texture, so aim for a low-humidity environment. Use an airtight container to keep them fresh. This will help maintain their flavor and prevent them from drying out.

Shelf Life

These bars last up to one week in the fridge. You can enjoy them chilled or at room temperature. For longer storage, freeze them. They keep well for up to three months in the freezer. Just remember to wrap them tightly in plastic wrap or foil before freezing.

Reheating Instructions

There’s no need to heat these bars since they taste great cold. If frozen, thaw them in the fridge overnight. For a quick thaw, leave them at room temperature for about 30 minutes. Once thawed, serve them as a snack or dessert. Enjoy the rich flavors and crunchy texture!

FAQs

Can I substitute ingredients in the recipe?

Yes, you can swap some ingredients. For oats, try quick oats. If you want nut-free, use sunflower seed butter. For sweeteners, agave syrup works too. You can use milk chocolate chips instead of dark chocolate.

How do I know when the bars are set?

The bars need at least 1 to 2 hours in the fridge. They should feel firm to the touch. If you press gently, they should hold their shape. If they feel soft, give them more time.

What can I use instead of honey or maple syrup?

You can use agave syrup or brown rice syrup. Both add sweetness and stickiness. If you want less sugar, try mashed bananas. They will change the flavor a bit, but they work well.

Are there any allergens in this recipe?

Yes, this recipe contains peanuts, oats, and chocolate. If you use nuts, be aware of allergies there too. Always check labels to ensure safety for you and your guests.

Can I make these bars ahead of time?

Absolutely! These bars store well in the fridge for up to a week. You can also freeze them for longer storage. Just cut them beforehand and wrap them well.

This blog post shared a simple recipe for delicious oat bars. You learned about the key ingredients like rolled oats, peanut butter, and chocolate. I provided clear steps for preparation and tips for a great texture. You can customize these bars and try different flavors to fit your taste. Remember to store them in a good place for freshness. Try making these oat bars for a healthy snack or treat. Enjoy experimenting with your own variations!

- 2 cups rolled oats - 1 cup creamy peanut butter - 1/2 cup honey or maple syrup - 1/2 cup dark chocolate chips - 1/4 cup unsweetened cocoa powder - 1 teaspoon vanilla extract - Pinch of salt I love using rolled oats in these bars. They add great texture and fiber. Creamy peanut butter gives the bars a smooth and rich taste. Honey or maple syrup adds natural sweetness. Dark chocolate chips bring a delicious chocolate flavor. Cocoa powder gives it a deeper chocolate taste. Vanilla extract adds warmth, while a pinch of salt enhances all the flavors. - 1/2 cup chopped nuts (almonds or walnuts) - Additional toppings (coconut, seeds) Chopped nuts add a nice crunch to the bars. You can use almonds or walnuts, depending on what you like. Additional toppings like coconut or seeds can also make your bars more fun and tasty. They add flavor and extra nutrients. Feel free to get creative with your choices! - Mixing dry ingredients: In a large bowl, add 2 cups of rolled oats, 1/4 cup of unsweetened cocoa powder, and a pinch of salt. Stir well to combine them. This step ensures an even flavor in every bite. - Melting peanut butter and sweetener: In a microwave-safe bowl, mix 1 cup of creamy peanut butter with 1/2 cup of honey or maple syrup. Heat for 30 to 45 seconds until warm. Stir until smooth and combined. - Combining mixtures: Add 1 teaspoon of vanilla extract to the peanut butter mixture. Pour this blend over the dry ingredients. Stir until all oats are coated. If you want, fold in 1/2 cup of chopped nuts for extra crunch. - Pressing into the baking dish: Line an 8x8 inch baking dish with parchment paper. Transfer the oat mixture into this dish and press it down firmly with your fingers or a spatula, making it even and compact. - Melting dark chocolate: In another microwave-safe bowl, add 1/2 cup of dark chocolate chips. Heat in 30-second increments, stirring well until smooth and fully melted. - Drizzling chocolate over oat mixture: Drizzle the melted chocolate over the pressed oats. Use a spatula to spread it evenly across the top. This adds a rich layer of flavor. - Refrigeration time: Place the dish into the refrigerator. Let it chill for at least 1 to 2 hours until the mixture sets. - Cutting and serving tips: Once set, lift out the bars using the overhanging parchment paper. Cut them into squares or rectangles for serving. For a nice touch, drizzle more melted chocolate on top and sprinkle with oats or chopped nuts. To get the best texture, pressing the mixture is key. Use your fingers or a spatula to push it down firmly. This keeps the bars from crumbling. The oat mix needs to be compact to hold its shape. Make sure the chocolate is fully melted before you drizzle it on top. Melt it in small bursts in the microwave. Stir between each burst to avoid burning. When serving, arrange the bars neatly on a plate. A clean look makes them more inviting. Drizzle a little melted chocolate on top for a fancy touch. You can also sprinkle chopped nuts or oats to make them pop. Pair these bars with a glass of cold milk or a warm cup of coffee. Fresh fruits like bananas or apples on the side also make a nice addition. Feel free to swap peanut butter for almond or cashew butter. This gives a fun twist to the flavor. You can also add flavor variations, like a dash of cinnamon or a scoop of protein powder. These small changes can transform the bars into something new and exciting! {{image_4}} You can easily change the flavor of your no-bake bars. For a salted caramel twist, add a swirl of caramel sauce on top before chilling. This adds a sweet, salty taste that pairs well with chocolate. You can also make them nut-free by using sunflower seed butter instead of peanut butter. This option keeps the bars creamy and delicious while being safe for those with nut allergies. If you follow a vegan diet, use maple syrup instead of honey. This simple swap keeps the bars plant-based. For gluten-free options, ensure you use certified gluten-free oats. This way, everyone can enjoy these tasty treats without worry. You can switch up your bars with seasonal flavors. In the fall, add some pumpkin spice to bring warmth and depth. Just mix a teaspoon of pumpkin spice into the dry ingredients. In summer, consider stirring in dried fruits like cranberries or apricots for a fruity burst. These additions keep the bars fresh and fun throughout the year. Store your no-bake chocolate peanut butter oat bars in a cool, dry place. Keep them away from heat and direct sunlight. Humidity can spoil their texture, so aim for a low-humidity environment. Use an airtight container to keep them fresh. This will help maintain their flavor and prevent them from drying out. These bars last up to one week in the fridge. You can enjoy them chilled or at room temperature. For longer storage, freeze them. They keep well for up to three months in the freezer. Just remember to wrap them tightly in plastic wrap or foil before freezing. There’s no need to heat these bars since they taste great cold. If frozen, thaw them in the fridge overnight. For a quick thaw, leave them at room temperature for about 30 minutes. Once thawed, serve them as a snack or dessert. Enjoy the rich flavors and crunchy texture! Yes, you can swap some ingredients. For oats, try quick oats. If you want nut-free, use sunflower seed butter. For sweeteners, agave syrup works too. You can use milk chocolate chips instead of dark chocolate. The bars need at least 1 to 2 hours in the fridge. They should feel firm to the touch. If you press gently, they should hold their shape. If they feel soft, give them more time. You can use agave syrup or brown rice syrup. Both add sweetness and stickiness. If you want less sugar, try mashed bananas. They will change the flavor a bit, but they work well. Yes, this recipe contains peanuts, oats, and chocolate. If you use nuts, be aware of allergies there too. Always check labels to ensure safety for you and your guests. Absolutely! These bars store well in the fridge for up to a week. You can also freeze them for longer storage. Just cut them beforehand and wrap them well. This blog post shared a simple recipe for delicious oat bars. You learned about the key ingredients like rolled oats, peanut butter, and chocolate. I provided clear steps for preparation and tips for a great texture. You can customize these bars and try different flavors to fit your taste. Remember to store them in a good place for freshness. Try making these oat bars for a healthy snack or treat. Enjoy experimenting with your own variations!

No-Bake Chocolate Peanut Butter Oat Bars

Craving something delicious and easy? Try these No-Bake Chocolate Peanut Butter Oat Bars! Made with wholesome ingredients like rolled oats, peanut butter, and dark chocolate, these bars are a perfect snack or dessert without the oven. Just mix, chill, and enjoy! Follow our simple step-by-step instructions to create this tasty treat in no time. Click through to explore the full recipe and get ready to indulge guilt-free!

Ingredients
  

2 cups rolled oats

1 cup creamy peanut butter

1/2 cup honey or maple syrup

1/2 cup dark chocolate chips

1/4 cup unsweetened cocoa powder

1 teaspoon vanilla extract

Pinch of salt

Optional: 1/2 cup chopped nuts (almonds or walnuts) for added crunch

Instructions
 

In a large mixing bowl, combine the rolled oats, unsweetened cocoa powder, and a pinch of salt. Stir thoroughly to ensure the cocoa powder is evenly incorporated throughout the oat mixture.

    In a separate microwave-safe bowl, add the creamy peanut butter and your choice of honey or maple syrup. Microwave for approximately 30 to 45 seconds, or until the mixture is warm and slightly melted. Remove and stir until fully combined for a smooth consistency.

      Incorporate the vanilla extract into the peanut butter blend, mixing until smooth and homogenous.

        Pour the creamy peanut butter mixture over the dry oat mixture. Using a spatula or wooden spoon, stir until everything is well combined and the oats are fully coated. If you’re opting for some extra texture, gently fold in the chopped nuts at this point.

          Prepare an 8x8 inch square baking dish by lining it with parchment paper, leaving a bit of overhang on the sides for easy removal later.

            Transfer the oat mixture into the lined baking dish. Press it down firmly into an even layer using your fingers or the flat side of a spatula. Ensure it's compact to maintain the shape of the bars once cut.

              In a microwave-safe bowl, melt the dark chocolate chips. Heat in 30-second increments, stirring well in between until the chocolate is completely melted and smooth.

                Drizzle the melted chocolate over the top of the pressed oat mixture, using a spatula to spread it evenly across the surface.

                  Place the dish in the refrigerator and let it chill for at least 1 to 2 hours, or until the mixture has fully set.

                    Once set, lift the bars from the dish using the overhanging parchment paper. Cut into squares or rectangles, depending on your preferred serving size.

                      Prep Time: 15 mins | Total Time: 2 hrs 15 mins | Servings: 12 bars

                        - Presentation Tips: Arrange the bars neatly on a serving plate. For an elegant touch, drizzle a bit of melted chocolate on top and garnish with a sprinkle of oats or finely chopped nuts to enhance their visual appeal!

                          WANT TO SAVE THIS RECIPE?