FREE DINNER EBOOK! Get your copy!
  • Cookie Policy
  • GDPR Policy
  • Disclaimer
  • Terms Of Use
  • Visit my other site: Fun Cookie Recipes
tastykitchentales
  • Home
  • Dinner
  • Desserts
  • Drinks
  • Appetizers
  • Contact
  • About
  • Privacy Policy
  • Home
  • Dinner
  • Desserts
  • Drinks
  • Appetizers
  • Contact
  • About
  • Privacy Policy
  • Cookie Policy
  • GDPR Policy
  • Disclaimer
  • Terms Of Use
Visit my other site: Fun Cookie Recipes

HOME / CATEGORIES /

Latest

To make a healthy eggplant moussaka, you need a mix of fresh ingredients. Here is what you will need: - 2 medium eggplants, sliced into 1/4 inch rounds - 1 large onion, finely chopped - 2 cloves garlic, minced - 1 pound lean ground beef or turkey - 1 can (14 oz) diced tomatoes (with juice) - 1 teaspoon dried oregano - 1 teaspoon ground cinnamon - Salt and freshly ground black pepper to taste - 1 cup Greek yogurt - 2 large eggs - 1/4 cup freshly grated Parmesan cheese - 1 tablespoon olive oil - Fresh parsley, finely chopped, for garnish Each ingredient plays a key role in building flavor. The eggplants add a lovely texture. Lean ground meat provides protein while keeping the dish light. Aromatic onion and garlic bring depth to the sauce. Diced tomatoes give it a nice acidity and sweetness. Oregano and cinnamon add warmth and complexity. Greek yogurt and eggs create a creamy topping. Finally, fresh parsley brightens the dish. Every time I make it, I think of how each ingredient shines. The balance of flavors and textures makes this dish truly special. Enjoying it with friends and family makes it even better! 1. Preheating the Oven: Start by turning your oven to 375°F (190°C). This heat is key for baking the moussaka well. 2. Salting and Rinsing Eggplants: Slice the eggplants into 1/4 inch rounds. Lay them out and sprinkle salt on top. Let them sit for about 30 minutes. This step draws out water and reduces bitterness. After 30 minutes, rinse the eggplant slices under cold water. Pat them dry with paper towels. 3. Sautéing Onions and Garlic: In a large skillet, add olive oil and heat it over medium. Once it's hot, add the chopped onion and minced garlic. Stir them for about 5 minutes. The onion should turn soft and fragrant. 4. Browning the Meat: Add the lean ground beef or turkey to the skillet. Cook it while breaking it up with a spatula. Keep cooking until it turns brown, about 6-8 minutes. If there’s extra fat, drain it from the skillet. 5. Adding Tomatoes and Spices: Stir in the canned diced tomatoes with their juice. Add dried oregano, ground cinnamon, and some salt and pepper. Let this mixture simmer on low heat for about 10-15 minutes. Stir it once in a while until it thickens slightly. 6. Prepping the Eggplant Slices: While the meat sauce simmers, cook the eggplant slices. You can grill them or bake them in the oven for about 10 minutes. They should be slightly tender. 7. Layering the Ingredients: In a greased baking dish, lay half of the eggplant slices on the bottom. Spread half of the meat sauce over the eggplant. Repeat with the remaining eggplant and meat sauce. 8. Pouring the Yogurt Topping: In a bowl, mix Greek yogurt, eggs, and grated Parmesan. Whisk until you have a smooth mix. Pour this creamy topping over the last layer of meat. 9. Baking Duration and Temperature: Place the dish in the oven. Bake it for 30-35 minutes. The topping should set and turn a light golden color. 10. Letting It Rest: Once it’s done, let the moussaka sit for about 10 minutes. This helps the layers stick together when you cut it. 11. Garnishing for Presentation: Before serving, sprinkle freshly chopped parsley on top. This adds color and freshness. Enjoy your healthier eggplant moussaka! Choosing the right eggplants is key. Look for firm, shiny skins without blemishes. A good eggplant feels heavy for its size. The color should be deep purple, not dull. Small to medium eggplants tend to be less bitter and have fewer seeds. To reduce bitterness, sprinkle salt on sliced eggplants. Let them sit for about 30 minutes. The salt draws out moisture and bitterness. After 30 minutes, rinse them under cold water. Pat them dry with paper towels to remove excess salt. This step enhances the taste and texture of your dish. You can easily make this dish healthier. Use lean ground turkey instead of beef. This cuts fat while keeping protein high. You could also swap Greek yogurt for low-fat options. It still adds creaminess without the extra calories. Enhance flavor without adding fat by using spices. Dried oregano and ground cinnamon add depth. Fresh herbs like parsley can brighten your dish. They provide flavor without the need for extra oil or butter. Plating can elevate your moussaka. Use a sharp knife to cut neat portions. This makes it easier to serve and looks great. A dollop of Greek yogurt on the side adds creaminess. It also contrasts beautifully with the warm moussaka. Add a sprinkle of fresh parsley on top for a pop of color. It makes the dish look fresh and inviting. Serve with a simple side salad for a complete meal. This adds crunch and freshness, balancing the rich flavors of the moussaka. {{image_4}} You can make a vegetarian moussaka by using plant-based proteins. Try lentils or chickpeas for protein. These options add texture and flavor to the dish. You can also include more veggies like zucchini, mushrooms, or spinach. These vegetables bring extra nutrients and taste to your meal. If you want a low-carb moussaka, consider using zucchini or cauliflower instead of eggplant. Slice zucchini thinly for layers or use cauliflower to make a mash. These options keep the dish light. For a keto-friendly version, skip the potatoes and use more meat and cheese. Adjust the spices to enhance the flavors without the carbs. Enhance your moussaka with spices for more flavor. Add heat by including chopped peppers like jalapeños or red chili flakes. For a fresh twist, mix in herbs like thyme, rosemary, or basil. These herbs can brighten the dish and add depth to the overall taste. Experiment with different combinations to find what you love best! To keep your Healthy Eggplant Moussaka fresh, store leftovers in the fridge. Use an airtight container. It stays good for about 3 to 4 days. If you want to keep it longer, freezing is a great option. Wrap pieces tightly in plastic wrap and place them in a freezer-safe bag. It can last up to 3 months in the freezer. When reheating, the oven is best for keeping the texture nice. Preheat it to 350°F (175°C). Place the moussaka in an oven-safe dish. Cover it with foil to prevent it from drying out. Heat for about 20-25 minutes until warm. If you use a microwave, put a slice on a microwave-safe plate. Heat for 1 to 2 minutes, but it might get a bit soggy. Enjoy your meal while keeping the flavors intact! Yes, you can make Moussaka ahead of time. Just prepare the dish up to the baking step. Then, cover it and store it in the fridge for up to three days. When you are ready, bake it straight from the fridge. This saves time on busy days. Absolutely! This recipe works great for meal prep. You can divide the Moussaka into portions. Store each portion in a container. It will keep well in the fridge for several days. This makes it easy to grab a meal on the go. To make this dish dairy-free, swap Greek yogurt for a plant-based yogurt. Use a dairy-free cheese for the topping as well. You can also skip the cheese altogether. This way, you still enjoy delicious Moussaka without dairy. The best way to reheat Moussaka is in the oven. Set your oven to 350°F (175°C). Place the Moussaka in an oven-safe dish. Cover it with foil to keep it moist. Heat for about 20 minutes or until warmed through. This keeps the texture nice. Yes, you can substitute other meats or proteins in Moussaka. Ground lamb works well for a richer taste. If you want a lighter option, use ground turkey or chicken. For a vegetarian version, try lentils or mushrooms. These options add flavor and keep it healthy. Moussaka is a rich, savory dish made with layers of eggplant, meat, and spices. We covered its ingredients, from eggplants to seasonings, and went through each step, from cooking to baking. I hope the tips help you choose the right eggplants and present your Moussaka beautifully. Remember, there are many variations to explore, whether you prefer vegetarian options or low-carb alternatives. Enjoy your cooking adventure and create a meal that brings joy to your table!

Healthy Eggplant Moussaka Flavorful and Nutritious Dish

- 2 cups carrots, peeled and chopped into bite-sized pieces - 2 cups butternut squash, peeled and cubed into 1-inch pieces - 1 red bell pepper, seeded and chopped - 1 medium onion, diced - 4 cloves garlic, peeled and left whole You can also use seasonal vegetables. Try zucchini, sweet potatoes, or parsnips. Just adjust the roasting time if they need more or less heat. - 3 tablespoons extra virgin olive oil - 4 cups vegetable broth, low-sodium preferred - 1 teaspoon dried thyme - 1 teaspoon smoked paprika - Salt and freshly ground pepper, to taste These staples help create a rich and flavorful base for your soup. They add depth to the roasted vegetables. - ½ cup full-fat coconut milk Coconut milk makes the soup creamy and rich. If you want a different option, try cashew cream or almond milk. Both can add creaminess while keeping the soup light. 1. Preheat the oven to 400°F (200°C). This helps roast the veggies perfectly. 2. In a large bowl, mix the carrots, butternut squash, red bell pepper, onion, and garlic. Make sure they are all cut into similar sizes. 3. Cutting tips: Chop the carrots into bite-sized pieces. Cube the butternut squash into 1-inch pieces. Dice the onion small so it cooks well. Keep the garlic whole to add sweetness. 1. Best practices: Spread the veggies in a single layer on a baking sheet. This helps them roast evenly. 2. Toss them halfway through cooking. This way, every side gets nice and brown. 3. Caramelization: This process adds deep flavor. It makes the veggies sweet and tasty. Look for golden edges when they are done. 1. Blending tips: Use an immersion blender for easy pureeing. If you use a traditional blender, blend in small batches. This helps avoid spills. 2. Adjusting consistency: After blending, add coconut milk for creaminess. If it’s too thick, add more vegetable broth. 3. Seasoning: Taste the soup. Add more salt, pepper, or spices as needed. This makes sure every bite is tasty. To make your soup even better, you can adjust the seasoning. Try adding a pinch of cayenne for heat or a splash of lemon juice for brightness. If you want a deeper flavor, roast the garlic until golden. The size of your vegetables matters, too. Larger pieces take longer to roast. Cut your veggies to about the same size for even cooking and roasting. Coconut milk gives the soup its creamy feel. When blending, make sure to mix until smooth. If your blender struggles, add a little broth to help it out. If it’s too thick, add more broth or coconut milk to reach your desired texture. Always blend in batches if your blender is small. This makes it easier to achieve that silky finish. Serving the soup can be fun! Use warm bowls to keep the soup hot. For extra flair, drizzle some coconut milk on top. This creates a lovely swirl. Finish with fresh herbs like basil or parsley. They add color and a fresh taste. You can also add croutons for crunch or a sprinkle of smoked paprika for a pop of color. Enjoy making your soup not just delicious but beautiful, too! {{image_4}} You can make this soup heartier by adding proteins. Beans or lentils work well in this dish. Black beans or chickpeas add a nice texture and flavor. Just rinse them well before adding them to the soup. You can also use cooked lentils. They blend in beautifully and add nutrition. If you want a meat option, try using chicken. You can add shredded cooked chicken right before serving for extra flavor. You can also swap vegetable broth for chicken stock. This change will add a savory depth to your soup. If you like some heat, you can spice things up! Adding chili flakes is a simple way to do this. Start with a pinch and add more if you want. You can also chop up jalapeños. Add them during the roasting phase for a warm kick. This will give your soup a nice depth of flavor. To make your soup more filling, consider adding grains. Quinoa is a great choice. It cooks quickly and adds protein. You can also use rice or barley. Just cook them separately and stir them into the soup before serving. This will give you a hearty meal that warms you up on cold nights. To store your silky roasted vegetable soup, let it cool down first. This helps keep it fresh. Pour the soup into an airtight container. It can last in the fridge for about four to five days. Always check for any changes in smell or texture before using it again. If you want to save some for later, freezing is a great option. Pour the cooled soup into freezer-safe containers. Leave some space at the top for expansion. Seal tightly and label with the date. The soup can stay good in the freezer for up to three months. When you’re ready to eat it, thaw it in the fridge overnight. Reheat it on the stove over low heat. Stir it often to keep it smooth and creamy. You can get creative with leftover soup. Use it as a sauce over pasta or grains. It can also work great as a base for casseroles. Pour it into a baking dish, add some cooked chicken or beans, and top with cheese. Bake until bubbly for a tasty meal. Another idea is to blend it with some fresh greens for a quick smoothie or savory shake. To make this soup vegan, use coconut milk and vegetable broth. Both are plant-based and perfect for a creamy texture. When buying vegetable broth, check the label to ensure it contains no animal products. This simple swap keeps your soup rich and satisfying while making it vegan-friendly. Yes, you can use frozen vegetables. Just remember, frozen veggies may need less roasting time. Check them after 20 minutes to see if they are soft. If you roast them too long, they might get mushy. Adjust your cooking time to get the right texture. Yes, this soup is gluten-free. All the ingredients are free from gluten. Just be sure that your vegetable broth is labeled gluten-free. This way, you can enjoy a safe and tasty meal without worrying about gluten. This blog post walked you through creating a delicious vegetable soup. We covered fresh vegetables, pantry staples, and creamy additions. You learned how to prepare, roast, and blend the ingredients for the best flavor and texture. In the end, feel free to experiment with proteins, spices, or grains to suit your taste. Don't forget about storage tips for refrigeration and freezing. Enjoy exploring different variations to keep it exciting and fresh!

Silky Roasted Vegetable Soup Recipe for Cozy Nights

- 1 lb baby carrots, peeled and trimmed - 2 tablespoons extra-virgin olive oil - 2 tablespoons hot honey (or regular honey with a pinch of cayenne pepper for heat) - 1 cup fresh ricotta cheese - 1 tablespoon freshly squeezed lemon juice - Sea salt, to taste - Fresh herbs (thyme or basil) - Additional honey for drizzling Hot Honey Roasted Carrots with Whipped Ricotta is a simple yet tasty dish. The sweet and spicy flavors of the hot honey blend perfectly with the earthy carrots. The whipped ricotta adds creaminess and a touch of freshness. This recipe brings together basic ingredients that you may already have in your kitchen. For the carrots, I love using baby carrots. They are sweet and cook quickly. The extra-virgin olive oil adds a rich flavor, while hot honey brings that spicy kick. If you don’t have hot honey, mix regular honey with a little cayenne pepper. This gives the same heat and sweetness. For the whipped ricotta, fresh ricotta cheese is key. It should be creamy and smooth. Adding lemon juice brightens the flavor, making it more refreshing. Just a pinch of sea salt enhances the taste without overpowering it. Garnishing with fresh herbs like thyme or basil gives a pop of color and flavor. A drizzle of extra honey on top makes it look fancy and taste even better. This dish not only pleases the palate but also the eyes! Set your oven to 400°F (200°C). This step is key for great roasting. A hot oven helps the carrots caramelize nicely. In a large bowl, mix the peeled baby carrots with 2 tablespoons of extra-virgin olive oil and 2 tablespoons of hot honey. Add a pinch of sea salt and black pepper. Toss well until every carrot is coated. This makes the carrots sweet and spicy. Line a baking sheet with parchment paper. Spread the carrots evenly in a single layer. Roast them for about 25-30 minutes. Flip the carrots halfway through. This helps them cook evenly and get a nice golden color. While the carrots roast, make the whipped ricotta. In a medium bowl, combine 1 cup of fresh ricotta cheese, 1 tablespoon of lemon juice, and a pinch of salt. Use a hand mixer or fork to whip until smooth and fluffy. This adds a creamy touch to your dish. Once the carrots are done, remove them from the oven and let them cool for a couple of minutes. On a serving plate, spread a generous amount of whipped ricotta in the center. Then, arrange the hot honey roasted carrots on top. This adds color and texture. Drizzle any leftover hot honey from the baking sheet over the carrots. This enhances the flavor. Finish by sprinkling fresh herbs like thyme or basil on top. This adds a pop of freshness and makes your dish look beautiful. - Selecting the best carrots: Choose vibrant baby carrots that are firm and free from blemishes. Fresh carrots will have a sweet flavor and a great crunch. If you can, buy them from a local market for the best taste. - Importance of even coating: Make sure to coat each carrot evenly with olive oil and hot honey. This step is key for getting that nice caramelization. Toss the carrots well in the bowl before spreading them out on your baking sheet. - Tips for whipping ricotta to a fluffy texture: Start with room temperature ricotta. This makes it easier to whip. Use a hand mixer or a fork to whip it until smooth. Add lemon juice and salt to bring out the flavor. - Flavor variations for whipped ricotta: You can mix in herbs like basil or thyme for a fresh taste. Try adding a bit of garlic powder for a savory kick or some lemon zest for extra brightness. - How to elegantly plate the dish: Use a shallow bowl or wide plate for serving. Spread a generous dollop of whipped ricotta in the center. Arrange the roasted carrots on top in a beautiful pattern. - Suggestions for garnishing with herbs: Sprinkle freshly chopped herbs over the dish for color. Thyme or basil adds a lovely touch. Drizzle some extra hot honey on top for a sweet finish that looks great. {{image_4}} You can easily kick up the heat in this dish. Instead of hot honey, try sriracha or chili flakes. Mix a teaspoon of sriracha into the honey before drizzling. This adds a nice kick. If you prefer chili flakes, sprinkle them on the carrots before roasting. Both options will give your carrots a bold flavor. Carrots are great, but don’t stop there! You can swap them for parsnips or sweet potatoes. Parsnips add a sweet, nutty taste. Sweet potatoes bring a creamy texture. Just cut them into similar sizes, so they cook evenly. These swaps keep the dish fresh and fun. Ricotta is creamy and light, but you can use other cheeses too. Mascarpone gives a rich and smooth flavor. Cream cheese offers a tangy twist. Just whip them with lemon juice and salt like you would with ricotta. Each cheese brings its own flair to the dish. To keep your leftover hot honey roasted carrots fresh, follow these steps: - Let the carrots cool completely. - Place them in an airtight container. - Store in the fridge for up to three days. Keeping them in a good container helps maintain their flavor and texture. To ensure your whipped ricotta stays tasty, do this: - Place it in a clean, airtight container. - Store it in the fridge for up to five days. - When ready to use, whip it again with a fork or mixer to restore its fluffiness. This simple step keeps your ricotta creamy and light. To reheat your carrots without losing their charm, use these methods: - Preheat your oven to 350°F (175°C). - Spread the carrots on a baking sheet. - Heat for about 10-12 minutes until warm. You can also microwave them: - Place the carrots in a microwave-safe dish. - Cover with a damp paper towel. - Heat for 1-2 minutes on medium power. These methods help keep your carrots tender and flavorful. Yes, you can prep this dish ahead of time. Wash and peel the baby carrots. Toss them with olive oil and hot honey. Store them in the fridge for up to 24 hours. When you're ready, just roast them as directed. The whipped ricotta can also be made ahead. Keep it covered in the fridge. Just rewhip it slightly before serving to restore its fluffiness. To achieve perfect browning, spread the carrots in a single layer on the baking sheet. This allows hot air to circulate. Flip them halfway through roasting. This ensures even cooking and caramelization. Keep an eye on them towards the end of cooking. If they start to darken too much, reduce the oven temperature slightly. These carrots pair well with many dishes. Try serving them with grilled chicken or fish. They also work great with a hearty grain salad. For a vegetarian option, serve them alongside quinoa or farro. Adding a fresh green salad can balance the sweetness too. Don't forget to drizzle some extra hot honey on top for added flavor. Yes, you can use regular honey. To mimic the heat, add a pinch of cayenne pepper. Mix it in with the honey before tossing with the carrots. This will give you a similar sweet and spicy flavor. Adjust the amount to suit your taste. You can always add more for extra heat! This article covered how to make hot honey roasted carrots with whipped ricotta. You learned the main ingredients, step-by-step instructions, and helpful tips for perfect results. We also explored variations and storage tips. For a delightful dish, focus on quality ingredients and careful cooking. The blend of sweet and spicy transforms simple carrots into a standout dish. Enjoy sharing this tasty recipe with friends or family for any occasion.

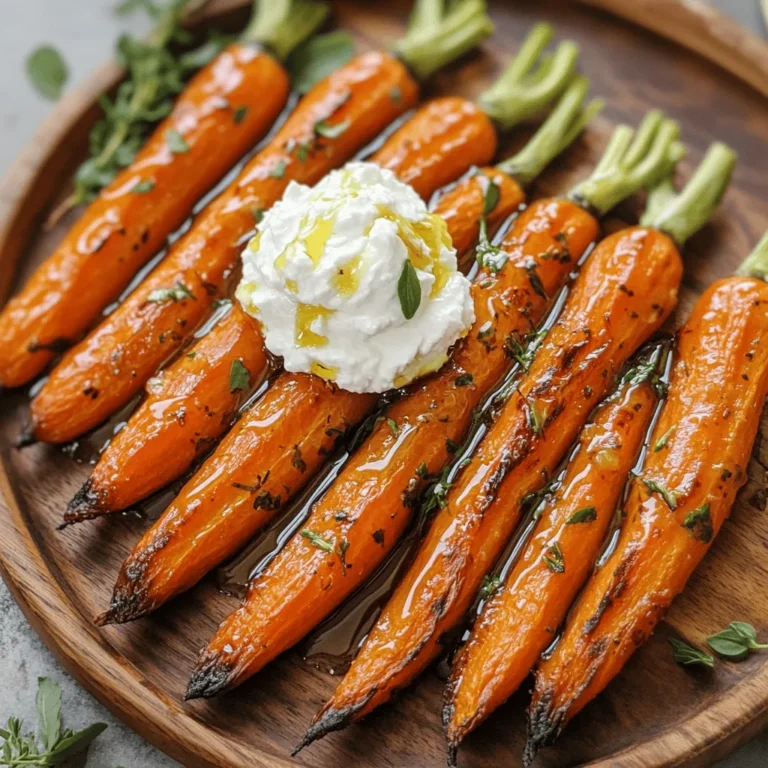
Hot Honey Roasted Carrots with Whipped Ricotta Delight

- 2 cups cooked chicken, shredded - 1 cup shredded mozzarella cheese - 1/2 cup cream cheese, softened - 2 cloves fresh garlic, minced - 1 teaspoon dried oregano - 1 teaspoon smoked paprika - Salt and freshly cracked pepper These main ingredients create a creamy, cheesy filling. The shredded chicken adds protein and heartiness. The mozzarella and cream cheese make it rich and gooey. Garlic gives it a strong flavor, while oregano and paprika add warmth and depth. - 4 large flour tortillas - Whole wheat tortillas for a healthier choice You can use flour or whole wheat tortillas. Flour tortillas are soft and chewy. Whole wheat adds fiber and a nutty taste. Choose the size that fits your appetite. A larger tortilla holds more filling, while smaller ones are better for snacks. - 1 cup fresh spinach leaves - 1/2 cup cherry tomatoes, halved Adding fresh spinach makes your wraps colorful and healthy. Spinach adds a nice crunch and lots of nutrients. Cherry tomatoes bring sweetness and a pop of flavor. These add-ins make the wraps look great and taste even better. To start, you need to mix the chicken mixture. In a medium bowl, combine these ingredients: - 2 cups cooked chicken, shredded - 1 cup shredded mozzarella cheese - 1/2 cup cream cheese, softened - 2 cloves fresh garlic, minced - 1 teaspoon dried oregano - 1 teaspoon smoked paprika - Salt and pepper to taste Use a spatula to blend everything together. Keep mixing until it feels creamy and smooth. This mixture should stick together well but not be too runny. Next, lay your tortillas flat on a clean surface. You can use either flour or whole wheat. Now, take the chicken mixture and spread it down the center of each tortilla. Make sure to leave about an inch of space on each side. This space helps with folding later. On top of the chicken, add fresh vegetables: - 1 cup fresh spinach leaves - 1/2 cup cherry tomatoes, halved These veggies bring color and crunch. Once you add them, fold the sides of the tortilla inward. Then, roll it up tightly from the bottom. This keeps all the tasty filling inside. It’s time to cook the wraps! Preheat a non-stick skillet over medium heat. While it heats, brush the outside of each wrap lightly with olive oil. This will help make them crispy. Place the wraps seam-side down in the skillet. Cook for about 3-4 minutes on each side. You want them to turn golden brown and feel crispy. Once they are done, take them out and let them cool for a minute. Then, slice each wrap in half, and they are ready to serve! - When flipping wraps, use a wide spatula. This helps keep them intact. - Cook wraps seam-side down first. This secures the filling and prevents spills. - Avoid soggy wraps by not overfilling them. Leave space at the edges. - Lightly brush olive oil on the outside. This adds crispness and flavor. - Add fresh herbs like basil or cilantro for a burst of flavor. - Try spices like cayenne for heat or cumin for depth. - Serve with dipping sauces like ranch, salsa, or a creamy garlic sauce. - A squeeze of fresh lemon juice can brighten the dish. - Serve wraps on a rustic wooden board for a cozy look. - Slice them in half for easy eating and a nice display. - Garnish with fresh herbs, like parsley or chives, on top. - Pair wraps with a small bowl of dipping sauce for a fun touch. {{image_4}} You can switch proteins in your wraps. Turkey works great if you want leaner meat. Tofu is a good choice for a vegetarian option. It soaks up flavors well. For tortillas, try low-carb versions. They taste great and keep the wraps light. You can add a spicy kick to your wraps. Mix in hot sauce or jalapeños for heat. For a smoky flavor, use smoked paprika or chipotle powder. Think globally too! Try adding Mediterranean herbs for a fresh twist. Or, use Mexican spices for a zesty flair. For a vegan wrap, use plant-based cheese. There are many great options available. You can also add more veggies for crunch. Bell peppers, zucchini, or avocados work well. These additions keep the wraps healthy and tasty. To keep your Cheesy Garlic Chicken Wraps fresh, place them in an airtight container. This helps prevent them from drying out. You can store them in the fridge for up to three days. After that, they may lose their taste and texture. If you want to save some wraps for later, freezing is a great option. Wrap each one tightly in plastic wrap, then place them in a freezer bag. This keeps air out and helps prevent freezer burn. You can store them for up to three months. To cook from frozen, remove the wraps from the freezer and let them thaw in the fridge overnight. You can also cook them directly in a skillet, adding a few extra minutes to the cooking time. When you're ready to enjoy your wraps, reheating them correctly is key. The best way to reheat is in a skillet over medium heat. This keeps the outside crispy while warming the inside. You can also use an oven, wrapping them in foil to avoid drying out. If you want extra crispiness, place them directly on the oven rack for the last few minutes. Enjoy your delicious Cheesy Garlic Chicken Wraps! Yes, you can prepare these wraps in advance. To meal prep, follow these tips: - Mix the chicken filling and store it in the fridge. - Wrap the tortillas without cooking them. - Keep the wraps in an airtight container. - Cook them just before serving for the best taste. If you want to change the protein, you have great options: - Use shredded turkey for a leaner choice. - Try shredded beef for a bolder flavor. - For a plant-based option, use tofu or chickpeas. Yes, these wraps can be frozen. Here’s how: - Assemble the wraps, but do not cook them. - Wrap each one in plastic wrap. - Store them in a freezer-safe bag or container. - To reheat, cook straight from frozen in a skillet. These wraps taste great with various dips: - Salsa adds a fresh and zesty touch. - Ranch dressing gives a creamy addition. - Try a yogurt-based dip for a cool contrast. - Guacamole or hummus also works well. In this article, we explored how to make Cheesy Garlic Chicken Wraps. From the main ingredients to the best tortilla options, we covered it all. You learned how to prepare the chicken mixture, assemble the wraps, and achieve perfect crispiness. I shared tips for flavor enhancements and storage options for leftovers, too. Finally, we discussed variations, including healthy and vegetarian choices. With these insights, you can create delicious wraps that suit your taste. Enjoy experimenting with flavors and impressing your friends and family!

Cheesy Garlic Chicken Wraps Flavorful and Simple Meal

- 12 oz spaghetti - 8 oz cream cheese, softened - 1 cup mozzarella cheese, shredded - 1 cup ricotta cheese - 2 cups marinara sauce - 1/2 cup grated Parmesan cheese - 1/2 teaspoon garlic powder - 1/2 teaspoon onion powder - 2 tablespoons fresh basil, finely chopped - Salt and black pepper, to taste - 1/4 teaspoon red pepper flakes (optional) Each ingredient plays a key role in the dish. The spaghetti serves as the base. The cream cheese and ricotta add creaminess. The mozzarella gives a stretchy, cheesy texture. Marinara sauce adds flavor and moisture. Parmesan brings a salty, nutty touch. Use precise measurements for balance. - Spaghetti: Look for durum wheat pasta for the best texture. - Cheeses: Choose fresh cheeses for better taste. Avoid pre-shredded cheese; it often has additives. - Marinara Sauce: A good sauce can elevate your dish. Check for natural ingredients. - Herbs: Fresh basil has a brighter flavor than dried. Always smell fresh herbs to ensure quality. - Spices: Look for fresh spices for full flavor. Check the dates on the packaging. These tips help you select the best ingredients, ensuring your baked cream cheese spaghetti casserole turns out delicious every time. Preheat your oven to 350°F (175°C). This step is key for cooking your casserole evenly. While the oven heats up, fill a large pot with salted water. Bring it to a boil and add 12 oz of spaghetti. Cook for 8-10 minutes until it is al dente. Then, drain the spaghetti and set it aside. In a large bowl, add 8 oz of softened cream cheese and 1 cup of ricotta cheese. Mix them together until smooth. Then, add half of the 1 cup of shredded mozzarella cheese, 1/2 teaspoon garlic powder, 1/2 teaspoon onion powder, and 2 tablespoons of chopped fresh basil. Season with salt and pepper. Stir everything well to combine. Take a 9x13-inch baking dish and spread half of the 2 cups of marinara sauce on the bottom. Next, gently fold the drained spaghetti into the cheese mixture. Make sure each strand is well-coated. Layer this spaghetti and cheese mixture evenly over the marinara sauce. Pour the remaining marinara sauce on top of the spaghetti layer. Now, sprinkle the rest of the shredded mozzarella cheese and 1/2 cup of grated Parmesan cheese on top. If you want some heat, add 1/4 teaspoon of red pepper flakes. Cover the dish tightly with aluminum foil and place it in the oven. Bake for 25 minutes. After that, remove the foil and bake for another 15 minutes. You want the cheese to be melted and golden. Let the casserole rest for 5 minutes before serving. To cook spaghetti well, start with a large pot. Fill it with water and add salt. Bring the water to a boil. Add the spaghetti and cook for 8 to 10 minutes. The pasta should be al dente, meaning it is firm but not hard. Stir occasionally to prevent sticking. When done, drain it quickly and set aside. For the best cream cheese blend, make sure it is room temperature. This helps it mix easily with other ingredients. Use a large bowl and a sturdy spatula or mixer. First, combine cream cheese and ricotta until smooth. Then, add half of the mozzarella and spices. Mix gently to keep it fluffy. This will make the filling creamy and delicious. Serve your casserole hot from the oven. For a nice touch, use a large spoon to scoop servings. Place each portion on a plate. Sprinkle fresh basil or extra Parmesan on top. This adds color and flavor. For a fun twist, serve with garlic bread or a fresh side salad. {{image_4}} You can make this dish meat-free. Start by using extra veggies. Add bell peppers, zucchini, or spinach. These add flavor and color. You can mix in mushrooms for a hearty bite. This keeps the dish light while still being tasty. For a protein boost, use ground meat or chicken. Brown the meat before mixing it with the cheese mixture. Ground beef or turkey works well. Chicken adds a nice flavor too. Just ensure it is fully cooked before layering. This makes the casserole richer and more filling. You can easily make this dish gluten-free. Swap the spaghetti for gluten-free pasta. Look for rice or quinoa pasta options. These provide the same great taste and texture. Just cook them according to the package. This way, everyone can enjoy your casserole without worry. To store leftovers, let the casserole cool to room temperature. Once cool, transfer it to an airtight container. You can also keep it in the baking dish, covering it tightly with plastic wrap or foil. It stays fresh for up to three days in the fridge. When you want to reheat your casserole, preheat your oven to 350°F (175°C). If you stored it in the baking dish, cover it with foil to keep it moist. Heat for about 20 minutes or until warm. If you prefer, you can microwave individual portions for 2-3 minutes. Stir halfway through for even heating. Freezing is a great way to save this dish for later. To freeze, let it cool completely, then wrap it tightly in plastic wrap. Place it in a freezer-safe bag or container. You can freeze it for up to three months. To reheat from frozen, thaw it in the fridge overnight. Then bake at 350°F (175°C) for about 45 minutes, covered. This will help keep the texture and flavor intact. Yes, you can make this casserole ahead. Prepare it up to the baking step. Cover it well and store it in the fridge for up to 24 hours. When ready to bake, just add a few extra minutes to the cooking time. This makes it easy to serve a warm dish at dinner. You can use mascarpone cheese for a similar texture and taste. Greek yogurt is another option. It adds creaminess but with a tangy flavor. Sour cream also works well, though it will change the taste slightly. Choose what fits your taste best. To add heat, use more red pepper flakes. You can also add diced jalapeños or hot sauce to the cheese mixture. If you want a bolder flavor, try adding pepper jack cheese. Adjust the spice level to match your liking for a tasty kick. In this guide, we covered all you need for a perfect baked cream cheese spaghetti casserole. We explored the key ingredients, step-by-step instructions, and helpful tips. I shared tricks for cooking spaghetti and blending cream cheese well. You can also experiment with variations like vegetarian or gluten-free options. Finally, I provided storage info and answered common questions. Remember, with some practice, this comforting dish can be your go-to for many meals! Enjoy making it your own.

Baked Cream Cheese Spaghetti Casserole Delight

- 4 boneless, skinless chicken breasts - 1 cup breadcrumbs (panko preferred for extra crunch) - 1 cup grated Parmesan cheese - 2 large eggs, beaten - ½ cup all-purpose flour - 3 tablespoons olive oil - 1 cup heavy cream - 3 cloves garlic, minced - 1 teaspoon garlic powder - ½ teaspoon paprika - Salt and black pepper, to taste - 1 teaspoon Italian seasoning - Fresh parsley, finely chopped (for garnish) The key to making crispy Parmesan chicken lies in the ingredients. You want to use high-quality chicken breasts for the best flavor. I love panko breadcrumbs because they give a nice crunch. The Parmesan cheese adds rich flavor, making each bite special. Using fresh garlic is a must for the cream sauce. It brings warmth and depth. And don’t forget the Italian seasoning. It ties everything together. For garnishing, chopped parsley adds color and freshness. It makes the dish look even more appetizing. Each ingredient plays a role in creating this delightful meal. You can always adjust the seasonings to match your taste. Enjoy the process of cooking and have fun experimenting! To start, preheat your oven to 400°F (200°C). Take each chicken breast and place it between two pieces of plastic wrap. Use a meat mallet or a rolling pin to gently pound the chicken. Aim for an even thickness. This step makes the chicken tender and juicy. Next, set up your breading station with three shallow dishes. In the first dish, add the all-purpose flour. The second dish holds the beaten eggs. In the third dish, mix the breadcrumbs, grated Parmesan, garlic powder, paprika, salt, and black pepper. Mix well to spread the seasonings. Now, let’s cook! Heat olive oil in a large oven-safe skillet over medium heat. Once hot, add the breaded chicken breasts. Cook each side for about 3-4 minutes. Look for a golden brown color. After browning, transfer the skillet to your preheated oven. Bake for 10-12 minutes until the chicken hits 165°F (74°C) inside. While the chicken bakes, let’s make the sauce. In a separate saucepan, melt a bit of butter over medium heat. Add the minced garlic and sauté for 1 minute until you smell the garlic. Pour in the heavy cream and add the Italian seasoning. Stir well and let it simmer gently. Cook for around 5 minutes until slightly thickened. Season with salt and pepper to taste. Once the chicken is done, carefully take the skillet out of the oven. Spoon the creamy garlic sauce over each chicken breast. For a lovely presentation, place the chicken on a large plate. Let the sauce flow over the sides. Garnish with finely chopped parsley for a pop of color. This dish goes great with steamed veggies or a light salad. Enjoy! To get that crunchy coating, use panko breadcrumbs. They add a great texture. Make sure to coat the chicken well. Press the breadcrumbs firmly onto the chicken. This helps the coating stick better. Fry the chicken in hot oil for a golden crust. Don't crowd the pan; give each piece room to cook evenly. Start by pounding the chicken to even thickness. This helps it cook evenly and stay juicy. Use medium heat when frying. Too high heat can burn the coating before the chicken cooks through. Once golden, finish cooking in the oven. This method helps keep the chicken moist inside. Always check that the internal temperature hits 165°F for safe eating. Start with fresh garlic; it makes a big difference. Sauté the garlic until fragrant but not brown. Brown garlic can taste bitter. Add the heavy cream and Italian seasoning next. This mix gives the sauce a rich flavor. Let it simmer to thicken. Adjust the seasoning with salt and pepper to taste. For a twist, try adding a squeeze of lemon for brightness. {{image_4}} You can play with the cheese in this dish. Instead of Parmesan, try mozzarella for a melty twist. It gives a softer bite. Grana Padano also works well. This cheese has a similar flavor to Parmesan but is milder. For a bolder taste, consider using aged Gouda or even feta. These cheeses add a unique flair to your chicken. The garlic cream sauce is rich, but you can switch it up. A lemon butter sauce adds bright flavor. Simply melt butter with fresh lemon juice and zest. For a spicy kick, try a sriracha cream sauce. Mix sriracha with sour cream or Greek yogurt for a creamy dip. You could also use a pesto sauce for a fresh, herby taste. Each sauce will change how the dish feels. If you're looking for healthier options, consider using chicken thighs. They are juicier and full of flavor. For a gluten-free version, use almond flour instead of all-purpose flour. It gives a nice crunch too. If dairy is a concern, replace heavy cream with coconut cream. It will add a hint of sweetness. These swaps help everyone enjoy this tasty dish, no matter their diet. To keep your Crispy Parmesan Chicken fresh, store it in an airtight container. Place the cooled chicken in the container with the garlic cream sauce. This helps maintain its flavor and prevents it from drying out. You can keep it in the fridge for up to three days. If you want to store it longer, consider freezing. When you're ready to enjoy your leftovers, preheat your oven to 350°F (175°C). Place the chicken with the sauce in a baking dish. Cover it with foil to prevent drying. Heat for about 20-25 minutes or until it's warmed through. You can also use a microwave if you're in a rush. Heat it in short bursts, checking often to avoid overcooking. To freeze your chicken, first ensure it has cooled completely. Wrap each piece tightly in plastic wrap, then place them in a freezer bag. Remove as much air as possible to prevent freezer burn. You can freeze it for up to three months. When you're ready to eat, thaw it in the fridge overnight before reheating. This method keeps your chicken tasty and juicy. You can serve Crispy Parmesan Chicken with many sides. Here are some great options: - Steamed vegetables like broccoli or green beans - A light salad with mixed greens and vinaigrette - Garlic bread for a tasty addition - Mashed potatoes or rice for a filling plate These sides will balance the rich flavors of the chicken and sauce. Yes, you can prepare this dish ahead of time. You can bread the chicken and store it in the fridge for a few hours. This allows the breading to set and helps it stick better. You can also make the garlic cream sauce in advance. Just reheat it gently before serving. The best way to check if chicken is done is by using a meat thermometer. Insert it into the thickest part of the chicken. It should read 165°F (74°C). If you don’t have a thermometer, cut into the chicken. The juices should run clear, and the meat should be white, not pink. Yes, you can make this dish gluten-free. Use gluten-free breadcrumbs instead of regular ones. You can also swap the all-purpose flour for a gluten-free flour blend. These changes will keep the crispy texture while meeting gluten-free needs. Absolutely! Chicken thighs work well in this recipe. They have more fat, which makes them juicy and flavorful. Just be sure to adjust the cooking time. Thighs may take a bit longer to cook through, so check for that same 165°F (74°C) internal temperature. This blog covered all you need for Crispy Parmesan Chicken. We explored key ingredients and step-by-step cooking. You learned how to achieve crispy, juicy chicken and make a tasty garlic cream sauce. I shared tips for variations and how to store your leftovers too. Crispy Parmesan Chicken is simple, delicious, and fun to make. Enjoy experimenting with flavors and techniques!

Crispy Parmesan Chicken with Garlic Cream Sauce Delight

For perfect birria tacos, gather these key items: - 2 lbs beef chuck roast, cut into large chunks - 1 lb bone-in beef short ribs - 4 dried guajillo chilies - 3 dried ancho chilies - 2 tablespoons olive oil - 1 large onion, finely chopped - 4 cloves garlic, minced - 1 teaspoon ground cumin - 1 teaspoon dried oregano - 1/2 teaspoon freshly ground black pepper - 1 teaspoon sea salt (adjust more to taste) - 4 cups beef broth - 8 small corn tortillas - Fresh cilantro, chopped (for garnish) - Diced onions (for garnish) - Lime wedges (for serving) You will need a few tools to make these tacos: - A large pot or Dutch oven for cooking - A blender for the marinade - A skillet for toasting tortillas - A cutting board for shredding meat - Two forks for shredding Feel free to add your favorite touches: - Avocado slices for creaminess - Jalapeños for extra heat - Queso fresco for a cheesy twist - Sour cream for a cool contrast Start by taking four guajillo chilies and three ancho chilies. Remove the stems and seeds carefully. Heat a dry skillet over medium heat. Toast the chilies for two to three minutes. Keep an eye on them and stir. You want them fragrant and a bit dark. After toasting, put the chilies in a bowl and cover them with hot water. Let them soak for about 15 minutes. This step makes them soft and ready for blending. Grab a blender for this part. Add the soaked chilies, one chopped onion, and four minced garlic cloves. Don't forget one teaspoon of ground cumin and one teaspoon of dried oregano. Add half a teaspoon of black pepper and one teaspoon of sea salt. Pour in one cup of beef broth. Blend it all until smooth. This marinade will pack a punch! In a large pot or Dutch oven, heat two tablespoons of olive oil over medium heat. Add two pounds of beef chuck and one pound of bone-in beef short ribs. Sear the meat on all sides for about five to seven minutes. It should be nicely browned. Next, pour in the marinade you made. Add the rest of the beef broth, which is three cups. Bring the pot to a boil, then lower the heat to simmer. Cover it and let it cook for two to two and a half hours. The meat should become fork-tender. Once the meat cooks, take it out and place it on a cutting board. Use two forks to shred it into bite-sized pieces. This should be easy since the meat is tender. After shredding, return the meat to the pot. Let it soak in the rich broth for more flavor. Get a separate skillet and heat it over medium heat. Take each corn tortilla and toast it lightly, about 30 seconds on each side. The tortillas should warm up and be flexible. Now, it’s time to fill them! Take a warmed tortilla and add a generous amount of shredded birria meat. Top it with chopped onions and fresh cilantro. This adds a nice crunch and flavor. Serve the tacos with a side of the rich broth for dipping. Enjoy the tasty flavors! To make your meat flavorful, marinate it well. Use a mix of spices and chilies. Coat the beef chuck and ribs in the marinade. Cover the bowl with plastic wrap. Let it rest in the fridge for at least two hours, ideally overnight. This helps the flavors soak in. If you can, use fresh herbs for a brighter taste. To toast tortillas, heat a skillet over medium heat. Place one corn tortilla in the skillet. Toast for about 30 seconds on each side. You want them warm and soft, not crispy. This step makes them easy to fold. If you like, add a little oil for extra flavor. For a great look, arrange the tacos on a large platter. Place the tacos close together for a cozy feel. Add small bowls of broth for dipping. Garnish with lime wedges and fresh cilantro. This adds color and freshness. A well-presented dish makes the meal more inviting. {{image_4}} You can use various meats for birria tacos. Beef is the classic choice, but you can try lamb or goat. Each meat brings its own taste. If you prefer poultry, chicken works well too. Just adjust the cook time as needed. Chicken cooks faster than beef. If you want a plant-based option, use jackfruit or mushrooms. Jackfruit mimics the texture of meat. Shred it like you would beef. You can also use hearty veggies like eggplant or zucchini. Cook them in the same rich broth for great flavor. Toppings can make your birria tacos shine. Traditional choices include chopped onions and fresh cilantro. You can also add crumbled queso fresco for creaminess. Squeeze lime juice on top for a zesty kick. Serve with a side of spicy salsa for extra flavor. To keep your ingredients fresh, follow these tips: - Store the dried chilies in an airtight container. - Keep beef in the fridge, wrapped tightly. - Store any leftover marinade in a sealed jar. - Fresh cilantro should be kept in water, like a bouquet, in the fridge. For the best taste, refrigerate cooked birria meat: - Place it in a container and seal it well. - It lasts up to three days in the fridge. - For longer storage, freeze the meat in a freezer bag. - Frozen meat can last up to three months. - Store the broth separately in a jar for easy use. When you’re ready to enjoy leftovers: - For the meat, heat it in a pot over low heat. - Add a splash of broth to keep it moist. - For the broth, simmer it on the stove until hot. - Reheat tortillas in a skillet for a few seconds. - Assemble your tacos fresh for the best taste. Birria tacos are a tasty Mexican dish made from tender, shredded beef. The beef gets marinated in a mix of dried chilies, spices, and broth. Once cooked, you fill corn tortillas with the shredded beef and top them with onions and cilantro. You can dip these tacos into a rich broth called consommé for extra flavor. Making birria tacos takes about three hours in total. You spend about 20 minutes prepping the ingredients. The meat then cooks for two to two and a half hours to become tender. Marinating the meat for at least two hours helps develop great flavors. Yes, you can use chicken or pork for birria tacos. Each meat will give a different taste to the dish. For chicken, use thighs for more flavor. For pork, a shoulder cut works well. Adjust the cooking time based on the type of meat you choose. Birria tacos pair well with lime wedges, diced onions, and fresh cilantro. You can also serve them with rice, beans, or a light salad. A side of avocado or guacamole adds a nice creamy touch too. Don't forget the dipping consommé for extra flavor! You can find the full recipe for birria tacos above in this article. It includes all the ingredients and step-by-step instructions to help you make this delicious dish at home. Enjoy the cooking process and the tasty results! You learned about making delicious birria tacos today. We covered key ingredients, equipment, and how to customize your dish. I shared step-by-step instructions for perfect tacos. Tips helped you master marinade, tortillas, and presentation. We explored variations, from meats to vegetarian options. Lastly, we discussed storage and reheating. Now, you have the tools to create your own tasty birria tacos. Enjoy the flavors and impress your friends and family!

Birria Tacos Flavorful Guide to a Tasty Meal

- 1.5 lbs bone-in, skinless chicken thighs (or boneless chicken breast) - 1 cup creamy coconut milk - 1/2 cup plain yogurt - 1 medium onion, finely chopped - 4 cloves garlic, minced - 1 tablespoon fresh ginger, grated - 2 tablespoons garam masala spice blend - 1 teaspoon turmeric powder - 1 teaspoon ground cumin - 1 teaspoon chili powder (adjust to your spice preference) - 1 can (14 oz) diced tomatoes, with juices - 2 tablespoons tomato paste - Salt and pepper to taste - Fresh cilantro leaves, for garnishing - Cooked basmati rice, for serving You can swap chicken thighs for boneless chicken breast if you prefer. Coconut milk can be replaced with heavy cream for a richer taste. Use Greek yogurt instead of plain yogurt for a thicker texture. If you lack garam masala, try a mix of cumin, coriander, and paprika. For a vegan option, substitute chicken with chickpeas or tofu and use coconut yogurt. - Chicken: Bone-in chicken gives more flavor, while boneless cooks faster. Choose based on your time and taste. - Coconut Milk: Full-fat coconut milk adds creaminess. Light coconut milk works too but may be less rich. - Spices: Fresh spices boost flavor. Store them in a cool, dark place to keep them fresh. - Cilantro: Fresh cilantro adds a pop of color and flavor. If you dislike it, try parsley instead. - Basmati Rice: This rice pairs well with butter chicken. Make sure to rinse it before cooking to remove excess starch for fluffier rice. This dish is not just easy; it’s full of rich, warm flavors. Enjoy cooking! {{ingredient_image_2}} Start with the aromatics. Finely chop one medium onion. Mince four cloves of garlic. Grate one tablespoon of fresh ginger. These three ingredients add great flavor to our dish. Set them aside for later. Next, make the saucy base. In a mixing bowl, combine one cup of creamy coconut milk and half a cup of plain yogurt. Add two tablespoons of garam masala, one teaspoon of turmeric, one teaspoon of ground cumin, and one teaspoon of chili powder. Mix well and season with salt and pepper. Whisk until smooth and creamy. Now, we assemble everything in the slow cooker. Layer the chopped onion at the bottom. Spread the minced garlic and grated ginger on top of the onions. Place 1.5 pounds of chicken thighs over this base. Pour the creamy coconut mixture over the chicken, ensuring it covers all pieces. Add one can of diced tomatoes with juices to the slow cooker. Include two tablespoons of tomato paste as well. Gently stir to mix all the ingredients. This step helps the chicken soak up the tasty sauce. Cover the slow cooker. Cook on low heat for 6-8 hours or on high for 4 hours. The chicken is ready when it is tender and easy to shred. This slow cooking makes the flavors blend well. About 30 minutes before serving, shred the chicken in the slow cooker using two forks. Stir the shredded chicken back into the sauce. This helps the chicken soak up even more flavor, making it delicious. Serve the butter chicken hot over fluffy basmati rice. For a nice touch, garnish with freshly chopped cilantro. This adds color and fresh flavor. You can also serve a lime wedge for some zesty goodness. You can cook butter chicken on low for 6-8 hours or high for 4 hours. If you’re short on time, use the high setting. The chicken will still be tender. For best results, always check the chicken for doneness. It should shred easily with a fork. If it’s not ready, give it more time. For extra flavor, try adding a squeeze of lime juice before serving. You can also stir in a bit of honey for sweetness. If you love heat, add more chili powder or fresh chopped chili. Fresh herbs like mint or basil can also add a unique twist. Don’t be afraid to experiment! Serve your butter chicken over fluffy basmati rice for a complete meal. You can also pair it with naan bread for dipping. For a fresh touch, garnish with cilantro before serving. A side of steamed vegetables or a simple salad complements the dish well. Enjoy your flavorful butter chicken with friends and family! Pro Tips Use Marinade for Extra Flavor: Marinate the chicken thighs in the coconut milk and spices for at least an hour or overnight for a deeper flavor profile. Adjust the Spice Level: Tailor the chili powder to your taste. If you prefer a milder dish, reduce the amount, or add fresh chili for a kick. Thicken the Sauce: If you prefer a thicker sauce, remove the lid during the last hour of cooking to allow some moisture to evaporate. Experiment with Proteins: This recipe works well with other proteins too, such as shrimp or tofu, which can be added in the last hour of cooking. {{image_4}} If you love heat, try a spicy version! Simply add extra chili powder or fresh green chilies to the sauce. You can also mix in cayenne pepper. Start with a little. Taste the sauce, then add more if you want it hotter. This way, you control the spice level. You can make this dish vegetarian or vegan easily. Replace chicken with chickpeas or tofu. Use coconut yogurt instead of dairy yogurt. The coconut milk keeps it creamy and rich. You can also add more vegetables like spinach or bell peppers for a colorful twist. You can switch up the protein in this recipe. Besides chicken, you can use shrimp or fish. Just adjust the cooking time. Shrimp cooks faster, so add it in the last hour. Fish can be delicate, so add it a bit before serving. This keeps it tender and moist. After you enjoy your slow cooker butter chicken, store the leftovers right away. Place the chicken in an airtight container. Make sure to cover it well. You can keep it in the fridge for up to three days. When you store it, save some sauce too. The sauce keeps the chicken moist and tasty. If you want to save it for later, freezing is a good option. First, let the butter chicken cool down. Then, place it in a freezer-safe container. You can also use freezer bags. Remove as much air as possible to prevent freezer burn. This dish can last in the freezer for up to three months. When you’re ready to eat, thaw it overnight in the fridge. To reheat your butter chicken, you have a few choices. You can use the microwave or the stove. If you use the microwave, place the chicken in a bowl. Cover it with a lid or a paper towel to keep it moist. Heat it in short bursts, stirring in between. If you prefer the stove, heat it on low. Stir often to make sure it heats evenly. Always check that it’s hot all the way through before serving again. Enjoy it over fresh basmati rice or with naan! Yes, you can use boneless chicken. I often choose bone-in, skinless thighs for more flavor. However, boneless chicken breast works well too. Just adjust the cooking time. Boneless cuts cook faster, so check for doneness at around four hours on low. The spice level of Slow Cooker Butter Chicken can vary. The recipe uses chili powder, so you can adjust it to your taste. If you like it milder, use less chili powder. For more heat, add extra spices or fresh chilies. It’s all about your preference! Butter Chicken pairs well with basmati rice. The fluffy rice soaks up the sauce nicely. You can also serve it with naan bread for a fun twist. Some like to add a side of yogurt or salad to balance the dish. Absolutely! This dish is great for meal prep. You can make it a day ahead and store it in the fridge. The flavors deepen overnight. Just reheat it on the stove or in the microwave before serving. To make smaller servings, cut the ingredient amounts in half. You can still use the same cooking time. This recipe is flexible, so feel free to scale it down as needed. Enjoy your personalized Butter Chicken! In this post, we explored the key ingredients needed for a delicious Slow Cooker Butter Chicken. We covered how to prepare aromatics, create a rich sauce, and layer flavors in the slow cooker. Tips on cooking times, flavor boosts, and serving ideas add to your culinary toolkit. Remember, you can customize the recipe with spices and proteins that suit your taste. By following these steps, you’ll make a meal everyone will enjoy. Now, get ready to savor a tasty dish that feels special without being hard to make!

Slow Cooker Butter Chicken Flavorful and Easy Recipe

- 2 medium apples (preferably Granny Smith or Honeycrisp) - 1 cup all-purpose flour - 1/2 cup granulated sugar - 1 teaspoon baking powder - 1/2 teaspoon ground cinnamon - 1/4 teaspoon ground nutmeg - 1/2 teaspoon kosher salt - 1/2 cup milk (whole or 2%) - 1 large egg - 1 teaspoon pure vanilla extract - Vegetable oil (for frying) - Powdered sugar (for dusting) Gathering the right ingredients is key to making great apple fritter bites. Start with two medium apples. Granny Smith or Honeycrisp works best. These apples add a nice tartness and crunch. Next, you will need one cup of all-purpose flour. This gives the bites their structure. Add half a cup of granulated sugar for sweetness. Now, let’s look at the essential baking components. You need one teaspoon of baking powder to help the bites rise. A half teaspoon of ground cinnamon and a quarter teaspoon of ground nutmeg adds warmth and flavor. Finally, a half teaspoon of kosher salt balances the sweetness. For the wet ingredients, grab half a cup of milk. Whole or 2% milk adds richness. Crack one large egg into a bowl and whisk it. Add one teaspoon of pure vanilla extract for a lovely aroma. You will also need vegetable oil for frying. Lastly, powdered sugar dusts the bites to make them look and taste amazing. With these ingredients ready, you are set to create irresistible apple fritter bites that everyone will love! Start by whisking together your dry ingredients. In a large bowl, mix: - 1 cup all-purpose flour - 1/2 cup granulated sugar - 1 teaspoon baking powder - 1/2 teaspoon ground cinnamon - 1/4 teaspoon ground nutmeg - 1/2 teaspoon kosher salt Make sure these are well combined. This mix gives your fritter bites a nice flavor and texture. In another bowl, whisk together your wet ingredients. You will need: - 1 large egg - 1/2 cup milk (whole or 2% for extra creaminess) - 1 teaspoon pure vanilla extract Whisk until everything is smooth. This step ensures your fritter bites are moist and flavorful. Now, it’s time to combine the two mixtures. Gradually pour the wet mix into the dry mix. Stir gently until they are just combined. A few lumps are okay. Next, carefully fold in: - 2 medium apples, peeled and diced into small cubes Make sure each apple piece is coated in batter for even bites. Heat vegetable oil in a heavy pot over medium heat. Aim for about 350°F (175°C). To test, drop in a small spoonful of batter. If it sizzles, you’re ready! Using a small scoop or spoon, drop bite-sized balls of batter into the hot oil. Fry in small batches to avoid crowding. Cook for about 2-3 minutes on each side until golden brown. Once fried, use a slotted spoon to lift them out. Place them on a paper towel-lined plate to soak up extra oil. While still warm, dust lightly with powdered sugar for a sweet finish. Enjoy these delightful bites warm for the best taste! To get light and fluffy apple fritter bites, avoid overmixing the batter. When you combine the wet and dry ingredients, mix just until you see no more dry flour. A few small lumps are okay. This method keeps the bites airy and tender. Testing the oil temperature is key. Before you fry, drop a small spoon of batter into the oil. If it sizzles and rises, your oil is ready. If it sinks or does not bubble, wait a bit longer. Proper oil temperature gives you a crispy outside and soft inside. Serve your warm apple fritter bites with a side of warm caramel sauce or maple syrup. This adds a sweet touch that everyone will love. You can also dust them with powdered sugar for a beautiful finish. Enjoy them fresh with friends or family for a delightful treat. {{image_4}} You can make your apple fritter bites even sweeter! Just add chocolate chips or caramel bits to the batter. This extra touch gives a rich flavor and a fun surprise in every bite. Kids love chocolate, and caramel adds a nice gooeyness. Try it out next time for a sweet twist! Want to mix things up? You can use pears or peaches instead of apples. Both fruits bring a different taste and texture. Pears are juicy and sweet, while peaches add a lovely aroma. This way, you can enjoy a variety of flavors in your fritter bites! If you need a gluten-free treat, you can swap the all-purpose flour for a gluten-free flour blend. Many blends work well in this recipe, so you’ll still get that fluffy texture. Make sure to check the label for baking tips to get the best results. Enjoy your fritters without worry! Store your apple fritter bites in an airtight container. Keep them at room temperature for up to 2 days. This keeps them soft and tasty. If you let them sit out, they may get stale quickly. For longer storage, freeze your cooked apple fritter bites. Place them in a single layer on a baking sheet. Once frozen, transfer them to a freezer-safe bag. This method keeps them fresh for up to 2 months. To enjoy your fritter bites again, reheat them in the oven. Preheat the oven to 350°F (175°C). Place the bites on a baking sheet and heat for about 10 minutes. This restores their crispiness. Avoid microwaving, as it makes them soggy. - Follow the detailed step-by-step instructions provided above. Start by mixing your dry ingredients. Then whisk the wet ones and combine them. Don’t forget to fold in the diced apples! - Yes, you can prepare the batter ahead but fry them fresh for best results. This keeps them crispy and warm. - Granny Smith and Honeycrisp are recommended for their tartness and firmness. They hold up well when cooked and add great flavor. - The oil is ready when it reaches 350°F (175°C) or when a drop of batter sizzles instantly. This ensures a perfect fry each time. Making apple fritter bites is easy and fun. You learned about key ingredients, from apples to spices. I shared straightforward steps from mixing to frying. Use my tips to get the best texture and taste. You can even try variations with other fruits or flavors. Remember, fresh is always best, but storage options keep them tasty longer. Enjoy making these bites for yourself and others. They are sure to impress!

Apple Fritter Bites Irresistible Homemade Treats

- 2 tablespoons extra virgin olive oil - 1 pound boneless, skinless chicken breast - Sea salt and freshly cracked black pepper - 3 cloves fresh garlic - 4 cups rich chicken broth - 12 ounces fettuccine pasta - 1 cup heavy whipping cream - 1 cup freshly grated Parmesan cheese - 1 cup broccoli florets (optional) One-Pot Chicken Alfredo needs simple, fresh ingredients. The base starts with olive oil, chicken, salt, and pepper. This creates a rich flavor. You also need garlic, chicken broth, and fettuccine pasta. The broth adds depth, while pasta gives texture. For creaminess, use heavy whipping cream and freshly grated Parmesan. This makes the dish velvety. Broccoli is a great optional add-in for color and nutrition. This dish is quick and easy. You can find all ingredients at your local store. Choose high-quality items for the best taste. First, heat 2 tablespoons of extra virgin olive oil in a large pot. Use medium heat until the oil shimmers. Next, season 1 pound of diced chicken breast with sea salt and black pepper. Add the chicken to the pot and cook for 5-7 minutes. Stir occasionally until the chicken turns golden brown. Once browned, take the chicken out and set it aside on a plate. In the same pot, add 3 cloves of minced garlic. Sauté the garlic for about 1 minute. Stir constantly until it smells great and turns light gold. Be careful not to burn the garlic. Now, pour in 4 cups of rich chicken broth. Bring this mixture to a boil. This adds depth and flavor to your meal. Add 12 ounces of fettuccine pasta to the boiling broth. Cook the pasta according to the package instructions. This usually takes about 8-10 minutes for that perfect al dente texture. If you like broccoli, add 1 cup of florets during the last 3 minutes of cooking time. This keeps the broccoli tender but still crisp. When the pasta is al dente, lower the heat. Pour in 1 cup of heavy whipping cream and 1 cup of freshly grated Parmesan cheese. Stir it all together until the sauce is smooth and creamy. This is where the magic happens! Finally, return the browned chicken to the pot. Stir everything to combine well. Allow it to simmer for 2-3 minutes. This lets all the flavors meld together beautifully. Your One-Pot Chicken Alfredo is now ready to enjoy! To make your chicken shine, season it well. Use sea salt and freshly cracked black pepper. This simple step really boosts the taste. For extra flavor, try adding herbs like thyme or oregano while cooking the chicken. To enhance the creaminess of the sauce, use heavy whipping cream. It gives a rich and smooth texture. Stir in freshly grated Parmesan cheese at the end. This makes the sauce even creamier and adds depth. If you want more flavor, add a splash of lemon juice. It brightens the dish and balances the creaminess. For a stunning presentation, serve your Alfredo in wide, shallow bowls. This style shows off the creamy sauce and chicken. Add a sprinkle of extra Parmesan on top. A drizzle of olive oil enhances the look and taste. Finish with a sprig of fresh parsley for color. Pair your One-Pot Chicken Alfredo with simple side dishes. A crisp green salad works well. Garlic bread is another great choice for a comforting meal. These sides complement the rich flavors of the Alfredo. Choose a large, heavy-bottomed pot for this recipe. It helps cook the chicken evenly and prevents sticking. A Dutch oven is a great option, as it retains heat well. You will also need basic kitchen tools. A slotted spoon helps remove the chicken easily. A sharp knife and cutting board make prep quick and safe. Using a whisk to blend the sauce can simplify the process, making it smooth and creamy. {{image_4}} You can swap out the chicken for other proteins. Shrimp or tofu work great. Both add a nice twist to the dish. For a healthier cream, use Greek yogurt or cashew cream. Both options add creaminess without too many calories. Feel free to add more veggies! Spinach, peas, or bell peppers mix well with chicken Alfredo. These veggies add color and nutrients. To balance flavors, add a pinch of salt or a splash of lemon juice. This really brightens the dish. If you're gluten-free, choose gluten-free pasta. Many brands offer great options that taste good. For a vegan version, use plant-based cream and nutritional yeast instead of cheese. This keeps the creamy texture and flavor without animal products. To store your One-Pot Chicken Alfredo leftovers, let the dish cool first. Place it in a container that seals well. Glass containers work great, as they do not stain and keep food fresh. You can also use plastic containers if they are BPA-free. Make sure to cover it tightly to keep out air. When you reheat your Alfredo, you want to keep it creamy. Use a pot on low heat for best results. Add a splash of chicken broth or cream to help it rehydrate. Stir it gently as it heats. You can also use the microwave, but be careful not to overheat it. In the fridge, your Chicken Alfredo can last for about three days. If you want to save it longer, consider freezing it. In the freezer, it can last for up to two months. Just remember that freezing may change the texture a bit, so it might not be as creamy. To thaw, place it in the fridge overnight before reheating. To make One-Pot Chicken Alfredo creamy, start with heavy whipping cream. This rich ingredient gives the sauce its velvety texture. As you stir in the cream and Parmesan cheese, ensure you mix well. This helps create a smooth sauce without lumps. - Use freshly grated Parmesan for the best flavor. - Stir constantly as the cream heats up. - Lower the heat to prevent boiling after adding cream. Yes, you can use other types of pasta. Fettuccine is the classic choice, but many options exist. You could try penne, rotini, or even gluten-free pasta if needed. Just adjust the cooking time based on the pasta you select. - Penne is great for holding sauce. - Rotini adds fun shapes to your dish. - Gluten-free pasta works well for dietary needs. To adjust the recipe for more servings, scale the ingredients up. If you want to serve six, increase the chicken to 1.5 pounds. You should also add 1.5 cups of heavy cream and 1.5 cups of Parmesan cheese. - Keep the same cooking method. - Make sure to use a larger pot. - Taste as you go to balance flavors. Yes, you can make this dish ahead of time. Cook the chicken and pasta, then mix them with the sauce. Let it cool before storing in the fridge. When ready to eat, reheat it on low heat to warm it through. - Store leftovers in airtight containers. - Reheat slowly to keep it creamy. - Add a splash of cream while reheating for freshness. This blog post guides you through making a delicious one-pot chicken Alfredo. We covered main ingredients like chicken and pasta, and how to create a creamy sauce. I shared easy steps and handy tips for flavor and storage. Remember, you can tweak the recipe with different ingredients or veggies. This dish is flexible, tasty, and great for meal prep. So get cooking and enjoy your delightful meal!

One-Pot Chicken Alfredo Simple and Creamy Meal

PREV 1 … 10 11 12 … 17 NEXT
tastykitchentales

explore

DessertsDinnerAppetizersDrinks

Our Policies

  • Cookie Policy
  • Copyright Policy
  • Disclaimer
  • GDPR Policy
  • Terms Of Use
Back to Top
  • About
  • Contact Us
  • Privacy Policy
© 2025 tastykitchentales