FREE DINNER EBOOK! Get your copy!
  • Cookie Policy
  • GDPR Policy
  • Disclaimer
  • Terms Of Use
  • Visit my other site: Fun Cookie Recipes
tastykitchentales
  • Home
  • Dinner
  • Desserts
  • Drinks
  • Appetizers
  • Contact
  • About
  • Privacy Policy
  • Home
  • Dinner
  • Desserts
  • Drinks
  • Appetizers
  • Contact
  • About
  • Privacy Policy
  • Cookie Policy
  • GDPR Policy
  • Disclaimer
  • Terms Of Use
Visit my other site: Fun Cookie Recipes

HOME / CATEGORIES /

Latest

- 4 salmon fillets (6 oz each) - 4 cloves garlic, finely minced - 1/4 cup extra-virgin olive oil - 1 tablespoon fresh lemon juice - 1 teaspoon lemon zest - Fresh herbs: 2 tablespoons parsley, 1 tablespoon dill - 1 teaspoon dried oregano - Salt and black pepper, to taste - Lemon wedges for serving The main ingredients for Marry Me Herb Garlic Salmon are simple yet flavorful. Salmon fillets are rich in omega-3 fatty acids, which support heart health. Garlic adds a punch of flavor while also bringing health benefits, like boosting the immune system. The extra-virgin olive oil is not only healthy but also helps create a lovely crust on the salmon when baked. To enhance the flavor, I use fresh lemon juice and lemon zest. The zest adds a bright citrus note that pairs perfectly with the rich salmon. Fresh herbs like parsley and dill bring color and freshness, making the dish more appealing. Seasonings include dried oregano, salt, and black pepper. They balance the flavors and highlight the natural taste of the salmon. Lemon wedges are perfect for serving, adding a fresh squeeze of juice just before eating. {{ingredient_image_2}} - Preheat oven to 400°F (200°C). - Line a baking sheet with parchment paper for easy cleanup. - In a bowl, combine olive oil, minced garlic, lemon juice, lemon zest, chopped parsley, chopped dill, dried oregano, salt, and black pepper. - Whisk until well blended. The mix should smell bright and fresh. - Place salmon fillets skin-side down on the baking sheet. - Generously coat each fillet with the herb garlic mixture. Make sure every bit is covered for great flavor. - Bake the salmon in the preheated oven for 12 to 15 minutes. - The salmon is done when it flakes easily with a fork and looks opaque. - Let the salmon rest for 1 minute before serving. This helps the flavors deepen. To ensure your salmon is evenly coated, use a brush or spoon. Apply the herb garlic mixture to all sides of each fillet. This way, every bite will burst with flavor. When checking for doneness, look for flakiness and opacity. The salmon should easily flake apart with a fork. If it looks opaque throughout, it’s good to go! For a beautiful plate, decorate with fresh herbs and lemon wedges. Place the baked salmon on a nice platter. Garnish with extra sprigs of parsley and dill for color. Arrange lemon wedges around the salmon. Drizzle any leftover sauce artfully around the plate. This adds a lovely touch and enhances the dish's appeal. For side dishes, serve the salmon with rice or steamed vegetables. Both options complement the flavors well. For a drink, consider a crisp white wine, like Sauvignon Blanc. Its acidity pairs nicely with the rich salmon and bright herbs. Enjoy your meal with great sides and a refreshing drink! Pro Tips Fresh Ingredients Matter: Always use fresh herbs and high-quality salmon for the best flavor and texture. Don’t Overcook: Salmon is best when it’s slightly undercooked in the center; it will continue to cook from residual heat. Experiment with Herbs: Feel free to mix in other herbs like tarragon or basil to give a unique twist to the flavor profile. Serve with Sides: Pair the salmon with roasted vegetables or a light salad to complement the dish beautifully. {{image_4}} You can change the flavor with different marinades. A honey mustard glaze adds a sweet twist. Mix honey, mustard, and a bit of olive oil. Brush it on your salmon before baking. Another option is a spicy sriracha garlic sauce. Combine sriracha, minced garlic, and olive oil. This sauce gives your salmon a bold kick. Brush it on just like the herb garlic mix. You can also try grilling the salmon. Heat your grill and cook the fillets for about 5-6 minutes on each side. This method gives a smoky flavor and beautiful grill marks. Pan-searing is another method. Heat a skillet over medium-high heat and add olive oil. Cook the salmon skin-side down for about 4-5 minutes. Flip it and cook for another 3-4 minutes. This method gives a crispy skin. If you want to switch proteins, use chicken or tofu. For chicken, use thighs or breasts. Marinate them in the same herb garlic mix. Bake them for about 20-25 minutes, or until cooked through. Tofu is great for a plant-based option. Press the tofu to remove excess water. Marinate it like the salmon, then bake for 25-30 minutes. You can also try different fish, like trout or halibut. Adjust the cooking time based on the thickness of the fillets. To keep your leftover Marry Me Herb Garlic Salmon fresh, use an airtight container. This will stop air from drying it out. Make sure to store it in the fridge right after it cools down. You can keep the salmon for up to three days. After that, the taste may not be as good. When reheating salmon, the goal is to keep it moist. The best way is to use the oven. Preheat it to 275°F (135°C). Place your salmon on a baking sheet and cover it with foil. Heat it for about 15 minutes. This will warm it up without drying it out. If you want to save some salmon for later, freezing is a great choice. First, wrap each fillet tightly in plastic wrap. Then, place them in a freezer bag. This helps prevent freezer burn. You can freeze it for up to three months. When you are ready to eat it, thaw the salmon in the fridge overnight. For best quality, avoid using a microwave to thaw. To check if salmon is cooked right, look for a few signs. First, see if the salmon flakes easily with a fork. This means it's done. The color should be opaque, not translucent. Use a meat thermometer if you like. It should read 145°F (63°C) in the thickest part. You can pair this dish with many sides. Rice or quinoa works well. Try roasted vegetables for a healthy option. A fresh salad with lemon dressing can add a nice crunch. Garlic bread is a great choice, too. It soaks up all the tasty juices! Yes, you can swap fresh herbs for dried ones. Use one-third of the amount. For instance, if the recipe calls for 2 tablespoons of fresh parsley, use about 2 teaspoons of dried. Dried herbs are stronger, so less is more. Mix them well into the oil for best flavor. This recipe is great for meal prep! Cook the salmon ahead of time and store it in an airtight container. It keeps well in the fridge for about 3 days. To reheat, use a low oven or microwave to avoid drying it out. Enjoy easy meals all week long! This blog post covered how to make delicious Marry Me Herb Garlic Salmon. You learned about the key ingredients, step-by-step instructions, and helpful tips. You saw variations to keep meals fresh and fun. Proper storage and reheating advice helps you enjoy leftovers too. Cooking doesn’t have to be hard. With simple steps, you can impress anyone at your table. Try this recipe and make it your own! Your friends and family will love it.

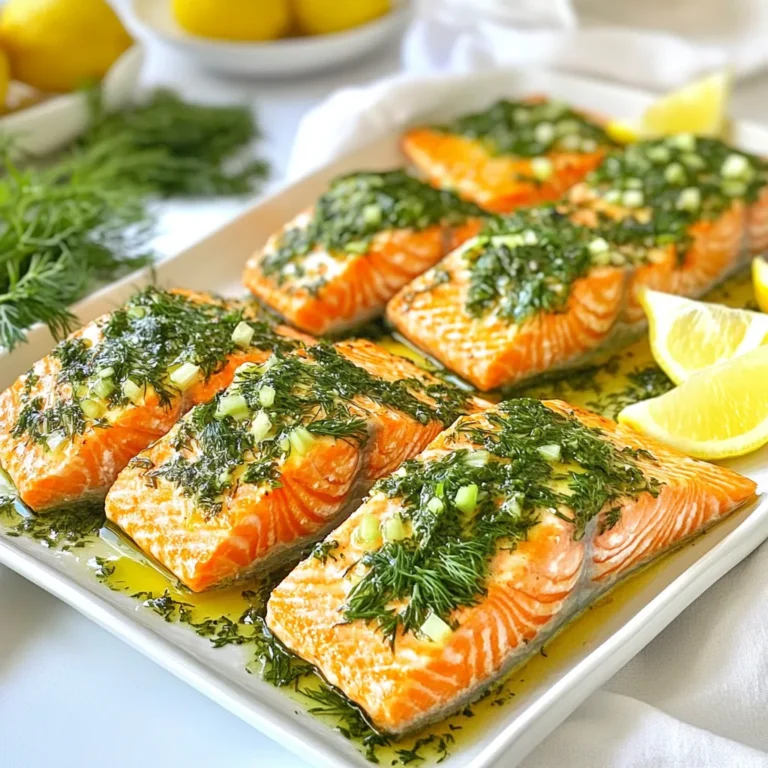
Marry Me Herb Garlic Salmon Flavorful and Easy Dish

- 4 boneless, skinless chicken breasts - 1 cup fresh mozzarella cheese, diced into small cubes - 1 cup cherry tomatoes, halved - 1 cup fresh basil leaves, chopped finely The main ingredients create a classic Caprese flavor. You will taste the freshness in every bite. The chicken is the perfect vessel to hold the cheese, tomatoes, and basil. - 2 tablespoons balsamic glaze (store-bought or homemade) - 2 tablespoons olive oil - 1 teaspoon garlic powder - Salt and black pepper to taste The balsamic glaze adds a sweet tang. Olive oil helps to keep the chicken moist. Garlic powder enhances the overall flavor. Salt and pepper bring everything together, making it savory. - Fresh basil leaves for garnish - Arugula or spinach for presentation Garnishes are key for a beautiful dish. Fresh basil adds color and aroma, while arugula or spinach gives a nice base. These simple touches make your meal look and taste gourmet. {{ingredient_image_2}} - Preheat your oven to 375°F (190°C). This helps cook the chicken evenly. - Carefully slice a pocket into each chicken breast. Be sure not to cut all the way through. - Combine mozzarella, cherry tomatoes, and basil in a bowl. Use fresh ingredients for bright flavors. - Add olive oil, salt, and pepper to the mixture. Stir gently until everything is mixed well. - Generously fill the chicken pockets with the mixture. Make sure you pack it in well. - Secure the openings with toothpicks to keep the filling inside. This step is important. - Sear each side in an oven-safe skillet for about 3-4 minutes. This gives the chicken a nice golden color. - Sprinkle garlic powder over the chicken. Drizzle with balsamic glaze for a tangy kick. - Transfer the skillet to the oven. Bake until the internal temperature is 165°F (75°C). - Let the chicken rest for a few minutes after baking. This helps keep it juicy. - Garnish with fresh basil leaves before serving. This adds a nice touch and flavor. - Use fresh ingredients for the best taste. Fresh mozzarella and ripe tomatoes bring full flavor. - Allow the mixture to sit for a few minutes. This helps the flavors blend well together. - Perfectly sear chicken for a golden crust. Searing adds a nice texture and locks in moisture. - Monitor internal temperature for safety. Cook until the chicken reaches 165°F (75°C). This ensures it’s safe to eat. - Serve on a bed of greens. Arugula or spinach adds a nice touch and color. - Drizzle additional balsamic glaze for flair. This not only looks great but adds extra flavor to your dish. Pro Tips Use Fresh Ingredients: Always opt for fresh mozzarella, ripe cherry tomatoes, and fragrant basil to elevate the flavors of your dish. Perfectly Sear the Chicken: Ensure your skillet is hot enough before adding the chicken to achieve a golden brown crust that locks in moisture. Let it Rest: Allowing the chicken to rest for a few minutes after baking redistributes the juices, resulting in a juicier bite. Experiment with Flavors: Feel free to add other ingredients like sun-dried tomatoes or pesto to the filling for a unique twist on this classic recipe. {{image_4}} You can easily switch up the cheese. Feta or goat cheese tastes great too. These cheeses add a nice tang. For presentation, try using arugula instead of spinach. Arugula has a peppery flavor that pairs well with the chicken. Want more flavor? Add sun-dried tomatoes to the filling. They bring a rich, sweet taste. You can also stir in some pesto for a fresh twist. It enhances the dish with herbal notes and depth. If you need a gluten-free meal, make sure to avoid cross-contamination. Check all labels to ensure your ingredients are safe. You can also try plant-based chicken. It works well for a vegetarian option that is still tasty. Store any leftovers in an airtight container. This keeps the chicken fresh and safe. Enjoy the chicken within 3-4 days for the best taste. You can freeze cooked chicken for up to 2-3 months. Make sure it cools completely before you freeze it. When you are ready to eat, reheat it thoroughly before serving. This ensures the chicken is hot and safe to eat. For even reheating, use the oven or a skillet. Preheat the oven to 350°F (175°C) and bake until warm. Using a skillet allows for good heat distribution. Avoid microwaving, as it may dry out the chicken. You can pair Caprese stuffed chicken with many sides. Here are some tasty options: - Garlic bread for a crunchy bite. - Roasted vegetables like zucchini or bell peppers. - A simple green salad with vinaigrette. - Creamy mashed potatoes for comfort. - Quinoa or couscous for a healthy grain. These sides balance well with the chicken's flavors. Yes, you can prep this dish ahead of time. Here’s how: - Stuff the chicken breasts a day early. - Store them in the fridge in an airtight container. - You can also make the filling a day before. This saves time when you cook. Just bake the chicken when ready. To check if the chicken is done, use a meat thermometer. - Insert it into the thickest part of the breast. - The temperature should read 165°F (75°C). This ensures the chicken is safe to eat. Juices should run clear, not pink. Reheating can dry out the chicken, so be careful. - Use the oven at 350°F (175°C) for even heating. - Place the chicken in a covered dish with a splash of broth. - You can also reheat in a skillet over low heat. These methods keep the chicken moist and tasty. This blog post shared a simple recipe for Caprese Stuffed Chicken. We explored the main and additional ingredients that create amazing flavors. You learned how to prep, stuff, and bake the chicken for a perfect meal. I also shared helpful tips for flavor and presentation, along with variations and storage options. Enjoy making this dish for family or friends. It’s tasty, healthy, and easy. Your cooking skills will shine with this recipe!

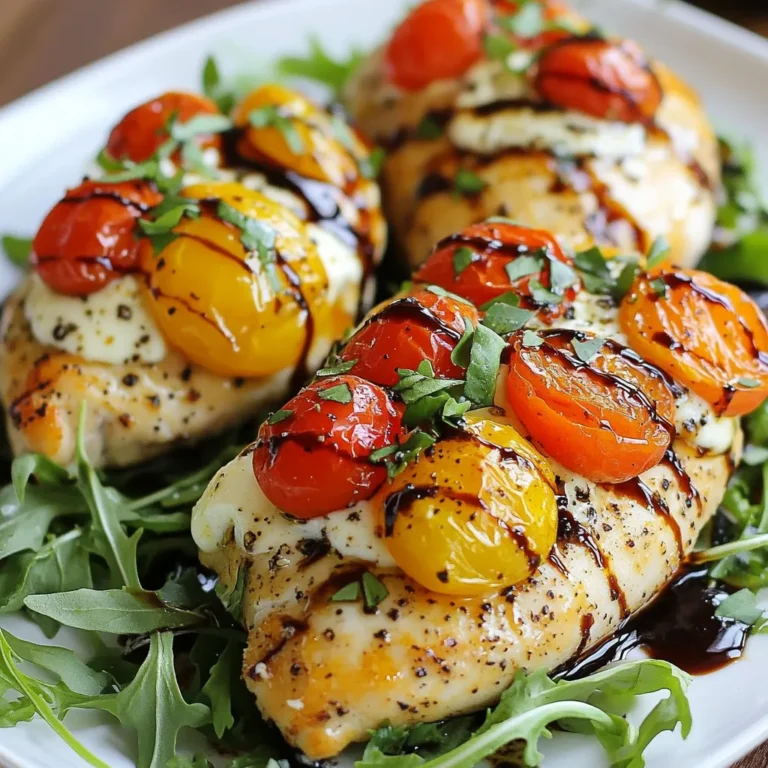
Caprese Stuffed Chicken Flavorful and Easy Recipe

- Chicken and Potatoes - 4 boneless, skinless chicken breasts - 1.5 lbs baby potatoes, halved - Seasonings and Broth - 1 cup chicken broth - 5 cloves garlic, finely minced - 1 cup freshly grated Parmesan cheese - 1 teaspoon Italian seasoning blend - 1/2 teaspoon freshly ground black pepper - 1/2 teaspoon salt (adjust to taste) - 1 tablespoon extra virgin olive oil - Garnishing Ingredients - Fresh parsley, chopped (for garnish) I love using simple, fresh ingredients for this dish. The chicken and baby potatoes create a hearty base. The chicken is tender and juicy, while the potatoes soak up the savory broth and flavors. The garlic adds a lovely kick, and Parmesan brings a rich, cheesy taste. I always use fresh garlic and real Parmesan cheese for the best flavor. The Italian seasoning blend adds warmth and depth to the dish. Don't forget about the olive oil! It keeps everything moist as it cooks. Finally, fresh parsley brightens the plate and adds a pop of color. These ingredients work together to make a delicious, comforting meal. {{ingredient_image_2}} Making the Garlic-Parmesan Mixture Start by taking a large bowl. Add five cloves of minced garlic. Then, mix in one cup of grated Parmesan cheese. Next, add one teaspoon of Italian seasoning, half a teaspoon of black pepper, and half a teaspoon of salt. Stir all the ingredients well until they form a smooth paste. This mixture brings great flavor to your chicken. Preparing the Crockpot Take your crockpot and drizzle one tablespoon of olive oil on the bottom. Use a paper towel or your hands to spread it around. This step helps to keep the chicken and potatoes from sticking to the pot. Layering the Ingredients Now, take 1.5 pounds of halved baby potatoes. Arrange them evenly across the bottom of the crockpot. This layer will soak up all the yummy juices. Then, take each chicken breast and rub the garlic-Parmesan mixture all over it. Place the chicken on top of the potatoes. Setting the Crockpot Once everything is layered, pour one cup of chicken broth around the edges of the crockpot. Avoid pouring it on top of the chicken. This keeps the flavor strong. After that, secure the lid tightly. Cooking Time and Temperature You can set your crockpot on low for 6-7 hours or high for 3-4 hours. Cooking on low gives the best flavor and tenderness. Checking for Doneness When the cooking time is up, check if the chicken is fully cooked. It should be white and juices should run clear. The potatoes should be tender when pierced with a fork. If everything is done, taste and add more salt or pepper if needed. Enjoy your meal hot, and don’t forget to garnish with fresh parsley for color and flavor! Ensuring Tender Chicken To keep your chicken juicy, don’t skip the marinade step. Rub the garlic-Parmesan mixture on the chicken well. This helps the meat soak in flavor. Use chicken breasts that are even in size. This way, they cook evenly. Always check the internal temperature. It should reach 165°F for safe eating. Flavor Enhancement Suggestions Add herbs for extra taste. Fresh thyme or rosemary work great. You can also squeeze lemon juice before serving. This adds brightness to the dish. For a kick, sprinkle some red pepper flakes in the garlic-Parmesan mix. This small change can make a big difference. Presentation Ideas Serve the chicken and potatoes on a nice platter. Drizzle some cooking juices over them. This keeps everything moist and adds shine. Finish with a sprinkle of fresh parsley. It adds color and freshness to the dish. Pairing Recommendations This meal pairs well with a simple green salad. A light vinaigrette works best to balance the rich flavors. You can also serve it with crusty bread. It’s perfect for soaking up any extra sauce. For a drink, try a crisp white wine or sparkling water. Pro Tips Use Fresh Ingredients: Always opt for fresh garlic and high-quality Parmesan cheese to enhance the flavor of your dish. Customize Your Seasoning: Adjust the Italian seasoning and salt according to your taste preferences for a personalized flavor profile. Check for Doneness: Use a meat thermometer to ensure that the chicken reaches an internal temperature of 165°F for safe consumption. Let it Rest: Allow the chicken to rest for a few minutes after cooking to retain its juices before serving. {{image_4}} Chicken Alternatives You can use other meats like turkey or pork. These will change the taste but still work well. Bone-in chicken adds flavor but takes longer to cook. If you prefer a leaner option, try chicken thighs. They stay juicy and tender. Potato Substitutes If you want a lower-carb option, use cauliflower. It cooks quickly and absorbs flavors well. Sweet potatoes add a nice sweetness and color. You can also try parsnips for a unique twist. They add a bit of sweetness and are creamy when cooked. Different Seasoning Blends You can mix up the spices for new tastes. Try adding smoked paprika for a smoky flavor. Cajun seasoning gives it a spicy kick. For an Asian twist, use soy sauce and ginger. Each mix brings a different vibe to the dish. Vegetarian Versions To make this dish vegetarian, swap chicken for hearty vegetables like mushrooms or eggplant. Use vegetable broth instead of chicken broth. Add beans for protein and texture. This version will still be rich and satisfying while being meat-free. - Proper Container Use: Use a clean, airtight container for storing leftovers. This helps keep the chicken and potatoes fresh. Make sure to let the meal cool down before sealing it. - Shelf Life: Store your leftovers in the fridge for up to three days. If you want to keep them longer, consider freezing them instead. - How to Freeze: To freeze, place the cooled chicken and potatoes in a freezer-safe bag or container. Remove as much air as you can to prevent freezer burn. Label the bag with the date for easy tracking. - Reheating Tips: When ready to eat, thaw the meal in the fridge overnight. Reheat in the microwave or oven until heated through. Ensure the chicken reaches 165°F. You can add a splash of chicken broth to keep the dish moist while reheating. Can I use frozen chicken? Yes, you can use frozen chicken. Just add extra cooking time. Cook on high for 4-5 hours if using frozen chicken. This way, the chicken cooks safely and stays juicy. How do I know when the chicken is done? Check the chicken with a meat thermometer. It should reach 165°F (75°C). The meat will be white and tender when fully cooked. If you don't have a thermometer, cut into the chicken. It should be no longer pink in the center. Can I double the recipe? Yes, you can double the recipe. Make sure your crockpot is big enough to hold all the ingredients. You may need to add a bit more broth and adjust the cooking time. Check on it to ensure everything cooks evenly. This article covered how to make a tasty chicken and potato dish in a crockpot. You learned about the key ingredients, step-by-step cooking methods, and helpful tips to enhance flavor. I shared ways to customize your meal and how to store leftovers properly. For best results, always check for doneness and try out different flavors. I hope you feel excited to try this recipe. Enjoy your cooking journey!

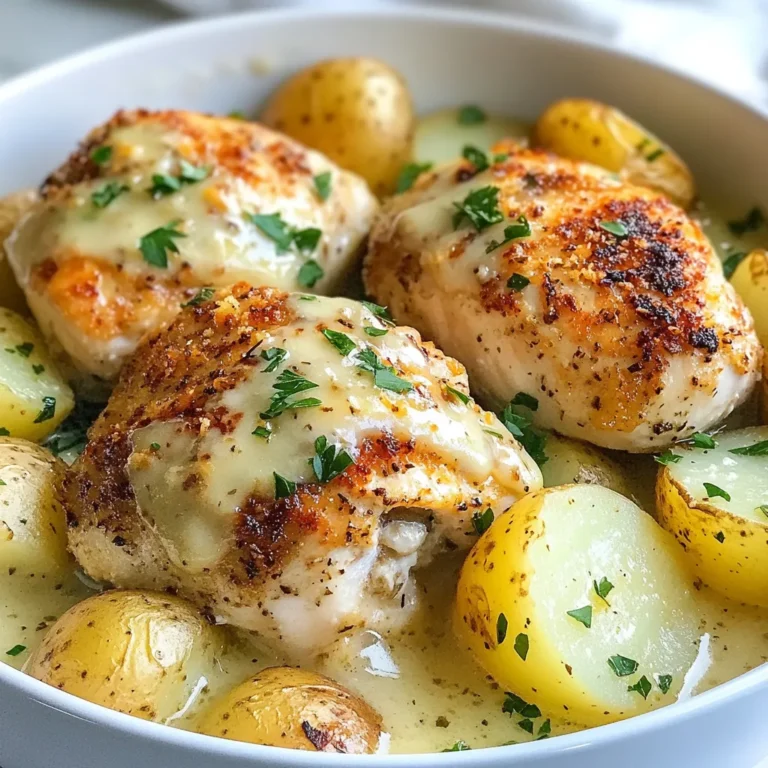
Garlic Parmesan Crockpot Chicken and Potatoes Delight

To make Vegan Creamy Tomato Pasta, you'll need these key items: - 12 oz pasta of your choice (penne or spaghetti recommended) - 1 tablespoon olive oil - 1 medium onion, finely chopped - 3 cloves garlic, minced - 1 can (14 oz) diced tomatoes, undrained - 1 cup coconut cream (or cashew cream for a nut-free alternative) - 1 teaspoon dried basil - 1 teaspoon dried oregano - Salt and pepper, to taste - Fresh basil leaves for garnish You can enhance this dish with these optional ingredients: - Nutritional yeast (for a cheesy flavor boost) - Red pepper flakes (for some heat) - Fresh herbs like parsley or thyme If you need to swap some items, here are some ideas: - Use gluten-free pasta for a gluten-free option. - Substitute olive oil with avocado oil for a different taste. - Replace coconut cream with silken tofu for a lower fat option. - Use fresh tomatoes instead of canned for a fresher flavor. These ingredients make this dish rich and satisfying. Feel free to mix and match based on what you have. Enjoy experimenting! {{ingredient_image_2}} To start, grab a large pot and fill it with salted water. Bring this water to a boil. Once it’s bubbling, add 12 ounces of your pasta choice. I love penne or spaghetti for this dish. Cook the pasta according to the package instructions until it is al dente. This usually takes about 8 to 10 minutes. Once the pasta is ready, drain it well. Make sure to save 1 cup of the pasta water for later. This helps make your sauce creamy! While the pasta cooks, heat 1 tablespoon of olive oil in a large skillet over medium heat. Add 1 medium onion that you’ve finely chopped. Sauté it for about 5 minutes. You want the onion to become soft and fragrant. Next, stir in 3 minced garlic cloves. Cook for another minute, stirring often to keep the garlic from burning. This step fills your kitchen with amazing smells! Now it’s time to add flavor. Carefully pour in a 14-ounce can of diced tomatoes, undrained, into the skillet with the onions and garlic. Stir everything together and let it simmer for about 5 minutes. This helps the flavors mix well. After that, lower the heat to medium-low. Add 1 cup of coconut cream (or cashew cream for a nut-free option). Stir until the sauce is smooth and creamy. If it’s too thick, add some of that reserved pasta water, a little at a time, until it reaches your desired consistency. Once your sauce is ready, it’s time to mix it with the pasta. Gently fold the cooked pasta into the skillet with the creamy tomato sauce. Make sure all the pasta is coated evenly with that rich sauce. This step combines all the flavors into one delicious dish! When serving, plate the pasta in individual bowls. Garnish with fresh basil leaves for a pop of color and flavor. If you want a little cheesy taste, sprinkle some nutritional yeast over the top. This adds a nice depth to the dish. Enjoy your Vegan Creamy Tomato Pasta straight away for the best taste! To make sure your pasta is just right, follow these tips: - Use a large pot with plenty of water. This helps the pasta cook evenly. - Add salt to the water. This flavors the pasta from the inside out. - Cook the pasta until al dente. This means it should still have a slight bite. - Reserve some pasta water. It helps adjust the sauce later. You can tweak the creaminess and flavor easily: - For a creamier sauce, add more coconut cream or cashew cream. - If the sauce is too thick, mix in the reserved pasta water a little at a time. - Taste your sauce as you go. Adjust the salt, pepper, and herbs to your liking. - Nutritional yeast adds a cheesy note. Sprinkle it in for extra flavor. Storing and reheating your pasta can be simple: - Keep leftovers in an airtight container in the fridge. They should last up to three days. - To reheat, add a splash of water or cream. This helps revive the sauce's texture. - Heat gently on the stove or in the microwave. Stir often to avoid burning. - If you notice it thickens too much, add more water as needed. Pro Tips Perfect Pasta Texture: Always cook your pasta al dente. This means it should be firm to the bite, as it will continue to cook slightly when mixed with the hot sauce. Flavor Enhancement: For a deeper flavor, consider roasting your garlic and onions before adding them to the skillet. This adds a lovely caramelized note to your sauce. Adjusting Creaminess: If you want a creamier sauce, start with less pasta water and add more gradually. This way, you have better control over the sauce's consistency. Fresh Basil Boost: Add fresh basil at the end of cooking to preserve its vibrant flavor and color. This ensures your dish bursts with freshness upon serving. {{image_4}} You can easily make this dish nut-free. Simply swap coconut cream for cashew cream. To make cashew cream, soak 1 cup of cashews in water for at least two hours. Drain and blend them with 1 cup of water until smooth. This creates a rich and creamy sauce that fits perfectly in this dish. Want to boost your meal's health? Add vegetables! Toss in some spinach, zucchini, or bell peppers when you sauté onions and garlic. Just chop them small, so they cook quickly. These veggies not only add nutrients but also enhance the flavor and texture of your creamy tomato pasta. If you like a little kick, add some heat! You can mix in red pepper flakes or chopped jalapeños. Start with a small amount and taste as you go. This way, you find the perfect spicy balance for your creamy tomato pasta. Enjoy the burst of flavors! Vegan Creamy Tomato Pasta is rich in nutrients. It offers a good balance of carbs, healthy fats, and protein. The pasta gives you energy, while coconut cream adds healthy fats. The tomatoes provide vitamins like C and K, plus antioxidants. Garlic and onions boost your immune system and add flavor. Together, these ingredients make a wholesome meal that satisfies hunger. Each serving of this pasta dish has about 400-500 calories. This number can change based on the type of pasta and cream you use. Here’s a rough breakdown: - Pasta (12 oz): 300 calories - Olive oil (1 tbsp): 120 calories - Coconut cream (1 cup): 550 calories - Onion (1 medium): 45 calories - Tomatoes (14 oz can): 50 calories This dish serves four, making it easy to share. Here are some health benefits of the key ingredients: - Pasta: Provides energy and can be whole grain for added fiber. - Olive oil: Contains healthy fats that support heart health. - Onion: Has antioxidants and may help fight inflammation. - Garlic: Can boost the immune system and may lower blood pressure. - Diced tomatoes: Packed with vitamins and may lower the risk of heart disease. - Coconut cream: Offers healthy fats and may support brain health. - Basil and oregano: Have anti-inflammatory properties and add flavor without extra calories. This dish not only tastes great but also supports your health. Yes, you can make this pasta gluten-free! Just choose gluten-free pasta made from rice or chickpeas. These options taste great and cook well. Be sure to check the package for cooking times. This dish can last for about 3 to 5 days in the fridge. Store it in an airtight container to keep it fresh. When you reheat it, add a splash of water or extra cream. This keeps it creamy and delicious. Absolutely! You can use fresh tomatoes. Just chop about 4 to 5 medium tomatoes. Cook them down until soft, then add them to your sauce. This gives a fresh taste and vibrant color. You can serve this pasta with a crisp salad or garlic bread. Roasted vegetables also pair well. For protein, add some chickpeas or lentils. They make the meal filling and satisfying. This blog post covered all you need for a great pasta dish. You learned about essential and optional ingredients, plus helpful substitutions. Step-by-step, I walked you through cooking the pasta and making a creamy sauce. You found tips to perfect your dish and even ways to add more flavor or nutrients. Lastly, we explored health benefits and answered common questions. You can create a delicious meal that fits your needs. Keep experimenting, and enjoy your cooking journey!

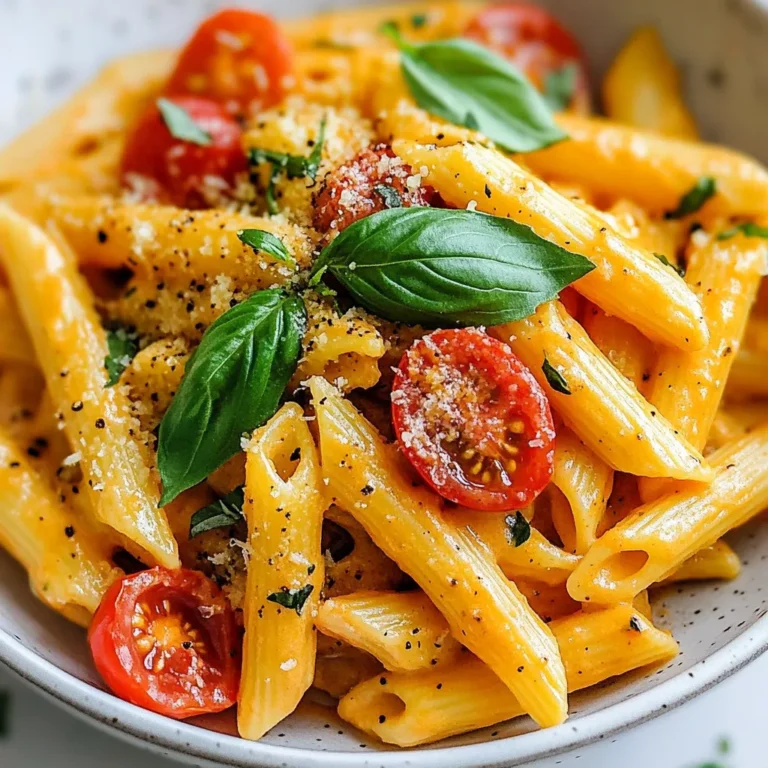
Vegan Creamy Tomato Pasta Rich and Flavorful Dish

- 2 cups cooked rice - 2 cups shredded cooked chicken - 1 can (10 oz) enchilada sauce - 1 can (15 oz) black beans - 1 cup corn - 1 teaspoon ground cumin - 1 teaspoon chili powder - 1 cup diced bell peppers - 1 cup diced onion - 2 cups shredded cheese - Salt and pepper to taste - Fresh cilantro for garnish I love this recipe because it uses simple, tasty ingredients. You can use white or brown rice, depending on your choice. Shredded chicken works best here. A rotisserie chicken makes it even easier. The enchilada sauce brings great flavor. You can pick red or green sauce. Both work well! Black beans add protein and fiber. Corn adds a nice sweetness to the dish. Don’t forget the spices! Ground cumin and chili powder give it a warm kick. Diced bell peppers and onions add crunch and color. For cheese, a mix of cheddar and Monterey Jack melts perfectly. Finally, salt and pepper are key for taste. Fresh cilantro adds a pop of color and flavor. This mix of ingredients creates a hearty meal that everyone will love. {{ingredient_image_2}} First, preheat your oven to 350°F (175°C). This step is key for even cooking. While the oven heats, grab a 9x13-inch casserole dish. Grease it well with cooking spray or a drizzle of olive oil. This helps keep the casserole from sticking. In a large bowl, combine the cooked rice, shredded chicken, and enchilada sauce. This is the base of your casserole. Next, add the black beans and corn. These add texture and taste. Now, sprinkle in the ground cumin and chili powder for a nice kick. Toss in diced bell peppers and diced onion for color and crunch. Use a spatula to mix everything well. Make sure all the ingredients are coated in sauce. Once mixed, taste your creation. Add salt and pepper to your liking. Then, transfer the mixture into the greased casserole dish. Spread it out evenly. Now, it's time for cheese. Sprinkle the shredded cheese generously on top. Cover the dish tightly with aluminum foil, which helps keep moisture in. Bake the casserole for 25 minutes. This allows all those flavors to come together. After 25 minutes, carefully remove the foil. Let it bake uncovered for another 10-15 minutes. This step makes the cheese melt and bubble, giving it a golden look. When it's done, take it out of the oven. Let it cool for about 5 minutes before serving. This cooling time makes it easier to serve. You can garnish it with fresh cilantro if you like. This adds a nice pop of color and flavor! To ensure even cooking, spread the mixture flat in the dish. This helps heat reach all parts. For cheese, I love a mix of cheddar and Monterey Jack. Their flavors blend well and melt beautifully. Adjust spices based on your taste. If you like heat, add more chili powder. You can also toss in extra veggies like zucchini or spinach for more nutrition. They add color and flavor too. Pair your casserole with simple sides like a green salad or tortilla chips. These add crunch and freshness. For garnish, sprinkle fresh cilantro on top. It makes the dish pop with color and taste. Pro Tips Use Rotisserie Chicken: For a quick and flavorful option, using rotisserie chicken saves time and adds depth to your dish. Customize the Spice Level: Adjust the amount of chili powder and cumin to suit your taste; you can also add diced jalapeños for extra heat. Experiment with Cheese: While cheddar and Monterey Jack are classic choices, try adding pepper jack or queso fresco for a unique twist. Make it Ahead: This casserole can be assembled a day in advance and stored in the fridge; just add a few extra minutes to the baking time. {{image_4}} You can switch the chicken for ground turkey or beef. Both meats add great taste. Just cook them in a pan before adding to the casserole. If you want a vegetarian dish, use beans and veggies. Black beans and corn work well. You can also add zucchini or spinach for extra flavor and nutrition. To change up the flavor, try adding spices. A pinch of smoked paprika can add warmth. You can also add cayenne for heat or garlic powder for depth. For the sauce, you can choose red or green enchilada sauce. Green sauce gives a fresh taste, while red sauce adds a rich flavor. You can even mix both for a unique twist! Rice is classic, but you can try quinoa or cauliflower rice. Quinoa has more protein and is gluten-free. Cauliflower rice is low in carbs, perfect for a lighter meal. If you prefer brown rice, it has more fiber than white rice. Brown rice keeps you full longer, making it a healthy choice. To store leftovers, let the casserole cool first. Cover it tightly with plastic wrap or aluminum foil. You can also use an airtight container. It stays fresh in the fridge for about three to four days. If you want to keep it longer, freezing is a great option. When reheating, the best method is to use the oven. Preheat your oven to 350°F (175°C). Place the casserole in a baking dish and cover it with foil. This keeps it moist. Heat for about 20 minutes or until warm. You can also use a microwave. Just cover it and heat in short bursts, stirring in between. This helps avoid dry spots. To freeze this casserole, first, let it cool completely. Then, cut it into portions. Wrap each piece tightly in plastic wrap. After that, place them in freezer bags or an airtight container. It can last up to three months in the freezer. When you want to eat it, thaw it in the fridge overnight. Reheat it in the oven for the best taste. Chicken enchilada rice casserole is a warm, cheesy dish. It combines rice, chicken, beans, corn, and enchilada sauce. This dish layers flavors and textures for a tasty meal. You can top it with cheese, which makes it even more delicious. It’s perfect for family dinners or gatherings. Yes, you can prepare this casserole ahead of time. Mix all the ingredients and place them in your greased dish. Cover it tightly and store it in the fridge for up to 24 hours. When you’re ready, just bake it. This saves time on busy nights. Absolutely! You can freeze the casserole before baking. Just wrap it well in foil or plastic wrap. It will stay fresh for about three months. When you want to eat it, let it thaw in the fridge overnight. Then, bake it as directed for a hot meal. If you need an alternative to enchilada sauce, try salsa or taco sauce. You can also make your own sauce with tomatoes, chili powder, and spices. This way, you control the flavors and heat level. Different sauces can give your casserole a unique twist. This blog post guides you on making a tasty Chicken Enchilada Rice Casserole. You learned about the ingredients, steps, and tips for the best flavor. I shared ideas for variations and storage to keep your meals fresh. This dish is easy to customize and perfect for any meal. Enjoy making it your own with different proteins and spices. I hope this inspires you to create a delicious meal for friends and family!

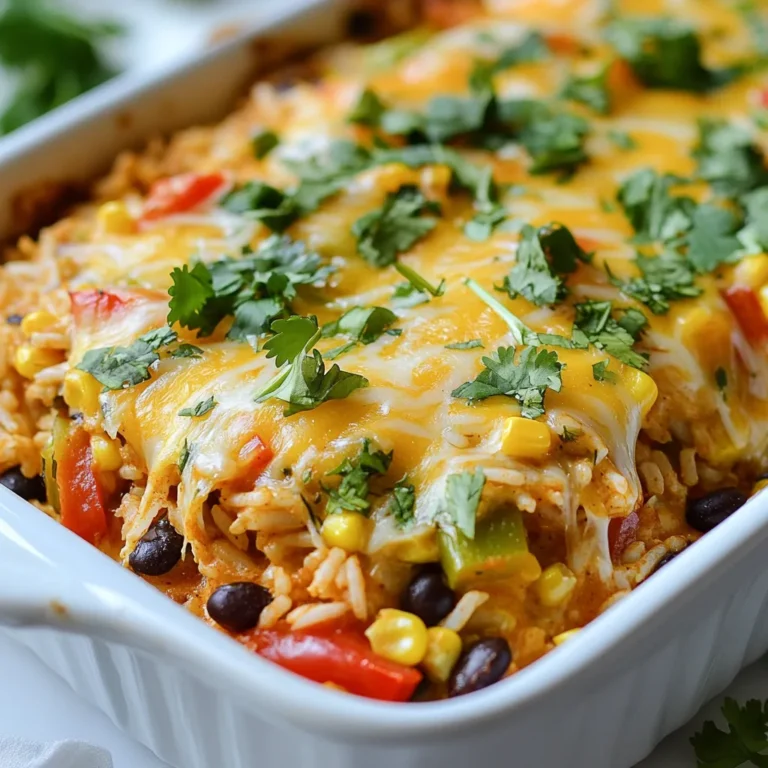
Chicken Enchilada Rice Casserole Simple and Tasty Meal

To make Monterey Chicken Orzo Skillet, you need fresh ingredients. Here’s the list: - 2 boneless, skinless chicken breasts, cut into bite-sized pieces - 1 cup orzo pasta - 1 cup Monterey Jack cheese, shredded - 1 bell pepper (red or green), diced - 1 small onion, finely chopped - 2 cloves garlic, minced - 1 cup fresh spinach, chopped - 2 cups low-sodium chicken broth - 1 teaspoon smoked paprika - ½ teaspoon ground cumin - Salt and pepper to taste - 2 tablespoons olive oil - Fresh cilantro or parsley, chopped, for garnish Each ingredient adds flavor and texture to your dish. The chicken gives protein, while orzo adds a nice bite. The cheese melts beautifully for a creamy finish. Bell peppers and onions add sweetness and crunch. Garlic packs a punch of flavor, and spinach brings color and nutrition. Using low-sodium broth helps control the salt in the dish, making it healthier. Spices like smoked paprika and cumin give it warmth and depth. Finally, fresh herbs like cilantro or parsley brighten up the meal. Gather these items before you start cooking. It makes the process smoother and more enjoyable. Happy cooking! {{ingredient_image_2}} Start by heating 2 tablespoons of olive oil in a large skillet over medium heat. When the oil is hot, add 1 finely chopped onion and 1 diced bell pepper. Sauté these for about 3-4 minutes until the onion turns translucent and the veggies soften. Next, stir in 2 minced garlic cloves. Cook for about 1 more minute until the garlic smells nice but does not burn. Now, take 2 boneless, skinless chicken breasts cut into bite-sized pieces. In a bowl, season the chicken with 1 teaspoon of smoked paprika, ½ teaspoon of ground cumin, salt, and pepper. Increase the skillet heat to medium-high and add the seasoned chicken. Cook it for about 5-6 minutes, stirring often, until the chicken turns golden brown. Carefully pour in 2 cups of low-sodium chicken broth. This will help the dish simmer nicely. Once it simmers, add 1 cup of orzo pasta, stirring well to mix. Lower the heat to medium-low, cover the skillet, and let it cook for 10-12 minutes. Stir it now and then to stop the orzo from sticking. After cooking, fold in 1 cup of chopped fresh spinach. The heat will wilt the spinach quickly. Then, sprinkle 1 cup of shredded Monterey Jack cheese evenly over the dish. Cover the skillet for about 1 minute to let the cheese melt and bubble. Once done, take the skillet off the heat and let it sit for a few minutes. For serving, you can keep it rustic by serving directly from the skillet. You can also portion it into bowls to show off the melted cheese. A slice of crusty bread on the side makes a great addition! Finally, garnish the dish with fresh cilantro or parsley for a nice touch. - To ensure chicken is cooked through, use a meat thermometer. The chicken should reach 165°F. This helps keep it safe and juicy. - For avoiding clumping of orzo, stir it often while cooking. This keeps it separate and helps it cook evenly. - To boost flavor, try adding Italian herbs like oregano or basil. These spices add depth to your dish. - If you want cheese alternatives, consider using cheddar or gouda. Each brings a unique flavor to the skillet. - Side dishes that work well include a simple green salad or roasted vegetables. These sides add freshness and balance to your meal. - For beverages, pair this dish with a light white wine or sparkling water. Both options enhance the meal without overpowering it. Pro Tips Use High-Quality Chicken: Opt for organic or free-range chicken for better flavor and texture in your dish. Customize the Vegetables: Add your favorite vegetables like zucchini or mushrooms for extra nutrition and flavor. Perfect Cheese Melting: For the best melt, grate your Monterey Jack cheese fresh from the block instead of using pre-shredded cheese. Leftover Storage: Store any leftovers in an airtight container in the refrigerator for up to 3 days, and reheat gently on the stove. {{image_4}} You can easily switch proteins in this dish. Try shrimp for a seafood twist. If you want a plant-based option, tofu works well too. Both will absorb the flavors nicely. You can also mix up the veggies. Add zucchini, mushrooms, or even corn for a new taste. Each swap adds a fresh twist to your meal. If you need gluten-free options, use gluten-free orzo. Many brands offer this choice. You can also swap out the chicken broth for vegetable broth to keep it plant-based. For dairy-free alternatives, try using a dairy-free cheese. Nutritional yeast can also give a cheesy flavor without dairy. For an oven-baked version, preheat your oven to 350°F. You can cook the skillet mix on the stove, then transfer it to a baking dish. Top with cheese and bake until bubbly. If you have an Instant Pot, you can make it there too. Sauté the veggies and chicken first, then add orzo and broth. Cook on high pressure for 5 minutes, and your meal is ready in no time! To store leftovers, let the skillet cool first. Then, place the dish in an airtight container. Divide the meal into smaller portions for easy access. This makes it easier to grab a quick meal later. Use glass or plastic containers that seal well to keep food fresh. For the best results when reheating, use the stovetop. Place the leftover meal in a skillet over medium heat. Add a splash of chicken broth or water to help the orzo stay moist. Stir often until heated through. You can also use the microwave if you’re in a hurry. Just cover the bowl with a lid or a damp paper towel to keep moisture in. If you want to freeze it, let the meal cool completely first. Transfer the cooled dish to freezer-safe bags or containers. You can freeze it for up to three months. When ready to eat, thaw it in the fridge overnight before reheating. In the fridge, leftovers will last about three to four days. Check for signs of spoilage, like an off smell or mold. If the dish looks or smells bad, it's best to throw it away. Always trust your nose and eyes when it comes to food safety. Can I use regular pasta instead of orzo? Yes, you can use regular pasta. Choose a small type like macaroni or penne. Just remember, cooking times may differ. Keep an eye on the pasta as it cooks. What can I substitute for Monterey Jack cheese? You can use cheddar or mozzarella. Both melt well and taste great. Try different cheeses to find your favorite mix. How long does it take to cook the orzo? Cooking the orzo takes about 10 to 12 minutes. Stir it a few times to prevent sticking. Check for tenderness before serving. How can I tell if the chicken is done? Cut into the chicken and check the center. It should be white and no longer pink. You can also use a meat thermometer. Aim for 165°F for safety. Is smoked paprika essential for flavor? Smoked paprika adds a nice depth. If you don’t have it, try regular paprika or a pinch of cayenne for some heat. Can I add other vegetables to the skillet? Absolutely! You can add zucchini, mushrooms, or peas. Just chop them small so they cook quickly. This makes the dish even more colorful and tasty. This blog post covered a delicious skillet dish featuring chicken, orzo, and fresh veggies. We explored simple steps for cooking and serving this hearty meal. Tips and variations add spice and fun to your cooking. Remember, you can swap ingredients based on your taste. With easy storage ideas, you can enjoy leftovers without hassle. Cooking should be enjoyable, so try new flavors and methods. I hope you feel inspired to create this dish and make it your own!

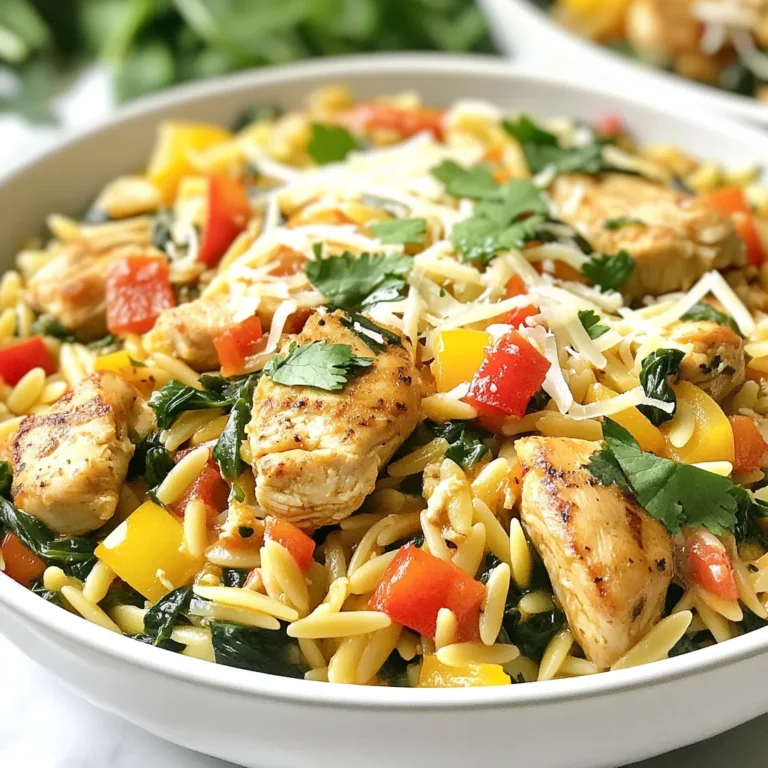
Monterey Chicken Orzo Skillet Flavorful One-Pan Meal

- 2 boneless, skinless chicken breasts - 3 cups chicken broth - 1 jar (15 oz) creamy Alfredo sauce - 1 cup heavy whipping cream - 1 package (9 oz) refrigerated cheese tortellini - 1 cup frozen peas - 1 teaspoon garlic powder - 1 teaspoon Italian seasoning - Salt and black pepper, to taste - Fresh parsley, finely chopped - Grated Parmesan cheese In this dish, the chicken provides a great base. I love using boneless, skinless chicken breasts. They cook well in the crockpot and stay juicy. The chicken broth adds flavor and helps cook the chicken. For creaminess, I use a jar of Alfredo sauce and heavy whipping cream. The combination makes a rich sauce that clings to the tortellini. The cheese tortellini adds a fun twist. It's quick to prepare and pairs well with the creamy sauce. Frozen peas add color and a pop of sweetness. They also give a nice texture contrast. For seasoning, garlic powder and Italian seasoning bring out great flavors. A pinch of salt and a few cracks of black pepper make it all come alive. To finish, I love to garnish with fresh parsley for brightness. A sprinkle of grated Parmesan cheese adds a nice touch of saltiness. These simple ingredients work together to create a comforting and delicious meal that feels special, yet is easy to make. {{ingredient_image_2}} To start, place the two boneless, skinless chicken breasts at the bottom of your crockpot. I like to season the chicken with garlic powder, Italian seasoning, salt, and black pepper. This adds great flavor. Pour the chicken broth over the seasoned chicken. Ensure the chicken is fully submerged for even cooking. Cover the crockpot and set it to cook on low for 5-6 hours or high for 3-4 hours. This makes the chicken tender and easy to shred. Once the chicken is cooked, carefully take it out of the crockpot. I use two forks to shred the chicken into bite-sized pieces. Then, return the shredded chicken to the pot. Now, pour in the rich Alfredo sauce and the heavy whipping cream. Stir gently until everything is mixed well. This creates a creamy base that makes the dish so delicious. Next, add the refrigerated cheese tortellini and frozen peas to the mix. This adds great texture and flavor. Make sure to mix everything together well so the tortellini is evenly distributed in the sauce. Cover the crockpot again and continue to cook on low for another 30-40 minutes. This will make the tortellini tender and heat everything through. Before serving, taste and adjust the flavors if needed. For the best results, set your crockpot to low. Cooking on low gives the chicken time to absorb flavors and stay juicy. To keep the chicken tender, make sure it is covered with broth. This helps it cook evenly and prevents it from drying out. Always taste your dish before serving. You can add salt or pepper to boost the flavor. If you want extra richness, mix in a bit more heavy cream or a splash of broth. This will make the sauce even creamier and more delightful. Serve your dish in deep bowls or stylish plates. This makes it look fancy and inviting. Drizzle some extra Alfredo sauce on top for added flair. Finish with a sprinkle of fresh parsley for color and freshness. This simple touch makes a big difference in how your meal looks. Pro Tips Cook Chicken Thoroughly: Ensure the chicken is cooked to an internal temperature of 165°F (75°C) for safety and tenderness. Use Quality Ingredients: The flavor of your Alfredo sauce will greatly depend on the quality of the sauce and cheese used; opt for a reputable brand for best results. Don’t Overcook Tortellini: Keep an eye on the tortellini as it cooks; overcooked pasta can become mushy. Aim for al dente for the best texture. Garnish for Presentation: A sprinkle of fresh parsley and Parmesan not only enhances the flavor but also makes the dish visually appealing. {{image_4}} You can swap chicken for turkey or tofu. Turkey has a lean taste that works well here. Tofu gives a nice plant-based option. Just prepare it the same way as chicken. Season it well for the best flavor. If you want to try something new, swap the Alfredo sauce for a different one. A creamy mushroom sauce or a marinara can change the whole dish. You can also add spices like cayenne or smoked paprika for depth. These flavors make your meal exciting and unique. Adding vegetables can boost nutrition and flavor. Try carrots, spinach, or broccoli for extra crunch. You can also use zucchini or bell peppers for a colorful twist. If you want a lighter meal, add more veggies and cut back on tortellini. This way, you keep it healthy and tasty. To keep your Crockpot Chicken Alfredo Tortellini fresh, store leftovers right away. Place the dish in an airtight container. Glass or plastic containers work well. Make sure to cool it down before sealing. This helps prevent moisture buildup. Store it in the fridge for up to four days. If you want to save some for later, freezing is a great option. Let the dish cool completely before freezing. Use freezer-safe containers or heavy-duty bags. Remove as much air as you can to prevent freezer burn. To thaw, move it to the fridge overnight. Reheat in a pot over low heat, stirring often, until warm. In the fridge, your Chicken Alfredo Tortellini lasts about four days. If frozen, it can stay good for up to three months. Just remember, the longer it stays frozen, the more it may lose taste and texture. To make this dish, follow these simple steps: - Place two boneless, skinless chicken breasts in the crockpot. - Season with garlic powder, Italian seasoning, salt, and pepper. - Pour three cups of chicken broth over the chicken. - Cook on low for 5-6 hours or high for 3-4 hours. - When done, shred the chicken with two forks. - Add a jar of Alfredo sauce and one cup of heavy cream. - Mix in a package of refrigerated cheese tortellini and one cup of frozen peas. - Cook on low for another 30-40 minutes, until the tortellini is tender. - Serve hot, topped with parsley and Parmesan cheese. Yes, you can use frozen tortellini. It cooks well in the crockpot. Here’s what to know: - Frozen tortellini saves time and works perfectly. - If using frozen, add it to the crockpot during the last 30-40 minutes of cooking. - Fresh tortellini is softer and cooks faster. - Both options taste great; choose what you prefer. Pair your dish with these tasty sides for a complete meal: - Garlic bread complements the creamy sauce. - A fresh salad adds crunch and balance. - Steamed broccoli or green beans bring color and nutrition. - Roasted vegetables offer a hearty touch. - Choose any side you love to make it special! This recipe for Crockpot Chicken Alfredo Tortellini combines simple ingredients for a tasty dish. You learned how to season chicken, prepare tortellini, and add flavor with tips and variations. Remember, you can switch proteins and sauces or add veggies to suit your taste. Store leftovers properly for later enjoyment. With this guide, you can make a delicious meal with ease. Enjoy the creamy goodness and happy cooking!

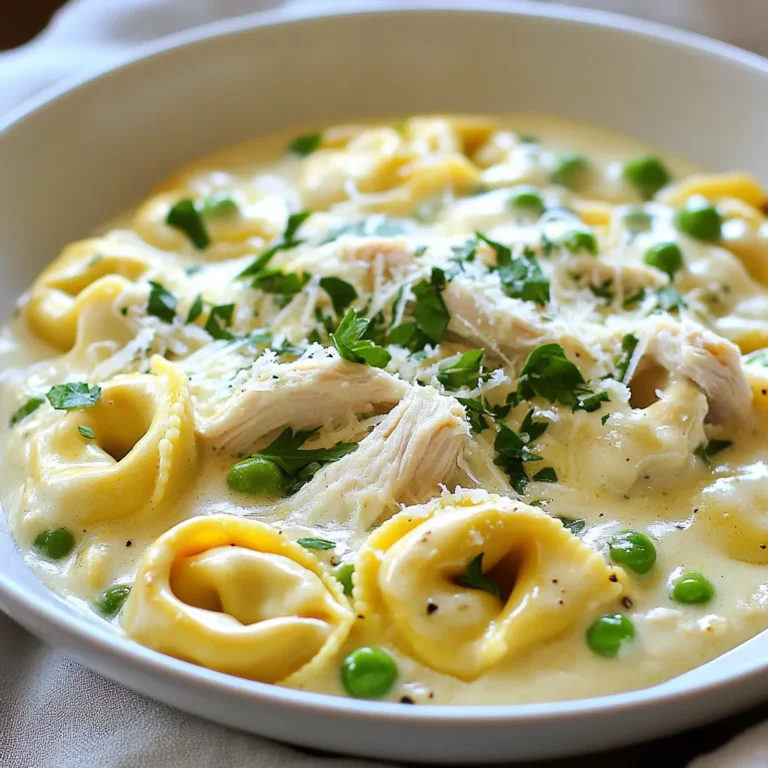
Crockpot Chicken Alfredo Tortellini Comfort Dish

- 8 chicken drumsticks - 1 cup panko breadcrumbs - 1/2 cup freshly grated Parmesan cheese - 4 cloves garlic, finely minced - 1 tablespoon mixed dried Italian herbs - 1/2 teaspoon paprika - 1/4 teaspoon cayenne pepper (optional) - Salt and freshly ground black pepper, to taste - 1/2 cup all-purpose flour - 2 large eggs, beaten well - 1/4 cup extra-virgin olive oil Gather these ingredients for a tasty treat. Chicken drumsticks bring a juicy base. Panko breadcrumbs give the crunch. Freshly grated Parmesan cheese adds a savory touch. For seasoning, I love using garlic. It gives flavor that everyone enjoys. The mixed dried Italian herbs add a nice touch too. Paprika brings color, while cayenne pepper can add heat if you like spice. Don’t forget salt and black pepper for balance. For binding, all-purpose flour helps the coating stick well. Beaten eggs serve the same purpose. Finally, olive oil helps crisp up the drumsticks during baking. With these ingredients, you're on your way to making a delicious meal. {{ingredient_image_2}} 1. Preheating and Lining the Baking Sheet First, I set my oven to 425°F (220°C). This high heat helps make the chicken crispy. Next, I line a large baking sheet with parchment paper. This step makes clean-up easy and helps the chicken brown better. 2. Mixing the Breadcrumb Coating Ingredients In a big mixing bowl, I combine the following: - 1 cup panko breadcrumbs - 1/2 cup freshly grated Parmesan cheese - 4 cloves garlic, finely minced - 1 tablespoon mixed dried Italian herbs - 1/2 teaspoon paprika - 1/4 teaspoon cayenne pepper (if you want some heat) - Salt and freshly ground black pepper, to taste I mix these ingredients well. This mix gives the chicken its crunchy and tasty coating. 1. Dredging in Flour I take one chicken drumstick and coat it in 1/2 cup of all-purpose flour. I shake off any extra flour to ensure an even layer. 2. Dipping in Beaten Eggs Next, I dip the floured drumstick into 2 large beaten eggs. I let any excess egg drip back into the bowl. This helps the breadcrumbs stick. 3. Rolling in Breadcrumb Mixture Finally, I roll the drumstick in the breadcrumb mixture. I press gently to make sure the coating sticks well. I repeat this for all the drumsticks. 1. Arranging on the Baking Sheet I place the coated drumsticks on the prepared baking sheet. I make sure they have some space between them for even cooking. 2. Drizzling with Olive Oil I drizzle the drumsticks lightly with 1/4 cup of extra-virgin olive oil. This step helps them bake to a golden brown and adds flavor. 3. Baking Time and Temperature Details I bake the drumsticks in the preheated oven for 35-40 minutes. I check that they reach an internal temperature of 165°F (75°C). Halfway through baking, I flip the drumsticks for even crispiness. After baking, I let them rest for a few minutes before serving. This helps keep them juicy. To get that amazing crunch, panko breadcrumbs are key. They are lighter and crispier than regular breadcrumbs. This makes your chicken drumsticks extra crunchy. When you coat the drumsticks, make sure to press the panko firmly. This helps it stick better. Using olive oil is important for browning. Drizzle a little over the coated drumsticks before baking. This not only helps them brown but also adds rich flavor. You want that golden color and crisp texture! Flipping the drumsticks halfway through cooking is a must. This ensures both sides get equally crispy. Set a timer for about 20 minutes into baking. Turn them gently to keep the coating intact. Check the internal temperature to make sure they are done. You want it to reach 165°F (75°C). This keeps the chicken safe to eat and juicy inside. A meat thermometer is a handy tool for this. For a stunning presentation, serve the drumsticks on a rustic wooden board. Add freshly chopped parsley for color. You can also use lemon wedges for a bright touch. Dipping sauces can elevate your chicken. A side of garlic aioli or spicy ranch adds fun flavors. This makes your meal more interactive and delicious! Pro Tips Preheat Properly: Always preheat your oven to ensure even cooking and to achieve that perfect crispy texture. Double-Dip for Extra Crunch: For an even crunchier coating, consider double dipping the drumsticks in the egg and breadcrumb mixture. Season the Flour: Add some seasoning to your flour mixture for an extra layer of flavor that seeps into the chicken. Rest Before Serving: Let the drumsticks rest for a few minutes after baking to allow the juices to redistribute for juicier meat. {{image_4}} You can spice up your drumsticks with some heat. Adding cayenne pepper gives a nice kick. If you want more, try crushed red pepper flakes. These options add flavor without much effort. For cheese lovers, you can try different cheeses. Mozzarella melts well and adds a stretchy texture. Cheddar gives a sharp taste, while feta offers a tangy twist. Choose what you love best. If you need gluten-free options, use gluten-free breadcrumbs. They give a similar crunch without the gluten. Also, almond flour can work as a great substitute for all-purpose flour. For a low-carb option, skip the breadcrumbs. Instead, coat your drumsticks in crushed pork rinds. They give a tasty crunch and fit low-carb diets perfectly. You still get that delightful crunch you crave! After enjoying your crunchy garlic Parmesan chicken drumsticks, store any leftovers right away. Refrigeration guidelines say to cool the drumsticks to room temperature before putting them in the fridge. This helps keep them fresh. Place them in a container with a lid to avoid drying out. You can also wrap them in plastic wrap or aluminum foil. Best containers for storage are airtight ones. This keeps the chicken moist and tasty for up to three days. When you want to enjoy your leftovers, best methods for reheating include the oven or an air fryer. Preheat your oven to 375°F (190°C). Place the drumsticks on a baking sheet. Heat them for about 15-20 minutes. This keeps them warm and crispy. If you use an air fryer, set it to 360°F (182°C). Reheat for about 8-10 minutes. Ensuring the drumsticks remain crispy is key. You can also place a rack in the oven. This allows air to circulate, which helps keep that crunch! Yes, you can use chicken thighs. Thighs are juicier and have a richer flavor. They may need a longer cooking time. Drumsticks usually bake for about 35-40 minutes, while thighs may take 45-50 minutes. Always check that the internal temperature reaches 165°F (75°C) for safe eating. To cook these drumsticks in an air fryer, preheat your air fryer to 400°F (200°C). Follow the same coating steps. Place the drumsticks in a single layer in the basket. Cook for about 25-30 minutes. Flip halfway for even cooking. Again, ensure they reach 165°F (75°C) inside. These drumsticks pair well with many sides. Try serving them with: - Mashed potatoes - Roasted vegetables - A fresh garden salad - Garlic bread - Spicy ranch dipping sauce These sides balance the rich, crunchy chicken perfectly. In this post, we explored how to create Crunchy Garlic Parmesan Chicken Drumsticks. I covered the main ingredients, including chicken, panko, and spices. I shared step-by-step instructions for preparation, coating, and baking. We also discussed tips for achieving a perfect crunch and variations for different diets. For a tasty meal, follow these steps closely. Experiment with flavors and enjoy your cooking!

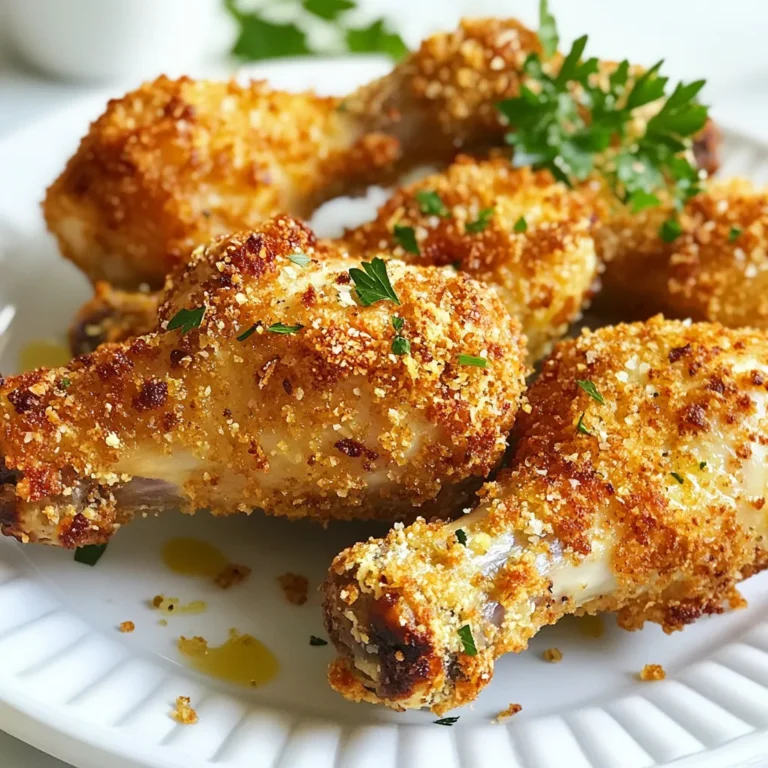
Crunchy Garlic Parmesan Chicken Drumsticks Delight

- 500g chicken breast, diced into bite-sized pieces - 200g plain yogurt - 2 tablespoons garam masala - 1 tablespoon ground cumin - 1 tablespoon ground coriander - 1 teaspoon turmeric powder - 1 teaspoon cayenne pepper (adjust for spice) - 2 tablespoons olive oil - 1 large onion, finely chopped - 3 cloves of garlic, minced - 1-inch piece of ginger, freshly grated - 2 ripe tomatoes, pureed - 200ml coconut milk - Fresh cilantro leaves, for garnish - Salt and black pepper to taste - 500g chicken breast = about 1.1 lbs - 200g yogurt = approximately 0.44 lbs or ¾ cup - 2 tablespoons = 30 ml - 1 tablespoon = 15 ml - 1 teaspoon = 5 ml - 200ml coconut milk = about 0.85 cups - For chicken, I suggest using organic brands for better quality. - Greek yogurt works best; try Fage or Oikos. - Look for high-quality garam masala from brands like Spice Islands or McCormick. - For olive oil, choose extra virgin options; I recommend California Olive Ranch. - Choose canned coconut milk from brands like Thai Kitchen or Aroy-D for richness. - Fresh cilantro can often be found from local farmers or organic sections in stores. This list gives you everything you need for Gordon Ramsay’s Chicken Tikka Masala. Each ingredient plays a key role in creating a balanced dish that is rich in flavor. {{ingredient_image_2}} Start by mixing the yogurt with spices. In a big bowl, combine: - 200g plain yogurt - 2 tablespoons garam masala - 1 tablespoon ground cumin - 1 tablespoon ground coriander - 1 teaspoon turmeric powder - 1 teaspoon cayenne pepper - Salt to taste Add the diced chicken breast to the bowl. Make sure every piece is coated well. For the best flavor, let the chicken sit in the fridge for at least 1 hour. If you have more time, marinate it overnight. Heat 2 tablespoons of olive oil in a large skillet over medium heat. Once the oil is hot, add one large, finely chopped onion. Cook it for 7-8 minutes until it turns golden brown. Stir it often to avoid burning. Next, add 3 cloves of minced garlic and 1 inch of freshly grated ginger. Cook these for 2 more minutes, stirring to release their great smells. Then, add the marinated chicken to the skillet. Cook it for about 5-6 minutes, turning the pieces until they are browned on all sides. After browning the chicken, pour in 2 ripe pureed tomatoes and the last tablespoon of garam masala. Let this cook for about 5 minutes. This step allows the flavors to mix well. Now, reduce the heat and stir in 200ml of coconut milk. Let the curry simmer for 10 minutes. This helps the chicken cook fully and makes the sauce rich and creamy. Finally, taste it! Adjust the salt and pepper if needed. For a nice touch, garnish with fresh cilantro leaves before serving. Enjoy your Chicken Tikka Masala! To make Chicken Tikka Masala shine, use fresh spices. Fresh spices boost flavor. Always taste as you cook. This helps you adjust flavors as needed. For a deeper flavor, let the sauce simmer longer. The coconut milk adds creaminess, but don’t rush it. Serve with warm naan or rice for the best meal! One big mistake is not marinating long enough. Marinate the chicken for at least one hour. If you have time, marinate overnight for more flavor. Another mistake is cooking on high heat. This can dry out the chicken. Always cook on medium heat for juicy pieces. Stir the sauce often to prevent sticking. Marinating the chicken is key. I recommend at least one hour. However, overnight gives the best results. The yogurt helps tenderize the meat. It also absorbs all those spices. For busy cooks, you can marinate in the morning and cook at night. This method saves time and ensures a tasty dish. Pro Tips Marination Magic: Letting the chicken marinate overnight intensifies the flavors and ensures a juicier texture. Onion Perfection: Cooking the onions until golden brown caramelizes their natural sugars, adding depth to the dish. Spice Control: Adjust the cayenne pepper based on your spice tolerance; start with less if you're unsure! Coconut Creaminess: For an extra creamy sauce, use full-fat coconut milk, which enhances the richness of the curry. {{image_4}} You can make a great vegetarian version of Chicken Tikka Masala. Simply swap the chicken for paneer or tofu. Both options soak up flavors well. Use the same marinade for these ingredients. You can also add mixed vegetables like bell peppers or spinach for extra color and nutrients. Just remember, cook the paneer or tofu until golden before adding the sauce. If you love heat, you can easily spice up your Chicken Tikka Masala. Add more cayenne pepper to the marinade. You can also include fresh green chilies while cooking. If you want a smoky flavor, try adding some smoked paprika. Taste as you go to ensure the spice level suits your palate. Serving Chicken Tikka Masala with the right sides makes the meal even better. I recommend fluffy basmati rice or warm naan bread. Both soak up the rich sauce perfectly. You might also consider a fresh salad or cucumber raita to cool the heat. For a special touch, garnish with fresh cilantro to add color and flavor. You can store leftover Chicken Tikka Masala in the fridge. Place it in an airtight container. This helps keep the dish fresh. It will stay good for up to three days. When you want to eat it, check the smell and look for any changes. If it seems off, throw it away. You can also freeze Chicken Tikka Masala. Put it in a freezer-safe container or bag. Make sure to remove as much air as possible. This helps prevent freezer burn. It can last for about three months in the freezer. When you are ready to eat it, thaw it in the fridge overnight. To reheat Chicken Tikka Masala, you have a few options. The best way is to use the stove. Heat it on low, stirring often. This helps it warm evenly. If you're in a rush, you can use the microwave. Place it in a microwave-safe dish, cover it, and heat in short bursts. Stir in between to avoid hot spots. Always check the temperature before eating. It should reach 165°F (74°C) to be safe. To adjust spice levels, start with less cayenne pepper. You can always add more later. If you want a milder dish, skip the cayenne altogether. Instead, add more yogurt to balance the heat. For a spicier version, increase the cayenne or add green chilies. Taste as you go to find your sweet spot. Yes, you can use different proteins in this recipe. Chicken is classic, but try shrimp or tofu for variety. If using shrimp, cook it quickly to avoid overcooking. For tofu, press it first to remove excess water. This helps it absorb flavors better. Feel free to experiment with your favorite proteins. Serve your Chicken Tikka Masala with fluffy basmati rice or warm naan bread. Both soak up the creamy sauce well. A simple cucumber salad adds freshness and crunch. You can also serve it with raita, a yogurt-based side that cools the heat. These sides create a balanced meal that everyone will enjoy. This blog post covered the main parts of making Chicken Tikka Masala. We went over the best ingredients, how to cook the chicken, and make the sauce. I shared tips to avoid common mistakes and secrets from Chef Ramsay. You also learned about fun variations and how to store leftovers. Remember, adjusting spices and picking sides can make this dish unique. Use these tips to make your Chicken Tikka Masala special and delicious. Enjoy your cooking journey!

Gordon Ramsay Chicken Tikka Masala Perfectly Balanced Meal

- 12 ounces cheese tortellini (fresh or frozen) - 2 boneless, skinless chicken breasts - 1 cup heavy cream - 3 tablespoons extra virgin olive oil - 4 cloves garlic, finely minced - 1 cup freshly grated Parmesan cheese - 1 teaspoon Italian seasoning - Fresh parsley, chopped, for garnish - Red pepper flakes - Salt and black pepper To make Garlic Parmesan Tortellini with Chicken, gather all the ingredients. It's important to have fresh cheese tortellini for the best taste. You can use frozen tortellini if that’s what you have. For the chicken, boneless, skinless breasts work great. They cook evenly and stay juicy. Heavy cream adds a rich flavor. It makes the sauce creamy and smooth. You will also need some olive oil to cook the chicken and garlic. Garlic is key for flavor and aroma. Parmesan cheese brings a salty taste that pairs perfectly with the cream. Italian seasoning adds a nice herbal note. Lastly, fresh parsley makes a lovely garnish. It adds color and freshness. If you like a bit of heat, red pepper flakes are a fun addition. Adjust salt and black pepper to your taste. With these ingredients, you can create a delightful meal that everyone will love! {{ingredient_image_2}} - Boiling Method: Fill a large pot with water. Add a good pinch of salt. Bring the water to a boil. Once boiling, add the cheese tortellini. Cook them until they float. This shows they are done. - Drain and Set Aside: Carefully drain the tortellini in a colander. Set them aside while you cook the chicken. - Seasoning the Chicken Breasts: Take the chicken breasts. Sprinkle salt, pepper, and Italian seasoning on both sides. This adds great flavor. - Cooking Time and Temperature: Heat 2 tablespoons of olive oil in a skillet over medium heat. Add the chicken. Cook for about 6-7 minutes on each side. The chicken should be golden brown and reach 165°F inside. - Sautéing Garlic: In the same skillet, add 1 tablespoon of olive oil. Once hot, add minced garlic. Sauté for about 1 minute. Stir often to avoid burning. - Mixing Cream and Parmesan: Reduce the heat to low. Pour in the heavy cream while stirring. Slowly add the grated Parmesan cheese. Stir until smooth and creamy. - Incorporating Tortellini and Chicken: Add the drained tortellini to the sauce. Toss gently to coat them well. Then fold in the sliced chicken. - Adjusting Seasoning for Flavor: Taste the dish. Add more salt, pepper, or red pepper flakes for heat if you like. - Plate Presentation: Spoon the Garlic Parmesan Chicken Tortellini onto plates or a serving dish. - Optional Garnishes: Garnish with fresh chopped parsley. For extra flair, drizzle olive oil and sprinkle more Parmesan on top. Enjoy your delicious meal! - Cooking Time Recommendations: To cook tortellini perfectly, boil them for 3-5 minutes. They are ready when they float. Keep an eye on them to avoid overcooking. - Troubleshooting Undercooked Tortellini: If your tortellini is still firm, return it to boiling water. Cook for an extra minute and check again. - Seasoning Best Practices: Use salt, pepper, and Italian seasoning on both sides of the chicken. This enhances the flavor and makes every bite tasty. - Searing Techniques for Juicy Chicken: Heat olive oil until hot. Cook chicken for 6-7 minutes on each side. This creates a golden crust while keeping the inside juicy. Always check that the chicken reaches 165°F. - Additional Flavor Boosts: For a richer taste, add a pinch of red pepper flakes or fresh herbs. These can elevate your dish and add unique flavors. - Avoiding Clumps in Cheese Sauce: To prevent clumps, add cheese slowly while stirring. Keeping the heat low helps the cheese melt smoothly into the sauce. Pro Tips Use Fresh Ingredients: Fresh garlic and good-quality Parmesan cheese will elevate the flavor of your dish significantly. Don’t Overcook the Chicken: To maintain moisture, ensure you check the internal temperature and avoid cooking beyond 165°F. Adjust Cream for Thickness: If you prefer a thicker sauce, let it simmer a bit longer to reduce, or add more Parmesan for a richer texture. Garnish for Flavor: Fresh parsley not only adds color but also enhances the overall flavor profile of the dish. {{image_4}} You can change the protein in this dish to suit your taste. - Shrimp or Salmon Alternatives: If you love seafood, try shrimp or salmon. Both cook fast and add a nice flavor. For shrimp, sauté them in the pan for about 3-4 minutes until they turn pink. For salmon, cook it for about 5-6 minutes on each side until it flakes easily. - Vegetarian Options: For a meat-free meal, use mushrooms or tofu instead. Mushrooms add rich umami, while tofu absorbs all the sauce flavors. Just sauté them until golden and add them to the dish. Adding vegetables can make the dish more colorful and healthy. - Spinach or Kale: Toss in fresh spinach or kale at the end of cooking. They wilt quickly and add great nutrition. Just stir them in for a minute until they soften. - Peas or Asparagus: Sweet peas or crunchy asparagus also work well. For peas, add them in the last few minutes of cooking. For asparagus, chop it into bite-sized pieces and cook it with the chicken. You can make this dish even more exciting with some flavor tweaks. - Spicy Variations with Chili: If you like spice, add red pepper flakes or diced fresh chili to the sauce. This gives a nice kick that balances the creamy sauce. - Zesty Lemon or Herb Additions: Brighten the dish with fresh lemon juice or zest. You can also add herbs like basil or thyme for an aromatic touch. Just sprinkle them in when mixing the sauce for a fresh twist. To store leftovers, let the dish cool first. Place it in an airtight container. It keeps well in the fridge for up to three days. Always reheat gently to keep the flavors fresh. For best practices, cover the dish tightly. This helps prevent the pasta from drying out. Stir before serving to mix in any separated sauce. If you want to freeze prepped ingredients, cook the tortellini and chicken first. Let them cool completely. Then, pack them into freezer-safe bags or containers. This way, you can enjoy the dish later. For thawing and reheating, move the frozen meal to the fridge overnight. Reheat in a skillet on low heat. Add a splash of cream to loosen the sauce. In the fridge, Garlic Parmesan Tortellini with Chicken lasts about three days. In the freezer, it can stay fresh for up to three months. Signs of spoilage include an off smell and a change in color. If you see mold or if it feels slimy, it's best to discard it. Yes, you can use frozen tortellini. Just follow these steps: - Boil the water with salt. - Add the frozen tortellini directly to the boiling water. - Cook for an extra minute or two. They might take longer than fresh ones. - Once they float, they are done. Using frozen tortellini saves time. It also keeps well in your freezer for a quick meal. If you need a substitute for heavy cream, try these options: - Half-and-half works well for a lighter sauce. - Full-fat coconut milk gives a creamy texture and is dairy-free. - Greek yogurt can add richness with less fat, but mix it in off the heat. These substitutes keep the dish creamy and delicious, even if you're avoiding heavy cream. To make this recipe gluten-free, use gluten-free tortellini. Many brands offer options made from rice, corn, or quinoa. Here are some tips: - Check the package for cooking times. They may differ from regular tortellini. - Ensure that all your other ingredients, like the chicken and spices, are gluten-free. This way, you enjoy the same great flavors without gluten. Yes, you can prep this dish ahead of time. Here’s how: - Cook the tortellini as directed and cool them completely. - Cook the chicken and slice it. Store it in the fridge. - Keep the sauce separate until you're ready to serve. When you’re ready to eat: - Reheat the chicken and tortellini. - Warm the sauce on low heat, then combine everything. This makes for a quick and tasty meal when you're short on time! In this blog post, we explored a delicious Garlic Parmesan Tortellini with Chicken recipe. We covered key ingredients, cooking steps, and tips to perfect the dish. I highlighted ways to customize it with different proteins or veggies. You learned how to store leftovers for freshness and answers to common questions. Cooking is fun and rewarding. This recipe makes a tasty meal that is easy to modify. Enjoy creating your version of this creamy dish!

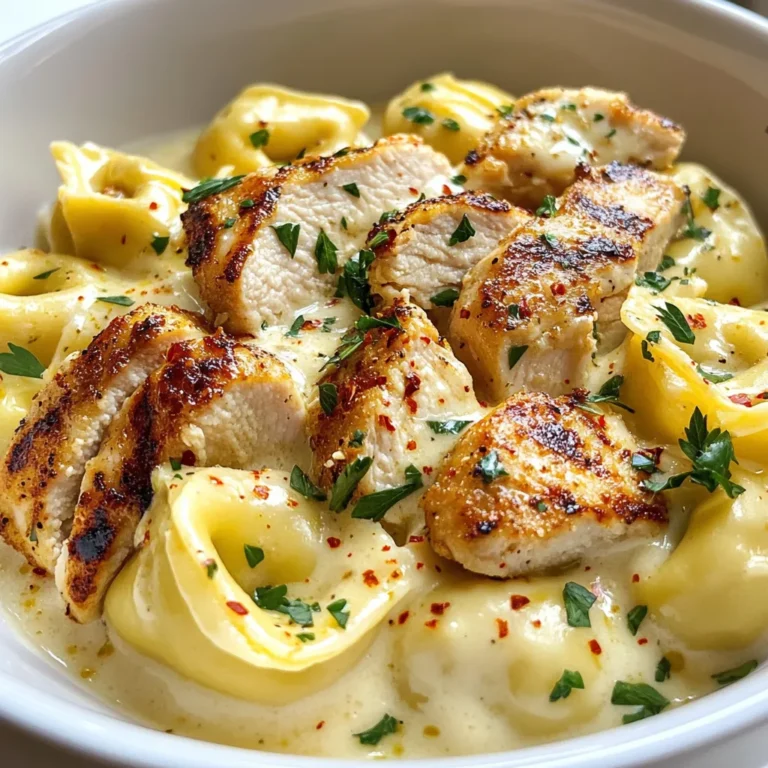
Garlic Parmesan Tortellini with Chicken Recipe Delight

PREV 1 … 15 16 17 NEXT
tastykitchentales

explore

DessertsDinnerAppetizersDrinks

Our Policies

  • Cookie Policy
  • Copyright Policy
  • Disclaimer
  • GDPR Policy
  • Terms Of Use
Back to Top
  • About
  • Contact Us
  • Privacy Policy
© 2025 tastykitchentales