FREE DINNER EBOOK! Get your copy!
  • Cookie Policy
  • GDPR Policy
  • Disclaimer
  • Terms Of Use
  • Visit my other site: Fun Cookie Recipes
tastykitchentales
  • Home
  • Dinner
  • Desserts
  • Drinks
  • Appetizers
  • Contact
  • About
  • Privacy Policy
  • Home
  • Dinner
  • Desserts
  • Drinks
  • Appetizers
  • Contact
  • About
  • Privacy Policy
  • Cookie Policy
  • GDPR Policy
  • Disclaimer
  • Terms Of Use
Visit my other site: Fun Cookie Recipes

HOME / CATEGORIES /

Latest

- 1 cup dark chocolate chips - 1/2 cup sweetened condensed milk - 1/4 cup blue sparkling sugar (or edible blue glitter) - 1/2 teaspoon peppermint extract - 1/4 cup crushed graham crackers - 1/4 cup crushed walnuts (optional) - Sea salt flakes for garnish For these Blue Christmas Truffles, you need simple, tasty ingredients. The dark chocolate chips make them rich and sweet. Sweetened condensed milk adds creaminess. Blue sparkling sugar or edible glitter gives them a festive look. Peppermint extract adds a refreshing taste. Crushed graham crackers give a nice texture. If you like, add crushed walnuts for a crunch. Finally, a sprinkle of sea salt flakes enhances the flavor. Gather these ingredients before you start. They all work together to create a delightful treat for the holidays. Enjoy the process and the yummy results! {{ingredient_image_2}} In a microwave-safe bowl, combine 1 cup of dark chocolate chips with 1/2 cup of sweetened condensed milk. Microwave this mix in 20-second intervals. Stir after each interval. Keep going until the chocolate melts and becomes smooth. This usually takes about 1 minute. Once smooth, add 1/2 teaspoon of peppermint extract. Mix well to spread the mint flavor throughout the chocolate. Let the bowl cool for about 10 minutes. This helps the mixture firm up a bit. Next, fold in 1/4 cup of crushed graham crackers and 1/4 cup of crushed walnuts if you like a bit of crunch. Make sure everything blends well together. With slightly damp hands, take about one tablespoon of the mixture. Roll it into a smooth ball. This keeps the mixture from sticking to your hands. Place each ball onto a parchment-lined tray. This makes them easy to handle later. Now it’s time to coat the truffles. Roll each one in 1/4 cup of blue sparkling sugar. Make sure they are well covered. This gives them a beautiful look and a touch of sweetness. Sprinkle a few sea salt flakes on top of each truffle. This adds a nice contrast to the sweetness. Place the tray in the refrigerator. Chill the truffles for at least 1 hour. This will help them hold their shape. If you want them to be extra firm, leave them in longer. Cooling time is key for great truffles. After mixing, let the bowl cool for about 10 minutes. This helps the mixture firm up. A firmer mix makes rolling easier. To avoid sticky hands, dampen your palms slightly. This will help you shape the truffles without mess. Just a little water will do the trick. For holiday displays, arrange truffles on a colorful plate. Using festive colors brightens your table. You can also place them in small boxes for gift giving. Add blue sparkling sugar around the truffles. This creates a fun winter wonderland look. It adds a special touch that guests will love. Want to boost the flavor? Try adding a splash of vanilla extract. It pairs well with peppermint and chocolate. You can also experiment with other extracts, like almond. This can change the taste in a fun way. Pro Tips Use Quality Chocolate: Opt for high-quality dark chocolate chips to enhance the flavor of your truffles. Chill for Best Texture: Make sure to chill the truffles thoroughly; this helps them maintain their shape when serving. Experiment with Flavors: Feel free to substitute the peppermint extract with other flavors like orange or almond for a unique twist. Packing and Gifting: If gifting, consider adding a small card with serving suggestions or flavor notes to make it extra special. {{image_4}} You can easily change the flavor of your truffles. If peppermint isn't your thing, swap it for vanilla or almond extract. This will give a warm touch to the truffles. You can also skip the nuts if you want a smoother texture. Instead of walnuts, use pecans or almonds for a different crunch. If you prefer no nuts, just leave them out. The truffles will still be tasty! Colors can add fun to your truffles. Use different colored sugars for various themes. Red, green, or white sugars work well for the holidays. To create your own blue coloring, mix a bit of blue food dye with sugar. This DIY method lets you customize the shade to your liking. It can make your truffles pop even more. Toppings can elevate your truffles. Try adding crushed candy canes for a festive crunch. You can also use sprinkles or edible glitter to make them sparkle. For a cozy touch, drizzle melted white chocolate on top. This adds both flavor and visual appeal. These small details can turn your treats into a holiday masterpiece! To keep your Blue Christmas Truffles fresh, store them in the fridge. They last up to two weeks when chilled. Use an airtight container to prevent moisture and odors from ruining their taste. This helps maintain their creamy texture and delightful flavor. You can freeze these truffles for longer storage. First, place them in a single layer on a baking sheet. Freeze them for about an hour until they are firm. After that, transfer them into a freezer-safe bag or container. This method prevents them from sticking together. When you’re ready to enjoy them, take the truffles out of the freezer. Let them thaw in the fridge for a few hours. This keeps them from becoming too soft. Enjoy the rich taste whenever you like! Blue Christmas Truffles last about one week in the fridge. Store them in an airtight container. Keep them away from strong-smelling foods. They also freeze well for up to three months. Just remember to thaw them in the fridge overnight. Yes, you can make these truffles a day or two ahead. Just follow the recipe and chill them. This way, they have time to set. Having them ready early helps save time when you need them. If you can't find blue sparkling sugar, use edible blue glitter. You can also use white sparkling sugar for a classic look. Try colored sugar in different shades for fun. This keeps the festive spirit alive. Absolutely, these truffles make great gifts. Package them in festive boxes or jars. You can add a ribbon for a nice touch. Present them on a decorative plate for a stylish look. Dusting more sugar around them adds a charming finish. You learned how to make Blue Christmas Truffles step-by-step, from melting chocolate to garnishing. With ingredients like dark chocolate and peppermint, these treats are festive and fun. Remember to chill them well for best flavor and texture. You also discovered tips for storage and creative variations. Whether for a party or a gift, these truffles bring joy. Get creative and enjoy this delicious treat during the holiday season!

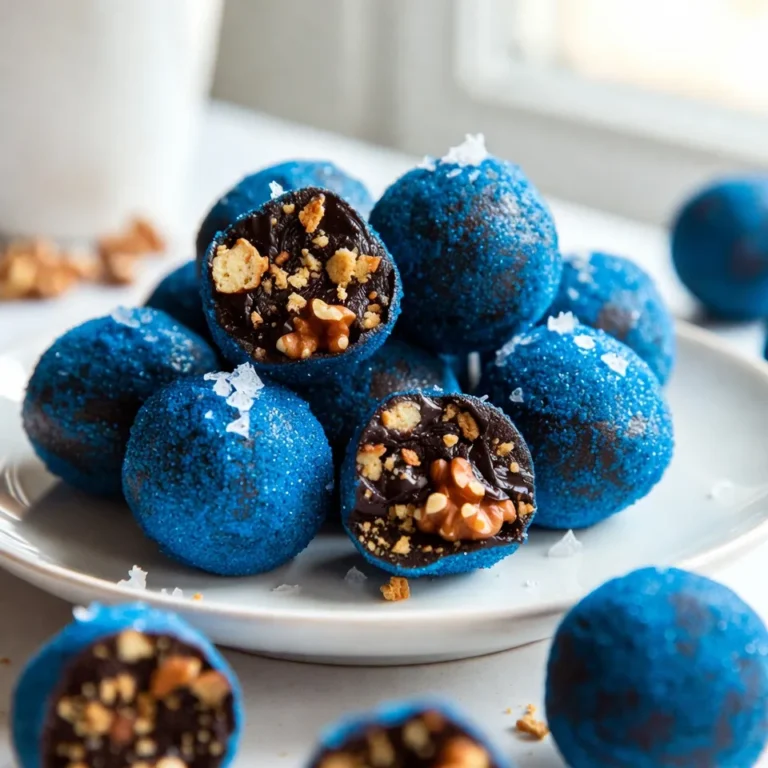
Blue Christmas Truffles Delicious Festive Treats

- 1 cup unsalted butter, softened to room temperature - 1 cup packed brown sugar - 1/2 cup granulated sugar - 2 large eggs, at room temperature - 2 1/2 cups all-purpose flour - 1 tablespoon chai spice blend - 1 teaspoon baking soda - 1/2 teaspoon fine salt - 1 teaspoon pure vanilla extract - 1/2 cup chopped walnuts (optional) - 1/2 cup raisins or dried cranberries (optional) You can add chopped walnuts for a nice crunch. Walnuts give a rich flavor that works well with the spices. Raisins or dried cranberries can add sweetness and chewiness to each bite. These optional ingredients can make your cookies even more delightful. The chai spice blend is a mix of warm flavors. It includes: - Ground cardamom - Ground cinnamon - Ground ginger - Ground cloves Each spice brings its own taste. Together, they create a cozy and inviting flavor profile. This blend is key to making your cookies feel like a warm hug on a chilly day. {{ingredient_image_2}} First, set your oven to 350°F (180°C). This is the perfect temperature for baking. Next, line two baking sheets with parchment paper. This will help the cookies bake evenly and not stick. In a large bowl, add the softened butter, brown sugar, and granulated sugar. Use a hand mixer or stand mixer to beat them together. Mix until it gets light and fluffy. This should take about 2-3 minutes. Next, add the eggs one by one. Make sure to mix each egg in well before adding the next. Finally, stir in the vanilla extract. In another bowl, whisk together the all-purpose flour, chai spice blend, baking soda, and salt. Make sure the dry ingredients are well mixed. This step is key for even flavor in every cookie. Now, slowly add the dry mix to the wet mix. Stir until just combined. Don’t overmix, or your cookies may be tough. If you want, gently fold in chopped walnuts and raisins or dried cranberries for extra flavor. Using a cookie scoop or spoon, drop rounded balls of dough onto the prepared sheets. Leave at least 2 inches of space between each cookie. Bake for 10-12 minutes. You want the edges to be a light golden brown. The centers may look a little underbaked, but they will firm up. After baking, let the cookies rest on the sheets for about 5 minutes before moving them to a rack to cool. Enjoy your tasty chai cookies! To get soft and chewy cookies, you need to follow a few key steps. First, cream the butter and sugars well. This makes air pockets, giving your cookies a nice lift. Beat for 2-3 minutes until fluffy. Next, mix in the eggs one by one. This helps the dough stay light. When adding the dry ingredients, mix just until combined. Overmixing can make your cookies tough. You want to see some flour bits still visible. If you want a crunchy cookie, fold in more nuts. For softer cookies, skip the nuts or add more raisins. Accurate measuring is crucial for great cookies. Use the spoon and level method for flour. First, fluff up the flour in its container. Then, spoon it into your measuring cup without packing it down. Finally, level it off with a knife. For brown sugar, pack it tightly into the cup. This helps keep your cookies moist. For spices, like the chai blend, use a measuring spoon. This ensures you get the right flavor without being too strong. After baking, let your cookies cool on the sheet for 5 minutes. This step helps them set and makes them easier to move. Then, transfer them to a wire rack to cool completely. To store them, place the cookies in an airtight container. They can last about a week at room temperature. For longer storage, freeze them in a zip-top bag. Just make sure to separate layers with parchment paper. This keeps them from sticking together. Pro Tips Chill the Dough: For thicker cookies, chill the dough in the refrigerator for at least 30 minutes before baking. This helps prevent spreading and gives you a chewier texture. Use Fresh Spices: Ensure your chai spices are fresh for the best flavor. If possible, grind whole spices just before using them for maximum aroma and taste. Don't Overbake: Keep an eye on the cookies in the oven. They should be lightly golden at the edges but still soft in the center. They will firm up as they cool. Customize Your Add-ins: Feel free to swap out walnuts and raisins for your favorite mix-ins like pecans, chocolate chips, or dried apricots to create your unique flavor combinations. {{image_4}} You can make these cookies even more fun with add-ins. Chocolate chips work well. They add sweetness and a rich taste. Use semi-sweet or dark chocolate to balance the chai spices. You can also try butterscotch chips or white chocolate. Nuts like pecans or almonds add crunch. Dried fruits like apricots or figs give a chewy texture. Mix and match to find your favorite combo. The chai spice blend is key to these cookies. You can tweak the spices to fit your taste. If you love cinnamon, add more. For a spicier bite, increase the ginger or cardamom. You can even add a pinch of black pepper for extra heat. Try using fresh spices if you have them. They can elevate the flavor of your cookies. Experiment until you create your perfect mix. If you need a gluten-free option, it’s easy to adapt this recipe. Replace all-purpose flour with a gluten-free flour blend. Look for blends made for baking to ensure good texture. You may need to adjust the liquid a bit. Add a bit more almond milk or water if the dough feels dry. The cookies may spread less, so keep an eye on them while baking. Enjoy your tasty gluten-free chai cookies! To keep your Taylor Swift Chai Cookies fresh, place them in an airtight container. Line the bottom with parchment paper to absorb moisture. This method helps the cookies stay soft and tasty. Store them at room temperature for up to a week. You can also use wax paper between layers if you stack them. If you want to save some cookies for later, freezing is a great option. First, let the cookies cool completely. Then, place them in a single layer on a baking sheet. Freeze them for about an hour. Once frozen, transfer them to a freezer-safe bag or container. This helps prevent freezer burn. They can last up to three months in the freezer. When you’re ready to enjoy, just thaw them at room temperature. Taylor Swift Chai Cookies have a good shelf life. If stored properly in an airtight container, they last about a week at room temperature. If frozen, they stay fresh for up to three months. Always check for any signs of spoilage before eating. Enjoy your cookies while they are at their best! Yes, you can. Brown sugar adds moisture and flavor. White sugar gives a crispier cookie. You can mix both for balance. Try using coconut sugar for a healthier option. It will change the taste slightly. Experiment to find your favorite blend. To make these cookies vegan, swap the butter for a plant-based spread. Use flaxseed or chia seeds mixed with water instead of eggs. For every egg, mix 1 tablespoon of ground flax or chia with 2.5 tablespoons of water. Let it sit for a few minutes until it thickens. This will help bind the cookies. Serve these cookies warm with a cup of chai tea. You can stack them on a fancy plate for a nice look. Dust them lightly with powdered sugar for a sweet touch. Pairing with ice cream is also delicious. The warm cookies and cold ice cream make a great combo. Yes, you can swap nuts and dried fruits. Use chocolate chips for a sweeter taste. Or, add dried apricots for a fruity twist. If you prefer no mix-ins, feel free to leave them out. The base cookie will still taste great! This blog post covers how to make delicious chai cookies from start to finish. We explored the key ingredients, step-by-step instructions, and helpful tips for perfect texture. You can even customize your cookies with fun add-ins. In conclusion, these chai cookies are tasty and easy to make. Don’t hesitate to experiment with different flavors and textures. Enjoy baking and sharing these delightful treats with others!

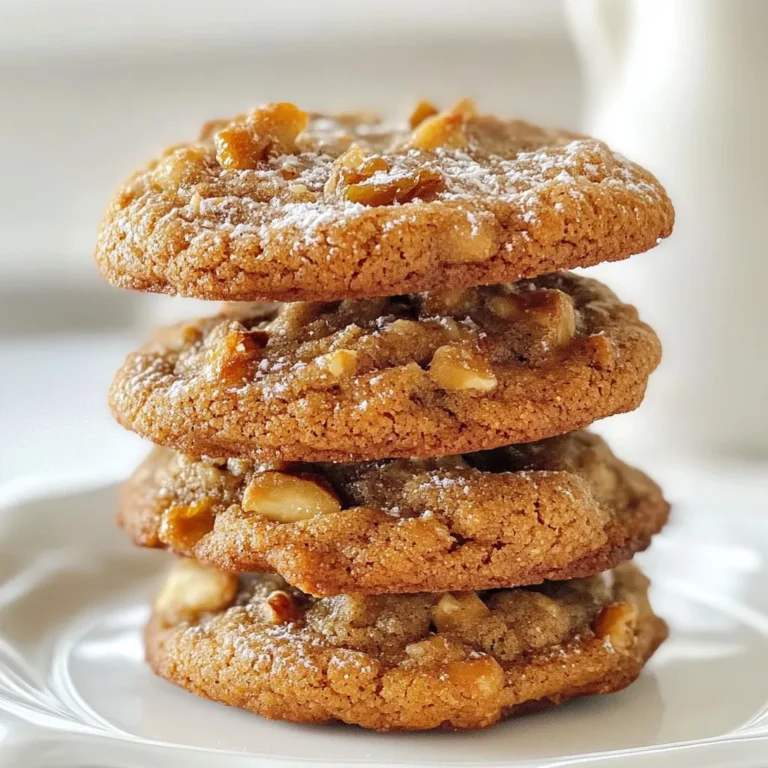
Taylor Swift Chai Cookies Sweet and Simple Recipe

- 1 lb boneless, skinless chicken thighs - 1 cup fresh pineapple chunks (or canned, well-drained) - 1/2 cup brown sugar - 1/4 cup low-sodium soy sauce - 2 tablespoons apple cider vinegar - 2 cloves garlic, minced - 1 teaspoon fresh ginger, finely grated - 1 tablespoon sesame oil - 1/2 teaspoon ground black pepper - 1/2 teaspoon salt These main ingredients create the heart of the dish. The chicken thighs provide a juicy base. Brown sugar adds sweetness, while soy sauce gives a savory kick. Pineapple brings freshness and tang. Apple cider vinegar balances the flavors beautifully. Ginger and garlic add warmth and depth. - 2 green onions, finely sliced - Sesame seeds Garnishes elevate this dish. Green onions add a fresh crunch. Sesame seeds bring a nutty flavor and look great too. You can use them to make your plate pop with color. - Medium mixing bowl - Ziplock bag or shallow dish - Grill or skillet - Small saucepan Having the right tools makes cooking easier. A mixing bowl works well for the marinade. A ziplock bag helps to coat the chicken evenly. A grill or skillet cooks the chicken perfectly. A saucepan thickens the marinade for serving. {{ingredient_image_2}} First, grab a medium-sized mixing bowl. Combine these key ingredients: - 1/2 cup brown sugar - 1/4 cup low-sodium soy sauce - 2 tablespoons apple cider vinegar - 2 cloves garlic, minced - 1 teaspoon fresh ginger, finely grated - 1 tablespoon sesame oil - 1/2 teaspoon ground black pepper - 1/2 teaspoon salt Whisk these together until the brown sugar dissolves. This mix should smell sweet and tangy. Next, take 1 pound of boneless, skinless chicken thighs. Place them in a large ziplock bag or a shallow dish. Pour the marinade over the chicken, making sure it coats every piece. Seal the bag or cover the dish. Place it in the fridge. Let it marinate for at least 1 hour. For the best flavor, try to let it marinate overnight. When you are ready to cook, preheat your grill or skillet to medium heat. Take the chicken out of the marinade. Let any excess marinade drip off, but keep the rest for later. Cook the chicken for about 6-7 minutes on each side. Use a meat thermometer to check for 165°F (75°C). While the chicken cooks, pour the reserved marinade into a small saucepan. Heat it until it boils, then lower the heat to let it simmer for 5-7 minutes. This will thicken it nicely. In the last few minutes, add 1 cup of fresh pineapple chunks to the grill or skillet. Let them caramelize with the chicken. When the chicken is done, let it rest for 5 minutes. Slice it into strips. Serve it with the warm pineapple and the thickened marinade drizzled on top. Garnish your dish with finely sliced green onions and sesame seeds for extra flavor and crunch. Enjoy your delicious meal! Start with fresh chicken. I love using boneless, skinless chicken thighs. They stay juicy. Mix the marinade well. Use brown sugar for sweetness and soy sauce for salt. The garlic and ginger add flavor. Always marinate in the fridge. This keeps the chicken safe and flavorful. Aim for at least one hour. Overnight marinating gives the best taste. Cook the chicken over medium heat. This helps it cook evenly. Use a meat thermometer. The chicken should reach 165°F (75°C). This ensures it’s safe to eat. Let the chicken rest after cooking. This step helps keep the juices inside. Slice it after resting for the best texture. Add pineapple to the grill or skillet in the last few minutes. This caramelizes the sugars. Cook until they’re warm and slightly charred. This adds a sweet flavor that pairs well with the chicken. Always use fresh or well-drained canned pineapple. This gives the best results. Feel free to explore other ways to use these tips! You can adjust flavors and ingredients to fit your taste. Pro Tips Marinate Longer for Flavor: For the best flavor, marinate the chicken thighs overnight. This allows the marinade to deeply penetrate the meat, enhancing the taste. Check Temperature with a Thermometer: To ensure your chicken is perfectly cooked, use a meat thermometer. The internal temperature should reach 165°F (75°C). Use Fresh Pineapple for Extra Sweetness: If possible, opt for fresh pineapple chunks instead of canned. Fresh pineapple adds a natural sweetness and vibrant flavor to the dish. Resting Time is Key: After cooking, let the chicken rest for about 5 minutes before slicing. This helps keep the juices inside, resulting in a moist and tender chicken. {{image_4}} You can use many cuts of chicken for this recipe. Chicken thighs are juicy and flavorful. If you prefer, try chicken breasts. Breasts cook faster and can be very tender. Just check the internal temperature. It should reach 165°F (75°C). You can also use chicken drumsticks or wings. These cuts add a fun twist and make great finger food. Brown sugar adds a rich sweetness, but you can change it up. Honey or maple syrup work well in this recipe. Both give a unique taste while keeping it sweet. If you want a lower-calorie option, try using agave nectar. Each sweetener brings its flavor, so experiment and see what you prefer! Feel free to get creative with spices! Add a pinch of cayenne for heat or a dash of smoked paprika for depth. You can also add vegetables. Bell peppers, zucchini, or snap peas are great choices. Just toss them on the grill with the chicken. They soak up all the delicious flavors. This way, you create a colorful, tasty meal that everyone will love! After enjoying your Brown Sugar Pineapple Chicken, let any leftovers cool. Place the chicken and pineapple in an airtight container. This keeps the flavors fresh. Store it in the fridge for up to three days. If you have extra marinade, keep it separate in another container. To reheat, you can use the oven or microwave. For the oven, preheat it to 350°F (175°C). Place the chicken in an oven-safe dish. Cover it with foil to keep it moist. Heat for about 15-20 minutes. In the microwave, use a microwave-safe plate. Heat on medium power for 2-3 minutes. Check that it is warm throughout. If you want to save some for later, freezing works well. First, let the chicken cool completely. Cut it into pieces if you like. Place it in a freezer-safe bag or container. Remove as much air as you can. It can stay frozen for up to three months. When ready to eat, thaw it in the fridge overnight before reheating. Enjoy! Yes, you can use chicken breast instead of thighs. Chicken breasts are leaner and cook faster. They might not be as juicy as thighs, but they will still taste great. Just keep an eye on the cooking time. Cook them for about 5-6 minutes on each side, checking for doneness. If you need a soy sauce substitute, try using coconut aminos. It has a similar flavor and is a bit sweeter. You can also use tamari for a gluten-free option. If you want a quick mix, combine equal parts of water and balsamic vinegar, but note that the taste will differ. To check if the chicken is cooked, use a meat thermometer. It should read 165°F (75°C) in the thickest part. If you don’t have a thermometer, cut into the chicken. The meat should be white and the juices should run clear. This ensures it's safe to eat. In this blog post, we covered how to make delicious brown sugar pineapple chicken. You learned about the key ingredients and tools needed to cook it perfectly. We also shared tips to marinate the chicken well and keep it juicy. Variations let you switch cuts or add spices for new flavors. Lastly, proper storage helps leftovers stay fresh. Cooking this dish is simple and rewarding. Enjoy your time in the kitchen and savor every bite!

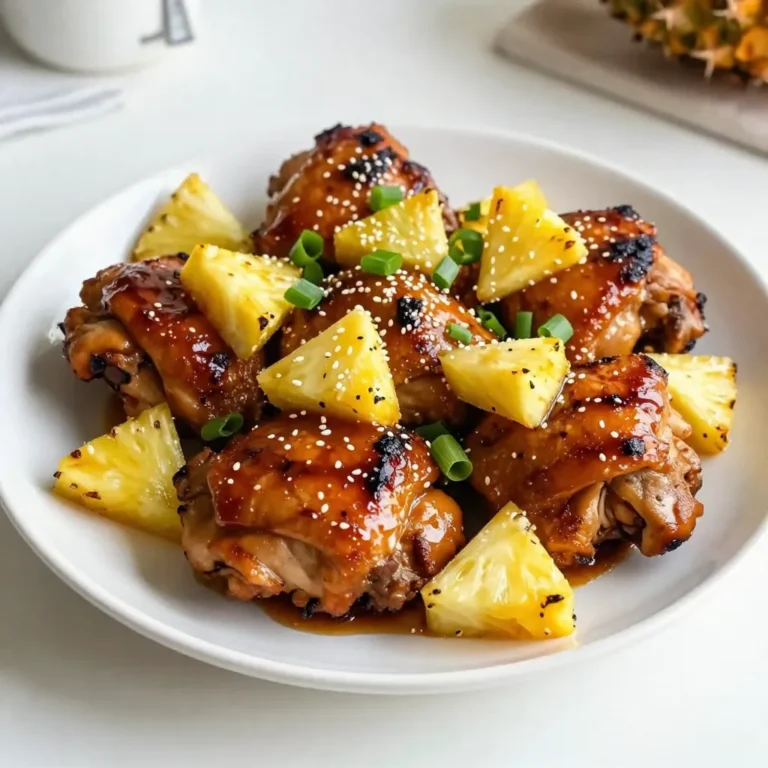
Brown Sugar Pineapple Chicken Flavorful Dinner Recipe

To make this tasty dip, you'll need a few main ingredients: - 8 oz cream cheese, softened to room temperature - 1/2 cup cranberry sauce (homemade or store-bought) - 1 small jalapeño, finely diced (remove seeds for less heat) - 1/4 cup green onions, finely chopped - 1/2 teaspoon garlic powder - 1/4 teaspoon salt - 1/4 teaspoon freshly ground black pepper These ingredients blend to create a creamy, tangy base with a kick from the jalapeño. If you want to add more depth to your dip, consider these optional ingredients: - 1/2 cup shredded cheddar cheese This cheese adds richness and a delightful sharpness to the overall flavor. You can adjust the amount to fit your taste. To make your dip look even more inviting, consider these garnishes: - Fresh cilantro leaves Cilantro adds a pop of color and a fresh, herbaceous note. A few sprigs on top makes your dip look beautiful and appetizing. Feel free to explore these ingredients and personalize your dip to suit your taste! {{ingredient_image_2}} Start by softening the cream cheese. Place your 8 oz of cream cheese in a bowl. Let it sit at room temperature for a few minutes. This helps it blend easily. Then, add 1/2 cup of cranberry sauce to the bowl. You can use homemade sauce for fresh flavor. Store-bought sauce works too if you're short on time. Mix these two ingredients together. Use a hand mixer or a spatula. Blend until the mixture is smooth and creamy. Now, let's add some zing! Finely dice 1 small jalapeño. If you want less heat, remove the seeds. Add the jalapeño to the cream cheese mix. Next, chop 1/4 cup of green onions and add them in. Sprinkle in 1/2 teaspoon of garlic powder, 1/4 teaspoon of salt, and 1/4 teaspoon of black pepper. Mix everything well. Make sure all the ingredients are evenly blended. If you like cheese, fold in 1/2 cup of shredded cheddar for extra flavor. Transfer your dip to a nice serving bowl. Use a spatula to smooth the top. For a pop of color, garnish with fresh cilantro leaves. If you can, refrigerate the dip for at least 30 minutes. This helps the flavors blend even better. You can serve it chilled or let it sit out for a bit. Pair it with colorful crackers, sliced baguette, or fresh veggies for dipping. Enjoy! To get that smooth and creamy texture, start with softened cream cheese. This makes it easy to blend. You can use a hand mixer or a spatula. Mix until there are no lumps left. If it feels too thick, add a little more cranberry sauce. This small change gives a silkier dip. Want more heat? Add more jalapeño! Be careful with the seeds; they pack a punch. For less spice, remove the seeds and the white part of the jalapeño. Taste the dip as you go. You can always add more jalapeño, but you can’t take it away once it’s in. To make your dip shine at a party, use a nice bowl. Transfer the dip and smooth the top with a spatula. Garnish with fresh cilantro leaves for color. Serve it with an array of snacks like colorful crackers, sliced baguette, or fresh veggies. This adds fun textures and flavors, making your dip even more appealing. Pro Tips Use Fresh Ingredients: Opt for homemade cranberry sauce if possible, as it enhances the flavor and freshness of the dip. Adjust Spice Level: For a milder dip, remove the seeds and membranes from the jalapeño before dicing. Chill for Best Flavor: Allow the dip to chill in the refrigerator for at least 30 minutes before serving to let the flavors meld together. Creative Serving Ideas: Serve the dip with an assortment of colorful veggies, crackers, or slices of baguette for a visually appealing presentation. {{image_4}} You can try many cheeses to change the flavor. Cream cheese is great, but adding shredded cheddar gives a sharp taste. You could also use pepper jack cheese for a spicy kick. Try goat cheese for a tangy twist. Each cheese brings a new taste that makes the dip special. This dip is fun to change up with fruits and herbs. Add diced apples for crunch and sweetness. You can also mix in dried cranberries for extra flavor. Fresh herbs like parsley or dill can add a fresh taste. Experiment with what you like best to make it yours. If you want a lighter dip, try these swaps. Use low-fat cream cheese for a healthier base. Greek yogurt can replace cream cheese for a creamy texture. Instead of cranberry sauce, use fresh cranberries. These simple changes keep the flavor while being kinder to your waistline. To keep your dip fresh, store it in an airtight container. This prevents air from getting in and keeps out odors. If possible, cover the top with plastic wrap before sealing. This extra layer helps lock in moisture and flavor. Your dip can last in the fridge for about 3 to 5 days. Always check for any change in color or smell before eating. If it looks or smells off, it’s best to throw it away. You can freeze the dip for up to a month. Place it in a freezer-safe container or bag. Make sure to press out any air before sealing. When ready to eat, let it thaw in the fridge overnight. Stir well before serving, as some ingredients may separate. Yes, you can use store-bought cranberry sauce. It saves time and keeps it easy. I often choose homemade for the best taste, but store-bought works well too. Just look for a brand with real fruit and no additives. This helps keep the flavors fresh and bright. To make the dip spicier, add more jalapeño. You can use two small jalapeños or one larger one. Make sure to include the seeds for extra heat. If you want even more spice, try adding a pinch of cayenne pepper or some hot sauce. Start with a little, then taste and adjust. This dip pairs well with many snacks. Here are some fun options to consider: - Colorful crackers - Sliced baguette - Fresh vegetable sticks, like carrots and cucumbers - Tortilla chips These choices add great textures and flavors. They also make your serving platter look inviting! This blog post covered how to make a tasty Cranberry Jalapeño Cream Cheese Dip. You learned about key ingredients, steps to prepare it, and tips to make it creamy. We explored variations and storage tips for leftovers. In conclusion, this dip is simple to make and perfect for any gathering. Customize it to fit your taste and impress your guests! Enjoy your dip-making journey!

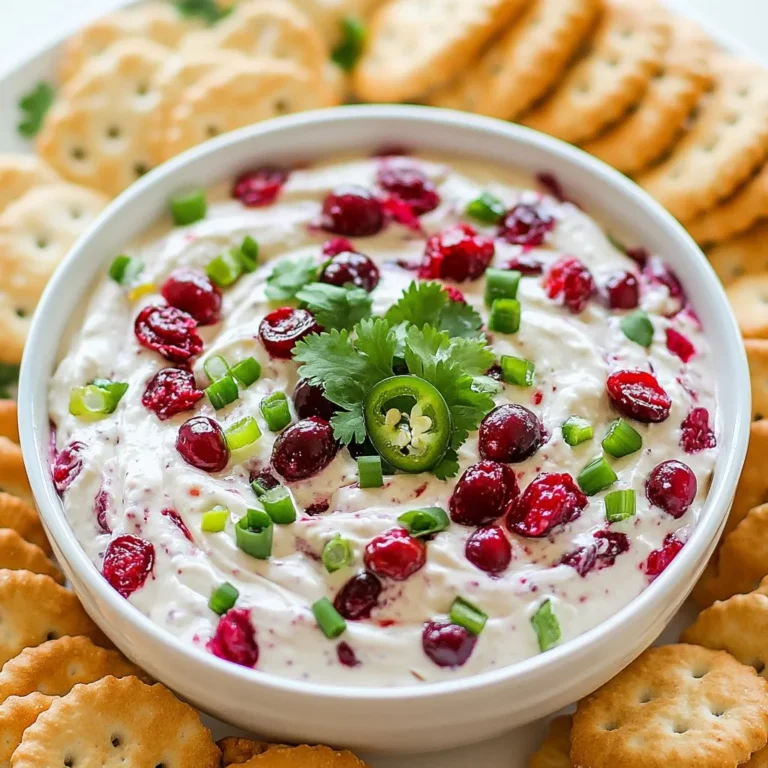
Cranberry Jalapeño Cream Cheese Dip Simple and Tasty

For the Creamy Southern Spaghetti Bake, gather these key ingredients: - 8 ounces spaghetti - 1 tablespoon olive oil - 1 medium onion, finely diced - 2 cloves garlic, minced - 1 bell pepper, diced (choose your favorite color) - 1 pound ground chicken or turkey - 1 can (14.5 ounces) diced tomatoes, drained of excess liquid - 1 cup heavy cream - 1 cup shredded sharp cheddar cheese - 1 cup shredded mozzarella cheese - 1 teaspoon Italian seasoning - 1/2 teaspoon red pepper flakes (optional for heat) - Salt and freshly cracked black pepper to taste - Fresh parsley, chopped (for garnish) Each ingredient plays a vital role. The spaghetti acts as the base and holds the sauce. Olive oil adds a nice flavor and helps cook the veggies. Onion, garlic, and bell pepper create a tasty mix that enhances the dish. Ground chicken or turkey gives the bake its protein. Diced tomatoes bring freshness and moisture. Heavy cream makes the dish rich and creamy while the cheeses add a melty, cheesy layer on top. Seasonings like Italian seasoning and red pepper flakes give it a little kick. Finally, salt and black pepper help balance the flavors. Don’t forget the fresh parsley for a pop of color and freshness when you serve! {{ingredient_image_2}} First, bring a large pot of water to a boil. Add 8 ounces of spaghetti. Cook it until it is al dente. This usually takes about 8-10 minutes. Once done, drain the spaghetti in a colander and set it aside. While the pasta cooks, heat 1 tablespoon of olive oil in a large skillet over medium heat. Add 1 medium onion, finely diced. Sauté the onion until it turns soft and clear, about 3-4 minutes. Next, add 2 cloves of minced garlic and 1 diced bell pepper. Stir and cook for another 2-3 minutes. Now, add 1 pound of ground chicken or turkey to the skillet. Use a wooden spoon to break it apart. Cook until the meat is browned and no longer pink, which takes about 5-7 minutes. Once the meat and veggies are ready, mix in 1 can of drained diced tomatoes. Add 1 teaspoon of Italian seasoning and 1/2 teaspoon of red pepper flakes, if you like some heat. Season with salt and freshly cracked black pepper to taste. Cook this mixture for an extra 2-3 minutes to blend the flavors well. In a large mixing bowl, combine the cooked spaghetti with 1 cup of heavy cream. Add half of the shredded cheddar cheese and half of the shredded mozzarella cheese. Toss everything together so that the spaghetti gets a good coating of the cream and cheese. Gently fold the sautéed meat and vegetable mixture into the spaghetti. Make sure it's evenly mixed throughout. Now, pour the combined spaghetti mixture into a well-greased 9x13 inch baking dish. Spread it out evenly. Top the dish with the remaining cheddar and mozzarella cheeses for a nice cheesy finish. Place the baking dish in your preheated oven at 350°F (175°C). Bake for 20-25 minutes until the cheese is melted and bubbling. Once baked, take it out of the oven. Let it cool for about 5 minutes before serving. To make your creamy southern spaghetti bake shine, focus on the flavor. Adjusting seasoning is key. Start with salt and black pepper. Taste as you go. If you like heat, add red pepper flakes. The spice brings warmth without overpowering. For creaminess, heavy cream is your best friend. Mix it well with the spaghetti. This will coat every noodle. If it's too thick, add a touch of pasta water. This keeps it rich but not too heavy. Serve your spaghetti bake hot from the oven. A sprinkle of fresh parsley adds color and freshness. You might also try a side salad for crunch. Garlic bread pairs nicely for a full meal. One common mistake is overcooking the pasta. Cook it al dente, so it holds up in the bake. This keeps each bite firm. Another pitfall is overdoing the cheese. Too much can make it greasy. Stick to the recipe's cheese amounts for the best texture. Pro Tips Use Leftover Vegetables: Feel free to add any leftover vegetables you have on hand, such as zucchini or spinach, to enhance the dish's nutrition and flavor. Make It Ahead: This spaghetti bake can be prepared in advance and stored in the refrigerator. Just cover it tightly and bake when ready! Cheese Variations: Experiment with different cheese combinations! Try adding pepper jack for a spicy kick or gouda for a smoky flavor. Garnish for Flavor: Add fresh herbs like basil or oregano as a garnish for an extra burst of flavor and a beautiful presentation. {{image_4}} You can change up the recipe with different proteins. Ground beef works great instead of chicken or turkey. If you prefer a plant-based option, use crumbled tofu or lentils for a hearty twist. For those avoiding dairy, you can easily swap the heavy cream for coconut cream. Use a dairy-free cheese blend to keep it cheesy. If you're gluten-free, choose gluten-free pasta for a perfect fit. To boost flavor, add veggies like spinach or zucchini. They add color and nutrition to your dish. Sauté them with the onion and bell pepper for a tasty mix. You can also try new seasonings. Add a pinch of paprika for a smoky taste or a dash of Worcestershire sauce for depth. If you love a kick, mix in some hot sauce for extra heat. These tweaks can make your creamy Southern spaghetti bake even more delicious! Store any leftover Creamy Southern Spaghetti Bake in an airtight container. This keeps it fresh and tasty. Place the dish in the fridge right after it cools down. Proper storage helps prevent spoilage. You can enjoy it for up to 3-4 days. Make sure to check for any signs of spoilage before eating. If you want to keep your spaghetti bake longer, freezing is a great option. You can freeze it before or after baking. For best results, wrap the dish tightly in plastic wrap and then in aluminum foil. This helps prevent freezer burn. When you're ready to eat, thaw it in the fridge overnight. Reheat it in the oven at 350°F (175°C) until hot throughout. This usually takes about 25-30 minutes. Enjoying homemade comfort food has never been easier! Yes, you can prepare this dish ahead of time. Just follow the recipe until you layer the ingredients in the baking dish. Cover it with plastic wrap and store it in the fridge. When you are ready to bake, remove the wrap and cook it as directed. This method keeps the flavors fresh. You can also freeze it for later. Just thaw it in the fridge before baking. This meal pairs well with salad and bread. A simple green salad adds crunch. You can also serve garlic bread for a tasty side. If you want something warm, consider a vegetable soup. These sides balance the creamy pasta dish and round out your meal. To keep leftovers fresh, let the dish cool first. Then, cover it tightly with foil or plastic wrap. You can also use an airtight container. Store it in the fridge for up to three days. For longer storage, freeze it. Just remember to reheat it thoroughly before serving. Yes, you can use non-dairy cheese in this recipe. Look for brands that melt well. They work great in baked dishes. However, the taste may differ from traditional cheese. Try a few brands to find your favorite. This option is perfect for those who are lactose intolerant or prefer plant-based diets. This blog post covered how to make a delicious Creamy Southern Spaghetti Bake. We went over all the ingredients, from spaghetti to cheeses, and detailed step-by-step instructions. Tips for perfecting the dish and serving ideas also came up. I shared common mistakes to help ensure your bake turns out great. Remember, you can customize this recipe with different proteins or veggies. With proper storage, your leftovers can stay fresh and tasty. Enjoy making this dish and sharing it with others!

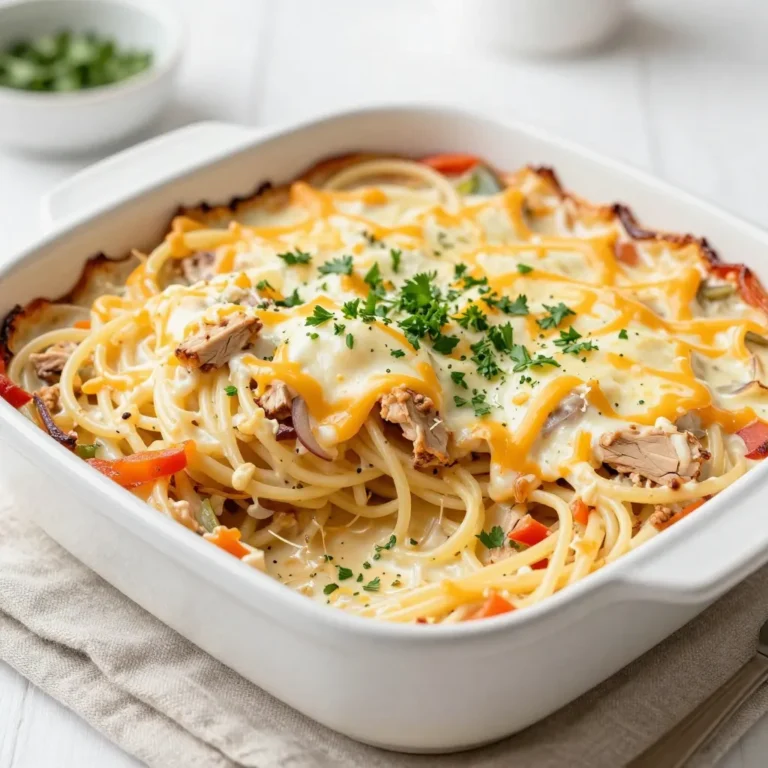
Creamy Southern Spaghetti Bake Simple Family Meal

- 1 lb baby carrots, peeled and trimmed - 2 tablespoons extra-virgin olive oil - 3 tablespoons hot honey (or use regular honey with chili flakes) - 1 teaspoon flaky sea salt - 1 teaspoon ground cumin - 1 cup whole milk ricotta cheese - 1 tablespoon fresh lemon juice - Fresh parsley, finely chopped, for garnish - Crushed red pepper flakes, for an optional spicy kick You can change baby carrots to regular carrots. Just cut them into sticks. Use any oil, like canola, if you don’t have olive oil. If you want less spice, go for regular honey. You can skip flaky sea salt and use regular salt. For a creamier texture, mix in a bit of heavy cream with the ricotta. If you want a vegan option, substitute ricotta with a plant-based cheese. Each serving has about: - Calories: 200 - Protein: 6 g - Fat: 10 g - Carbohydrates: 25 g - Fiber: 4 g - Sugar: 6 g This dish is a great mix of flavors and good nutrition. It pairs well with many meals. {{ingredient_image_2}} First, preheat your oven to 425°F (220°C). This helps the carrots roast well. Next, take 1 pound of baby carrots and peel them. Trim the ends to keep them neat. In a large bowl, mix the peeled carrots with 2 tablespoons of extra-virgin olive oil. Add 3 tablespoons of hot honey for sweetness and spice. Then sprinkle in 1 teaspoon of flaky sea salt and 1 teaspoon of ground cumin. Toss everything together until the carrots are evenly coated. Now, line a baking sheet with parchment paper. This makes cleanup easier. Spread the carrots in a single layer on the sheet. Give them space so they roast evenly. Place the baking sheet in the oven and roast for about 25 minutes. Halfway through, toss the carrots gently. This helps them caramelize nicely on all sides. They should be tender and golden-brown when done. While the carrots roast, prepare the whipped ricotta. In a separate bowl, combine 1 cup of whole milk ricotta cheese with 1 tablespoon of fresh lemon juice. Add a light sprinkle of flaky sea salt for taste. Use a hand mixer or whisk to whip the mixture until smooth and creamy. This will add a rich and fresh flavor to your dish. Once the carrots are done, let them cool for a few minutes before serving. For perfect roasted carrots, choose fresh, young baby carrots. Their sweetness shines through. Toss them with olive oil, hot honey, flaky sea salt, and ground cumin. This mix brings out great flavors. Spread the carrots on a baking sheet, leaving space between each one. This helps them roast evenly. Roast at 425°F for about 25 minutes. Halfway through, toss the carrots gently. Look for a golden-brown color and tender texture when done. To whip ricotta for that creamy texture, start with whole milk ricotta. Add fresh lemon juice and a pinch of flaky sea salt. This brightens the flavor. Use a hand mixer or whisk to mix until smooth. Aim for a light and fluffy texture. If you want it even creamier, mix in a bit of heavy cream. This will give you a richer, luxurious feel. For serving, spread the whipped ricotta on a large platter. This serves as a tasty base for the carrots. Arrange the hot honey roasted carrots on top. Finish with fresh parsley for color. You can also sprinkle crushed red pepper flakes for a spicy kick. Pair this dish with a light salad or crusty bread. Adding a glass of chilled white wine enhances the meal. Enjoy your flavorful creation! Pro Tips Choose the Right Carrots: Opt for fresh, vibrant baby carrots for the best flavor and texture. If unavailable, consider using larger carrots cut into uniform pieces. Customize Your Heat: Adjust the heat level by varying the amount of hot honey or adding more chili flakes to the whipped ricotta, catering to your spice preference. Perfectly Whipped Ricotta: For an ultra-smooth texture, use room temperature ricotta and whip it longer. Adding a touch of cream can also elevate its creaminess. Garnishing for Flair: When garnishing, consider adding toasted nuts or seeds for crunch, and a few drizzles of balsamic reduction for an extra flavor dimension. {{image_4}} If you want to turn up the heat, you can add more chili flakes. Mix them directly into the hot honey. You could also use a spicier honey, like chili-infused honey. For a fiery twist, try adding a squeeze of sriracha to the whipped ricotta. This adds a creamy texture and a kick. Carrots are great, but you can mix in other veggies too. Think about using parsnips, sweet potatoes, or even turnips. These veggies roast well and add different flavors. Just cut them to match the size of the carrots for even cooking. You can also use beets for a sweeter taste and a pop of color. Ricotta is lovely, but you can swap it out. Cream cheese adds a rich texture. Goat cheese gives a tangy flavor that pairs well with the sweetness of the honey. You can even use feta for a salty kick. Just remember to mix in some lemon juice to keep it creamy and fresh. After you enjoy your hot honey roasted carrots, store any leftovers in an airtight container. Keep them in the fridge for up to three days. Make sure the carrots cool down before sealing them. This keeps them fresh and prevents sogginess. If you have leftover whipped ricotta, store it in a separate container as well. It will stay good for about four days in the fridge. To reheat the carrots, place them on a baking sheet. Heat your oven to 350°F (175°C). Roast the carrots for about 10 minutes until they are warm. This keeps their texture nice and crispy. If you're reheating the whipped ricotta, use the microwave. Heat it for about 15 seconds, stirring in between. This helps maintain its creamy texture. If you want to keep the roasted carrots longer, freeze them. First, let them cool completely. Spread them out on a baking sheet in a single layer and freeze for about one hour. Once frozen, transfer them to a freezer-safe bag. They can last up to three months in the freezer. Note that freezing may change their texture slightly. It’s best to use them in cooked dishes after thawing. Yes, you can use regular carrots. Just peel and cut them into similar sizes. Aim for pieces about the same length as baby carrots. This helps them cook evenly. Regular carrots may take a little longer to roast. Keep an eye on them and adjust the cooking time as needed. Hot honey is honey infused with heat. You can easily make it at home. Mix regular honey with chili flakes or hot sauce. Use 3 tablespoons of honey with a pinch of chili flakes for a nice kick. Let it sit for a few hours to blend flavors. You can also buy hot honey at many stores. To adjust the spice level, add more or less hot honey. If you like it mild, use regular honey instead. For more heat, sprinkle in extra crushed red pepper flakes. You can also add a pinch of cayenne pepper to the carrots before roasting. Taste as you go to find your perfect heat. This blog post covered how to make a tasty carrot dish from start to finish. We talked about the main ingredients, tips for roasting, and ways to make it your own. Remember, you can swap ingredients or add spices to match your taste. Storing leftovers properly helps you enjoy this dish later. Dive into the FAQs for more helpful info. I hope you feel ready to try this recipe yourself! Enjoy the simple and delicious flavors.

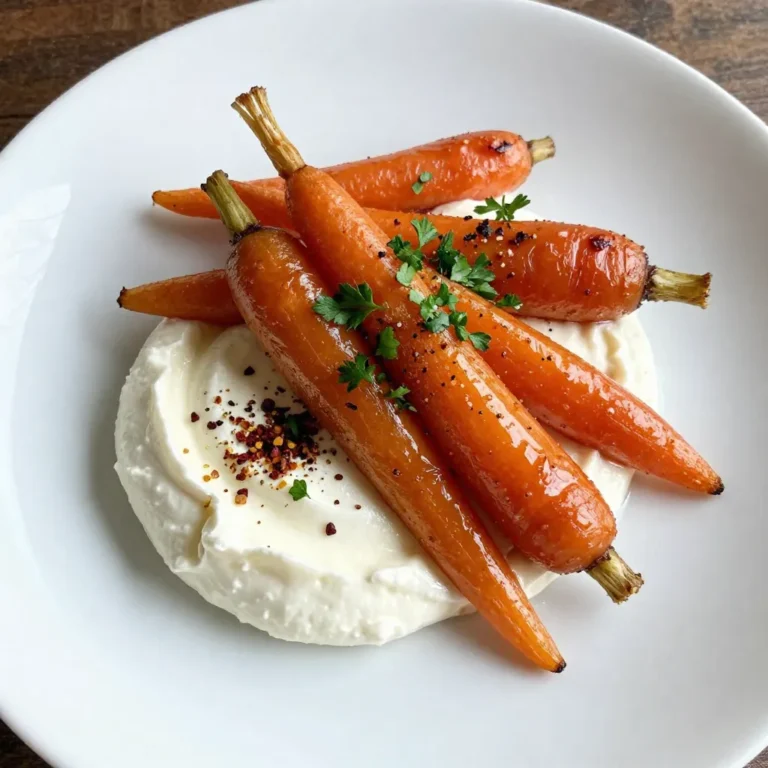
Hot Honey Roasted Carrots with Whipped Ricotta Treat

- 1 cup cream cheese, softened to room temperature - 1/4 cup unsalted butter, softened - 1/2 cup powdered sugar, sifted - 2 tablespoons fresh lemon zest - 1 tablespoon freshly squeezed lemon juice - 1 teaspoon pure vanilla extract - 1 cup white chocolate chips - 1/2 cup crushed graham crackers or digestive biscuits - Extra lemon zest for garnish - Electric mixer - Microwave-safe bowl - Cookie scoop or hands - Baking sheet Bright Lemon Truffles start with some simple ingredients. Cream cheese gives them a smooth base. The unsalted butter adds richness. Powdered sugar sweetens the truffles, while fresh lemon zest and juice add a bright twist. Vanilla extract adds depth to the flavor. You will also need white chocolate chips. They give the truffles a creamy coating. The crushed graham crackers or digestive biscuits serve as a crunchy outer layer. Don’t forget the extra lemon zest for a lovely garnish! For equipment, an electric mixer makes blending easy. A microwave-safe bowl works best for melting the chocolate. A cookie scoop helps shape the truffles perfectly. Finally, a baking sheet is needed to chill the truffles before serving. These ingredients and tools help you create a delightful treat that shines with lemony goodness! {{ingredient_image_2}} Beating Cream Cheese and Butter Start by gathering your materials. In a medium mixing bowl, add 1 cup of softened cream cheese and 1/4 cup of softened unsalted butter. Use an electric mixer on medium speed. Beat them together until the mix becomes smooth and creamy. You want to avoid lumps, so keep mixing. Adding Dry and Wet Ingredients Next, you will add the dry and wet ingredients. Gradually sift in 1/2 cup of powdered sugar. Then, add 2 tablespoons of fresh lemon zest, 1 tablespoon of lemon juice, and 1 teaspoon of vanilla extract. Switch your mixer to low speed. Mix until everything combines into a creamy and thick mixture. Microwave Technique and Tips Now, it’s time to melt the white chocolate. In a microwave-safe bowl, add 1 cup of white chocolate chips. Microwave in 30-second bursts. Stir the chips between each round. Be careful not to overheat them. When melted and smooth, let the chocolate cool slightly before using it. Chilling and Scooping the Mixture Once your chocolate cools, gently fold it into the cream cheese mix using a spatula. Be gentle to keep the air in. Cover the bowl with plastic wrap and chill for about 30 minutes. This will help the mixture become firm. After chilling, use a small cookie scoop or your hands to shape the mixture into 1-inch balls. Coating with Graham Crackers Next, roll each truffle in 1/2 cup of crushed graham crackers. Make sure they are fully coated. This adds a nice texture and flavor. Place the truffles on a lined baking sheet. Chill them again for another 30 minutes to set. Before serving, sprinkle extra lemon zest on top for a bright touch. To get the best texture in your Bright Lemon Truffles, start with room temperature ingredients. This helps them mix better. Softened cream cheese and butter blend smoothly. It prevents lumps and makes the mix creamy. Folding techniques matter too. After melting your chocolate, gently fold it into the cream cheese mix. Use a spatula and mix slowly. This keeps air in the mixture, making your truffles light and fluffy. One big mistake is overheating chocolate. When melting, use a microwave-safe bowl. Heat in 30-second intervals. Stir in between to avoid burning. If the chocolate gets too hot, it can seize up. You want it melted, not cooked. Another common error is overmixing the mixture. Once you add the chocolate, mix just until combined. Overmixing can deflate your truffles. This can lead to a dense texture instead of a light one. For a lovely display, serve your truffles on a bright plate. Garnish each one with fresh mint leaves. This adds color and flavor. You can also sprinkle extra lemon zest on top. It makes them look fresh and inviting. When plating, consider adding sliced lemons or sprigs of rosemary. This enhances the citrus theme. A well-presented plate makes your truffles even more appealing. Pro Tips Use Room Temperature Ingredients: Allow the cream cheese and butter to soften at room temperature for a smoother mixture that blends effortlessly. Don’t Overheat the Chocolate: Melt the white chocolate in short intervals to prevent it from seizing, ensuring a silky finish to your truffles. Chill for Firmness: Refrigerate the truffle mixture for the recommended time to make scooping easier and achieve the perfect texture. Add Zest at the End: For the brightest lemon flavor, fold in the lemon zest just before forming the truffles to preserve its vibrant aroma. {{image_4}} You can change the taste of your truffles easily. Try using different citrus zests like lime or orange. This adds a unique twist. You can also add extracts or flavorings. Almond or coconut extract can bring new layers of flavor to your truffles. If you need gluten-free options, consider using gluten-free crushed cookies for the coating. Many brands offer great choices. For those avoiding dairy, you can swap cream cheese with a dairy-free cream cheese. Coconut cream works well and gives a lovely taste. Want to make your truffles more exciting? Roll them in chopped nuts like almonds or pistachios. Shredded coconut is another fun option that adds texture. If you love chocolate, try dipping the truffles in dark chocolate. This makes them rich and indulgent. Each of these ideas can help you create a special treat that suits your taste! When storing your bright lemon truffles, you want to keep them fresh. Use an airtight container to prevent them from drying out. Glass containers work well, but plastic ones are fine too. Make sure they are completely cool before you store them. This helps keep the texture just right. You can refrigerate the truffles to keep them firm. They stay fresh in the fridge for about a week. If you want them to last longer, freezing is a great option. Just wrap each truffle tightly in plastic wrap before placing them in a freezer-safe bag. This keeps them safe from freezer burn. How long do they last? In the fridge, bright lemon truffles last about 7 days. In the freezer, they can last for up to 3 months. This is great if you want to make them ahead of time. What are the signs of spoilage? Look for changes in texture or smell. If they feel sticky or have an off smell, it's best to toss them. Keeping an eye on them ensures you enjoy every bite fresh and tasty. Yes, you can use regular chocolate. Dark or milk chocolate gives a richer taste. Just melt it the same way. The mix will change in flavor but still be tasty. You can make these truffles a day or two before your event. Just follow the steps and let them chill. Store them in the fridge in an airtight container. They stay fresh and yummy! You can use mascarpone cheese or a dairy-free cream cheese. They will give a smooth texture. Make sure it is soft to mix well with the other ingredients. These truffles can fit some special diets. Use gluten-free graham crackers for a gluten-free option. For dairy-free, use non-dairy cream cheese and chocolate. Always check the labels to be safe. Serve these truffles on a nice plate. Add fresh mint leaves for color. You can place sliced lemons around them. This adds a fun touch and makes them look fancy! Making Bright Lemon Truffles is simple and fun. You need basic ingredients like cream cheese, butter, and lemon juice. Follow the steps for mixing, melting, and shaping. Use tips to avoid mistakes and enhance flavors. Variations let you adapt the truffles to different tastes or diets. Store them properly for the best shelf life. These truffles will impress at any gathering and are easy to share. Enjoy making, sharing, and tasting your bright and tangy treats.

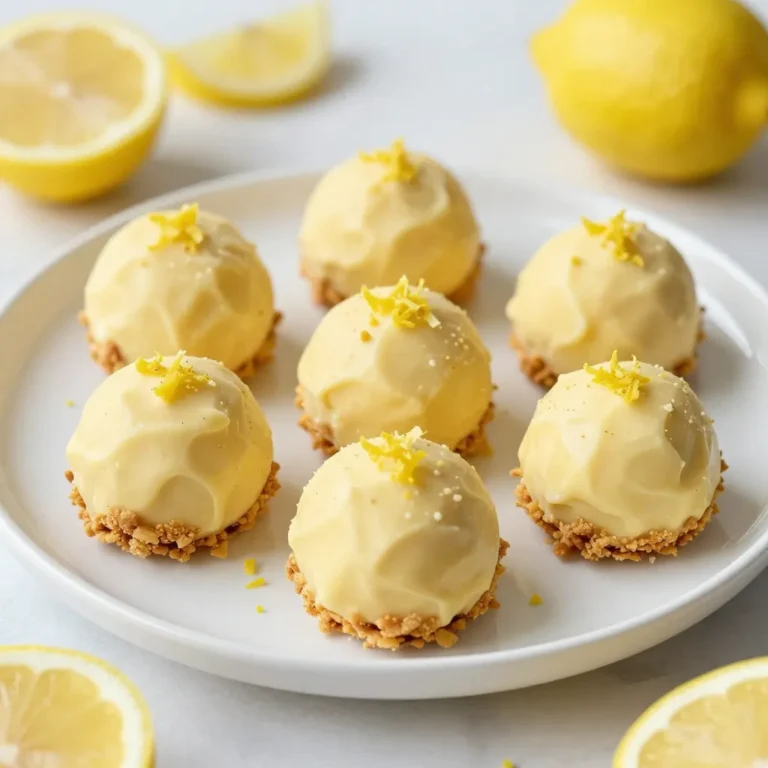
Bright Lemon Truffles Delightful and Easy Recipe

- 1 lb ground turkey or beef - 1 medium onion, finely chopped - 1 bell pepper, chopped - 2 cloves garlic, minced - 1 can (15 oz) black beans, drained and rinsed - 1 can (15 oz) sweet corn, drained - 1 can (14.5 oz) diced tomatoes, with juice - 1 packet taco seasoning - 2 cups tortilla chips, crushed - 1 cup shredded cheese - Salt and pepper, to taste For my Crockpot Taco Casserole, I love using ground turkey or beef. It gives the dish a rich base. I also add a medium onion and bell pepper. These veggies boost flavor and color. Garlic adds an aromatic touch, making it more enticing. Black beans and sweet corn add protein and a sweet crunch. Diced tomatoes bring moisture and tang. I use taco seasoning to infuse that classic Mexican flavor. The tortilla chips give the casserole texture, while the cheese adds creaminess. - Sour cream - Sliced jalapeños - Fresh cilantro - Diced avocado Toppings make this dish even better. I like to add sour cream for creaminess. Sliced jalapeños add a spicy kick. Fresh cilantro gives a bright, herbal note. Diced avocado brings smoothness and richness. You can mix and match to suit your taste. If you want to swap ingredients, that’s easy! Use chicken instead of turkey or beef for a lighter option. You can replace black beans with pinto beans if you prefer. Try quinoa or rice instead of tortilla chips for a gluten-free version. Going dairy-free? Use plant-based cheese or skip it entirely. Just remember to keep the flavors balanced. {{ingredient_image_2}} Start by cooking 1 pound of ground turkey or beef in a medium skillet over medium heat. Break it apart with a spatula as it cooks. Once browned, drain any extra fat. Next, add 1 medium onion, chopped finely, and 1 chopped bell pepper. You can pick any color bell pepper you like. Add 2 cloves of minced garlic. Sauté for about 5 minutes. The veggies should be tender and smell great. Now, transfer the meat and veggie mix to your slow cooker. Add 1 can of black beans, drained and rinsed, and 1 can of sweet corn, also drained. Then, add 1 can of diced tomatoes with their juice. Sprinkle in 1 packet of taco seasoning. Stir everything well so the flavors mix nicely. Gently fold in 2 cups of crushed tortilla chips, making sure they blend into the mix. Cover your slow cooker and set it to cook. You can choose low for 4 to 6 hours or high for 2 to 3 hours. In the last 30 minutes, sprinkle 1 cup of shredded cheese on top. Re-cover the cooker so the cheese melts perfectly. When cooking is done, taste the casserole. Add salt and pepper as needed. Stir gently before serving. Enjoy this hearty meal with toppings like sour cream or fresh cilantro! To season your casserole, start with taco seasoning. One packet usually works well. If you want more flavor, add extra spices like cumin or paprika. Taste the mixture before serving. Adjust salt and pepper to your taste. You can always add more, but you can't take it out! For the best melted cheese, add it in the last 30 minutes of cooking. This keeps it gooey and prevents it from getting tough. Spread the cheese evenly on top of the casserole. Cover the slow cooker to trap heat and melt the cheese fully. Use a mix of cheeses for extra flavor, like cheddar and Monterey Jack. Serve the casserole hot in bowls. Top it with extra crushed tortilla chips for crunch. Add sour cream for creaminess and flavor. Fresh cilantro adds a nice touch. Sliced jalapeños give a kick if you like heat. Diced avocado adds creaminess and pairs well with the other toppings. Enjoy customizing your dish! Pro Tips Perfect Protein: Experiment with different proteins like shredded chicken or plant-based alternatives for a unique twist on this casserole. Add Some Heat: If you enjoy spicy flavors, consider adding diced jalapeños or a splash of hot sauce to the mix for an extra kick. Fresh Herbs: Enhance the flavor by adding fresh cilantro or parsley right before serving to give a fresh and vibrant finish. Make Ahead: This casserole can be assembled in advance and stored in the refrigerator for up to 24 hours before cooking, making it a great meal prep option. {{image_4}} To make a vegetarian or vegan taco casserole, skip the meat. Use 1 can of lentils or chickpeas instead of ground turkey or beef. Add more beans or veggies, like zucchini or mushrooms, for texture. You can also swap in a plant-based cheese to keep it dairy-free. You can change the meat in this recipe. Ground chicken or pork works well. If you prefer a leaner option, try ground turkey. For a richer flavor, use beef. Each meat adds a unique taste to the casserole, so feel free to explore your favorites. If you're gluten-free, use gluten-free tortilla chips. You can also swap the taco seasoning for a homemade blend to control ingredients better. For those watching calories, reduce the cheese or use low-fat options. Each swap helps you tailor the dish to fit your needs. To store leftovers, let the casserole cool first. Use an airtight container to keep it fresh. You can place the casserole in the fridge for up to 3-4 days. This way, you can enjoy it later without losing flavor. When you're ready to eat the leftovers, take out the portion you want. You can reheat it in the microwave. Place it in a microwave-safe dish and cover it. Heat for 2-3 minutes, stirring halfway through. You can also reheat it on the stove over medium heat. Stir often until it's hot. If you want to save some for later, freezing works great. Make sure the casserole is completely cool. Then, place it in a freezer-safe container. It can stay in the freezer for up to 3 months. When you want to eat it, move it to the fridge for a day to thaw. Once thawed, reheat it as mentioned earlier. Enjoy your tasty meal! Yes, you can use chicken! Shredded or ground chicken works great. It will give you a lighter flavor but still keep that taco taste. Just cook it until it's no longer pink. Follow the same steps as before. To make this dish gluten-free, choose gluten-free tortilla chips. Check the taco seasoning, too. Many brands contain gluten, so read the label. You can even make your own seasoning mix at home. Use spices like chili powder, cumin, and paprika. Many sides go well with this casserole! Here are some ideas: - Fresh salad: A crisp green salad adds crunch. - Rice: Mexican rice or cilantro lime rice complements the dish. - Guacamole: Creamy guacamole is always a hit. - Refried beans: They add a nice texture and flavor. Choose what you love for a fun meal! You now know how to make a tasty Crockpot Taco Casserole. We covered main ingredients, optional toppings, and substitutions. I shared step-by-step instructions along with tips for perfect seasoning and cheese. You learned about fun variations, storage, and even some FAQs. Overall, this dish is easy to make and great for any meal. Enjoy making it your own!

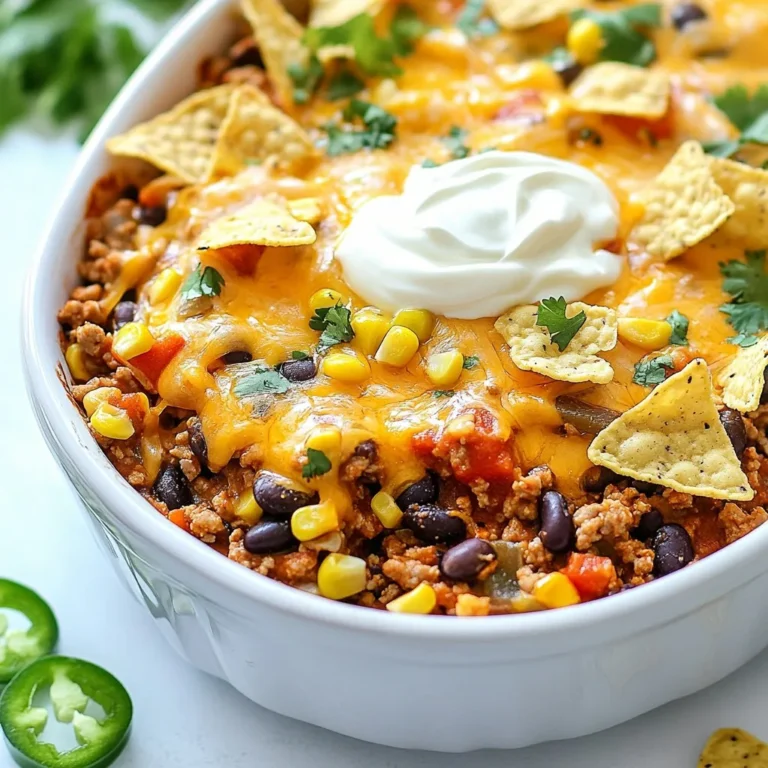
Crockpot Taco Casserole Hearty and Flavorful Meal

To make this creamy Greek yogurt cranberry dip, you need: - 1 cup plain Greek yogurt - 1/2 cup fresh cranberries (or dried if fresh are hard to find) - 1/4 cup honey (adjust for your taste) - 1/4 cup walnuts, coarsely chopped and toasted - 1 tablespoon freshly squeezed lemon juice - 1 teaspoon pure vanilla extract - A pinch of salt These main ingredients work together to create a rich and tasty dip that everyone will love. You can add a few optional ingredients to boost the flavor: - Fresh mint leaves (for garnish) Mint adds a nice touch and looks great on the table. To prepare this dip, you will need the following tools: - A small saucepan (for cooking cranberries) - A medium mixing bowl - A spatula (for mixing) - A decorative serving bowl Having these tools ready helps you make the dip quickly and easily. {{ingredient_image_2}} To prepare fresh cranberries, start by rinsing them well. Place the cleaned cranberries in a small saucepan. Cover them with water. Bring the water to a boil over medium heat. Cook the cranberries for about five minutes. They will soften and pop. Once cooked, drain the cranberries and let them cool completely. If you can't find fresh cranberries, coarsely chop dried ones and set them aside. In a medium mixing bowl, add one cup of plain Greek yogurt. Next, include the cooled cranberries or chopped dried cranberries. Pour in a quarter cup of honey. Squeeze in one tablespoon of fresh lemon juice. Add one teaspoon of pure vanilla extract. Finally, sprinkle in a pinch of salt. Gently fold all the ingredients together with a spatula. Make sure everything blends well, but don’t overmix. You want the cranberries to stay intact. Now, take a quarter cup of coarsely chopped and toasted walnuts. Add them to the bowl with the yogurt mixture. Carefully fold the walnuts in. This step adds a nice crunch and texture to your dip. Be gentle to keep the walnuts from breaking down. After mixing, taste your dip. Adjust the sweetness by adding more honey if you like. Once it's to your taste, transfer the dip into a decorative serving bowl. Cover it and place it in the fridge for at least thirty minutes. This chilling time lets the flavors meld beautifully. Just before serving, you can garnish it with fresh mint leaves for a pop of color and freshness. You can easily change the sweetness of this dip. Start with the honey amount in the recipe. Mix it in, then taste. If you want it sweeter, add more honey. Remember, a little goes a long way, so add slowly. This gives you control over the flavor. You can also try using maple syrup for a unique twist. For a great presentation, use a shallow bowl for the dip. Add a splash of color with fresh mint leaves on top. Arrange a platter with fresh fruits, crunchy crackers, or colorful veggies around the bowl. This invites everyone to dig in. You can also serve it with pita chips or pretzels for different textures. If you need a dairy-free option, use coconut yogurt instead of Greek yogurt. It gives a nice creamy texture. For a nut-free version, skip the walnuts or use seeds like pumpkin or sunflower seeds. You can also swap honey for agave syrup if you prefer a vegan option. These swaps keep the dip tasty and friendly for various diets. Pro Tips Fresh vs. Dried Cranberries: Fresh cranberries provide a tart flavor and vibrant color, while dried cranberries offer sweetness. Choose based on your preference or availability. Honey Adjustments: The sweetness of honey can vary, so taste the mixture before serving and adjust the amount to suit your taste. Toasting Walnuts: Toasting walnuts enhances their flavor and adds a delightful crunch. Just be sure to watch them closely to prevent burning. Resting Time: Allowing the dip to rest in the refrigerator for at least 30 minutes helps the flavors meld together, making it even more delicious. {{image_4}} You can switch up the yogurt for this dip. Try using regular yogurt if you want a lighter dip. Dairy-free options like coconut yogurt work well too. Each type gives a unique taste and texture. Greek yogurt adds creaminess, while alternatives can add flavor depth. Get creative with your dip! Add fresh herbs like mint or basil for a fresh twist. A pinch of cinnamon or nutmeg can bring warmth. You can even add a dash of cayenne for heat. Mix and match until you find your favorite flavor combo! If you want a healthier dip, try using maple syrup or agave syrup. These sweeteners can replace honey and keep the dip tasty. You can also use stevia or monk fruit for a low-calorie option. Adjust the amount to fit your taste and health goals. To keep your creamy Greek yogurt cranberry dip fresh, store it in an airtight container. Make sure to cover it tightly to avoid air exposure. This step helps prevent it from drying out or absorbing other flavors in the fridge. You can also use plastic wrap directly on the dip's surface before sealing the lid. This method adds an extra layer of protection. This dip tastes best cold or at room temperature. If you want to refresh it after storage, simply stir it gently to mix the ingredients again. If it seems a bit thick, add a splash of lemon juice or honey to bring back the creamy texture. Avoid heating it, as this may change the flavor and texture. Your dip can last in the fridge for up to five days. Always check for signs of spoilage before enjoying it. Look for any mold or off smells. If the dip has an unusual texture or color, it’s best to discard it. Keeping track of the date when you made it can help you enjoy it at its best. Yes, you can use dried cranberries. They add a nice chewiness. Just chop them coarsely before mixing. The flavor will still be great. You might want to adjust the honey since dried cranberries are sweeter. You can store the dip in the fridge for up to five days. Make sure to keep it in an airtight container. This helps keep it fresh and tasty. If you notice any change in smell or color, it's best to discard it. This dip pairs well with many things! You can serve it with: - Fresh fruits like apples and pears - Crunchy crackers or pita chips - Colorful vegetable sticks like carrots and celery These options add fun flavors and textures. Absolutely! Making this dip a day ahead is a great idea. It lets the flavors blend better. Just cover it well and store it in the fridge. When ready to serve, garnish with fresh mint for a pop of color. In this article, we explored how to make a tasty Greek Yogurt Cranberry Dip. We covered the main and optional ingredients, plus the tools you'll need. I provided step-by-step instructions and helpful tips for serving and storing. You can adjust sweetness and try different flavors based on your taste. This dip is easy to make and perfect for any occasion. Enjoy creating and sharing this refreshing snack!

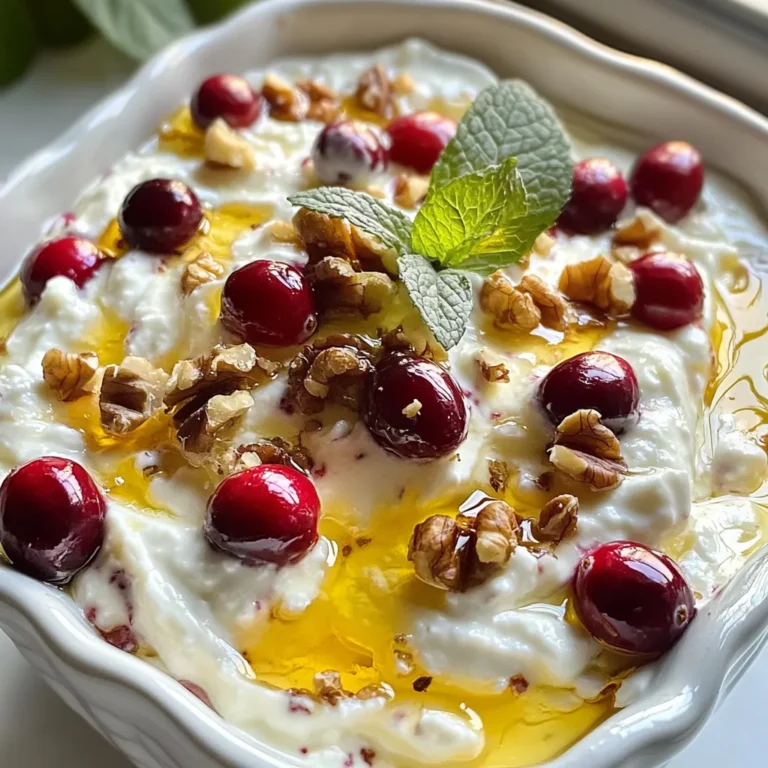
Creamy Greek Yogurt Cranberry Dip Easy and Delicious

To make this spooky milkshake, you need: - 2 cups vanilla ice cream - 1 cup milk (or almond milk) - 1/4 cup activated charcoal powder - 2 tablespoons chocolate syrup - 1/2 teaspoon vanilla extract These ingredients create a rich and creamy treat. The activated charcoal gives it that eerie black color. The chocolate syrup adds a nice sweetness. You can add a few fun ingredients to enhance the flavor: - 1 tablespoon black sesame paste This paste adds a nutty taste. It works well with the chocolate. Feel free to skip it if you want a simpler flavor. Toppings make your milkshake look festive. Here are some great ideas: - Whipped cream - Edible black glitter or sprinkles - Halloween-themed candies (like gummy worms or chocolate spiders) These add a fun touch and make your drink eye-catching. You can also rim the glasses with chocolate syrup and sprinkles for added fun. {{ingredient_image_2}} Start by gathering your ingredients. You will need: - 2 cups vanilla ice cream - 1 cup milk (or almond milk) - 1/4 cup activated charcoal powder - 2 tablespoons chocolate syrup - 1 tablespoon black sesame paste (optional) - 1/2 teaspoon vanilla extract In a blender, combine the ice cream, milk, activated charcoal, chocolate syrup, and vanilla extract. If you want a nutty flavor, add the black sesame paste. This mix gives the shake its spooky color and rich taste. Blend all the ingredients on high speed. Watch for a smooth and creamy texture. You want the charcoal and syrup mixed well. This step is key for the shake's deep black color. Once blended, taste it. If you like it sweeter, add more chocolate syrup and blend again. Pour the milkshake into tall glasses, filling them about three-quarters full. This leaves room for toppings. Top each shake with whipped cream. Sprinkle edible black glitter or sprinkles for a fun look. To add to the Halloween theme, place candies like gummy worms or chocolate spiders on top. You can also rim the glasses with chocolate syrup and dip them in sprinkles for extra flair. Serve with colorful straws and enjoy your spooky treat! To make your Black Halloween Milkshake taste great, balance is key. The chocolate syrup adds sweetness, while the activated charcoal gives a fun twist. If you want it sweeter, start with a small amount of chocolate syrup. Blend and taste before adding more. A little goes a long way! For the best texture, use cold milk and ice cream. This keeps your shake thick and creamy. Blend on high until smooth. If it’s too thick, add a bit more milk. If it’s too thin, add more ice cream. You want it to be thick enough to hold the whipped cream! Make your milkshake look spooky and fun! Use tall glasses to show off the dark color. Top with whipped cream and sprinkle edible black glitter on top. You can also add Halloween candies like gummy worms or chocolate spiders for a creepy touch. Rimming the glass with chocolate syrup and sprinkles adds a fun twist! Pro Tips Use High-Quality Ice Cream: For the best flavor and texture, opt for a premium vanilla ice cream. The quality of the ice cream will significantly enhance the overall taste of your milkshake. Activated Charcoal Safety: While activated charcoal is trendy, use it sparingly and ensure it is food-grade. Overconsumption can interfere with nutrient absorption, so enjoy this treat in moderation. Customize Your Sweetness: Adjust the amount of chocolate syrup to your taste. Start with the recommended amount and add more gradually, blending until you reach your desired sweetness level. Creative Garnishing: Get creative with toppings! Besides whipped cream, consider adding spooky-themed garnishes like candy eyes or chocolate shavings to make your milkshake even more festive. {{image_4}} You can easily make this milkshake dairy-free. Use almond milk instead of regular milk. Almond milk gives a nice, nutty taste. It pairs well with the vanilla ice cream. You can also use coconut milk for a tropical twist. Both options keep the shake creamy and delicious. While the black Halloween milkshake is great, you can try new flavors. Swap vanilla ice cream for chocolate ice cream for a richer taste. You can add mint extract for a cool kick. Another fun idea is to mix in some pumpkin puree. This adds a fall flavor and makes it extra festive! If you have special dietary needs, you can modify the recipe. For a lower-sugar option, use sugar-free chocolate syrup. This keeps the shake sweet without added sugar. If you want to avoid activated charcoal, you can skip it. The shake will still taste good, just with a lighter color. For nut allergies, omit black sesame paste and use more chocolate syrup instead. If you have leftover milkshake, pour it into a sealed container. Use a glass jar or a plastic container with a tight lid. Store it in the fridge for up to two days. When you are ready to enjoy it again, stir well before serving. You can freeze the milkshake base if you want to keep it longer. Pour the mixture into an ice cube tray or a freezer-safe bag. This way, you can use it later. When you want a treat, blend the frozen cubes with a splash of milk until smooth. To keep your milkshake fresh, avoid exposing it to air. Always seal your containers tightly. If you notice any ice crystals forming, it’s best to consume it soon. Adding fresh toppings before serving will also enhance its appearance and taste. Yes, you can make this milkshake ahead. Just blend all the ingredients. Then, store it in a sealed container in the fridge. Give it a good stir before serving. Keep in mind that the texture may change when stored. The milkshake might get a bit thicker. If that happens, add a splash of milk to thin it out. If you don't have activated charcoal, you can skip it. The milkshake will be less black, but still tasty. You can use black cocoa powder for color and flavor. Another option is using dark chocolate syrup. It will add a rich flavor without the charcoal. To sweeten your milkshake, add more chocolate syrup. Start with a tablespoon, then blend well. Taste it after each addition to avoid over-sweetening. You can also use honey or agave syrup. Both will add sweetness without changing the flavor too much. This blog post covered how to make a fun black Halloween milkshake. We explored the key ingredients, tips for flavor and texture, and creative ways to present it. I also shared variations for different diets and best storage practices. Remember, you can easily adjust flavors and ingredients to suit your taste. Enjoy the process of creating this spooky treat! It’s a great way to celebrate Halloween with friends and family.

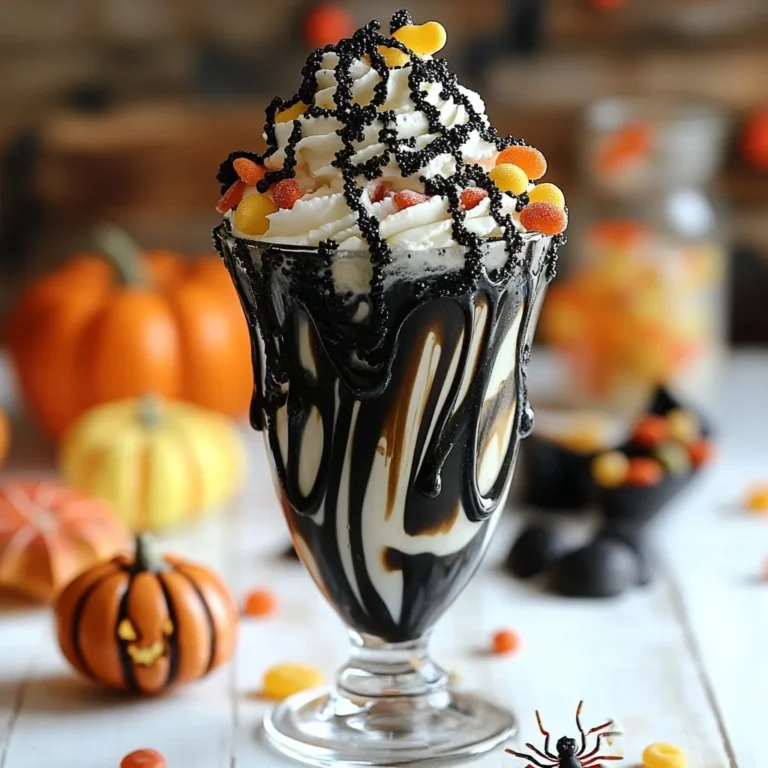
Black Halloween Milkshake Spooky and Delicious Treat

PREV 1 2 3 4 … 41 NEXT
tastykitchentales

explore

DessertsDinnerAppetizersDrinks

Our Policies

  • Cookie Policy
  • Copyright Policy
  • Disclaimer
  • GDPR Policy
  • Terms Of Use
Back to Top
  • About
  • Contact Us
  • Privacy Policy
© 2025 tastykitchentales