FREE DINNER EBOOK! Get your copy!
  • Cookie Policy
  • GDPR Policy
  • Disclaimer
  • Terms Of Use
  • Visit my other site: Fun Cookie Recipes
tastykitchentales
  • Home
  • Dinner
  • Desserts
  • Drinks
  • Appetizers
  • Contact
  • About
  • Privacy Policy
  • Home
  • Dinner
  • Desserts
  • Drinks
  • Appetizers
  • Contact
  • About
  • Privacy Policy
  • Cookie Policy
  • GDPR Policy
  • Disclaimer
  • Terms Of Use
Visit my other site: Fun Cookie Recipes

HOME / CATEGORIES /

Latest

- 2 cups all-purpose flour - 3/4 cup boiling water - 1/2 teaspoon salt - 1/4 cup sesame oil (divided) - 4-5 scallions, finely chopped - Black sesame seeds (optional, for garnish) - Additional flour for dusting To make crispy Chinese scallion pancakes, start with these ingredients. The all-purpose flour forms the base of the dough. Boiling water helps create a soft, pliable texture. Salt enhances the flavor of the dough, while sesame oil adds a rich taste. Scallions bring a fresh, onion-like flavor that makes these pancakes unique. Optional black sesame seeds provide a nice garnish and extra crunch. You will also need additional flour for dusting while rolling out the dough. Gather all your ingredients before you start cooking. This way, you’ll have everything ready and won’t miss a step in the process. {{ingredient_image_2}} - Mixing flour and salt: In a large bowl, combine 2 cups of all-purpose flour with 1/2 teaspoon of salt. This mix forms the base of your pancake. - Incorporating boiling water: Carefully pour in 3/4 cup of boiling water. Use chopsticks or a fork to stir until a shaggy dough forms. Be careful of the steam—it can be hot! - Kneading until smooth: Once the dough cools, transfer it to a floured surface. Knead for about 5-7 minutes. You want the dough to be smooth and elastic. Cover it with a towel and let it rest for 30 minutes. - Dividing the dough: After resting, divide the dough into four equal pieces. This makes it easy to work with each piece. - Rolling out into circles: Take one piece and roll it out on a lightly floured surface. Aim for a thin circle, about 8-10 inches wide. - Applying oil and adding scallions: Brush a thin layer of sesame oil on the rolled dough. Evenly sprinkle the finely chopped scallions over the top. - Heating the skillet: Heat a non-stick skillet over medium-high heat. Add a tablespoon of sesame oil to the pan. - Frying until golden brown: Place one pancake in the skillet. Cook for about 3-4 minutes on each side. Look for a golden brown color and a crispy texture. - Slicing and serving: Once cooked, transfer the pancake to a plate with paper towels. This helps absorb any extra oil. Slice each pancake into wedges and serve them hot. Optionally, garnish with black sesame seeds for extra flavor. To make your scallion pancakes super crispy, follow these simple steps: - Patience in cooking: Cook each pancake slowly. This allows the outside to crisp up nicely while the inside cooks through. - Proper oil temperature: Heat the oil until it shimmers. This ensures a good sear on the pancakes. - Resting the dough: Let the dough rest for 30 minutes. This makes it easier to roll out and helps with texture. Avoid these common pitfalls for the best results: - Overworking the dough: Knead just until smooth. Too much kneading makes the dough tough. - Not using enough oil: Oil is key for crispness. Don’t skimp on it in the skillet. - Incorrect skillet heat: If the heat is too low, the pancakes may turn soggy. If too high, they can burn. Make your pancakes pop with these serving ideas: - Dipping sauces: Serve with soy sauce, chili oil, or a creamy dip for added flavor. - Presentation ideas: Slice the pancakes into wedges. Arrange them on a large platter. Garnish with black sesame seeds for color and flair. Pro Tips Use High-Quality Scallions: Fresh, vibrant scallions will enhance the flavor and texture of your pancakes significantly. Rest the Dough: Allowing the dough to rest is crucial; it helps the gluten relax and makes rolling easier. Adjust Oil for Crispiness: Don’t skimp on the sesame oil when cooking; it aids in achieving that perfect crispy texture. Experiment with Fillings: Feel free to add other ingredients like herbs or spices in addition to scallions for a unique twist. {{image_4}} You can change up your scallion pancakes by adding different fillings. Here are some ideas: - Cheese or herbs: Try adding shredded cheese or fresh herbs like cilantro or basil for a delicious twist. - Spicy flavored oil: Mix chili oil or Szechuan pepper oil with the sesame oil for a kick. - Additional vegetables: Grated carrots, spinach, or bell peppers can boost flavor and nutrition. If you need a gluten-free version, you can still enjoy these pancakes. Here are some tips: - Alternative flours: Use rice flour or a gluten-free all-purpose blend. These work well but may change the texture. - Tips for texture: Add a little xanthan gum to help bind the dough and give it a better chew. You can cook these pancakes in different ways. Each method offers a unique taste. - Cooking methods: Frying gives a crispy texture, while baking is easier and healthier. - Texture differences: Fried pancakes are golden and flaky, while baked ones are softer and chewier. After cooking, let your scallion pancakes cool. This step is key to keeping them crispy. Wrap each pancake in plastic wrap or foil. Avoid stacking them while they are warm. Store them in the fridge if you plan to eat them within a few days. Use an airtight container to keep them fresh longer. To bring back the crispness, you can reheat your pancakes in two ways: - Oven method: Preheat your oven to 375°F (190°C). Place the pancakes on a baking sheet. Heat for about 10 minutes. This keeps them crispy and warm. - Skillet method: Heat a non-stick skillet over medium heat. Add a little sesame oil. Place the pancake in the skillet and cook for 2-3 minutes on each side. This method gives great texture. You can freeze your scallion pancakes for later use. Here’s how: - Freezing before cooking: Roll and shape the pancakes, then place them on a baking sheet. Freeze until solid. Once frozen, transfer them to a zip-top bag. This keeps them fresh. - Freezing after cooking: Cool the pancakes fully, wrap them tightly, and store them in a freezer-safe container. For thawing, place the frozen pancakes in the fridge overnight. Reheat them using the skillet or oven method for the best results. Crispy Chinese scallion pancakes are flat, savory treats. They are made from simple dough and chopped scallions. The pancakes are crispy on the outside and chewy on the inside. You cook them in a hot skillet with oil until golden brown. They are perfect as a snack or appetizer. Yes, you can make the dough in advance. After kneading, wrap it tightly in plastic wrap. Store it in the fridge for up to 24 hours. When you’re ready to cook, let it sit at room temperature for about 30 minutes. This helps the dough relax and makes it easier to roll out. This recipe is already vegan-friendly. All the ingredients are plant-based. You can use vegetable oil instead of sesame oil if you prefer. Just keep the same technique for rolling and frying the pancakes. Soggy pancakes often come from too much moisture or not enough heat. Ensure your skillet is hot enough before adding the pancake. If they are still soggy, try cooking them longer on each side. You can also place them on paper towels after cooking to absorb extra oil. Scallion pancakes pair well with several dips. Soy sauce is a classic choice. You can also try a spicy chili oil or a tangy vinegar dip. For a fun twist, serve with a side of pickled vegetables. These add a nice contrast to the rich pancakes. Crispy Chinese scallion pancakes are fun and easy to make. We covered the right ingredients, mixing techniques, and cooking methods. Remember to choose the best frying temp for crispiness. Avoid common mistakes and try different fillings for variety. Store, reheat, and even freeze leftovers properly to enjoy later. With these tips, you can impress anyone with your scallion pancakes. Enjoy the process and savor each bite!

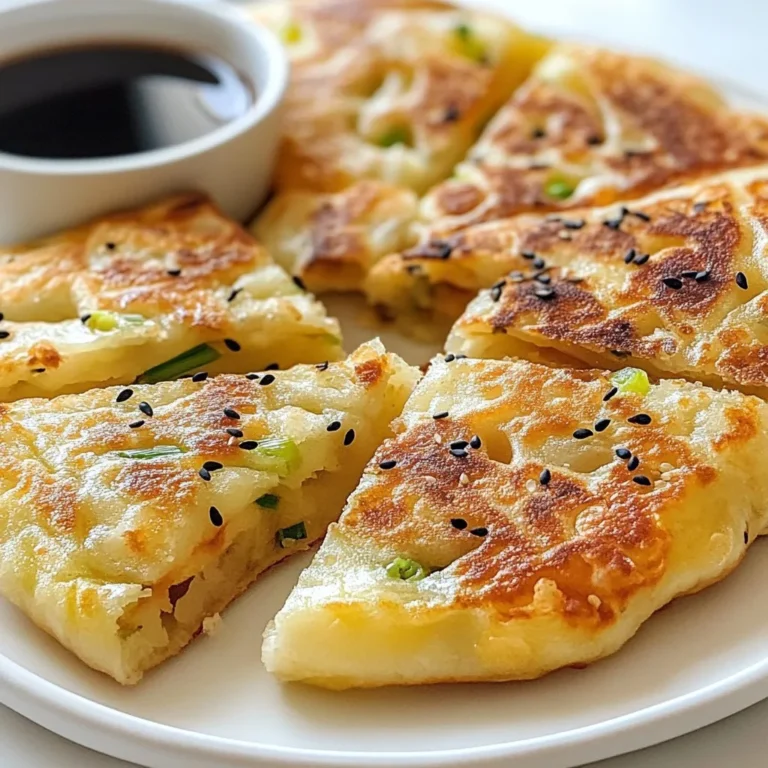
Crispy Chinese Scallion Pancakes Easy Cooking Guide

- Chicken and Potatoes - 4 boneless, skinless chicken breasts - 1.5 lbs baby potatoes, halved - Seasonings and Broth - 1 cup chicken broth - 5 cloves garlic, finely minced - 1 cup freshly grated Parmesan cheese - 1 teaspoon Italian seasoning blend - 1/2 teaspoon freshly ground black pepper - 1/2 teaspoon salt (adjust to taste) - 1 tablespoon extra virgin olive oil - Garnishing Ingredients - Fresh parsley, chopped (for garnish) I love using simple, fresh ingredients for this dish. The chicken and baby potatoes create a hearty base. The chicken is tender and juicy, while the potatoes soak up the savory broth and flavors. The garlic adds a lovely kick, and Parmesan brings a rich, cheesy taste. I always use fresh garlic and real Parmesan cheese for the best flavor. The Italian seasoning blend adds warmth and depth to the dish. Don't forget about the olive oil! It keeps everything moist as it cooks. Finally, fresh parsley brightens the plate and adds a pop of color. These ingredients work together to make a delicious, comforting meal. {{ingredient_image_2}} Making the Garlic-Parmesan Mixture Start by taking a large bowl. Add five cloves of minced garlic. Then, mix in one cup of grated Parmesan cheese. Next, add one teaspoon of Italian seasoning, half a teaspoon of black pepper, and half a teaspoon of salt. Stir all the ingredients well until they form a smooth paste. This mixture brings great flavor to your chicken. Preparing the Crockpot Take your crockpot and drizzle one tablespoon of olive oil on the bottom. Use a paper towel or your hands to spread it around. This step helps to keep the chicken and potatoes from sticking to the pot. Layering the Ingredients Now, take 1.5 pounds of halved baby potatoes. Arrange them evenly across the bottom of the crockpot. This layer will soak up all the yummy juices. Then, take each chicken breast and rub the garlic-Parmesan mixture all over it. Place the chicken on top of the potatoes. Setting the Crockpot Once everything is layered, pour one cup of chicken broth around the edges of the crockpot. Avoid pouring it on top of the chicken. This keeps the flavor strong. After that, secure the lid tightly. Cooking Time and Temperature You can set your crockpot on low for 6-7 hours or high for 3-4 hours. Cooking on low gives the best flavor and tenderness. Checking for Doneness When the cooking time is up, check if the chicken is fully cooked. It should be white and juices should run clear. The potatoes should be tender when pierced with a fork. If everything is done, taste and add more salt or pepper if needed. Enjoy your meal hot, and don’t forget to garnish with fresh parsley for color and flavor! Ensuring Tender Chicken To keep your chicken juicy, don’t skip the marinade step. Rub the garlic-Parmesan mixture on the chicken well. This helps the meat soak in flavor. Use chicken breasts that are even in size. This way, they cook evenly. Always check the internal temperature. It should reach 165°F for safe eating. Flavor Enhancement Suggestions Add herbs for extra taste. Fresh thyme or rosemary work great. You can also squeeze lemon juice before serving. This adds brightness to the dish. For a kick, sprinkle some red pepper flakes in the garlic-Parmesan mix. This small change can make a big difference. Presentation Ideas Serve the chicken and potatoes on a nice platter. Drizzle some cooking juices over them. This keeps everything moist and adds shine. Finish with a sprinkle of fresh parsley. It adds color and freshness to the dish. Pairing Recommendations This meal pairs well with a simple green salad. A light vinaigrette works best to balance the rich flavors. You can also serve it with crusty bread. It’s perfect for soaking up any extra sauce. For a drink, try a crisp white wine or sparkling water. Pro Tips Use Fresh Ingredients: Always opt for fresh garlic and high-quality Parmesan cheese to enhance the flavor of your dish. Customize Your Seasoning: Adjust the Italian seasoning and salt according to your taste preferences for a personalized flavor profile. Check for Doneness: Use a meat thermometer to ensure that the chicken reaches an internal temperature of 165°F for safe consumption. Let it Rest: Allow the chicken to rest for a few minutes after cooking to retain its juices before serving. {{image_4}} Chicken Alternatives You can use other meats like turkey or pork. These will change the taste but still work well. Bone-in chicken adds flavor but takes longer to cook. If you prefer a leaner option, try chicken thighs. They stay juicy and tender. Potato Substitutes If you want a lower-carb option, use cauliflower. It cooks quickly and absorbs flavors well. Sweet potatoes add a nice sweetness and color. You can also try parsnips for a unique twist. They add a bit of sweetness and are creamy when cooked. Different Seasoning Blends You can mix up the spices for new tastes. Try adding smoked paprika for a smoky flavor. Cajun seasoning gives it a spicy kick. For an Asian twist, use soy sauce and ginger. Each mix brings a different vibe to the dish. Vegetarian Versions To make this dish vegetarian, swap chicken for hearty vegetables like mushrooms or eggplant. Use vegetable broth instead of chicken broth. Add beans for protein and texture. This version will still be rich and satisfying while being meat-free. - Proper Container Use: Use a clean, airtight container for storing leftovers. This helps keep the chicken and potatoes fresh. Make sure to let the meal cool down before sealing it. - Shelf Life: Store your leftovers in the fridge for up to three days. If you want to keep them longer, consider freezing them instead. - How to Freeze: To freeze, place the cooled chicken and potatoes in a freezer-safe bag or container. Remove as much air as you can to prevent freezer burn. Label the bag with the date for easy tracking. - Reheating Tips: When ready to eat, thaw the meal in the fridge overnight. Reheat in the microwave or oven until heated through. Ensure the chicken reaches 165°F. You can add a splash of chicken broth to keep the dish moist while reheating. Can I use frozen chicken? Yes, you can use frozen chicken. Just add extra cooking time. Cook on high for 4-5 hours if using frozen chicken. This way, the chicken cooks safely and stays juicy. How do I know when the chicken is done? Check the chicken with a meat thermometer. It should reach 165°F (75°C). The meat will be white and tender when fully cooked. If you don't have a thermometer, cut into the chicken. It should be no longer pink in the center. Can I double the recipe? Yes, you can double the recipe. Make sure your crockpot is big enough to hold all the ingredients. You may need to add a bit more broth and adjust the cooking time. Check on it to ensure everything cooks evenly. This article covered how to make a tasty chicken and potato dish in a crockpot. You learned about the key ingredients, step-by-step cooking methods, and helpful tips to enhance flavor. I shared ways to customize your meal and how to store leftovers properly. For best results, always check for doneness and try out different flavors. I hope you feel excited to try this recipe. Enjoy your cooking journey!

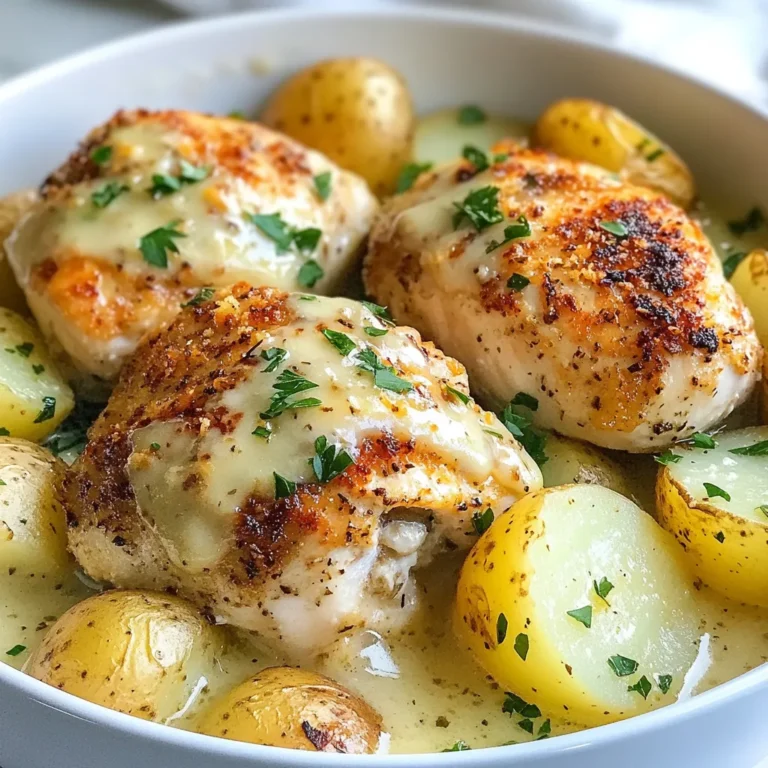
Garlic Parmesan Crockpot Chicken and Potatoes Delight

To make a delicious Eggnog Espresso Martini, you need the following ingredients: - 1 cup dairy-free or traditional eggnog - 1 shot freshly brewed, cooled espresso - 1 tablespoon pure maple syrup - 1 teaspoon vanilla extract - 1/2 teaspoon ground nutmeg (plus extra for garnish) - 1/2 teaspoon ground cinnamon - Ice cubes for shaking - Whipped coconut cream for topping Each ingredient plays a key role. Eggnog gives the drink its creamy texture and holiday taste. Espresso adds a rich coffee flavor. Maple syrup brings sweetness, while vanilla and spices enhance the drink's warmth. The ice cubes ensure your drink is cold and refreshing. Lastly, whipped coconut cream adds a fun and tasty topping. You can easily find these ingredients at your local store. Choose your favorite eggnog, whether dairy-free or traditional. Fresh espresso makes the best flavor, so brew it just before you mix. Gather everything and get ready to create your festive treat! {{ingredient_image_2}} First, brew a fresh shot of espresso. This step is key for flavor. Use a good quality coffee bean. After brewing, let the espresso cool to room temperature. This is vital. Cooling helps keep the ice from melting too fast later. You want a rich, fresh taste. Fresh espresso makes a big difference in your drink. Now, it’s time to combine the flavors. In a cocktail shaker, add the cooled espresso. Then, pour in 1 cup of eggnog. Follow this with 1 tablespoon of maple syrup. Next, add 1 teaspoon of vanilla extract. Sprinkle in 1/2 teaspoon of ground nutmeg and 1/2 teaspoon of ground cinnamon. Mixing in this order helps blend the flavors well, ensuring every sip is tasty. Add ice cubes to the shaker, filling it halfway. This step is crucial for chilling your drink. Secure the lid tightly. Shake the mixture vigorously for 15-20 seconds. You want to mix everything well and chill the drink perfectly. The shaking helps create a nice froth for texture. Now, it’s time to serve. Use a fine strainer to pour the mixture into a pre-chilled martini glass. This helps keep the drink cold longer. The pre-chilled glass also adds to the drink's look. Top it generously with whipped coconut cream. Finally, sprinkle a bit of ground nutmeg on top for that holiday touch. Enjoy your festive treat! - Whipped coconut cream adds a rich touch. - Ground nutmeg gives it a festive flair. - Use a wide-mouthed martini glass for a fun look. - For a twist, try a coupe glass to stand out. - Shake your cocktail well for a smooth mix. - Use ice cubes to keep it frosty while shaking. - If it’s too thick, add a splash more eggnog. - Sweeten it up with more maple syrup if needed. - Pour into pre-chilled glasses for a classy feel. - Add a sprinkle of cinnamon on top for color. - Set the scene with holiday lights or candles. - Serve with festive straws for extra fun. Pro Tips Chill Your Glasses: For an extra refreshing experience, chill your martini or coupe glasses in the freezer for about 10-15 minutes before serving. Customize Your Sweetness: Adjust the amount of maple syrup based on your taste preference; feel free to add more or less to suit your sweetness level. Experiment with Spices: Try adding a pinch of ground ginger or allspice for a unique flavor twist that enhances the holiday spirit. Make It Ahead: If you're preparing for a party, you can mix the eggnog and spices in advance, then shake with espresso and ice just before serving for freshness. {{image_4}} If you want a dairy-free version of the Eggnog Espresso Martini, choose dairy-free eggnog. Brands like So Delicious and Silk offer tasty options. You can also use almond milk or oat milk mixed with spices. For creaminess, add coconut cream instead of regular cream. When making a dairy-free drink, you might need to adjust flavors. If the dairy-free eggnog is sweet, use less maple syrup. Taste your mix as you go. This way, you can keep the balance just right. To give your Eggnog Espresso Martini a twist, try adding spices. A pinch of allspice or cardamom adds warmth. You can also use flavored extracts. Peppermint extract brings a fun holiday feel. For coffee flavor variations, think about using cold brew coffee. It has a smooth taste that works well. You can even infuse the espresso with cinnamon sticks while brewing. This adds a sweet and cozy flavor. Pair your Eggnog Espresso Martini with holiday appetizers. Try it with cheese platters or spiced nuts. The rich drink complements savory bites perfectly. For presentation, use festive glassware. A martini glass or coupe glass looks elegant. You can also rim the glass with crushed candy canes. This adds a pop of color and a hint of sweetness. To keep your eggnog and espresso fresh, store them separately. Place leftover eggnog in a sealed container. For espresso, let it cool down and then store it in the fridge. Use these within three days for the best taste. Always check for any off smells before using. You can make the eggnog espresso mixture ahead of time. Mix everything except the ice and whipped cream. Store it in the fridge for up to two days. When you’re ready to serve, shake it with ice. This keeps the drink cold and frothy. Pre-chill your glasses for extra flair. Some ingredients do not store well. Whipped coconut cream can lose its texture. If added ahead, it might separate or become flat. The freshness of espresso fades quickly after brewing. Always brew it just before serving. This helps keep the flavor bright and bold. The Eggnog Espresso Martini is a creamy cocktail. It blends rich eggnog with espresso. This drink is festive, perfect for holiday parties. It has a cozy feel that makes it special. You can serve it at Christmas or New Year’s Eve. It’s a fun twist on the classic martini. Yes, you can use decaf espresso. This option is great for those avoiding caffeine. The flavor will still be rich and smooth. Just remember, the taste may change slightly. Decaf can be less bold, but it still works well. To make a non-alcoholic version, skip the alcohol. Use more eggnog and espresso. You can add a splash of vanilla extract for flavor. This keeps the drink tasty and fun for kids. Use whipped coconut cream on top for a sweet touch. If you don’t have maple syrup, try honey. Honey adds sweetness and a floral note. Agave syrup is another option for a smooth taste. Each sweetener will change the flavor a bit. Consider your taste when choosing a substitute. This blog post has shared how to create a delightful Eggnog Espresso Martini. We covered the key ingredients, clear steps, and helpful tips to make your cocktail shine. You can adjust flavors and even make it non-alcoholic with ease. Remember, serving this drink in chilled glasses enhances its taste. Explore variations to find the perfect mix for your holiday gatherings. Enjoy this festive drink and impress your friends with your skills!

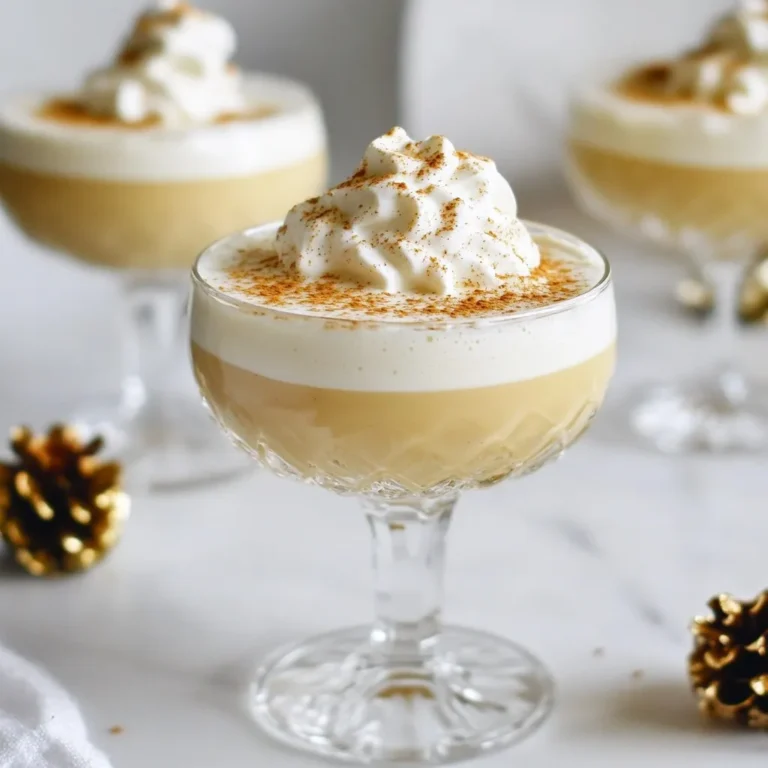
Eggnog Espresso Martini Festive Holiday Delight

- 2 cups water - 2 black tea bags (or 2 tablespoons loose black tea) - 1 cup milk (dairy or any plant-based alternative) - 1 tablespoon pure vanilla extract - 1 teaspoon ground cinnamon (plus additional for garnish) - 2 tablespoons honey or maple syrup (adjust according to your taste preference) - A pinch of salt - Water: You can use milk instead of water for a creamier drink. - Black tea: Try green tea or chai for a unique twist. - Milk: Almond, oat, or soy milk make great plant-based options. - Vanilla extract: Use vanilla bean paste or fresh vanilla pods for a rich flavor. - Ground cinnamon: Nutmeg or cardamom can add a different spice flavor. - Honey or maple syrup: Agave nectar or stevia are good alternatives. - Water: Keeps you hydrated and is the base for the tea. - Black tea: Contains antioxidants that may support heart health and boost metabolism. - Milk: Provides calcium and protein, adding creaminess to the drink. - Vanilla extract: Offers a sweet aroma that can help reduce stress. - Ground cinnamon: May help regulate blood sugar and has anti-inflammatory properties. - Honey or maple syrup: Natural sweeteners that provide quick energy and have health benefits. - Salt: Enhances flavors and balances sweetness, making the drink taste better. {{ingredient_image_2}} To start, grab a medium-sized pot. Pour in 2 cups of water. Place the pot on medium heat and bring the water to a vigorous boil. This step is crucial. Boiling water helps extract the full flavor from the tea. Once the water bubbles, promptly take the pot off the heat. Next, add 2 black tea bags or 2 tablespoons of loose black tea into the hot water. Let it steep for about 4-5 minutes. This time allows the tea to develop a rich flavor. The longer you steep, the stronger the taste. After steeping, remove the tea bags or strain out the loose tea leaves. Now, in a separate saucepan, gently warm 1 cup of milk over low heat. You want it to be steaming, but don't let it boil. Once the milk is warm, combine it with the steeped tea. Add 1 tablespoon of pure vanilla extract, 1 teaspoon of ground cinnamon, and 2 tablespoons of honey or maple syrup to the tea. A pinch of salt enhances the flavors too. Stir well until everything mixes nicely. For serving, carefully pour the tea mixture into mugs. To make it special, sprinkle a little ground cinnamon on top. This adds a nice touch and extra flavor. You can even add a cinnamon stick in each cup for more flair. Enjoy your warm, delightful vanilla cinnamon milk tea! To make the best vanilla cinnamon milk tea, focus on water temperature. Bring your water to a strong boil. This helps release the tea's rich flavors. Steep your black tea for about 4-5 minutes. If you steep it too long, the tea can taste bitter. Sweetness is personal. Start with 2 tablespoons of honey or maple syrup. Stir well and taste. If you want it sweeter, add more. You can also try agave syrup or brown sugar. Each option adds a unique flavor. Serve your tea in pretty mugs to make it special. Add a cinnamon stick in each cup for flair. This gives an extra hint of flavor while you sip. You can also sprinkle some extra cinnamon on top. This not only looks good but enhances the taste. Enjoy your beautiful drink! Pro Tips Use Fresh Ingredients: Freshly brewed black tea and high-quality vanilla extract will enhance the overall flavor of your milk tea, making it richer and more aromatic. Adjust Sweetness: Feel free to adjust the amount of honey or maple syrup according to your taste preferences; start with less and add more gradually to avoid over-sweetening. Experiment with Milk: Try different types of milk, such as almond, oat, or coconut, to find the flavor profile that you enjoy the most in your vanilla cinnamon milk tea. Enhance Presentation: Garnish with a cinnamon stick and a sprinkle of ground cinnamon on top for an elegant touch that also adds extra flavor as you sip. {{image_4}} You can use any milk you like for this drink. Dairy milk gives a creamy taste. Whole milk makes it richer, while skim milk feels lighter. If you prefer plant-based milk, try almond or oat milk. Almond milk adds a nutty twist. Oat milk has a smooth texture. Each choice changes the flavor, so feel free to experiment. Want to spice things up? You can add more flavor! Nutmeg adds warmth. Just a pinch can make a big difference. Cardamom gives a sweet, floral note. Mix in a little for a unique taste. You can also try a splash of coconut milk for a tropical vibe. These extras let you create your own signature drink. Craving something cold? Let’s make iced vanilla cinnamon milk tea! Start with the same steps but cool the tea. After steeping, remove the tea bags. Allow the tea to cool down completely. Then, pour it over ice. Mix in the milk, vanilla, and sweetener just like before. This creates a refreshing drink for hot days. Enjoy your iced version on a sunny afternoon! You can store leftover vanilla cinnamon milk tea in the fridge. Use an airtight container to keep it fresh. Make sure it cools down to room temperature first. This will help prevent condensation and keep the flavors intact. Leftovers should be consumed within three days for the best taste. When you are ready to enjoy your tea again, gently reheat it on the stove. Use low heat to avoid boiling. Stir it well to mix any settled flavors. You can also use a microwave. Heat it in short bursts of 30 seconds. Stir between each burst to keep it even. The shelf life of your ingredients varies. Here’s a quick guide: - Black tea bags: Keep them in a cool, dry place. They last about two years. - Milk: Check the expiration date. Dairy milk lasts about a week after opening. Plant-based milk can last 7-10 days after opening. - Vanilla extract: It stays good for several years in a cool spot. - Ground cinnamon: This spice lasts for about three years if kept dry and cool. Storing your ingredients properly will help you make delicious tea for a long time. Yes, you can use green tea instead of black tea. However, the flavor will change. Green tea is lighter and more delicate. It has less caffeine too. If you choose green tea, steep for 3 minutes. This will give you a nice taste without bitterness. Vanilla cinnamon milk tea has several health benefits. Cinnamon can help lower blood sugar. It may also reduce inflammation. Vanilla adds a nice flavor and can improve mood. Milk provides calcium for strong bones. Honey or maple syrup adds natural sweetness and energy. You can find vanilla cinnamon tea blends at many stores. Look in the tea aisle or health food section. Online shops like Amazon also offer a variety. Be sure to check the ingredient list for quality. You learned about the key ingredients in vanilla cinnamon milk tea, how to make it, and tips for a perfect brew. You now know how to customize flavors and enjoy variations like iced milk tea. Remember to store leftovers properly and reheat with care to maintain taste. This drink is not just delicious; it offers health benefits, too. Try different ingredients and enjoy your unique version of this cozy beverage!

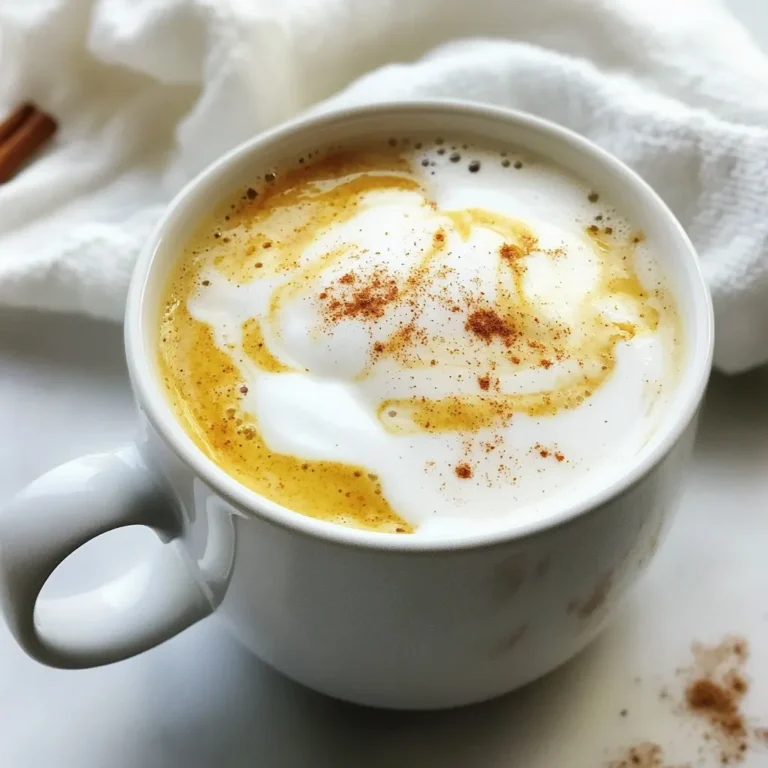
Vanilla Cinnamon Milk Tea Flavorful and Simple Recipe

To make a No-Bake Oreo Cheesecake, gather these simple ingredients: - 24 Oreo cookies, finely crushed - 5 tablespoons unsalted butter, melted - 2 cups cream cheese, softened - 1 cup powdered sugar, sifted - 1 teaspoon pure vanilla extract - 1 cup heavy whipping cream, chilled - 12 Oreo cookies, coarsely chopped (for filling and garnish) These ingredients create a rich and creamy dessert. The crushed Oreos form a delightful crust. The cream cheese gives the cheesecake its smooth texture. Powdered sugar adds sweetness without grit. Heavy cream is key for a light and fluffy filling. Finally, coarsely chopped Oreos add crunch and flavor. Make sure to use room-temperature cream cheese. This helps it blend easily. Chilled heavy cream whips better, giving your cheesecake its airy feel. When you gather these ingredients, you set the stage for a delightful treat. Enjoy each step as you create this delicious dessert. {{ingredient_image_2}} To start, gather your ingredients. You need 24 Oreo cookies and 5 tablespoons of melted butter. - Crush the Oreo cookies in a large bowl until they are fine crumbs. - Add the melted butter and mix until all crumbs are coated. - Press this mixture into the bottom of a 9-inch springform pan. Use your fingers or a measuring cup to flatten it evenly. - Place the pan in the refrigerator to chill while you make the filling. Next, we make the creamy filling. You will need 2 cups of softened cream cheese. - In a large bowl, beat the cream cheese with an electric mixer. Mix until it is smooth and creamy. - Gradually add in 1 cup of sifted powdered sugar and 1 teaspoon of pure vanilla extract. - Continue mixing until everything is well blended. Now it's time to whip the cream. You will need 1 cup of chilled heavy whipping cream. - In a separate bowl, use an electric mixer to whip the heavy cream. - Whip until stiff peaks form, which should take about 3 to 5 minutes. - Be careful not to over-whip, or it will become grainy. Now, let’s combine everything. - Gently fold the whipped cream into the cream cheese mixture using a spatula. - Add 12 coarsely chopped Oreo cookies to the cheesecake filling. Fold them in carefully. - Pour the filling over the prepared crust. Smooth the top with a spatula. - Cover the cheesecake and refrigerate for at least 4 hours, or overnight for best results. To get the right texture, avoid over-mixing the whipped cream. When you fold it in, use gentle motions. This keeps the mixture light and airy. If you mix too much, the whipped cream loses its fluffiness. Chilled ingredients play a big role in achieving the perfect texture. Make sure your cream cheese and heavy cream are cold before you start. Chilling helps them blend smoothly. This ensures a creamy, rich filling that melts in your mouth. Garnishing can elevate your cheesecake’s look. Here are some ideas for topping: - Crushed Oreo cookies add a nice crunch. - Fresh whipped cream makes it look inviting. - Drizzling chocolate sauce gives it a touch of luxury. For a stunning presentation, serve the cheesecake on a decorative plate. Add dollops of whipped cream and a few whole Oreos on the side. This not only looks great but also adds to the flavor. Pro Tips Use Room Temperature Cream Cheese: Ensure your cream cheese is at room temperature before mixing. This helps achieve a smoother filling without lumps. Chill the Bowl for Whipping Cream: For an even better whipped cream, chill your mixing bowl and beaters in the freezer for about 10 minutes before whipping. This keeps the cream cold and helps it whip up faster. Don’t Over-Mix: When folding the whipped cream into the cream cheese mixture, be gentle. Over-mixing can deflate the whipped cream, resulting in a denser cheesecake. Let it Chill Overnight: For the best results, allow your cheesecake to set in the refrigerator overnight. This enhances the flavors and ensures a firmer texture for slicing. {{image_4}} You can change the flavor of your No-Bake Oreo Cheesecake to keep things exciting. Here are two fun ideas: - Chocolate Oreo Cheesecake: Instead of using regular Oreos, use chocolate Oreos in the crust and filling. This adds a rich chocolate flavor. You can also mix in some melted chocolate for extra depth. - Mint Oreo Cheesecake: Swap regular Oreos for mint Oreos. This will give your cheesecake a refreshing minty twist. You can even add a few drops of mint extract to enhance the flavor. You can enjoy this delicious dessert while making healthier choices. Here are some options: - Using Low-Fat Cream Cheese: Replace regular cream cheese with low-fat cream cheese. This cuts down on calories while still keeping a creamy texture. - Gluten-Free Oreo Options: If you need a gluten-free version, look for gluten-free Oreos. They work just as well in the crust and the filling. This way, everyone can enjoy a slice! To keep your no-bake Oreo cheesecake fresh, store it in the fridge. Wrap it tightly in plastic wrap or place it in an airtight container. This keeps moisture out and keeps the cheesecake tasting great. If you want to save it for later, freezing is a good option. Cut the cheesecake into slices and wrap each piece in plastic wrap. Place them in a freezer-safe bag or container. This way, you can enjoy a slice anytime! In the fridge, your cheesecake will last about 5 days. Make sure to check for any signs of spoilage. If you see mold or if it smells off, it’s time to throw it away. If you freeze it, the cheesecake can last up to 2 months. Just remember, the texture may change slightly after freezing, but the taste will still be delicious! Yes, you can use different cookies! Here are some great options: - Chocolate chip cookies - Graham crackers - Nutter Butter cookies These cookies change the flavor but keep the fun. Just crush them the same way. Chill the cheesecake for at least 4 hours. For the best taste, chill it overnight. This time lets the cheesecake set firmly and improves the flavor. Yes, you can make a vegan version! Here are some tips: - Use vegan cream cheese instead of regular cream cheese. - Substitute heavy cream with coconut cream or a vegan whipping cream. - Choose vegan cookies, like Oreos or specific brands that are dairy-free. These swaps keep the cheesecake delicious while fitting a vegan diet. This blog offered a detailed guide on making an Oreo cheesecake. We covered the key ingredients needed and walked through each step, from preparing the crust to adding the fluffy filling. Remember to chill your cheesecake to set properly and consider fun variations like chocolate or mint flavors. With a few helpful tips, you can achieve the perfect texture and impress others with your presentation. Enjoy your cheesecake journey!

No-Bake Oreo Cheesecake Decadent Dessert Recipe

- Ground beef or turkey: The base of our meatballs, you can choose beef or turkey. Both work great in this recipe, giving a nice flavor and texture. - Breadcrumbs: They help hold the meatballs together. I like using seasoned breadcrumbs for an extra kick. They add flavor and keep meatballs moist. - Fresh herbs and aromatics: I use parsley and onion. They bring freshness to the meatballs and make every bite tasty. Chopping them finely lets their flavors blend well. - Cranberry sauce varieties: You can use homemade or store-bought. Both add a sweet and tangy flavor that pairs perfectly with the meatballs. - Soy sauce: This adds depth to the sauce. Low-sodium soy sauce works best. It enhances the meat's savory notes without overpowering. - Additional sauce elements: I add Dijon mustard and apple cider vinegar. Mustard gives a nice sharpness, and vinegar adds balance. Brown sugar adds sweetness, rounding out the flavors. - Substitutions for dietary restrictions: If you're avoiding meat, you can use ground chicken or a plant-based option. - Gluten-free options: Use gluten-free breadcrumbs to keep this dish safe for those with gluten sensitivities. - Vegetarian variations: To make this dish vegetarian, swap meat for chickpeas or lentils. Blend them with breadcrumbs and herbs, and follow the same steps for cooking. {{ingredient_image_2}} In a large bowl, combine the ground beef, breadcrumbs, onion, parsley, egg, garlic powder, salt, and pepper. Use your hands or a spatula to mix. You want to mix until everything is well blended. But don’t overdo it; that can make the meatballs tough. The texture is key for great meatballs. You want them to be soft but hold their shape. If they are too dry, they will fall apart while cooking. If they are too wet, they may not form well. Shape the mixture into small meatballs. Aim for about one inch in size. This gives you around 20 to 25 meatballs. Uniform size helps them cook evenly. In a separate bowl, whisk together the cranberry sauce, soy sauce, Dijon mustard, brown sugar, and apple cider vinegar. Use a steady motion to mix until it is smooth. This helps blend the flavors well. You can adjust the sweetness and tartness to your taste. If you like it sweeter, add more brown sugar. For more tartness, a little extra apple cider vinegar works well. Next, set up your slow cooker. Place the meatballs gently in the cooker. Pour the cranberry sauce mixture over them. Make sure each meatball is coated well. Cook on low for 4 to 6 hours, or on high for 2 to 3 hours. This slow cooking makes the meatballs tender and full of flavor. Once done, stir the meatballs carefully in the sauce. This ensures every meatball gets an even coat of sauce before serving. To make juicy meatballs, avoid dryness by not overcooking them. The slow cooker helps, but keep an eye on the time. For flavor, mix fresh parsley and garlic powder into the meat. These add a nice taste and aroma. You can serve these meatballs with fluffy rice or creamy mashed potatoes. Both sides soak up the sauce well. For a beautiful plate, drizzle some cranberry sauce on top. A sprinkle of fresh parsley adds color and freshness, making it eye-catching. One common mistake is overmixing the meatball mixture. This can make them tough. Mix just until combined. Another pitfall is under-seasoning the sauce. Taste it before cooking to ensure it has enough flavor. Adjust as needed for a perfect balance. Pro Tips Use Fresh Ingredients: Fresh herbs and quality meat will elevate the flavor of your meatballs significantly. Opt for fresh parsley and high-quality ground beef or turkey. Experiment with Seasonings: Feel free to add spices like cumin, paprika, or even chili flakes to the meat mixture for an extra kick of flavor. Make Ahead: These meatballs can be made ahead of time and frozen. Just thaw them and cook in the sauce when you’re ready to serve! Perfect Pairings: Pair these meatballs with creamy mashed potatoes or fluffy rice to soak up the delicious sauce, making for a complete and satisfying meal. {{image_4}} You can swap ground beef for ground turkey. Turkey gives a lighter flavor. You can also use ground chicken if you prefer. Each option still holds up well in the sauce. If you're gluten-free, use gluten-free breadcrumbs. These work just as well for binding. You can also try oats as a substitute. Just make sure to use quick oats for the best texture. To add some heat, consider spices like red pepper flakes or cayenne. Start small and taste as you go. This way, you can find the right level for your family. Balancing sweet and savory is key. If you prefer more sweetness, add extra brown sugar. For a savory kick, try adding more soy sauce. This balance makes the dish more complex and enjoyable. If you own an Instant Pot, you can prepare this dish there. Use the sauté function for the meatballs. Then, pressure cook them with sauce for about 10 minutes. This method speeds up the cooking time. For an oven-baked option, preheat to 400°F (200°C). Place the meatballs on a baking sheet. Bake for 20-25 minutes, then add the sauce and bake for another 10 minutes. This gives a nice caramelization on the meatballs. To store leftover slow cooker cranberry meatballs, let them cool first. Place them in an airtight container. You can store them in the fridge for up to four days. If you want to keep them longer, freeze them. Use freezer-safe bags, and remove as much air as you can. Label the bags with the date for easy tracking. When you reheat meatballs, you want to keep them juicy. The best method is to use the microwave. Place them in a bowl, cover with a damp paper towel, and heat in short bursts. Stir often to heat evenly. You can also use the stove. Just add a splash of water or sauce to a pan, and heat on low. Always check that they are warm throughout. Cooked meatballs last about four days in the fridge. If frozen, they can last for up to three months. Watch for signs of spoilage. If you see any mold or smell a sour odor, it's best to toss them out. Always trust your senses to keep your meals safe. Yes, you can use frozen meatballs. They save time and work well. Just place them in the slow cooker. Pour the sauce over them and cook as directed. The meatballs will heat through nicely. To add heat, try these options: - Add red pepper flakes to the sauce. - Mix in some hot sauce with the meatball mixture. - Use spicy mustard instead of Dijon. These will give your meatballs a nice kick. Serve your cranberry meatballs with: - Fluffy rice or creamy mashed potatoes - Toasted bread or buns for meatball sandwiches - A fresh salad for a light touch These sides complement the sweet and savory flavors. Yes, you can prep in advance. Mix the meatball ingredients and shape them. Store them in the fridge for up to a day. You can also prepare the sauce ahead and keep it in the fridge. Just cook everything together when you're ready. Check the meatballs for doneness with a meat thermometer. The center should reach 165°F. If you don’t have one, cut a meatball in half. The inside should be no longer pink and juices should run clear. This blog post covered everything you need to know about slow cooker cranberry meatballs. We explored the key ingredients, sauce components, and dietary options. I shared step-by-step instructions to ensure perfect meatballs and tips to avoid common mistakes. Remember, flavor and texture are essential. Don’t shy away from experimenting with variations and serving ideas. With the right techniques, you can impress anyone with this dish. Enjoy making these meatballs and savor every bite!

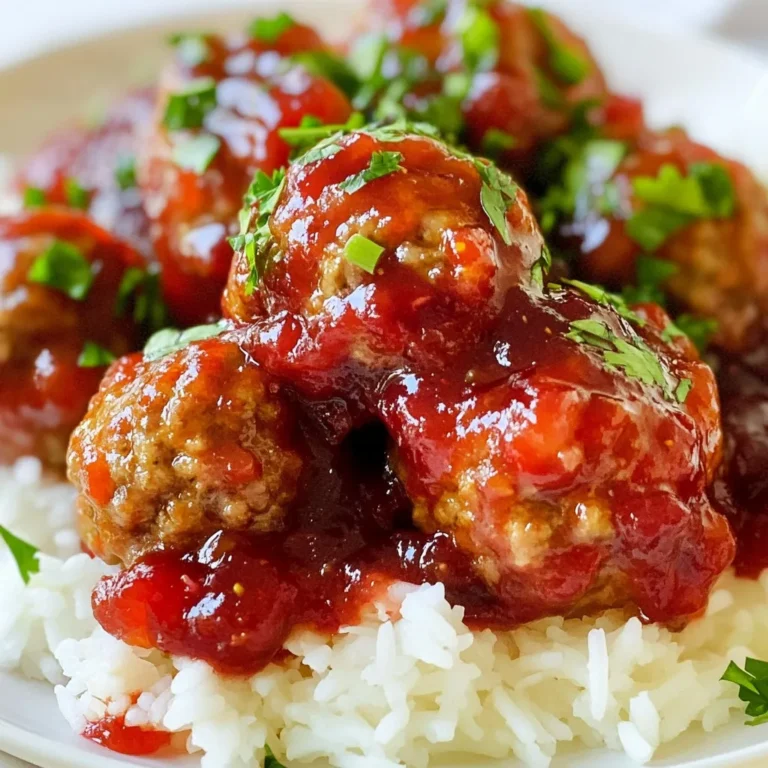
Slow Cooker Cranberry Meatballs Flavorful Dinner Idea

- 4 boneless, skinless chicken breasts - 1 can (10.5 oz) cream of chicken soup - 1 can (10.5 oz) cream of mushroom soup - 1 cup chicken broth - 1 cup long-grain white rice - 1 cup frozen mixed vegetables - 1 teaspoon garlic powder - 1 teaspoon onion powder - 1 teaspoon dried thyme - Salt and pepper to taste - 1 cup shredded cheddar cheese I love this recipe because it uses simple items. You can find these ingredients at any store. The main ingredients are the stars of this dish. The chicken breasts are juicy and tender after baking. The cream soups add a rich flavor and smooth texture. For the additional ingredients, the chicken broth makes the rice fluffy. Long-grain white rice cooks well in this dish. The frozen mixed vegetables add color and nutrients. The seasoning is key to flavor. Garlic powder gives a nice taste. Onion powder and dried thyme add depth. Do not forget salt and pepper; they enhance everything. Top the casserole with shredded cheddar cheese. It melts beautifully and adds a delicious crust. This dish is comfort food at its best, and you will enjoy every bite! {{ingredient_image_2}} - Preheat your oven to 350°F (175°C). - Grease a large casserole dish. Spread uncooked rice evenly on the bottom. - In a big bowl, mix the cream of chicken soup, cream of mushroom soup, and chicken broth. - Add garlic powder, onion powder, dried thyme, and a pinch of salt and pepper. Stir until smooth. - Pour the soup mixture over the rice. Make sure the rice is fully covered. - Place the chicken breasts on top. Season them with salt, pepper, and thyme. - Scatter frozen mixed vegetables around the chicken. Cover the dish tightly with foil. - Bake the casserole covered for 1 hour. Do not peek to keep moisture in. - After 1 hour, take off the foil. Sprinkle cheese on top and bake uncovered for 15-20 minutes. - Wait for the cheese to melt and get bubbly before serving. Not peeking while the casserole bakes is key. When you open the oven, heat escapes. This can change how your dish cooks. Letting it bake undisturbed helps the rice absorb the flavors. A good cheese crust comes from baking it uncovered at the end. The cheese needs direct heat to melt and bubble nicely. To ensure even cooking of chicken, make sure they are all the same size. If they vary, some may cook faster than others. Using foil helps keep moisture inside. This makes your casserole creamy and tasty. Cover tightly, so steam doesn't escape during the first hour of baking. Garnish with fresh herbs like parsley or thyme. This adds color and a fresh taste. Pair the casserole with a simple salad for crunch. A side of green beans also works well. Enjoy your meal warm and fresh from the oven! Pro Tips Cook the Rice First: For a softer texture, consider partially cooking the rice before layering it in the casserole. This will ensure it absorbs just the right amount of moisture during baking. Season the Chicken: Don’t skip seasoning the chicken breasts with salt, pepper, and herbs. This step enhances the overall flavor of the dish and prevents the chicken from tasting bland. Experiment with Vegetables: Feel free to swap out the frozen mixed vegetables for your favorites—such as bell peppers, broccoli, or zucchini—to customize the dish to your liking. Let it Rest: Allow the casserole to rest for 10 minutes after baking. This helps the layers set and makes it easier to serve without falling apart. {{image_4}} You can switch out the chicken for other proteins. Tofu works great for a vegetarian option. Firm tofu absorbs flavors well. Turkey is another tasty choice. It adds a different twist to the dish. You can also try different types of cheese. Cheddar is classic, but mozzarella gives a nice stretch. Pepper jack adds a spicy kick. Experiment with whatever cheese you love. Want to amp up the flavor? Try adding spices like paprika or cayenne. Paprika adds a warm, smoky taste. Cayenne brings heat, so use it sparingly if you prefer mild flavors. Incorporating more veggies can also enhance the dish. Broccoli adds crunch and color. Bell peppers bring sweetness and a vibrant look. Mix and match your favorite vegetables for a fun twist. If you need gluten-free options, look for gluten-free soup brands. Many stores offer gluten-free cream soups. This way, everyone can enjoy the casserole. For a low-calorie version, use skinless chicken thighs. You can also swap the cream soups for lighter alternatives. Making these changes keeps the dish satisfying while cutting calories. To store leftovers properly, let the casserole cool first. Once cooled, cut it into portions. Place each portion in an airtight container. This helps keep it fresh for up to three days in the fridge. For maximum freshness, choose containers made from glass or BPA-free plastic. Glass containers resist stains and odors better than plastic. When you’re ready to enjoy the leftovers, reheating is simple. You can use the oven or microwave. For the oven, preheat it to 350°F (175°C). Place the casserole in a dish and cover it with foil. Bake for about 20 minutes. This helps keep it moist. If using a microwave, heat on medium power. Stir every few minutes to avoid cold spots. To prevent sogginess, avoid adding extra liquid during reheating. You can freeze this casserole either before or after baking. If freezing before baking, assemble it as directed but don’t bake it. Wrap the dish tightly in foil and store it in the freezer for up to three months. When ready to bake, thaw it overnight in the fridge before cooking. If freezing after baking, let it cool completely, then wrap well. Thaw in the fridge before reheating for the best taste and texture. Can I make this casserole ahead of time? Yes, you can make this casserole ahead. Prepare it up to the point of baking. Cover and store it in the fridge overnight. Just remember to bake it longer if it’s cold from the fridge. What can I substitute for the cream of chicken soup? You can use cream of mushroom soup or homemade white sauce. You could also try a can of vegetable soup for a different flavor. These swaps keep the dish tasty and creamy. How can I adjust cooking time for larger portions? If you double the recipe, bake for about 1 hour and 15 minutes. Keep the casserole covered for the first hour. Check if the rice is tender before serving. What if my rice isn't fully cooked? If your rice isn't cooked, cover the dish and bake longer. Add a splash of chicken broth if it seems dry. This lets the rice soak up more liquid and finish cooking. Caloric breakdown per serving Each serving has about 400 calories. This includes the chicken, rice, and sauces. The cheese adds a rich flavor but also extra calories. How to make it healthier without sacrificing flavor Use low-fat soups or cheese to cut calories. Add more veggies like spinach or zucchini for nutrition. This keeps the dish healthy, tasty, and satisfying. This blog post covered a delicious chicken casserole recipe. You learned about the main and additional ingredients, key seasonings, and clear baking steps. I shared tips for perfecting your casserole and various ways to make it your own. Finally, I provided storage info and answered common questions. With these insights, you can easily make this meal. Your next family dinner can be fun and tasty. Enjoy cooking!

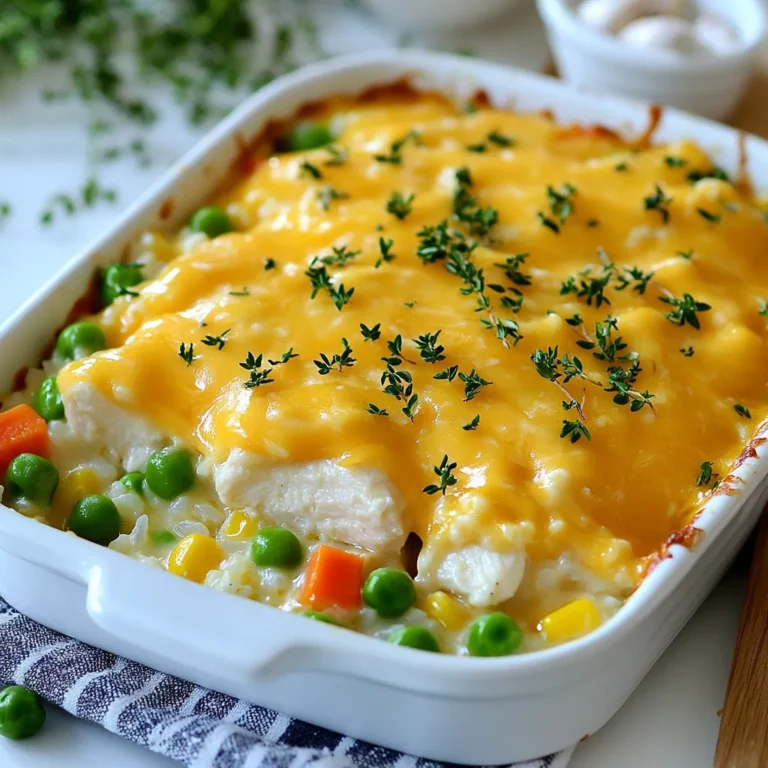
No-Peek Chicken Casserole Easy Comfort Food Dish

For my Keto Gingerbread Thumbprints, you will need the following ingredients: - 1 ½ cups almond flour - 1 teaspoon ground ginger - 1 teaspoon ground cinnamon - ½ teaspoon ground nutmeg - ¼ teaspoon baking soda - ¼ teaspoon salt - ¼ cup erythritol (or your preferred keto-friendly sweetener) - ½ cup unsalted butter, softened to room temperature - 1 large egg - 1 teaspoon vanilla extract - ½ cup sugar-free raspberry or strawberry jam (for filling) Each of these ingredients plays a key role in making the cookies delicious and keto-friendly. Ingredient Substitutions: - Sweeteners: You can swap erythritol with other keto sweeteners like monk fruit or stevia, but check the conversion ratios. - Nut Flour: If you cannot use almond flour, try coconut flour. Use less, as it's more absorbent. A good rule is to use ¼ cup of coconut flour for every 1 cup of almond flour. - Jam: For the filling, any sugar-free jam works great. Just ensure it's low in carbs. These choices keep your cookies tasty while staying true to your keto lifestyle. Enjoy crafting these delightful treats! {{ingredient_image_2}} 1. Prepping the oven and baking sheet: Start by preheating your oven to 350°F (175°C). This step ensures your cookies bake evenly. While the oven heats, line a baking sheet with parchment paper. This helps prevent sticking and makes cleanup easy. 2. Mixing dry ingredients: In a large mixing bowl, add 1 ½ cups of almond flour, 1 teaspoon of ground ginger, 1 teaspoon of ground cinnamon, ½ teaspoon of ground nutmeg, ¼ teaspoon of baking soda, ¼ teaspoon of salt, and ¼ cup of erythritol. Use a whisk or spoon to blend these ingredients well. This mixture should be lump-free. 3. Creaming butter and wet ingredients: In another bowl, take ½ cup of softened unsalted butter. Beat it with a hand mixer until it is light and creamy. Now, add 1 large egg and 1 teaspoon of vanilla extract. Mix until everything is smooth and fully combined. 4. Combining dry and wet mixtures: Gradually add the dry mix to the wet mix. Use a spatula or wooden spoon to stir until a dough forms. The dough should feel sticky but not unmanageable. 5. Shaping and filling the dough: Use a tablespoon to scoop out the dough. Roll each portion into a ball using your hands. Place them on the baking sheet, leaving about 2 inches between each ball. Press your thumb or a small spoon into the center of each ball to make a deep indentation. 6. Filling the thumbprints: Carefully fill each indentation with a small spoonful of sugar-free raspberry or strawberry jam. Be cautious not to overfill, as the jam may bubble over while baking. 1. Specific baking time and temperature: Place the baking sheet in the preheated oven. Bake for 10 to 12 minutes. The edges of the cookies should turn a lovely golden brown when they are done. 2. Cooling procedure post-baking: Once baked, take the baking sheet out of the oven. Let the thumbprints cool for a few minutes on the sheet. After that, gently transfer them to a wire rack to cool completely. This step helps them firm up and makes them easier to handle. To make perfect Keto Gingerbread Thumbprints, the dough consistency is key. You want the dough to be slightly sticky but easy to handle. If it feels too dry, add a drop of water. If it’s too wet, add a bit more almond flour. Avoid overfilling your thumbprints with jam. A small spoonful is best. If you add too much, the jam bubbles over while baking. This can lead to a messy sheet and less pretty cookies. For garnishing, use powdered erythritol to dust the tops of your thumbprints. This adds a festive feel. Arrange them on a colorful plate for a lovely display. You can also add fresh raspberries beside the cookies. The bright color makes the plate pop. For serving, these cookies pair wonderfully with a warm cup of herbal tea or coffee. Enjoy them fresh out of the oven or after they cool completely! Pro Tips Chill the Dough: After mixing, let the dough chill in the refrigerator for about 30 minutes. This will help the cookies maintain their shape while baking. Jam Selection: Experiment with different flavors of sugar-free jam to customize your thumbprints. Try lemon curd or blueberry for a delightful twist! Butter Temperature: Ensure your butter is at room temperature for easier mixing, resulting in a smoother dough that blends well with the other ingredients. Storage Tips: Store your thumbprints in an airtight container at room temperature for up to a week, or in the fridge for longer freshness. {{image_4}} You can easily switch up the flavors in these Keto Gingerbread Thumbprints. Try adding spices like pumpkin spice or a hint of nutmeg for a warm touch. Vanilla extract can also give your cookies a lovely aroma. These options make your cookies stand out at any holiday gathering. For the filling, consider using different sugar-free jams. Raspberry and strawberry are great, but you can explore flavors like blueberry or peach. Just make sure they are sugar-free to keep the recipe keto-friendly. Experimenting with these flavors can lead to delightful surprises! If you need nut-free options, you can swap out almond flour. Try sunflower seed flour or coconut flour. Both can work well, but be sure to adjust the amounts since they absorb moisture differently. For a dairy-free version, use coconut oil instead of butter. It gives a nice texture and flavor. You can also choose a plant-based butter as an alternative. If you want to go vegan, replace the egg with a flax egg. Mix one tablespoon of ground flaxseed with three tablespoons of water. Let it sit for five minutes until it thickens. This will help bind your dough, just like an egg would. With these variations, everyone can enjoy these tasty treats! To keep your Keto Gingerbread Thumbprints fresh, store them in an airtight container. This helps them stay soft and tasty. Place a piece of parchment paper between layers if you stack them. For longer storage, you can freeze these cookies. First, let them cool completely. Then, wrap each thumbprint in plastic wrap. Place them in a freezer-safe bag. They will last for up to three months. Just thaw them in the fridge before enjoying. When stored properly at room temperature, these thumbprints last about five days. If you keep them in the fridge, they can last up to two weeks. For frozen cookies, remember to consume them within three months for the best taste and texture. Can I use a different sweetener? Yes, you can use other sweeteners. Try monk fruit or stevia. Each sweetener has a different sweetness level. Adjust the amount to your taste for the best results. How can I make these thumbprints ahead of time? You can prepare the dough in advance. Store it in the fridge for up to three days. Just shape the thumbprints and fill them with jam before baking. This keeps them fresh and tasty. Are Keto Gingerbread Thumbprints suitable for a gluten-free diet? Yes! These thumbprints use almond flour, which is gluten-free. This makes them perfect for those who cannot eat gluten. Enjoy a delightful treat without worry. What can I use instead of almond flour? If you need a nut-free option, try sunflower seed flour. It mimics almond flour well. Coconut flour is another option, though you will need less. Adjust the liquids in the recipe when using it. In this article, we explored how to make Keto Gingerbread Thumbprints. We covered key ingredients, step-by-step baking instructions, and essential tips for success. You learned about flavor variations and how to store your treats to keep them fresh. Remember, baking can be fun and easy with the right guidance. Don’t hesitate to try different fillings or spices. Enjoy your baking adventure and share these yummy cookies with family and friends.

Keto Gingerbread Thumbprints Delightful Holiday Treat

- 2 cups homemade eggnog (or store-bought for convenience) - 1 cup whole milk - 1/2 cup freshly whipped cream - 1 teaspoon pure vanilla extract - 1/2 teaspoon ground nutmeg (plus extra for garnish) - 1 cinnamon stick - Dark chocolate shavings for garnish This recipe makes four servings. Each serving has a rich and creamy taste. For larger groups, you can double the ingredients. If you want fewer servings, cut the recipe in half. Always adjust the spices to your taste. Keeping the balance of flavors is key to a great drink. Using fresh eggnog will give you a better flavor. However, store-bought eggnog works just as well for quick preparation. Enjoy your Eggnog Brandy Alexander with friends and family! {{ingredient_image_2}} Start by warming the eggnog. Pour 2 cups of homemade or store-bought eggnog into a medium saucepan. Place the pan over medium heat. You want to gently warm it without letting it boil. This keeps the eggnog smooth and creamy. While the eggnog warms, mix the other ingredients. Take a bowl and add 1 cup of whole milk, 1/2 cup of freshly whipped cream, 1 teaspoon of pure vanilla extract, and 1/2 teaspoon of ground nutmeg. Whisk these together. You want to mix until it froths slightly, creating a light and airy base. Now it's time to combine the mixtures. Slowly pour the warm eggnog into the milk mixture. Do this gradually to keep the cream from deflating. Stir gently as you mix them. This step is key. A smooth blend will ensure a rich drink. After combining, return the mixture to the saucepan. Heat it over low heat for a few minutes. Stir frequently to keep the temperature even. Remember, do not let it boil. This helps maintain the lovely texture of your drink. When the drink is warm and aromatic, turn off the heat. Carefully pour it into festive mugs. Fill each mug to your desired level. For the final touch, sprinkle some extra ground nutmeg on top. This adds a lovely aroma. Place a cinnamon stick in each mug for a cozy look. Finish with dark chocolate shavings for that rich appeal. Enjoy your delicious Eggnog Brandy Alexander! Using fresh ingredients makes a big difference in taste. Freshly whipped cream adds a light and airy feel. Always choose the best quality milk you can find. Ground nutmeg is key for flavor. It adds warmth and spice to your drink. Use whole nutmeg and grate it yourself for the best taste. This simple step boosts your drink’s richness. To keep the cream fluffy, whip it well but don’t overdo it. You want soft peaks, not stiff peaks. When mixing hot eggnog with the cream mixture, pour slowly. Stir gently to keep the whip intact. Avoid boiling the mixture at any point. Boiling makes it lose its creamy texture and can ruin your drink. A creative garnish can elevate your drink. Try adding a sprinkle of ground nutmeg on top. It looks great and adds flavor. A cinnamon stick is a lovely touch for stirring. For a fun twist, add dark chocolate shavings. They not only look nice but also taste amazing. Serve in festive mugs for holiday cheer. This drink is perfect for cozy nights or holiday gatherings. Pro Tips Choose Quality Eggnog: Whether homemade or store-bought, opt for a high-quality eggnog made with real eggs and cream for the best flavor. Whip Cream Fresh: For a fluffy texture, always whip your cream just before incorporating it into the recipe, ensuring it maintains its volume. Garnish Creatively: Experiment with garnishes like a sprinkle of cocoa powder or crushed peppermint candies for a festive twist on presentation. Serve Warm: This drink is best served warm, so keep it on low heat until you're ready to pour for the ultimate cozy experience. {{image_4}} You can switch up the brandy in your Eggnog Brandy Alexander. Whiskey gives a warm kick. Rum adds sweetness. Both choices keep the drink festive and fun. Want to add depth? Try a splash of coffee liqueur. It adds a rich flavor and pairs well with the creaminess. This small change can make your drink a true treat. Not everyone wants alcohol, and that’s okay! You can make a great mocktail too. Use non-alcoholic eggnog as your base. It tastes just as good without the spirits. Want an even creamier drink? Mix in some milk and cream. You can also try using coconut milk for a fun twist. It adds a tropical vibe and makes it special. Don’t be shy about adding spices! A pinch of cinnamon or ginger can elevate your drink. Seasonal spices create a warming effect, perfect for cold days. You can also adapt this drink for different holidays. For Halloween, add pumpkin spice. For Easter, use a hint of vanilla bean. Each season brings a chance to try new flavors in your Eggnog Brandy Alexander. To keep your Eggnog Brandy Alexander fresh, follow these steps: - Use an airtight container. - Pour any leftover drink into the container. - Seal it tightly to lock in flavor. - Place the container in the fridge. This method helps keep your drink creamy and tasty. If you used homemade eggnog, it is best to consume it within a few days. The Eggnog Brandy Alexander stays good for up to three days in the fridge. After that, the taste and texture may change. Look out for these signs of spoilage: - Sour smell or taste. - Changes in color or texture. - Separation of liquids. If you notice any of these signs, it's best to throw it away. Enjoy your drink while it’s fresh for the best taste! Eggnog Brandy Alexander has a few key ingredients that create its rich flavor. Here’s what you need: - 2 cups homemade eggnog (or store-bought for ease) - 1 cup whole milk - 1/2 cup freshly whipped cream - 1 teaspoon pure vanilla extract - 1/2 teaspoon ground nutmeg (plus extra for garnish) - 1 cinnamon stick - Dark chocolate shavings for garnish The blend of creamy eggnog with milk and whipped cream gives it a smooth texture. The vanilla and nutmeg add warmth. The cinnamon stick and chocolate shavings make it look festive and appealing. Yes, you can prepare it ahead. Here are some tips: - Make the eggnog base a day before. Keep it in the fridge. - Mix the milk, cream, vanilla, and nutmeg just before serving. This keeps the cream fluffy. - Reheat the eggnog mix gently on the stove. Avoid boiling to keep the texture nice. Planning ahead can save time on busy days. Just remember to garnish when you serve! You can easily make this drink your own. Here are some ideas: - Swap brandy for whiskey or rum for different flavors. - Add a splash of coffee liqueur for a rich twist. - Try different spices like cinnamon or cloves for a unique taste. - For a non-alcoholic version, use a non-alcoholic eggnog or milk base. Getting creative with your Eggnog Brandy Alexander can make it special for your guests! This blog post provided a clear guide on making Eggnog Brandy Alexander. We covered ingredients, measurements, and step-by-step instructions. I shared tips on flavor, texture, and presentation, along with variations for every taste. Remember, using fresh ingredients and good mixing makes all the difference. Also, be creative with garnishes for a fun touch. Whether you enjoy it with or without alcohol, this drink can be personalized to fit your needs. Now, get ready to impress your friends and family with your eggnog skills!

Eggnog Brandy Alexander Rich and Creamy Holiday Drink

To make Vegan Creamy Tomato Pasta, you'll need these key items: - 12 oz pasta of your choice (penne or spaghetti recommended) - 1 tablespoon olive oil - 1 medium onion, finely chopped - 3 cloves garlic, minced - 1 can (14 oz) diced tomatoes, undrained - 1 cup coconut cream (or cashew cream for a nut-free alternative) - 1 teaspoon dried basil - 1 teaspoon dried oregano - Salt and pepper, to taste - Fresh basil leaves for garnish You can enhance this dish with these optional ingredients: - Nutritional yeast (for a cheesy flavor boost) - Red pepper flakes (for some heat) - Fresh herbs like parsley or thyme If you need to swap some items, here are some ideas: - Use gluten-free pasta for a gluten-free option. - Substitute olive oil with avocado oil for a different taste. - Replace coconut cream with silken tofu for a lower fat option. - Use fresh tomatoes instead of canned for a fresher flavor. These ingredients make this dish rich and satisfying. Feel free to mix and match based on what you have. Enjoy experimenting! {{ingredient_image_2}} To start, grab a large pot and fill it with salted water. Bring this water to a boil. Once it’s bubbling, add 12 ounces of your pasta choice. I love penne or spaghetti for this dish. Cook the pasta according to the package instructions until it is al dente. This usually takes about 8 to 10 minutes. Once the pasta is ready, drain it well. Make sure to save 1 cup of the pasta water for later. This helps make your sauce creamy! While the pasta cooks, heat 1 tablespoon of olive oil in a large skillet over medium heat. Add 1 medium onion that you’ve finely chopped. Sauté it for about 5 minutes. You want the onion to become soft and fragrant. Next, stir in 3 minced garlic cloves. Cook for another minute, stirring often to keep the garlic from burning. This step fills your kitchen with amazing smells! Now it’s time to add flavor. Carefully pour in a 14-ounce can of diced tomatoes, undrained, into the skillet with the onions and garlic. Stir everything together and let it simmer for about 5 minutes. This helps the flavors mix well. After that, lower the heat to medium-low. Add 1 cup of coconut cream (or cashew cream for a nut-free option). Stir until the sauce is smooth and creamy. If it’s too thick, add some of that reserved pasta water, a little at a time, until it reaches your desired consistency. Once your sauce is ready, it’s time to mix it with the pasta. Gently fold the cooked pasta into the skillet with the creamy tomato sauce. Make sure all the pasta is coated evenly with that rich sauce. This step combines all the flavors into one delicious dish! When serving, plate the pasta in individual bowls. Garnish with fresh basil leaves for a pop of color and flavor. If you want a little cheesy taste, sprinkle some nutritional yeast over the top. This adds a nice depth to the dish. Enjoy your Vegan Creamy Tomato Pasta straight away for the best taste! To make sure your pasta is just right, follow these tips: - Use a large pot with plenty of water. This helps the pasta cook evenly. - Add salt to the water. This flavors the pasta from the inside out. - Cook the pasta until al dente. This means it should still have a slight bite. - Reserve some pasta water. It helps adjust the sauce later. You can tweak the creaminess and flavor easily: - For a creamier sauce, add more coconut cream or cashew cream. - If the sauce is too thick, mix in the reserved pasta water a little at a time. - Taste your sauce as you go. Adjust the salt, pepper, and herbs to your liking. - Nutritional yeast adds a cheesy note. Sprinkle it in for extra flavor. Storing and reheating your pasta can be simple: - Keep leftovers in an airtight container in the fridge. They should last up to three days. - To reheat, add a splash of water or cream. This helps revive the sauce's texture. - Heat gently on the stove or in the microwave. Stir often to avoid burning. - If you notice it thickens too much, add more water as needed. Pro Tips Perfect Pasta Texture: Always cook your pasta al dente. This means it should be firm to the bite, as it will continue to cook slightly when mixed with the hot sauce. Flavor Enhancement: For a deeper flavor, consider roasting your garlic and onions before adding them to the skillet. This adds a lovely caramelized note to your sauce. Adjusting Creaminess: If you want a creamier sauce, start with less pasta water and add more gradually. This way, you have better control over the sauce's consistency. Fresh Basil Boost: Add fresh basil at the end of cooking to preserve its vibrant flavor and color. This ensures your dish bursts with freshness upon serving. {{image_4}} You can easily make this dish nut-free. Simply swap coconut cream for cashew cream. To make cashew cream, soak 1 cup of cashews in water for at least two hours. Drain and blend them with 1 cup of water until smooth. This creates a rich and creamy sauce that fits perfectly in this dish. Want to boost your meal's health? Add vegetables! Toss in some spinach, zucchini, or bell peppers when you sauté onions and garlic. Just chop them small, so they cook quickly. These veggies not only add nutrients but also enhance the flavor and texture of your creamy tomato pasta. If you like a little kick, add some heat! You can mix in red pepper flakes or chopped jalapeños. Start with a small amount and taste as you go. This way, you find the perfect spicy balance for your creamy tomato pasta. Enjoy the burst of flavors! Vegan Creamy Tomato Pasta is rich in nutrients. It offers a good balance of carbs, healthy fats, and protein. The pasta gives you energy, while coconut cream adds healthy fats. The tomatoes provide vitamins like C and K, plus antioxidants. Garlic and onions boost your immune system and add flavor. Together, these ingredients make a wholesome meal that satisfies hunger. Each serving of this pasta dish has about 400-500 calories. This number can change based on the type of pasta and cream you use. Here’s a rough breakdown: - Pasta (12 oz): 300 calories - Olive oil (1 tbsp): 120 calories - Coconut cream (1 cup): 550 calories - Onion (1 medium): 45 calories - Tomatoes (14 oz can): 50 calories This dish serves four, making it easy to share. Here are some health benefits of the key ingredients: - Pasta: Provides energy and can be whole grain for added fiber. - Olive oil: Contains healthy fats that support heart health. - Onion: Has antioxidants and may help fight inflammation. - Garlic: Can boost the immune system and may lower blood pressure. - Diced tomatoes: Packed with vitamins and may lower the risk of heart disease. - Coconut cream: Offers healthy fats and may support brain health. - Basil and oregano: Have anti-inflammatory properties and add flavor without extra calories. This dish not only tastes great but also supports your health. Yes, you can make this pasta gluten-free! Just choose gluten-free pasta made from rice or chickpeas. These options taste great and cook well. Be sure to check the package for cooking times. This dish can last for about 3 to 5 days in the fridge. Store it in an airtight container to keep it fresh. When you reheat it, add a splash of water or extra cream. This keeps it creamy and delicious. Absolutely! You can use fresh tomatoes. Just chop about 4 to 5 medium tomatoes. Cook them down until soft, then add them to your sauce. This gives a fresh taste and vibrant color. You can serve this pasta with a crisp salad or garlic bread. Roasted vegetables also pair well. For protein, add some chickpeas or lentils. They make the meal filling and satisfying. This blog post covered all you need for a great pasta dish. You learned about essential and optional ingredients, plus helpful substitutions. Step-by-step, I walked you through cooking the pasta and making a creamy sauce. You found tips to perfect your dish and even ways to add more flavor or nutrients. Lastly, we explored health benefits and answered common questions. You can create a delicious meal that fits your needs. Keep experimenting, and enjoy your cooking journey!

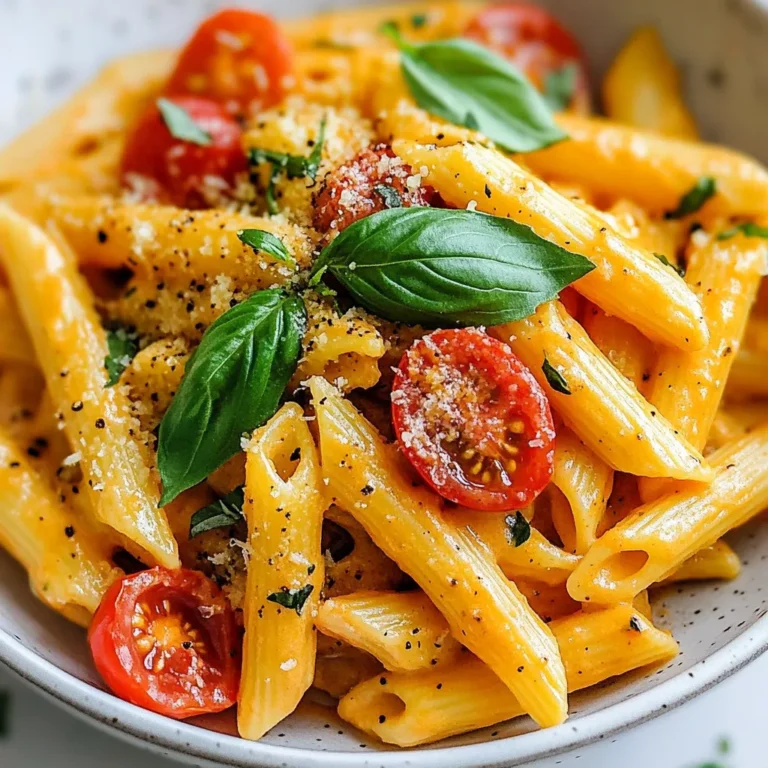
Vegan Creamy Tomato Pasta Rich and Flavorful Dish

PREV 1 … 36 37 38 … 41 NEXT
tastykitchentales

explore

DessertsDinnerAppetizersDrinks

Our Policies

  • Cookie Policy
  • Copyright Policy
  • Disclaimer
  • GDPR Policy
  • Terms Of Use
Back to Top
  • About
  • Contact Us
  • Privacy Policy
© 2025 tastykitchentales