FREE DINNER EBOOK! Get your copy!
  • Cookie Policy
  • GDPR Policy
  • Disclaimer
  • Terms Of Use
  • Visit my other site: Fun Cookie Recipes
tastykitchentales
  • Home
  • Dinner
  • Desserts
  • Drinks
  • Appetizers
  • Contact
  • About
  • Privacy Policy
  • Home
  • Dinner
  • Desserts
  • Drinks
  • Appetizers
  • Contact
  • About
  • Privacy Policy
  • Cookie Policy
  • GDPR Policy
  • Disclaimer
  • Terms Of Use
Visit my other site: Fun Cookie Recipes

HOME / CATEGORIES /

Latest

- 3 ripe bananas, thoroughly mashed - 1/3 cup coconut oil, melted - 1/2 cup brown sugar, packed - 1 teaspoon pure vanilla extract - 2 large eggs, at room temperature - 1 teaspoon baking soda - A pinch of salt - 1 1/2 cups all-purpose flour - 1 cup semi-sweet chocolate chips - 1/2 cup chopped walnuts (optional) I love using ripe bananas in this recipe. They add natural sweetness and moisture. You want them to be soft and spotty. The coconut oil gives the bread a nice richness. If you don’t have coconut oil, you can use melted butter or vegetable oil instead. Brown sugar adds a deep sweetness. If you want, you can swap it for white sugar. Just add a little molasses to get that rich taste. For egg replacements, mashed bananas or applesauce work great if you're vegan. You can use 1/4 cup of either for each egg. These ingredients come together to create a tasty treat. You can feel free to mix in extras like nuts or spices for a twist. Enjoy the process of making this easy and delightful banana bread! - Preheat your oven to 350°F (175°C). - Grease a 9x5 inch loaf pan with some coconut oil or butter. This step helps the bread come out easily. - In a large bowl, mash 3 ripe bananas until they are smooth. - Add 1/3 cup of melted coconut oil to the bananas. Mix them well. - Now, add 1/2 cup of packed brown sugar and 1 teaspoon of pure vanilla extract. Stir until well mixed. - Next, crack 2 large eggs into the bowl. Mix each egg in one at a time. This helps the batter stay light. - Sprinkle 1 teaspoon of baking soda and a pinch of salt over the mixture. Gently mix to combine. - Gradually add 1 1/2 cups of all-purpose flour. Mix just until combined. Don't over-mix to keep the bread soft. - Fold in 1 cup of semi-sweet chocolate chips. If you like, add 1/2 cup of chopped walnuts, too. - Pour the batter into the greased loaf pan. Smooth the top with a spatula. - Place the pan in the preheated oven. Bake for 60-70 minutes. Check for doneness by inserting a toothpick. It should come out clean, with just a few crumbs. - Once baked, cool the bread in the pan for about 10 minutes. Then, transfer it to a wire rack. Let it cool completely before slicing. To get the best texture, avoid over-mixing the batter. Over-mixing can make your bread tough. Mix just until the flour disappears. This keeps your bread soft and fluffy. Using room temperature ingredients is key. Cold eggs or butter can lead to uneven mixing. Let your ingredients sit out for about 30 minutes before you start. This helps them blend well together. Adding spices can boost the flavor. Cinnamon or nutmeg adds warmth to your bread. Just a pinch can change everything. Experiment with how much you like! You can also try different types of chocolate chips. Semi-sweet is a classic choice, but dark or white chocolate can add a fun twist. Mix and match to find your favorite flavor combo. For serving, slice the banana bread and arrange it on a rustic cutting board. This adds charm to your table. Dust the slices lightly with powdered sugar for a sweet touch. Fresh banana slices on the side can make your dish pop. You can also serve it with a dollop of whipped cream. This adds a creamy contrast to the soft bread. {{image_4}} You can make your chocolate chip banana bread even better! Try adding different types of nuts. Walnuts give a nice crunch, but pecans work well too. This adds flavor and texture. You might also want to try using white chocolate or dark chocolate. Each type of chocolate brings a unique taste to the bread. Dark chocolate adds richness, while white chocolate gives a sweet twist. If you need a gluten-free option, you can use almond flour or a gluten-free mix. This keeps the bread tasty and friendly for everyone. For a low-sugar version, swap the brown sugar for a sugar substitute. You can also use ripe bananas for their natural sweetness. This helps you enjoy the bread without too much sugar. You can change your recipe with seasonal flavors. In fall, try adding pumpkin puree. This gives a warm spice flavor. You can also mix in apples for a fresh twist. For the holidays, think about adding cranberries. They add tartness that balances the sweetness. This makes your banana bread festive and fun for gatherings. To keep your banana bread fresh at room temperature, wrap it tightly. I recommend using plastic wrap for this. It keeps moisture in and helps the bread stay soft. You can also use aluminum foil, but it may dry out the bread a bit. If you choose foil, make sure it’s wrapped snugly to protect the bread. If you want to save your banana bread for later, freezing is a great option. First, let the bread cool completely. Then, wrap it tightly in plastic wrap. After that, place it in a freezer-safe bag. This keeps out air and frost. When you’re ready to eat it, thaw it overnight in the fridge. For a quick treat, you can microwave slices for about 15 seconds. When stored at room temperature, banana bread lasts about 2 to 3 days. In the fridge, it can last up to a week. If you freeze it, the bread can last for up to 3 months. Just remember, the sooner you eat it, the better it tastes! To check if your banana bread is done, look for these signs: - The top should be golden brown. - A toothpick inserted in the center comes out clean. - The edges pull away slightly from the pan. - The bread feels firm and springs back when touched. These signs show your banana bread is ready. Keep an eye on it as it bakes. If it's browning too fast, you can cover it with foil. Yes, you can make this recipe without eggs. Here are some good egg alternatives: - 1/4 cup unsweetened applesauce for each egg. - 1/4 cup mashed banana as a swap. - 1 tablespoon ground flaxseed mixed with 2.5 tablespoons water for each egg. These options will help bind your bread. They keep it moist and tasty too. If you don’t have ripe bananas, you can ripen them quickly. Here are two easy methods: - Place unripe bananas in a paper bag. Close it loosely and leave it at room temperature for a day or two. - Bake bananas at 300°F (150°C) for about 15-20 minutes. This softens them and brings out sweetness. These tricks help you get perfectly ripe bananas fast for your bread! Banana bread blends simple ingredients to create a tasty treat. We covered the key components, the steps for baking, and personalized variations. You can switch ingredients, adjust flavors, and present it with style. Follow our tips for perfect texture and delicious twists. Whether for yourself or loved ones, this recipe is sure to delight! Enjoy baking and experimenting with flavors that suit your taste. Happy baking!

Chocolate Chip Banana Bread Delightful and Simple Recipe

For this delicious dish, you will need: - 2 boneless, skinless chicken breasts, diced into bite-sized pieces - 8 oz (225g) penne pasta - 4 tablespoons unsalted butter - 4 cloves garlic, finely minced - 1 cup heavy cream - 1 cup fresh grated Parmesan cheese - 1 cup cherry tomatoes, halved - Salt and freshly cracked black pepper, to taste These ingredients make a creamy and rich pasta that is full of flavor. The chicken gives it protein, while the pasta fills you up. The butter and cream add that lovely richness you crave. The right spices make this dish special. You will need: - 1 teaspoon smoked paprika - 1 teaspoon onion powder - ½ teaspoon red pepper flakes (adjust to taste) Smoked paprika brings a nice depth to the dish. Onion powder adds sweetness, and red pepper flakes give it a kick. Adjust the flakes based on your spice preference. Don't forget to finish your dish with a few garnishes: - 1 tablespoon fresh parsley, finely chopped Fresh parsley adds a pop of color and freshness. It also complements the rich flavors in the pasta. Just sprinkle it on top right before serving for the best look and taste. {{ingredient_image_2}} To cook the penne pasta, fill a large pot with water. Add a good amount of salt. Bring the water to a rolling boil. Add the penne and cook for 8 to 10 minutes. You want it al dente, which means firm to the bite. Once it’s done, drain the pasta in a colander. Save a cup of that starchy pasta water for later. Grab a large skillet and place it on medium heat. Add the unsalted butter and let it melt. When the butter bubbles, toss in the minced garlic. Sauté for 1 to 2 minutes, just until it smells great. Be careful not to burn the garlic. Next, add the diced chicken to the skillet. Spread it out evenly. Season with smoked paprika, onion powder, red pepper flakes, salt, and black pepper. Cook for 6 to 8 minutes. Stir occasionally until the chicken is golden and cooked through. Once the chicken is ready, pour in the heavy cream and bring it to a gentle simmer. Gradually add the grated Parmesan cheese while stirring. This helps the cheese melt smoothly into the sauce. Keep stirring for 3 to 4 minutes until the sauce thickens. When it’s ready, add the halved cherry tomatoes. Let them warm through for a minute. Now it’s time to combine everything. Add the drained penne pasta to the skillet. Toss it gently so each piece is coated in the creamy sauce. If the sauce looks too thick, add a splash of the reserved pasta water. This will help it reach the right consistency. Once it’s mixed well, remove the skillet from heat. Serve the Cowboy Butter Chicken Pasta on plates or in a large dish. Finish with a sprinkle of chopped parsley for color and freshness. Enjoy every delightful bite! To get the best flavor in your Cowboy Butter Chicken Pasta, focus on the spices. Use fresh garlic for a strong taste. The smoked paprika adds a nice depth to the dish. Adjust the red pepper flakes to match your spicy level. Always taste as you cook. This way, you can make quick changes if needed. Make sure to let the butter bubble before adding garlic. This step helps release its full flavor. When you mix in the cream, stir it well. This helps the cheese melt fully, which makes the sauce rich and creamy. If your pasta is too sticky, it may have overcooked. Always follow the package time for cooking. If the sauce is too thick, add a splash of reserved pasta water. This helps loosen it up without losing flavor. If the chicken is dry, try cooking it on lower heat next time. If the sauce doesn’t thicken, ensure your heat is high enough when adding cheese. Stir continuously while the cheese melts. If the garlic burns, it can make your dish bitter. Always watch it closely while it cooks. Having the right tools makes cooking easier. Here are some items you need: - Large pot for boiling pasta - Colander for draining pasta - Large skillet for cooking chicken and sauce - Wooden spoon for stirring - Measuring cups for cream and cheese - Chef’s knife for chopping chicken and garlic These tools help you cook efficiently and enjoy your Cowboy Butter Chicken Pasta more. Pro Tips Perfect Pasta: Be sure to cook the penne pasta until it's al dente for the best texture. The pasta should have a slight bite to it, which helps it hold up in the creamy sauce. Butter Bliss: Use unsalted butter to control the saltiness of your dish. This allows you to season it to your liking without overpowering the flavors. Cheese Choice: Freshly grated Parmesan cheese melts better than pre-grated. It creates a smoother sauce and enhances the overall flavor of the dish. Tomato Timing: Add the cherry tomatoes towards the end of cooking to keep them juicy and fresh. This adds a nice burst of flavor and color to your pasta. {{image_4}} You can easily make this dish vegetarian. Instead of chicken, use diced tofu or chickpeas. Both options soak up flavor well. You can sauté the tofu until golden brown. This adds a nice texture. For chickpeas, simply add them to the skillet with the spices. They will warm up nicely in the sauce. You can keep the rest of the recipe the same for a creamy, savory delight. Not everyone enjoys the same spice level. If you prefer less heat, skip the red pepper flakes. You can also reduce the amount of smoked paprika. For those who like it hot, feel free to add more red pepper flakes. You can also try adding a dash of hot sauce. This gives a nice kick without changing the dish too much. Always taste your dish as you go to find the right balance. Want to pack more nutrition into your meal? Add extra veggies! Spinach, bell peppers, or zucchini work great. Toss them into the skillet after cooking the chicken. Sauté them until they are tender. They will add color and flavor to your dish. You can also use frozen mixed veggies for an easy option. Just add them when you add the cream. This makes your Cowboy Butter Chicken Pasta even more delightful! To store your Cowboy Butter Chicken Pasta, let it cool first. Place it in an airtight container. This keeps the pasta fresh longer. Make sure to use it within three to four days. Label the container with the date. This way, you can track how long it's been in the fridge. When reheating, add a splash of cream or pasta water. This helps the sauce stay creamy. Use the stove for even heating. Heat it on low until warm. Stir often to avoid sticking. If using a microwave, cover the dish. Heat in short bursts to avoid overheating. You can freeze Cowboy Butter Chicken Pasta. Portion it into meal-sized containers. Make sure to leave some space at the top. The sauce can expand when frozen. It stays good for up to three months. To reheat, thaw in the fridge overnight before warming. Yes, you can use other pasta shapes. Bowtie, fusilli, or spaghetti work well. Each type brings a different texture. Just adjust cooking time based on the pasta you choose. Cowboy Butter Chicken Pasta lasts about 3-4 days in the fridge. Make sure to store it in an airtight container. This helps keep the flavors fresh. Always check for any changes before eating leftovers. If you want a lighter option, use half-and-half or whole milk. For a dairy-free choice, try coconut cream or almond milk. These alternatives change the flavor slightly but still taste good. Yes, this dish is very kid-friendly. The creamy sauce and mild spices appeal to kids. You can adjust spice levels to suit their taste. It's a fun way to get them excited about dinner. To make Cowboy Butter Chicken Pasta gluten-free, use gluten-free pasta. Many brands offer great options that taste delicious. Just cook it according to package instructions for the best results. In this blog post, we explored making Cowboy Butter Chicken Pasta. You learned about essential ingredients, spices, and garnishes. I shared step-by-step instructions for cooking pasta, chicken, and sauce. We also discussed tips for flavor and common cooking problems. With variations and storage info, you can customize and keep leftovers fresh. Remember, cooking is fun! Enjoy trying new flavors and sharing with others. Happy cooking!

Cowboy Butter Chicken Pasta Delight in Every Bite

To make Copycat Texas Roadhouse Green Beans, you need a few key ingredients. Each one adds flavor and makes the dish special. Here is what you will need: - 1 pound fresh green beans, trimmed and cleaned - 2 cups low-sodium vegetable broth - 1 medium onion, thinly sliced - 3 cloves garlic, minced - 2 tablespoons olive oil - 1 teaspoon smoked paprika - 1/2 teaspoon crushed red pepper flakes (adjust to your spice preference) - 1 tablespoon brown sugar - Salt and pepper, to taste - 1 tablespoon freshly squeezed lemon juice - 1 tablespoon fresh parsley, finely chopped for garnish Fresh green beans are the star of this dish. Choose bright green ones. They should snap easily when bent. Low-sodium vegetable broth keeps the dish light. It adds deep flavor without being too salty. Onion and garlic bring warmth to the recipe. Sautéing them creates a lovely aroma. Spices like smoked paprika and red pepper flakes add a smoky kick. Adjust the red pepper to fit your taste. Brown sugar balances the flavors, giving a hint of sweetness. Lemon juice brightens the dish at the end. Finally, fresh parsley adds a splash of color and freshness. These ingredients come together to create a delightful side. You can enjoy them with any main dish or as a snack. {{ingredient_image_2}} 1. Heating the olive oil Start by heating 2 tablespoons of olive oil in a large skillet. Use medium heat. Wait until the oil shimmers. This shows it's hot enough for cooking. 2. Sautéing onions and garlic Next, add 1 medium onion, thinly sliced. Stir it in the oil. Cook for about 5 minutes. The onions should soften and turn translucent. Then, add 3 cloves of minced garlic. Stir it in with the onions. This will add great flavor. Cook for 1-2 minutes more. The garlic should smell wonderful. 3. Adding broth and green beans Now, pour in 2 cups of low-sodium vegetable broth. Raise the heat a bit to bring it to a gentle boil. Once it boils, add 1 pound of trimmed and cleaned green beans. Stir them into the broth. This is where the magic begins! 4. Simmering the green beans After you add the green beans, add 1 tablespoon of brown sugar. This will balance the flavors. Season with salt and pepper to taste. Cover the skillet with a lid. Let it simmer for 10-15 minutes. Stir occasionally to keep them from sticking. 5. Adding seasonings and finishing touches When the green beans are tender yet crisp, drizzle 1 tablespoon of freshly squeezed lemon juice over them. This adds brightness to the dish. Stir gently to combine everything. Remove the skillet from heat. Transfer the beans to a serving dish. 6. Garnishing Finally, sprinkle 1 tablespoon of finely chopped fresh parsley on top. This adds a nice touch of color. Serve warm and enjoy your delicious Copycat Texas Roadhouse Green Beans! To ensure perfectly tender green beans, start with fresh beans. Trim the ends and remove any blemishes. Cooking them in vegetable broth gives great flavor. Keep the heat at medium when sautéing the onions and garlic. This helps soften them without burning. Let the green beans simmer for 10-15 minutes. Stir occasionally to make sure they cook evenly. Test them by biting into one; they should be crisp but tender. If you want more spice, adjust the crushed red pepper flakes. Start with half a teaspoon, then add more if you like heat. For extra flavor, try adding a pinch of cumin or black pepper. You can also toss in a bit of soy sauce for depth. Using fresh herbs like thyme or basil can brighten the dish. Sprinkle them on top right before serving for a fresh touch. Consider garnishing with lemon wedges for added zest. The bright color and flavor will make your green beans pop on the plate. Pro Tips Use Fresh Green Beans: For the best flavor and texture, opt for fresh green beans that are bright green and firm. Avoid those that are limp or have spots. Adjust Spice Levels: Feel free to modify the amount of crushed red pepper flakes based on your spice tolerance. Start with less if you're unsure, and add more to taste. Enhance Flavor with Broth: Using low-sodium vegetable broth adds depth to the dish. If you want a richer flavor, consider using homemade broth if available. Don't Overcook the Beans: Keep an eye on the green beans while they cook. They should be tender but still crisp for the best texture and vibrant color. {{image_4}} If you want to switch things up, you can change the vegetable broth. Here are some options: - Chicken broth: This adds a nice flavor for non-vegetarians. - Water: In a pinch, water works, but it may lack depth. - Mushroom broth: This brings an earthy taste, great for umami lovers. When it comes to sweeteners, you have choices too: - Honey: A natural sweetener that adds flavor. - Maple syrup: This gives a unique taste and sweetness. - Agave nectar: A vegan option that blends well with the dish. Want to make this dish vegan-friendly? It’s easy! Just use vegetable broth and a plant-based sweetener. If you want to add some protein, consider these options: - Cooked chicken: Shredded or diced, it pairs well with green beans. - Tofu: Firm tofu adds a nice texture; sauté it with the onions. - Bacon bits: For those who love meat, crispy bacon bits give a smoky flavor. These variations let you play with the recipe, making it fit your taste or diet. Enjoy experimenting! To keep your green beans fresh, store them in the fridge. Use an airtight container. They will last for about 3 to 5 days. Make sure they cool down before sealing. This helps avoid moisture buildup. If you want to freeze them, first, blanch the green beans. Boil them for 2-3 minutes, then plunge them into ice water. This stops cooking. Drain and dry them well. Place the beans in freezer bags, removing as much air as you can. They will keep well for up to 3 months. When it's time to enjoy your leftovers, reheating is key. The best method is using a skillet. Heat a little olive oil over medium heat. Add the green beans and a splash of broth or water. This keeps them moist and flavorful. Stir them often until they heat through. You can also use the microwave. Place the beans in a microwave-safe dish. Add a few drops of water, cover it with a lid, and heat in short bursts. Check every 30 seconds to avoid overcooking. This keeps them crisp yet warm. Both methods ensure your green beans taste just as good as when you first made them! Cook green beans for about 10 to 15 minutes. You want them to be tender but still crisp. Start checking at 10 minutes. Stir occasionally to ensure even cooking. Yes, you can make these green beans ahead of time. Cook them, then let them cool. Store them in the fridge for up to three days. Reheat them on the stove or in the microwave. These green beans pair well with many dishes. Try serving them with grilled chicken, steak, or fish. They also go great with mashed potatoes or rice. Add a fresh salad for a complete meal. This blog post covered a simple recipe for tasty green beans. We discussed the fresh ingredients you need and the easy steps to prepare them. I shared important tips for cooking and flavoring, plus variations to suit your needs. Finally, we talked about how to store leftovers and reheat them. Green beans can be a delicious side dish with your meals. Enjoy making them your way!

Copycat Texas Roadhouse Green Beans Simple Recipe

- 1 lb Italian chicken or turkey sausages - 1 red bell pepper, sliced into thin strips - 1 yellow bell pepper, sliced into thin strips - 1 small red onion, thinly sliced - 2 cups cherry tomatoes, halved - 2 tablespoons extra-virgin olive oil - 1 teaspoon garlic powder - 1 teaspoon smoked paprika - Salt and black pepper to taste - Fresh basil leaves The ingredients for Sheet Pan Pesto Sausage & Peppers create a fun mix. First, the Italian chicken or turkey sausages give a juicy bite. These sausages blend perfectly with the sweet and crunchy red and yellow bell peppers. The sliced red onion adds a nice sharpness, while the halved cherry tomatoes bring a burst of sweetness. Now, let’s talk about seasoning. Extra-virgin olive oil is key here. It helps the veggies cook and adds a rich flavor. Garlic powder and smoked paprika give a warm, smoky taste that pairs well with the sausages. Don’t forget salt and black pepper. They enhance all the flavors in this dish. For a finishing touch, add fresh basil leaves. They brighten up the meal and add a fresh aroma. This mix of ingredients not only tastes great but looks colorful on your plate too. - Preheat your oven to 400°F (200°C). - Line a large baking sheet with parchment paper. Preheating the oven is key. This helps your dish cook evenly. Parchment paper keeps food from sticking and makes cleanup easy. - Combine the sliced red and yellow bell peppers, red onion, and halved cherry tomatoes in a mixing bowl. - Toss with 2 tablespoons of extra-virgin olive oil, 1 teaspoon of garlic powder, 1 teaspoon of smoked paprika, salt, and freshly ground black pepper. Mixing the vegetables well is important. The olive oil and spices coat them nicely. This step gives your dish a great flavor base. - Spread the seasoned vegetables evenly on the baking sheet. - Nestle 1 lb of Italian chicken or turkey sausages among the veggies. - Spoon 1/2 cup of basil pesto over the sausages. Arranging the veggies and sausages gives even cooking. The pesto adds a burst of flavor. - Place the baking sheet in the oven and bake for 25-30 minutes. Stir the vegetables halfway through. This helps them cook evenly. The sausages are done at a safe 165°F (74°C). The veggies should be tender and slightly caramelized. To check if the sausages are done, use a meat thermometer. You want them to reach 165°F (74°C). This ensures they are safe to eat. The sausages should feel firm and juicy. If they look dry, they may be overcooked. Stir the vegetables halfway through cooking. This helps them cook evenly and get a nice caramelized look. It also mixes the flavors together nicely. You want all the veggies to be tender and slightly charred for the best taste. Try adding more seasonings for extra flavor. A pinch of red pepper flakes adds heat. You can also sprinkle some Italian herbs for more depth. Fresh herbs like oregano or thyme work great too. Choosing between homemade and store-bought pesto can change the dish. Homemade pesto tastes fresh and bright. Store-bought is convenient and still good. If you are short on time, go for the store-bought option. Just pick a good quality brand for the best results. For an inviting look, serve your dish on a rustic wooden platter. This allows the bright colors of the peppers and tomatoes to stand out. You can also drizzle some extra pesto over the top for a pop of flavor. Garnish with fresh basil leaves. This adds a lovely touch and brings out the aroma. The presentation makes the dish feel special and ready to impress! {{image_4}} If you want to change up the protein in this dish, there are great options. You can use Italian pork sausage for a richer flavor. Smoked sausage also works well for a twist. If you prefer a lighter choice, chicken or turkey sausage is a solid pick. For those who follow a vegetarian or vegan diet, consider using plant-based sausage. There are many good brands that mimic the taste of meat. You can also use hearty beans like chickpeas or black beans. They add protein and work well with the other flavors. You can swap the peppers for other veggies. Zucchini, mushrooms, or broccoli can add different tastes and textures. Carrots or cauliflower can also be good choices. Seasonal vegetables can really change the dish. In the fall, try butternut squash or Brussels sprouts. In spring, asparagus or snap peas can brighten up the meal. Use whatever looks good at the market. Adding cheese can enhance the flavor. Feta or goat cheese crumbles add a nice tang. For a creamy touch, try mozzarella or burrata. You can also experiment with other sauces. A drizzle of balsamic glaze adds sweetness. Hot sauce can bring a spicy kick. A splash of lemon juice brightens the whole dish. Don’t be afraid to get creative! To store leftovers, let the dish cool first. Use an airtight container for best results. This keeps the food fresh longer. Place the container in the fridge within two hours of cooking. It will stay fresh for up to three days. To maintain freshness, make sure to seal the container tightly. This helps prevent odor transfer to other foods. You can reheat this dish in a few ways. The oven is the best method. Preheat it to 350°F (175°C). Place the food on a baking sheet. Heat for about 10-15 minutes. This keeps the veggies from getting soggy. You can also use the microwave. Heat it in short bursts of one minute. Stir in between each burst to promote even heating. Yes, you can freeze this dish! First, let it cool completely. Then, transfer it to a freezer-safe container. Make sure to remove as much air as possible. This helps prevent freezer burn. It will keep well for up to three months. To thaw, move it to the fridge overnight. Reheat it as mentioned above for best taste and texture. Yes, you can prepare this dish in advance. Chop the veggies and mix them with oil and spices. Store them in the fridge for up to two days. You can also cook the sausages ahead and add the pesto just before baking. This makes meal prep easy and quick. Just heat everything together when you are ready to eat. This dish pairs well with many sides. Try serving it over rice or pasta for a hearty meal. A simple green salad adds freshness. You can also serve it with crusty bread to soak up the pesto. Roasted potatoes or a light quinoa salad make great options too. Absolutely! You can use different nuts, like walnuts or pine nuts, to change the taste. Swap basil with spinach or arugula for a twist. If you like heat, add some red pepper flakes. You can also mix in cheese, like Parmesan or feta, for extra creaminess. Feel free to get creative with your pesto! This recipe for Sheet Pan Pesto Sausage & Peppers is manageable and tasty. You learned about the main ingredients, how to prepare and bake them, and tips for enhancing flavor. You can even customize it with different proteins and vegetables. Remember, cooking should be fun! Don’t hesitate to experiment. Enjoy your delicious meal and impress your friends and family with your skills.

Sheet Pan Pesto Sausage & Peppers Flavor Explosion

- 2 salmon fillets (approximately 6 ounces each) - 1/4 cup honey - 3 cloves of garlic, finely minced - 2 tablespoons soy sauce - 1 tablespoon fresh ginger, finely grated - 1 tablespoon sesame oil - 1 cup jasmine rice - 2 cups water or broth (chicken or vegetable) - 1 cup steamed broccoli florets - 1/2 cup shredded carrots - 1/4 cup green onions, thinly sliced - Sesame seeds for garnish - Salt and pepper to taste You need specific amounts for each item. Use 2 salmon fillets, about 6 ounces each. For the sauce, mix 1/4 cup honey, 3 minced garlic cloves, and 2 tablespoons soy sauce. Add 1 tablespoon of grated ginger and 1 tablespoon sesame oil. For the rice, 1 cup of jasmine rice needs 2 cups of water or broth. If you want to switch things up, you can use maple syrup instead of honey. You can also try tamari for a gluten-free option. For rice, brown rice works too, but cooking times will change. For a fresh look, add sliced green onions and sesame seeds on top. These give a nice crunch and enhance flavor. You can also consider adding avocado or lime wedges for extra richness and zest. To start, gather your ingredients for the marinade. You will need: - 1/4 cup honey - 3 cloves of garlic, finely minced - 2 tablespoons soy sauce - 1 tablespoon fresh ginger, finely grated - 1 tablespoon sesame oil Mix these items in a small bowl. Whisk them together until they blend well. This mix gives the salmon a sweet and savory flavor. Achieving a good balance is key here. Too much soy sauce can make it salty, while too little honey can make it bland. Aim for harmony in taste. Now, let's marinate the salmon. Take your two salmon fillets and place them in a shallow dish. Pour the marinade over the salmon. Make sure they are well-coated. Cover the dish with plastic wrap. Let it sit at room temperature for at least 15 minutes. If you have more time, refrigerate it for up to an hour. This extra time allows the flavors to soak in deeply. For the rice, combine 1 cup of jasmine rice with 2 cups of water or broth in a medium saucepan. Bring this mixture to a boil over high heat. Once it boils, lower the heat. Cover the pot and let it simmer for 15 minutes. Remove it from heat and let it sit for another 5 minutes. Fluff the rice with a fork before serving. For the salmon, heat a non-stick skillet over medium-high heat. Carefully remove the fillets from the marinade. Set the marinade aside for later. Place the salmon in the hot skillet. Cook for 5-6 minutes on each side. The salmon should turn golden and flake easily when done. While the salmon cooks, take the reserved marinade and pour it into a small saucepan. Heat it over medium heat until it simmers. Let it simmer for about 2-3 minutes. This reduces the sauce and thickens it for drizzling over the salmon. Always remember to handle raw salmon with care to avoid contamination. Now it’s time to build your bowls. Start with a base of fluffy jasmine rice. On top of the rice, add steamed broccoli florets and shredded carrots. Place a salmon fillet in each bowl. Drizzle the thickened marinade glaze over the entire dish to enhance the flavors. For the final touch, sprinkle sliced green onions on top. Add sesame seeds for crunch. These garnishes boost flavor and add color. You can also consider using a lemon wedge for a fresh look and aroma. Arranging the bowls in a colorful way makes the meal even more appealing. To cook salmon perfectly, start with fresh fillets. Fresh salmon has a bright color and a mild smell. You want to achieve a golden brown crust while keeping the inside tender. - Use a non-stick skillet to prevent sticking. - Cook on medium-high heat for even cooking. Check doneness by using a thermometer. The thickest part should reach 145°F (63°C). If you don't have a thermometer, look for the fish to flake easily with a fork. For convenience, use a rice cooker or an Instant Pot. These devices simplify the cooking process. - In a rice cooker, add 1 cup of jasmine rice and 1.5 cups of water. - For the Instant Pot, combine the same amount of rice and water. Cook on high pressure for 4 minutes, then let it naturally release. You can also try different rice types. Brown rice adds a nutty flavor, while sushi rice offers stickiness. To boost flavor, consider adding spices or toppings. - A sprinkle of cayenne pepper gives heat. - A dash of lime juice adds brightness. You can pair the dish with sauces like sriracha or a tangy yogurt sauce. These add a new twist and enhance the meal's overall taste. {{image_4}} If you want to change things up, try different proteins. Chicken is a great substitute. Use boneless chicken thighs or breasts. Cook them in the same marinade as the salmon. You will enjoy the same sweet and savory taste. Tofu is another option. Choose firm tofu for a nice texture. First, press the tofu to remove excess water. Then, cut it into cubes. Marinate the tofu just like the salmon. Sauté it in a hot pan until golden. Cooking times will differ: - Chicken: Cook for about 6-7 minutes per side. - Tofu: Cook for about 4-5 minutes per side. Adding different vegetables can make your bowl fresher. Broccoli is great, but you can also use snap peas or bell peppers. They add nice colors and crunch. Seasonal veggies are perfect for this dish. Try asparagus in spring or zucchini in summer. These choices will keep your meal exciting. You can steam or sauté these veggies. Just make sure they are tender but still bright. While the honey garlic glaze is tasty, you can play with flavors. A spicy honey glaze adds a kick. Mix in some chili flakes or sriracha to the marinade. Teriyaki sauce is also a fun choice. Just swap out the soy sauce for teriyaki. This will give your salmon a sweet and tangy twist. Feel free to experiment with flavors. Each sauce will add a new layer to your meal. To store your honey garlic salmon rice bowls, let them cool to room temperature first. Place them in airtight containers. This keeps the flavors fresh and prevents spills. Use glass or BPA-free plastic containers for best results. You can keep these bowls in the fridge for up to three days. When reheating, the goal is to keep the salmon tender and the rice fluffy. You can use a microwave or stovetop. If using a microwave, cover the container and heat in short bursts. Stir in between to heat evenly. If you prefer stovetop, add a splash of water in a pan and warm over low heat. This keeps the rice moist. Freezing is a great option for longer storage. You can freeze the salmon, rice, and veggies separately. Use freezer-safe bags or containers. Squeeze out as much air as possible to prevent freezer burn. The salmon can last up to three months, while rice and veggies are best used within two months. Always label your containers with the date. You should marinate salmon for at least 15 minutes. This gives it a nice flavor. You can marinate it for up to 1 hour in the fridge for deeper taste. Avoid marinating longer than that, as the fish can become too soft. Yes, you can prep this dish ahead. I recommend cooking the rice and salmon in advance. Store them separately in the fridge. When ready to eat, just reheat and assemble your bowls. This makes for a quick meal on busy nights. You can serve a simple salad or steamed vegetables with these bowls. A light cucumber salad pairs well. For drinks, try iced tea or a crisp white wine. These options enhance the meal without overpowering the flavors. Yes, this recipe can be gluten-free. Use gluten-free soy sauce instead of regular soy sauce. Check the labels on your ingredients to ensure they are free from gluten. This way, you can enjoy the dish without worry. To make this dish lighter, use less honey or a sugar substitute. You can also add more veggies, like spinach or bell peppers. Grilling the salmon instead of pan-frying can reduce fat. These adjustments keep the flavor while making it healthier. This blog post covers how to make tasty honey garlic salmon rice bowls. We discussed the key ingredients, the cooking steps, and variations for your taste. I shared tips for cooking salmon perfectly and how to assemble your dish nicely. Remember, you can customize with different proteins and vegetables. Follow the storage and reheating tips to enjoy leftovers. Dive in and try this recipe for a healthy meal that is full of flavor. You’ll love the results!

Honey Garlic Salmon Rice Bowls Flavorful Weeknight Meal

- 1 cup unsalted butter, softened to room temperature - 1 cup brown sugar, packed firmly - 1/2 cup granulated sugar - 2 large eggs, at room temperature - 2 teaspoons vanilla extract - 3 cups all-purpose flour, sifted - 1 teaspoon baking soda - 1/2 teaspoon sea salt - 1/2 cup unsweetened cocoa powder - 1 cup dark chocolate chips - 1 cup dried cherries, roughly chopped - 1/4 cup brewed espresso or strong coffee, cooled to room temperature For the butter, choose unsalted for the best flavor. You can use salted butter but cut back on the sea salt. If you do not have dark chocolate chips, try semi-sweet or milk chocolate chips. Dried cherries give a nice tartness. If you can’t find dried cherries, you can use raisins or cranberries. For espresso, strong brewed coffee works well, too. This recipe makes about 24 cookies. Each cookie is a chewy treat packed with flavor. Prep time is 15 minutes, and baking takes about 10-12 minutes. You will want to cool them for a few minutes on the baking sheet before moving them to a wire rack. Enjoy these cookies with a cup of coffee or espresso for a delightful snack! First, preheat your oven to 350°F (175°C). Grab a baking sheet and line it with parchment paper. This helps with easy cleanup later. You can use a cookie scoop or two tablespoons for portioning the dough. Having these tools ready makes baking smoother. In a large bowl, add 1 cup of softened unsalted butter. Then, mix in 1 cup of packed brown sugar and 1/2 cup of granulated sugar. Use an electric mixer to beat them together for about 3-4 minutes. The mixture should be light, fluffy, and pale. Next, add 2 large eggs, one at a time, mixing well after each addition. Blend in 2 teaspoons of vanilla extract and 1/4 cup of cooled espresso. Make sure everything is smooth and well combined. In a separate bowl, whisk together 3 cups of sifted all-purpose flour, 1 teaspoon of baking soda, 1/2 teaspoon of sea salt, and 1/2 cup of unsweetened cocoa powder. Gradually fold this dry mix into the wet ingredients. Use a spatula or wooden spoon to combine. Be careful not to overmix; just blend until you see no flour. Finally, fold in 1 cup of dark chocolate chips and 1 cup of roughly chopped dried cherries. Ensure they are evenly spread in the dough. To make chewy cookies, use room temperature butter. This helps create a soft texture. Mix the butter and sugars well until light and fluffy. This step adds air to your dough. Be careful not to overmix after adding the flour. Overmixing can make cookies tough. For added chewiness, use brown sugar as it retains moisture better than white sugar. Bake the cookies just until the edges are firm but the center is soft. This will keep them chewy. To keep your cookies fresh, store them in an airtight container. This helps maintain moisture and prevents them from getting hard. You can also add a slice of bread to the container. The bread helps keep the cookies soft. For longer storage, freeze the cookies in a zip-lock bag. They stay fresh for up to three months. Just remember to thaw them at room temperature before enjoying. One common mistake is not measuring ingredients properly. Use a kitchen scale for accuracy. This ensures your cookies turn out just right. Another mistake is skipping the cooling time. Letting cookies cool on the baking sheet helps set their shape. Avoid opening the oven door too often while baking. This can cause temperature changes and affect the baking time. Lastly, don’t forget to space the dough mounds on the baking sheet. Proper spacing prevents the cookies from sticking together while baking. {{image_4}} If you need a gluten-free option, swap the all-purpose flour with a gluten-free blend. Make sure to find one that works well in baking. I often use almond flour or oat flour for a nutty flavor. You can also try coconut sugar instead of brown sugar for a lower glycemic option. This change adds a unique taste and gives the cookies a darker color. To boost the flavor, consider adding nuts like walnuts or pecans. They give the cookies a nice crunch. You can also mix in white chocolate chips for a sweet twist. Try using milk chocolate or even semi-sweet chocolate chips for a different taste. Each option creates a new cookie experience. For a festive touch, add holiday spices like cinnamon or nutmeg. These spices create warmth and comfort during the colder months. You can also use dried cranberries instead of cherries for a bright red color around the holidays. Each seasonal change makes the cookies special and fun! To keep your Cherry Mocha Chip Cookies fresh, store them correctly. For short-term storage, place cookies in an airtight container at room temperature. They will stay good for about one week. If you want to keep cookies for a longer time, the freezer is your best friend. They can last for up to three months in the freezer. Choosing the right container matters for cookie storage. Use a plastic or glass container with a tight lid. This helps keep moisture out and keeps your cookies chewy. If you stack cookies, place parchment paper between layers to prevent sticking. Avoid metal containers, as they can trap moisture and make cookies soggy. Freezing cookie dough is simple and smart. First, scoop the dough into mounds on a baking sheet lined with parchment paper. Freeze the mounds for about two hours or until firm. Then, transfer them to a freezer bag. Label the bag with the date and type of cookie. When you want fresh cookies, just bake them straight from the freezer. Add a couple of extra minutes to the baking time. Enjoy the convenience of homemade cookies anytime! You can use semi-sweet chocolate chips. They add a nice sweetness. Milk chocolate chips work too but will change the flavor a bit. If you want a fruity twist, try white chocolate chips. You can even chop up a chocolate bar. Just remember, the taste will shift. Look for cookies with firm edges and soft centers. They should not be too jiggly. The tops will look set, and the cookies should be slightly shiny. Bake them for 10-12 minutes. If they seem too soft, give them a minute more. They will firm up as they cool. Yes, you can prepare the dough in advance. After mixing, cover it tightly and store it in the fridge. It will stay good for about 3 days. You can also freeze the dough for up to three months. Just thaw it in the fridge overnight before baking. We covered ingredients, steps, and tips for making the best cookies. Remember to choose quality ingredients for great taste and texture. Use the tips to make chewy cookies and avoid common mistakes. Explore variations to fit your taste and the season. Finally, store them well to keep your cookies fresh. With these pointers, you can create delicious cookies every time!

Cherry Mocha Chip Cookies Deliciously Chewy Treat

Here is what you need for your One-Pot Carrot Lentil Soup: - 1 tablespoon olive oil - 1 medium onion, finely diced - 2 cloves garlic, minced - 4 large carrots, peeled and diced - 1 cup red lentils, thoroughly rinsed - 1 teaspoon ground cumin - 1 teaspoon ground coriander - 1/2 teaspoon smoked paprika - 4 cups vegetable broth - 1 can (14 oz) diced tomatoes (including juices) - 2 cups baby spinach (optional) - Salt and pepper to taste - Fresh cilantro or parsley for garnishing (optional) These ingredients come together to create a warm and tasty soup. The olive oil adds richness, while onion and garlic give it depth. Carrots add sweetness and color. The red lentils provide protein and a creamy texture. Spices like cumin and coriander bring warmth and earthiness. The vegetable broth serves as the base, while diced tomatoes add acidity and sweetness. If you like greens, baby spinach is a great addition. Don’t forget the salt and pepper; they balance the flavors. Finally, garnishing with fresh herbs makes the soup inviting and fresh. Each ingredient plays a key role in making this dish special. 1. Start by dicing one medium onion into small pieces. This adds flavor to your soup. 2. Next, take four large carrots. Peel and dice them into bite-sized chunks. 3. Rinse one cup of red lentils in cold water. This removes any dust and helps them cook well. 4. Finally, mince two cloves of garlic. This will add a strong, savory taste to your dish. 1. In a large pot, heat one tablespoon of olive oil over medium heat. 2. Once the oil is hot, add the diced onion. Sauté it for about five minutes until soft and clear. 3. Add the minced garlic to the pot. Cook for one more minute, stirring often to release its strong aroma. 4. Now, toss in the diced carrots. Sauté them for about three minutes while stirring to prevent sticking. 5. Stir in the rinsed red lentils along with one teaspoon of ground cumin, one teaspoon of ground coriander, and half a teaspoon of smoked paprika. Mix well to coat the lentils and carrots with the spices. 6. Pour in four cups of vegetable broth and one can of diced tomatoes with their juices. Increase the heat to bring this mixture to a gentle boil. 7. Once boiling, lower the heat and cover the pot. Let it simmer for 25 to 30 minutes. This allows the lentils to soften and the soup to thicken. 1. If you like baby spinach, add two cups during the last five minutes of cooking. Stir until it wilts and blends in. 2. Taste the soup and add salt and pepper to fit your flavor needs. Adjust to your liking. 3. Ladle the warm soup into bowls. Garnish with fresh cilantro or parsley if you want to add a pop of color and flavor. To make the soup even better, use fresh herbs. Fresh cilantro or parsley adds a burst of flavor. You can also add a splash of lemon juice. This gives the soup a bright taste that pairs well with lentils. Don't forget to play with spice levels. If you like heat, add a pinch of red pepper flakes. You can start small and increase it as you taste. Choosing the right pot is key. A heavy-bottomed pot works best for even cooking. It helps prevent burning and sticking. Simmering is very important too. It allows flavors to blend and the lentils to soften. Keep the heat low after boiling. This helps the soup develop a rich, deep taste. Pair your soup with warm bread. A crusty baguette or soft rolls are perfect. They soak up the soup and add texture. You can also suggest sides like a fresh salad. A simple green salad with vinaigrette brightens the meal. This balance makes your meal feel complete and satisfying. {{image_4}} You can switch the red lentils for other legumes. For example, try green or brown lentils. Each type gives a different taste and texture. You might notice green lentils stay firmer than red ones. You can also swap out carrots for sweet potatoes. Sweet potatoes add a nice sweetness. They also bring a lovely color to the soup. Feel free to mix in other veggies too, like bell peppers or zucchini. Just dice them and add them in the same step as the carrots. If you're gluten-free, this soup is safe for you! All the ingredients are naturally gluten-free. Just make sure to check your vegetable broth for any hidden gluten. For a vegan version, this recipe is already vegan. The soup uses no animal products. You can top it with nutritional yeast for a cheesy flavor. This adds a nice twist without using dairy. Want some heat? You can add chili flakes or fresh chili peppers. Start with a small amount and adjust to your taste. This will give your soup a spicy kick. You can also mix in spices like turmeric. Turmeric adds warmth and a golden color. It’s great for health and pairs well with cumin and coriander. Experiment with your favorite spices to find your unique flavor! To store your soup, let it cool first. I place it in the pot on a cool counter or table. Once cool, use airtight containers. Glass or plastic containers work well. Make sure to leave some space in the container for soup expansion when frozen. If you have a lot, divide it into smaller portions. This way, you can enjoy it later without waste. Freezing soup is easy and keeps it fresh. First, make sure it has cooled down completely. Pour the soup into freezer-safe bags or containers. I like to label them with the date. Lay bags flat in the freezer for easy stacking. To thaw, move the soup to the fridge the night before. You can also use cold water to speed up the thawing process. When reheating, I use a pot on the stove. This method helps keep the soup's flavor. Stir often to avoid sticking. If the soup is too thick, add a splash of broth or water. Heat it gently. Avoid boiling, as this can change the texture. Enjoy your soup warm, and savor the rich flavors! One-Pot Carrot Lentil Soup lasts about 5 days in the fridge. Store it in an airtight container to keep it fresh. Make sure it cools down before you seal it up. Yes, you can make this soup in a slow cooker. Just sauté the onion and garlic first. Then, add all the other ingredients to the slow cooker. Cook on low for about 6 hours or on high for about 3 hours. Lentils are full of protein and fiber. They help with digestion and keep you full longer. Carrots are rich in vitamins and good for your eyes. Together, they make this soup both tasty and healthy. This recipe is perfect for meal prep. You can make a big batch and store it in portions. It reheats well and tastes even better the next day. It’s a great option for lunch or dinner during the week. Yes, you can add meat for extra protein. Chicken or turkey works well. Just cook the meat first, then add it to the soup. You can also use cooked sausage or ham for added flavor. This blog post shared a simple and tasty one-pot carrot lentil soup recipe. We covered the key ingredients, step-by-step cooking, and helpful tips. You learned how to enhance flavors, make variations, and store leftovers. Remember, cooking can be fun and easy. Experiment with different herbs or spices. Enjoy your healthy meal and share it with friends and family. Happy cooking!

One-Pot Carrot Lentil Soup Nourishing and Simple Dish

To make these tasty date caramels, you need a few key ingredients: - 1 cup Medjool dates, pitted - 1/4 cup creamy almond butter - 1/4 cup full-fat coconut milk - 1 teaspoon pure vanilla extract - 1/2 teaspoon sea salt - 1/4 cup chopped nuts (walnuts or pecans) - 1/4 cup unsweetened shredded coconut These ingredients work together to create a rich and sweet treat. Medjool dates give the caramels their natural sweetness. Almond butter adds creaminess and helps bind everything. Coconut milk makes the mix extra smooth and rich. You can also add these optional ingredients to take your caramels up a notch: - Extra chopped nuts for crunch - More shredded coconut for flavor - A sprinkle of sea salt on top for contrast These additions can make each bite even better. You can mix and match to find your favorite combination. Each ingredient in these date caramels has its own health benefits: - Medjool dates are high in fiber and natural sugars, giving you energy. - Almond butter provides healthy fats and protein, which can keep you full. - Coconut milk contains medium-chain triglycerides (MCTs), which may boost energy. - Vanilla extract offers antioxidants that can support health. - Sea salt balances flavors and enhances sweetness. - Chopped nuts add healthy fats, protein, and crunch. - Shredded coconut offers fiber and may support heart health. Together, these ingredients create a sweet snack that is not only delicious but also packed with nutrients. Enjoy making your date caramels! To start, soak your pitted Medjool dates in warm water. This step helps them soften. Let them soak for about 10 to 15 minutes. After that, drain the water and set the dates aside. Soft dates blend easier, making your caramels smooth. Next, add the softened dates to your food processor. Include the creamy almond butter, coconut milk, vanilla extract, and sea salt. Blend these ingredients until the mix turns smooth and creamy. You may need to stop and scrape the bowl’s sides. This ensures everything mixes well. Once your mixture is creamy, it’s time to add the fun stuff! Toss in the chopped nuts and shredded coconut. Gently fold these ingredients into your date mix. This step adds crunch and flavor to your caramels. Now, prepare your baking dish. Line an 8x8 inch dish with parchment paper. Leave some paper hanging over the edges for easy removal. Spread your date mixture into the dish. Use a spatula to flatten it. Press down firmly to compact the mixture well. After shaping, cover the dish with plastic wrap. Put it in the fridge for at least 2 hours. This time helps the mixture set. When ready, lift the caramels out using the parchment paper. Place them on a cutting board and slice into small squares or rectangles. For a special touch, roll each piece in extra shredded coconut. Enjoy your sweet, chewy snacks! Start with soft dates. Soaking them in warm water makes blending easy. Use Medjool dates, as they are sweet and chewy. Drain the dates well before blending. This keeps the texture right. In your food processor, add almond butter and coconut milk. The almond butter adds creaminess. Coconut milk makes everything smooth. Blend until the mix is well combined. Stop to scrape down the bowl. This ensures even mixing. Aim for a smooth and creamy texture. If the mixture seems too thick, add more coconut milk. A little goes a long way. You want it to hold together but not be too runny. When adding nuts and coconut, fold them in gently. This keeps the mixture thick and chunky. If you want a firmer caramel, press down hard when spreading in the dish. Chill it in the fridge for at least two hours. This helps it set nicely. Store your date caramels in an airtight container. This keeps them fresh longer. You can keep them in the fridge for about a week. If you want to save them longer, consider freezing. Wrap them well in parchment paper first. When you're ready to eat, let them thaw in the fridge. Always check for any signs of spoilage. If they look dry or hard, it's time to toss them out. {{image_4}} You can enjoy date caramels without nuts. Simply skip the nuts in the recipe. You can replace them with more shredded coconut for texture. This keeps your caramels creamy and yummy. If you want, add seeds like sunflower seeds or pumpkin seeds. These seeds add a nice crunch without using nuts. Want to mix things up? You can add flavors! Try adding a teaspoon of cinnamon for warmth. You can also use cocoa powder for a chocolate twist. For a tropical taste, add a bit of lime zest. Another option is to mix in a splash of coffee or espresso for a rich flavor. These small changes create a unique taste in every bite! Making these caramels vegan is easy. The base is already plant-based! Just be sure to use almond butter that is free from animal products. You can also use any plant-based milk you like. Almond milk or oat milk works well. If you want a sweeter flavor, try a splash of maple syrup instead of the vanilla. These swaps keep your caramels tasty and vegan-friendly. To keep your date caramels fresh, store them in an airtight container. This helps keep them moist and tasty. Place parchment paper between layers if stacking them. This prevents sticking and makes them easier to grab. You can freeze date caramels for later use. Wrap each piece in plastic wrap. Then, place them in a freezer-safe bag or container. They will last up to three months. When ready to eat, thaw them in the fridge overnight. Date caramels can last about one week in the fridge. Check for any changes in texture or smell. If they feel hard or smell off, it’s best to toss them. For the best taste, enjoy them fresh! Yes, you can use other dates. Medjool dates are sweet and soft, making them great for caramels. However, you can also use Deglet Noor dates. They are firmer and less sweet. If you use them, soak the dates longer in warm water. This helps them blend better. If the mixture is too sticky, try these tips. First, chill the mixture for 30 minutes. This makes it easier to handle. If it’s still sticky, dust your hands with a little shredded coconut or almond flour. This will help you shape the caramels without the mixture sticking to your hands. You will know the caramels are set when they feel firm to the touch. After chilling for at least 2 hours, gently press the mixture. If it holds its shape, it’s ready. You can also slice a small piece to check the texture. It should be chewy and not too soft. Date caramels are simple to make and can be delicious. We covered key ingredients and how they add flavor and nutrition. I shared step-by-step instructions to make the process easy. You learned tips for the best texture and how to store them. We also explored fun variations and answered common questions. These caramels are tasty treats for everyone, and you can customize them easily. Enjoy making and sharing these healthy snacks!

Ingredient Date Caramels Easy Sweet Snack Recipe

In this Spring Vegetable Cream Soup, freshness is key. Here are the ingredients you need: - 1 tablespoon olive oil - 1 small onion, finely chopped - 2 cloves garlic, minced - 2 medium carrots, peeled and diced - 2 stalks celery, diced - 1 medium zucchini, diced - 1 cup green peas (fresh or frozen) - 1 cup asparagus, trimmed and cut into 1-inch pieces - 4 cups vegetable broth - 1 cup heavy cream or coconut milk - Salt and freshly ground black pepper, to taste - Fresh basil leaves for garnish Each of these vegetables brings its own taste and texture. You will love the vibrant colors and flavors they add to your soup. You can make this soup fit your needs. If you want a vegan option, use coconut milk instead of cream. You can also skip the cream for a lighter soup. If you are gluten-sensitive, check your broth for gluten. Feel free to swap in any veggies you have on hand. Spinach or kale can work well. Using fresh produce makes a big difference. Fresh veggies taste better and give your soup a bright color. They also pack in more nutrients. When shopping, look for vibrant colors and firm textures. This helps ensure you are getting the best flavor and health benefits. Remember, the quality of your ingredients shapes the quality of your dish. Start by gathering all your ingredients. You will need olive oil, onion, garlic, carrots, celery, zucchini, green peas, asparagus, vegetable broth, heavy cream, salt, pepper, and basil. Prepare the vegetables by chopping them into small pieces. This helps them cook evenly. First, warm one tablespoon of olive oil in a large pot over medium heat. Add the finely chopped onion and minced garlic. Cook for 3-4 minutes until the onion turns soft and clear. Next, add the diced carrots and celery. Stir them in and let them cook for about 5 minutes. This makes them tender. Now, add the diced zucchini, green peas, and asparagus. Cook this mixture for another 3-4 minutes. Then, pour in 4 cups of vegetable broth. Bring the soup to a boil, then lower the heat. Let it simmer uncovered for 15-20 minutes. The goal is to make all the vegetables fork-tender. Once the soup is done cooking, remove it from the heat. Let it cool for a few minutes. Use an immersion blender to blend the soup. You can blend it until it is smooth or leave some chunks for texture. If you want a heartier soup, blend only half and mix it back in. Then, return the pot to low heat. Stir in 1 cup of heavy cream or coconut milk. Warm the soup for another 5 minutes. Taste it and add salt and freshly ground black pepper as needed. This step is key to making the flavor shine. To boost the taste of your Spring Vegetable Cream Soup, use fresh herbs. Basil adds a bright note. You can also try thyme or parsley. They give a wonderful aroma and depth. Just chop them and add them when cooking. For spices, a pinch of nutmeg can bring warmth. A dash of cayenne pepper offers a subtle heat. Remember to taste as you go. This way, you can find the right balance. If you want a thicker soup, there are great options. You can add more heavy cream or coconut milk. This makes the soup rich and smooth. Another method is to use a potato. Simply peel, chop, and cook it with the other veggies. It will blend well and add creaminess. You can also use a cornstarch slurry. Mix cornstarch with a bit of cold water, then stir it into the soup. This will quickly thicken it without changing the flavor. Presentation is key to a lovely meal. Serve your soup in warm bowls for a cozy feel. A drizzle of cream or coconut milk on top looks beautiful. Add a sprinkle of fresh basil for color. You can also add croutons for crunch. For a fun touch, serve with a side of crusty bread. This makes your meal inviting and delicious. {{image_4}} You can easily switch up the flavors in your spring vegetable cream soup. For a sweeter taste, try using butternut squash or sweet potatoes instead of carrots. You can replace zucchini with yellow squash for a different color and flavor. If you want a bit of spice, add diced bell peppers or a hint of jalapeño. Fresh herbs like dill or thyme can also change the whole vibe of the soup. Feel free to experiment with what you have on hand. If you want a vegan version, skip the heavy cream. Use coconut milk instead for a creamy texture. You can also use cashew cream or almond milk, which offer a nice flavor. For extra richness, blend soaked cashews into the soup. This keeps it creamy while staying plant-based. Always check that your vegetable broth is vegan-friendly, as some brands may contain animal products. To make the soup heartier, you can add proteins or grains. Cooked lentils or chickpeas are great choices. They add protein and fiber, making the dish more filling. If you prefer grains, try adding cooked quinoa or brown rice. These options increase nutrition and texture. Just stir them in when you blend the soup for a creamy blend. Enjoy the added flavors and health benefits! To keep your spring vegetable cream soup fresh, let it cool first. Store it in an airtight container. Make sure the container is clean and dry. This helps prevent spoilage. Place the container in the fridge if you plan to eat it within a few days. For longer storage, consider freezing. When you're ready to enjoy the soup again, reheat it gently. Pour the soup into a pot. Warm it over low heat while stirring. This helps avoid burning. If the soup is too thick, add a splash of vegetable broth or water. Heat until it's hot, but do not boil it. If you've made a big batch, freezing is a great option. Pour the cooled soup into freezer-safe bags or containers. Leave some space at the top for expansion. To thaw, move the soup to the fridge overnight. You can also use the microwave, but be careful. Stir the soup while heating to ensure even warming. Yes, you can add other veggies. Try bell peppers, leeks, or spinach. They can change the flavor and add more color. Just make sure to chop them small for even cooking. If you like a bit of spice, add some diced jalapeños. The soup will stay fresh and bright with any new mix you choose. This soup can last about 3 to 4 days in the fridge. Make sure to store it in an airtight container. If you want to keep it longer, consider freezing it. When you want to enjoy it again, just reheat it on the stove until hot. Serve this soup with crusty bread or a fresh salad. A simple green salad with lemon dressing pairs well. You can also add a grilled cheese sandwich for a fun twist. If you like, top your soup with a dollop of sour cream or a sprinkle of cheese for extra flavor. This article explored the best ways to prepare a delicious Spring Vegetable Cream Soup. We discussed fresh seasonal ingredients and how to substitute them based on your dietary needs. Quality produce makes a big difference in flavor. I shared step-by-step instructions for preparation, cooking, and blending. You also learned some handy tips for enhancing flavor and texture. Don't forget to explore variations to suit your taste. Lastly, storing your soup properly will keep it fresh. Enjoy your tasty creation and share it with friends!

Spring Vegetable Cream Soup Flavorful and Healthy Dish

For tasty low-calorie air fryer eggplant, you need: - 1 medium eggplant, cut into 1-inch cubes - 1 tablespoon extra virgin olive oil - 1 teaspoon garlic powder - 1 teaspoon smoked paprika - ½ teaspoon sea salt - ½ teaspoon freshly cracked black pepper - ½ cup whole wheat bread crumbs These ingredients create a wonderful base. The eggplant provides a soft texture. The olive oil and spices add great flavor. The bread crumbs give a nice crunch. To make the eggplant even better, consider adding: - 2 tablespoons nutritional yeast Nutritional yeast adds a cheesy taste. It also boosts the umami flavor. This is perfect if you want a savory edge. For a fresh touch, you can garnish with: - Fresh parsley, finely chopped Garnishing with parsley adds color and freshness. It also enhances the dish's overall appeal. Consider serving with a dipping sauce like hummus for extra flavor. Start by preheating your air fryer to 375°F (190°C). This warms the air fryer, helping your eggplant bites cook evenly. It takes about 3 to 5 minutes. While it warms, gather your tools and ingredients. This makes your cooking process smooth and fun. In a large bowl, add the eggplant cubes. Pour in 1 tablespoon of extra virgin olive oil. Sprinkle 1 teaspoon of garlic powder, 1 teaspoon of smoked paprika, ½ teaspoon of sea salt, and ½ teaspoon of black pepper over the cubes. Mix well until every piece gets coated. In another bowl, combine ½ cup of whole wheat bread crumbs with 2 tablespoons of nutritional yeast. This mix gives the bites a tasty crunch. Take each eggplant cube and roll it in the breadcrumb mixture, pressing gently to stick. Make sure each piece is fully covered for the best flavor. Place the coated eggplant cubes in the air fryer basket. Keep them in a single layer. If your basket is small, cook in batches. Air fry them for 12-15 minutes. Halfway through, shake the basket to help them crisp up. They are done when golden brown and crispy on the outside. Carefully remove them from the air fryer and place them on a serving dish. Garnish with finely chopped fresh parsley for a pop of color. Enjoy your crispy eggplant bites as a healthy snack or appetizer! To achieve crispy eggplant bites, start with a good oil. I use extra virgin olive oil. It adds flavor and helps the crumbs stick. Make sure to coat each cube well with oil. This step is key for that crunchy texture. Also, preheat your air fryer. A hot fryer cooks the eggplant evenly and crisps it nicely. Soggy eggplant can ruin your bites. To avoid this, you must salt the eggplant first. Sprinkle sea salt on the cubes and let them sit for about 15 minutes. This step draws out excess moisture. After that, rinse and pat them dry. This process helps the eggplant stay firm and absorb less oil during cooking. Cooking times may vary based on your air fryer model. If your fryer runs hot, check the eggplant after 10 minutes. For cooler models, you may need the full 15 minutes. Always shake the basket halfway through. This action allows even cooking. Trust your eyes; look for that golden-brown color to ensure they are ready. {{image_4}} Want a kick? Add spice! Mix cayenne pepper or chili powder into your seasoning. Adjust the amount to your taste. Toss the eggplant with this mix along with the other spices. This will add heat and depth. The spicy bites are great as a snack or appetizer. Serve with a cooling dip, like yogurt or ranch. For a cheesy flavor, use nutritional yeast. Mix it with your breadcrumbs before coating the eggplant. Nutritional yeast adds a rich, umami taste without the extra calories. It’s perfect for those who love cheese but want to keep it light. Bake as usual, and enjoy the cheesy crunch. Herbs make everything better! Try adding dried herbs like oregano, thyme, or basil. Mix these into your seasoning blend. Fresh herbs like parsley or cilantro can also be added before serving. This will give your eggplant a fresh and fragrant taste. These bites pair well with any dipping sauce. To keep your leftover eggplant bites fresh, place them in a sealed container. Store them in the fridge for up to three days. This works best for quick snacks or meals. Make sure they cool down before sealing to avoid moisture buildup. If you want to save eggplant bites for later, freezing is a great option. First, let them cool completely. Next, arrange the bites in a single layer on a baking sheet. Freeze until solid, then transfer them to a freezer-safe bag. They can last for up to two months. This way, you can enjoy them anytime! To reheat and keep them crispy, use the air fryer again. Set it to 375°F (190°C) and cook for about 5-7 minutes. This method helps restore that crunchy texture. You can also use an oven if needed, but the air fryer is best for crispiness. Enjoy them like they are fresh out of the fryer! Yes, you can make this recipe gluten-free. Simply swap the whole wheat bread crumbs for gluten-free bread crumbs. Many brands offer great options that taste just as good. Always check labels to ensure they meet your needs. You have many tasty options for dipping sauces. Hummus is a great choice. It adds creaminess and flavor. A tangy yogurt dip also works well. You can mix yogurt with herbs or garlic for extra taste. Try a spicy sauce if you like heat. Each sauce will enhance the eggplant bites. To check if the eggplant is cooked, look for a golden brown color. The bites should feel crispy on the outside. You can also pierce them gently with a fork. If the fork goes in easily, they are done. Cooking time may vary, so keep an eye on them! This blog taught you about making low-calorie air fryer eggplant bites. We covered key ingredients, step-by-step cooking, tips for crispiness, fun variations, and storage tips. Remember, the right preparation means tasty bites every time. You can boost flavor with herbs or cheese, and sauces can add fun too. Feel free to experiment and make this recipe your own. Enjoy your crispy treats!

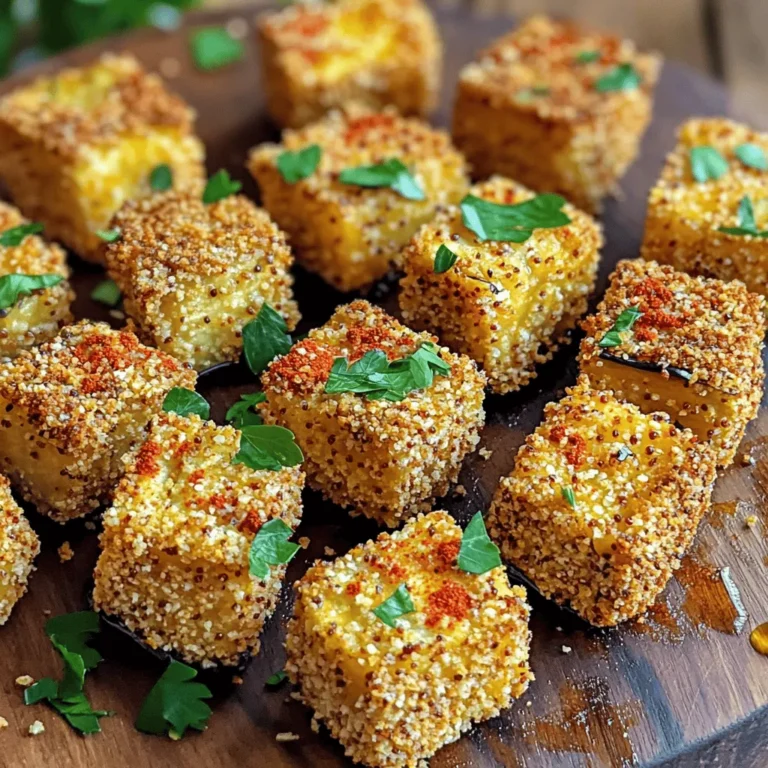
Low-Calorie Air Fryer Eggplant Flavorful and Crispy

PREV 1 … 8 9 10 … 17 NEXT
tastykitchentales

explore

DessertsDinnerAppetizersDrinks

Our Policies

  • Cookie Policy
  • Copyright Policy
  • Disclaimer
  • GDPR Policy
  • Terms Of Use
Back to Top
  • About
  • Contact Us
  • Privacy Policy
© 2025 tastykitchentales