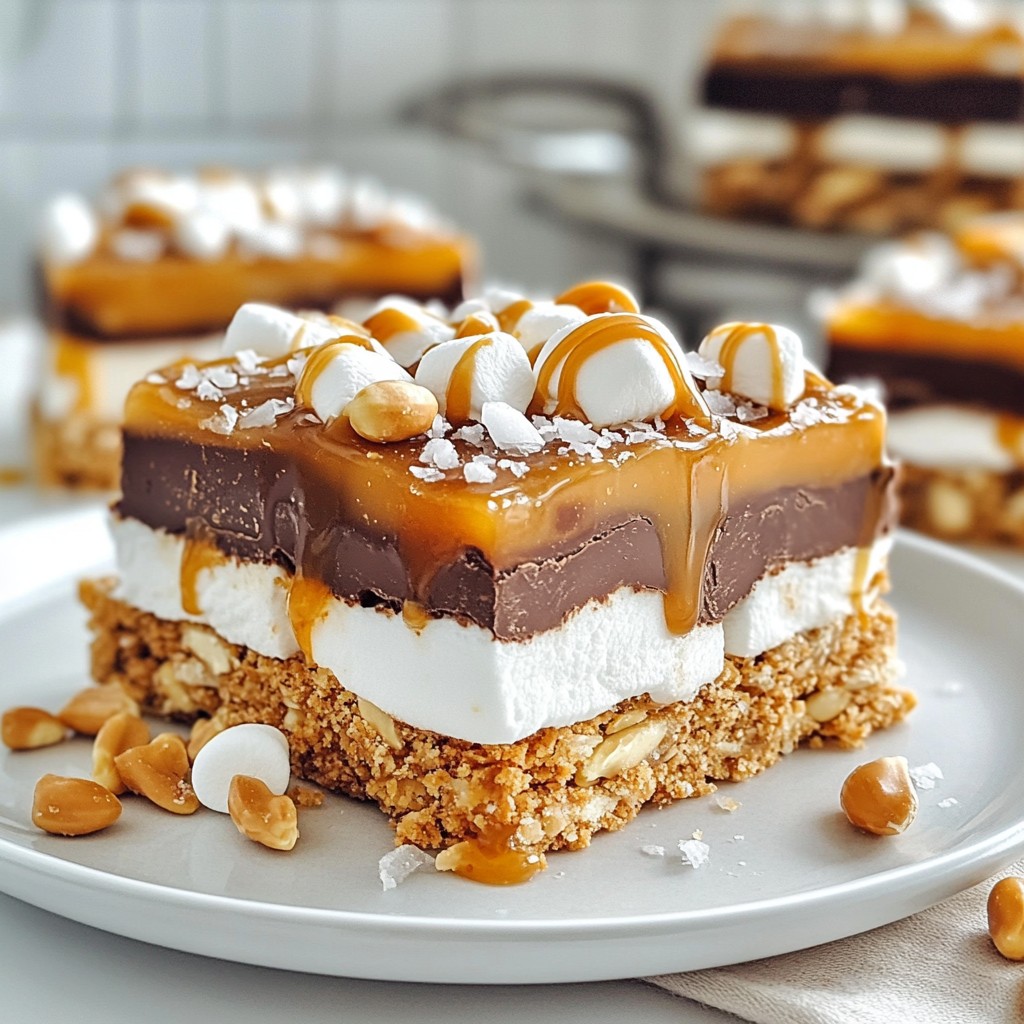
Are you ready to dive into a sweet adventure with my Caramel Chocolate Crunch Bars? These simple and tasty treats combine rich caramel, smooth chocolate, and a satisfying crunch in every bite. Whether you want to impress friends or treat yourself, this recipe is a win! In this post, I'll share everything you need from ingredients to tips, helping you create the perfect bars that everyone will love. Let's get started!
Why I Love This Recipe
- Deliciously Indulgent: These bars combine rich chocolate, creamy caramel, and crunchy peanuts for a treat that is truly irresistible.
- Easy to Make: With simple ingredients and straightforward steps, this recipe is perfect for bakers of any skill level.
- Perfect for Sharing: Cut into squares, these bars are ideal for parties, potlucks, or just sharing with friends and family.
- Customizable: Feel free to add your favorite nuts or substitute ingredients to make these bars uniquely yours!
Ingredients
Complete Ingredients List
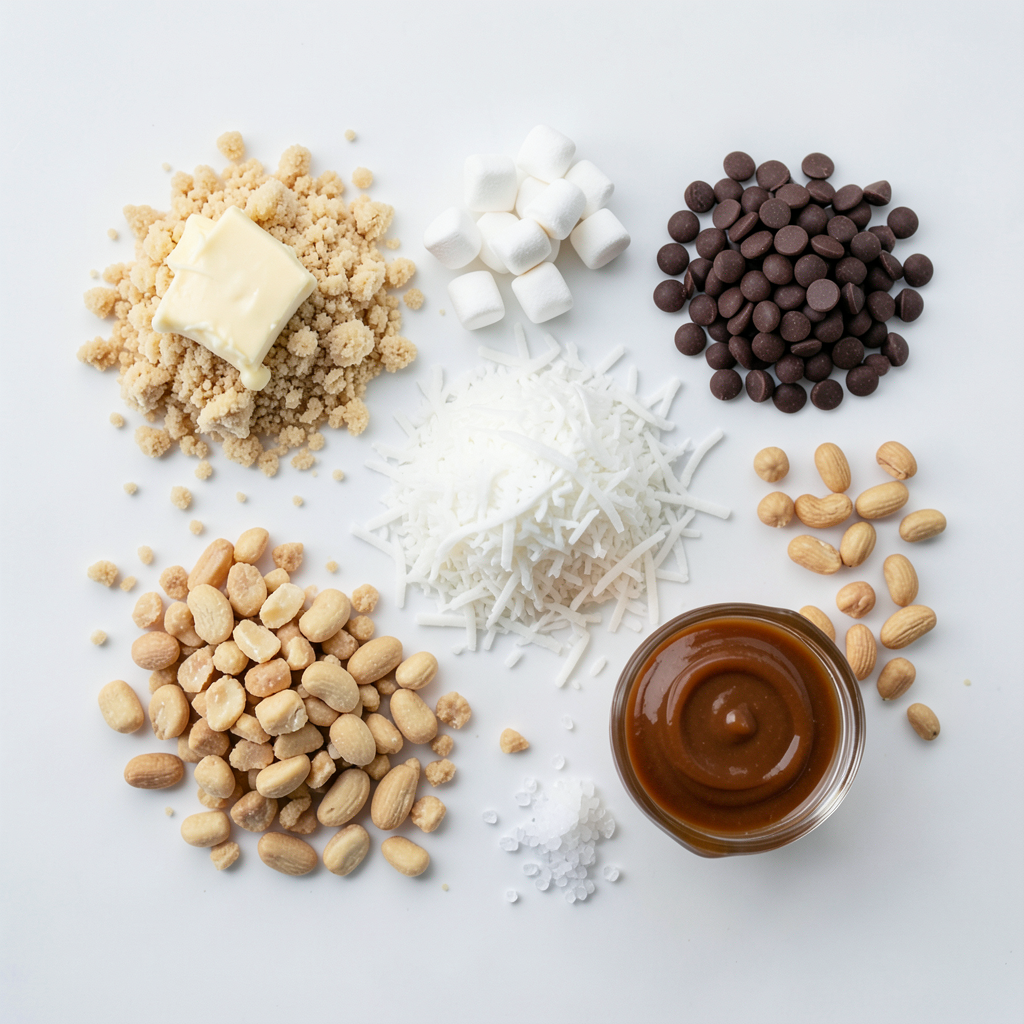
To make these Caramel Chocolate Crunch Bars, gather these ingredients:
- 1 cup graham cracker crumbs
- ½ cup unsalted butter, melted
- 1 cup sweetened shredded coconut
- 1 cup mini marshmallows
- 1 cup semi-sweet chocolate chips
- 1 cup caramel sauce
- 1 cup crunchy peanuts, roughly chopped
- Sea salt, for garnish
Key Ingredient Substitutions
You can swap some ingredients if needed. Here are some ideas:
- Graham cracker crumbs: Use crushed cookies like Digestive or Oreos.
- Unsalted butter: Coconut oil works great for a dairy-free option.
- Shredded coconut: Use almond flour for a nutty flavor.
- Mini marshmallows: Try using large marshmallows, cut into small pieces.
- Semi-sweet chocolate chips: Dark chocolate chips add a richer taste.
- Caramel sauce: Make your own with sugar and cream or use store-bought.
- Crunchy peanuts: Swap with almonds or walnuts for a different crunch.
Nutritional Information
Each bar packs a punch! Here’s an estimate for one serving:
- Calories: 200
- Total Fat: 10g
- Saturated Fat: 5g
- Carbohydrates: 25g
- Sugars: 15g
- Protein: 3g
These bars are sweet and crunchy. Enjoy them in moderation for a tasty treat!
Step-by-Step Instructions
Preparation Steps
1. Preheat your oven. Set it to 350°F (175°C).
2. Prepare your pan. Line an 8x8 inch baking pan with parchment paper. Leave some paper hanging over the sides. This helps you lift the bars out later.
3. Mix the crust. In a bowl, combine 1 cup of graham cracker crumbs and ½ cup of melted unsalted butter. Stir until the crumbs look wet and crumbly.
4. Press the mixture. Use your hands to pack the crumb mixture into the bottom of the pan. Make it firm and even.
Baking and Cooling Process
5. Bake the crust. Put the pan in the oven. Bake for 8 to 10 minutes. Look for a light golden brown on the edges.
6. Cool it down. Once baked, take it out and let it cool for a few minutes.
Assembly of Layers
7. Add the toppings. Spread 1 cup of shredded coconut, 1 cup of mini marshmallows, and 1 cup of chopped crunchy peanuts over the crust.
8. Drizzle caramel. Pour 1 cup of caramel sauce over the toppings. Make sure it covers everything.
9. Melt the chocolate. In a microwave-safe bowl, heat 1 cup of semi-sweet chocolate chips. Microwave in 30-second bursts. Stir until smooth.
10. Spread the chocolate. Pour the melted chocolate over the caramel. Use a spatula to spread it evenly.
11. Add sea salt. Sprinkle a pinch of sea salt on top of the chocolate.
12. Chill the bars. Place the pan in the refrigerator. Chill for at least 2 hours. They should feel firm when done.
13. Cut and serve. Lift the block out using the parchment paper. Cut into squares or rectangles with a sharp knife.
Enjoy each delicious bite of your Caramel Chocolate Crunch Bars!
Tips & Tricks
How to Avoid Common Mistakes
To make great caramel chocolate crunch bars, avoid these common mistakes:
- Don’t skip the cooling step. Let the crust cool before adding toppings.
- Watch your baking time. Overbaking can make the crust too hard.
- Be careful with the chocolate. Melt it slowly to prevent burning.
These tips help ensure your bars turn out perfect every time.
Expert Techniques for Perfect Bars
For the best bars, follow these expert techniques:
- Use a firm press. When you pack the crust, press it down tightly. This helps it hold together.
- Layer evenly. Distribute the coconut, marshmallows, and peanuts evenly for balanced taste.
- Chill well. Let the bars chill for at least two hours. This makes cutting easier.
These methods can elevate your bars from good to great.
Presentation Tips for Serving
Presentation matters too! Here are some easy tips:
- Use a decorative plate. It makes your bars look fancy and inviting.
- Drizzle extra caramel. A light drizzle adds flair and extra flavor.
- Add crushed peanuts. Sprinkling these on top gives a nice crunch and a pop of color.
These simple touches will impress your friends and family.
Pro Tips
- Cool Completely: Allow the bars to cool fully before cutting to ensure clean and neat squares.
- Use Fresh Ingredients: Opt for fresh marshmallows and high-quality chocolate for the best flavor and texture.
- Try Different Nuts: Experiment with different nuts like almonds or walnuts for a unique crunch.
- Store Properly: Keep the bars in an airtight container in the fridge to maintain freshness.
Variations
Alternate Flavor Combinations
You can easily change the flavor of your Caramel Chocolate Crunch Bars. Try adding different nuts, like almonds or walnuts. For a fun twist, use white chocolate instead of semi-sweet chocolate. You can even swap the caramel sauce for a rich peanut butter drizzle. Each choice gives a new taste to enjoy.
Dietary Adjustments (Gluten-Free, Vegan)
To make these bars gluten-free, use gluten-free graham crackers. You can also choose a dairy-free butter substitute for the melted butter. For a vegan option, use dark chocolate chips and a plant-based caramel sauce. These simple swaps keep the taste great while meeting dietary needs.
Seasonal Add-Ins and Twists
Seasonal flavors can make your bars extra special. In fall, add chopped apples or pumpkin spice. For summer, mix in fresh berries or citrus zest. During winter, add peppermint extract to the chocolate for a festive touch. These seasonal add-ins keep your treats fresh and exciting all year long.
Storage Info
How to Properly Store Leftovers
To keep your Caramel Chocolate Crunch Bars fresh, store them in an airtight container. Layer parchment paper between the bars to avoid sticking. You can keep them at room temperature for up to three days. If you live in a warm area, it’s best to refrigerate them. This keeps the chocolate from melting and the bars firm.
Freezing Instructions for Longer Storage
Freezing is a great option for longer storage. First, cut the bars into squares or rectangles. Wrap each piece tightly in plastic wrap. Then, place them in a freezer-safe bag or container. You can freeze the bars for up to three months. When you want to enjoy them, just thaw them in the fridge overnight.
Shelf Life of Stored Bars
The shelf life of stored bars depends on how you store them. If kept at room temperature, they last about three days. In the fridge, they can last up to a week. If frozen, they remain tasty for three months. Always check for signs of spoilage, like off smells or changes in texture. Keeping an eye on them ensures you enjoy every bite!
FAQs
Can I make these bars ahead of time?
Yes, you can make these bars ahead of time. They taste great after chilling. Prepare them a day in advance and store them in the fridge. Just cut the bars before serving. This makes a fun treat for gatherings.
What can I substitute for peanuts?
You can use any nut you like. Almonds or walnuts work well. If you need a nut-free option, try sunflower seeds or pumpkin seeds. These add a nice crunch without nuts.
How can I make these bars more indulgent?
To make these bars more indulgent, add more chocolate chips. You can also drizzle more caramel sauce on top. Chopped toffee bits can add extra sweetness. Using dark chocolate instead of semi-sweet will give a richer taste. Enjoy experimenting with flavors!
You can create delicious bars with simple ingredients and easy steps. We discussed the best ingredients and offered substitutions if needed. The baking process and assembly tips will help you avoid mistakes. We also explored fun variations and proper storage methods.
Remember, these bars can suit many diets and tastes. Use what you've learned to try new flavors. Enjoy making and sharing your tasty creations!