Craving a snack that's cheesy, buttery, and full of garlic goodness? Look no further! These Cheesy Garlic Butter Bites are simple to make and simply irresistible. Whether you’re preparing for a movie night or a casual get-together, this homemade treat will steal the show. I’ll guide you through each step, from gathering fresh ingredients to baking them to perfection. Get ready to indulge and impress your taste buds!
Why I Love This Recipe
- Easy to Make: With simple ingredients and straightforward steps, these cheesy butter bites come together quickly, making them perfect for any occasion.
- Flavorful Garlic Infusion: The addition of minced garlic elevates the taste, giving each bite a deliciously aromatic and savory kick.
- Cheesy Goodness: The combination of mozzarella and Parmesan cheeses creates a rich, gooey texture that cheese lovers will adore.
- Perfect for Sharing: These bites are great for gatherings, allowing everyone to enjoy a warm, cheesy treat that's easy to grab and go!
Ingredients
Complete List of Ingredients
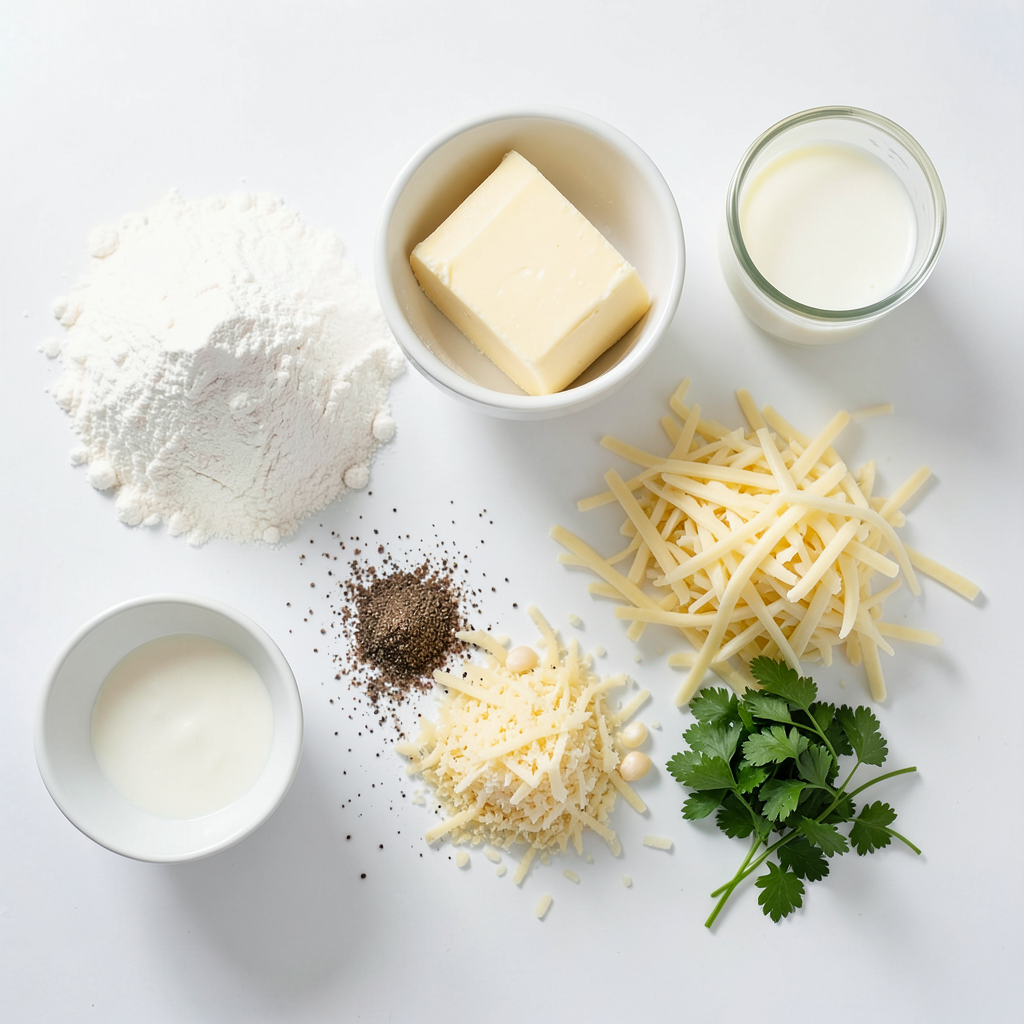
To make Cheesy Garlic Butter Bites, gather these simple ingredients:
- 1 cup all-purpose flour
- 1 tablespoon baking powder
- 1/2 teaspoon salt
- 1/4 teaspoon freshly ground black pepper
- 1/2 cup unsalted butter, melted and slightly cooled
- 1/2 cup shredded mozzarella cheese
- 1/2 cup finely grated Parmesan cheese
- 3 cloves garlic, minced (or adjust to taste)
- 1/4 cup fresh parsley, finely chopped (plus extra for garnish)
- 1/2 cup milk
Ingredient Substitutions and Variations
You can make swaps based on what you have. Here are some ideas:
- Flour: Try whole wheat flour for a nuttier taste.
- Cheese: Use cheddar or gouda for a different flavor.
- Butter: Replace unsalted butter with olive oil for a lighter bite.
- Garlic: Use garlic powder if you don't have fresh garlic.
- Milk: Almond milk or oat milk works well for dairy-free options.
- Herbs: Mix in dried oregano or basil for extra flavor.
Notes on Freshness and Quality of Ingredients
Fresh ingredients make a big difference. Use:
- Butter: Fresh, unsalted butter enhances richness.
- Cheese: Buy block cheese and shred it yourself. Pre-shredded cheese often has additives.
- Garlic: Fresh garlic gives the best flavor. Avoid pre-minced garlic for this recipe.
- Parsley: Fresh parsley adds a bright taste and color. If dried, use only half the amount.
Using quality ingredients ensures your bites taste amazing. Enjoy making these cheesy, garlic-filled snacks!
Step-by-Step Instructions
Prepping the Oven and Baking Sheet
Start by preheating your oven to 375°F (190°C). This step is key for even baking. Next, line a baking sheet with parchment paper. This prevents the bites from sticking and makes cleanup easier.
Mixing the Dry Ingredients
Grab a large mixing bowl. In it, combine 1 cup of all-purpose flour, 1 tablespoon of baking powder, 1/2 teaspoon of salt, and 1/4 teaspoon of freshly ground black pepper. Use a whisk to mix them well. Make sure everything is blended evenly. This helps the bites rise nicely when baked.
Preparing the Garlic Butter Mixture
In a separate bowl, melt 1/2 cup of unsalted butter and let it cool slightly. Add 3 minced garlic cloves and 1/2 cup of milk to the butter. Mix well until smooth. This mixture gives the bites their rich flavor. You can adjust the garlic to suit your taste!
Forming and Baking the Bites
Slowly pour the garlic butter mixture into the dry ingredients. Stir gently with a spatula until just combined. Be careful not to overmix. Next, fold in 1/2 cup of shredded mozzarella cheese, 1/2 cup of grated Parmesan cheese, and 1/4 cup of finely chopped parsley. Use a cookie scoop or tablespoon to drop the dough onto the baking sheet, spacing them about 2 inches apart. Bake for 15-18 minutes until they turn golden brown. A toothpick should come out clean when they’re done.
Cooling and Serving Suggestions
After baking, let the bites cool on the baking sheet for about 5 minutes. This helps them set. Then, transfer them to a serving plate. For a lovely touch, garnish with extra fresh parsley. Serve warm for the best taste. These bites make a great snack for any occasion!
Tips & Tricks
Perfecting the Dough Consistency
The right dough texture is key to great bites. Mix dry and wet ingredients gently. Overmixing can make them tough. Aim for a moist dough that holds together. If it feels too dry, add a splash of milk. If too wet, sprinkle in a bit more flour. The dough should be sticky but manageable.
Storage Tips for Leftovers
Store leftover bites in an airtight container. Keep them in the fridge for up to three days. For longer storage, freeze them. Place them in a freezer-safe bag. They can last for up to three months in the freezer. Make sure to label the bag with the date.
Reheating Instructions for Optimal Texture
To reheat bites, preheat your oven to 350°F (175°C). Place the bites on a baking sheet. Heat for about 10 minutes or until warm. This method keeps them crispy. You can also use a microwave, but they may become soft. If using a microwave, heat in short bursts of 15 seconds. Enjoy warm for the best taste!
Pro Tips
- Adjust Garlic to Taste: If you prefer a milder flavor, start with one or two cloves of garlic and adjust according to your palate.
- Cheese Variations: Experiment with different cheeses like cheddar or gouda for unique flavor profiles.
- Make Ahead: You can prepare the dough in advance and refrigerate it for up to 24 hours before baking.
- Serve Warm: These bites are best enjoyed warm, so consider serving them immediately after baking for the ultimate cheesy experience.
Variations
Adding Different Cheeses
You can change the cheese to fit your taste. Try cheddar for a sharp twist. Pepper jack adds a spicy kick. Goat cheese gives a creamy texture. Mixing cheeses can create a new flavor. Use equal parts of each cheese for balance. You can also add a bit more mozzarella for extra gooeyness.
Herb and Spice Variations
Herbs can brighten up these bites. Add fresh chives or thyme for a fragrant touch. You can also mix in dried Italian herbs for a robust flavor. A pinch of red pepper flakes brings heat without overpowering the garlic. Experiment with your favorite herbs to find your perfect mix.
Spicy Garlic Butter Bites Options
If you love heat, add diced jalapeños or crushed red pepper flakes. Use spicy garlic powder instead of regular for an extra punch. You can even mix in some sriracha with the butter for a bold twist. These spicy bites are perfect for those who enjoy a kick in their snacks. Adjust the spice to suit your taste and enjoy!
Storage Info
Best Practices for Storing Leftover Bites
To keep your cheesy garlic butter bites fresh, store them in an airtight container. Allow them to cool completely before sealing. This helps prevent moisture buildup, which can make them soggy. Place a paper towel at the bottom of the container to absorb extra moisture. This simple step keeps your bites tasty for longer.
Freezing Instructions
If you want to save some bites for later, freezing is a great option. First, let the bites cool fully. Then, arrange them in a single layer on a baking sheet. Freeze them for about one hour. Once frozen, transfer the bites to a freezer-safe bag or container. Be sure to label it with the date. You can keep them frozen for up to three months.
Shelf Life and Safety Tips
When stored properly at room temperature, these bites can last for about two days. If you refrigerate them, they can stay fresh for up to a week. Always check for any signs of spoilage, like mold or strange smells, before eating. If you notice any, it’s best to throw them away. Following these tips will help you enjoy your cheesy garlic butter bites safely and deliciously!
FAQs
Can I make Cheesy Garlic Butter Bites ahead of time?
Yes, you can make these bites ahead of time. Prepare the dough and scoop it onto the baking sheet. Then, cover it and keep it in the fridge for up to 24 hours. When you're ready, bake them straight from the fridge. Just add a few extra minutes to the baking time. This makes it easy for parties or busy weeknights.
What can I serve with Cheesy Garlic Butter Bites?
These bites pair well with many dishes. Here are some ideas:
- Tomato soup for a classic combo.
- A fresh salad for a light meal.
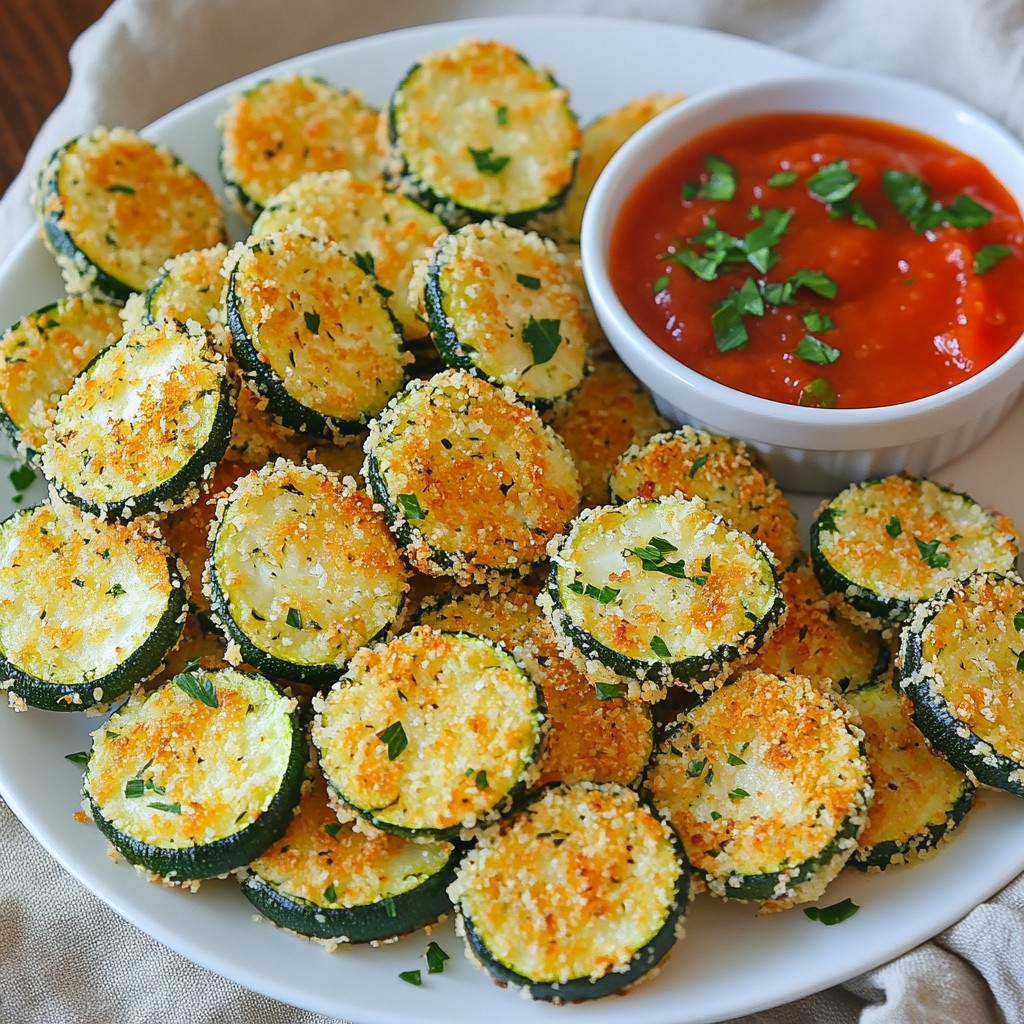
- Marinara sauce for dipping.
- A charcuterie board for a fun snack spread.
How do I know when they are fully baked?
You can tell they are done when they puff up and turn golden brown. Insert a toothpick into the center. If it comes out clean, they are ready. If the toothpick has dough on it, bake for a few more minutes.
Are there gluten-free options available for this recipe?
Yes, you can make gluten-free Cheesy Garlic Butter Bites. Use a 1-to-1 gluten-free flour blend in place of all-purpose flour. Make sure your baking powder is gluten-free as well. The texture may be slightly different, but they will still taste great!
To recap, we explored the key ingredients, their substitutes, and focused on freshness. Then, we broke down the easy steps for making cheesy garlic butter bites. We discussed tips for dough consistency, storage, and reheating. We also covered delicious variations and best practices for storing leftovers.
These bites are perfect for any gathering. Use these tips to impress your guests. With a few adjustments, you can make them your own. Enjoy every cheesy, buttery bite!