Cheesy Garlic Chicken Wraps Flavorful and Simple Meal

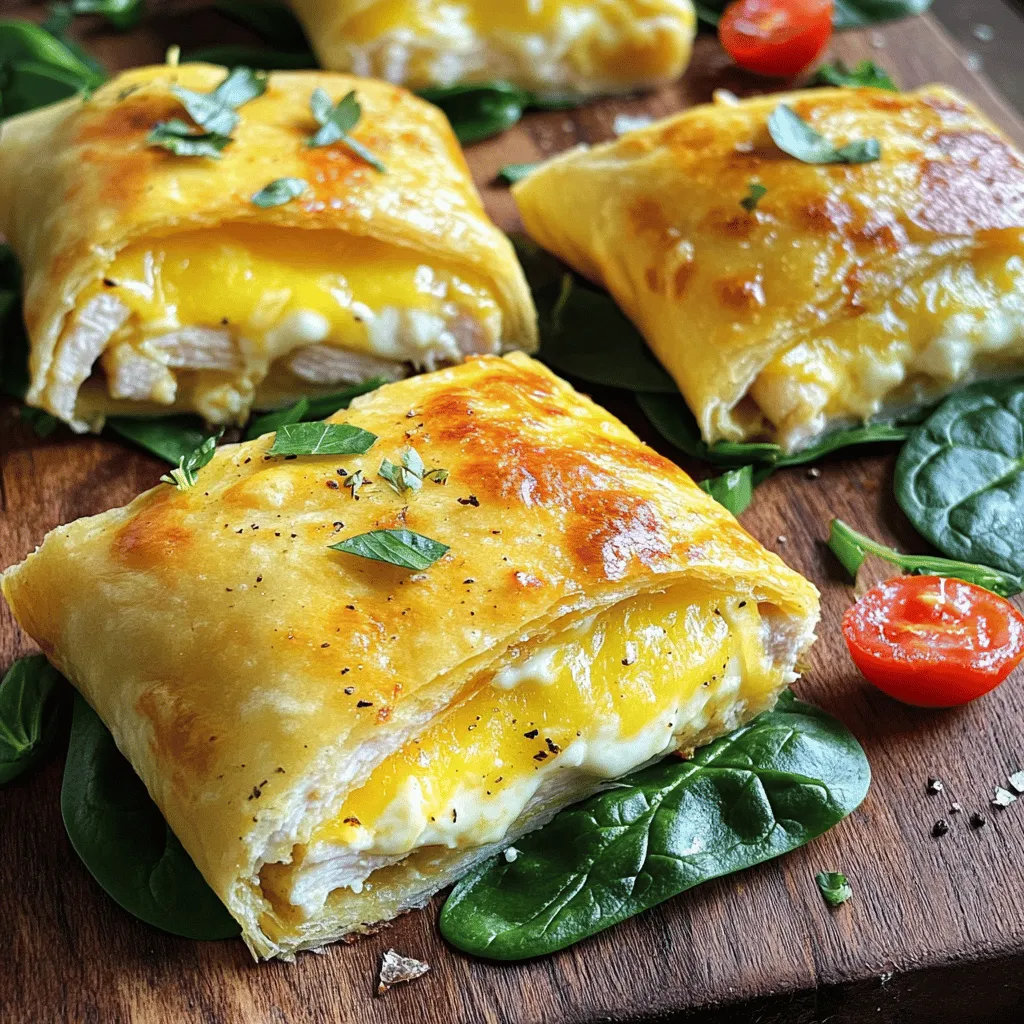
Craving something quick, tasty, and fun to make? Cheesy Garlic Chicken Wraps hit the spot! Packed with shredded chicken, creamy cheese, and fresh veggies, these wraps are both flavorful and simple. Whether you’re preparing a family dinner or a quick snack, you’ll love how easy it is to whip these up. Let’s dive into the ingredients and steps to create your new favorite meal!

- 2 cups cooked chicken, shredded - 1 cup shredded mozzarella cheese - 1/2 cup cream cheese, softened - 2 cloves fresh garlic, minced - 1 teaspoon dried oregano - 1 teaspoon smoked paprika - Salt and freshly cracked pepper These main ingredients create a creamy, cheesy filling. The shredded chicken adds protein and heartiness. The mozzarella and cream cheese make it rich and gooey. Garlic gives it a strong flavor, while oregano and paprika add warmth and depth. - 4 large flour tortillas - Whole wheat tortillas for a healthier choice You can use flour or whole wheat tortillas. Flour tortillas are soft and chewy. Whole wheat adds fiber and a nutty taste. Choose the size that fits your appetite. A larger tortilla holds more filling, while smaller ones are better for snacks. - 1 cup fresh spinach leaves - 1/2 cup cherry tomatoes, halved Adding fresh spinach makes your wraps colorful and healthy. Spinach adds a nice crunch and lots of nutrients. Cherry tomatoes bring sweetness and a pop of flavor. These add-ins make the wraps look great and taste even better. To start, you need to mix the chicken mixture. In a medium bowl, combine these ingredients: - 2 cups cooked chicken, shredded - 1 cup shredded mozzarella cheese - 1/2 cup cream cheese, softened - 2 cloves fresh garlic, minced - 1 teaspoon dried oregano - 1 teaspoon smoked paprika - Salt and pepper to taste Use a spatula to blend everything together. Keep mixing until it feels creamy and smooth. This mixture should stick together well but not be too runny. Next, lay your tortillas flat on a clean surface. You can use either flour or whole wheat. Now, take the chicken mixture and spread it down the center of each tortilla. Make sure to leave about an inch of space on each side. This space helps with folding later. On top of the chicken, add fresh vegetables: - 1 cup fresh spinach leaves - 1/2 cup cherry tomatoes, halved These veggies bring color and crunch. Once you add them, fold the sides of the tortilla inward. Then, roll it up tightly from the bottom. This keeps all the tasty filling inside. It’s time to cook the wraps! Preheat a non-stick skillet over medium heat. While it heats, brush the outside of each wrap lightly with olive oil. This will help make them crispy. Place the wraps seam-side down in the skillet. Cook for about 3-4 minutes on each side. You want them to turn golden brown and feel crispy. Once they are done, take them out and let them cool for a minute. Then, slice each wrap in half, and they are ready to serve! - When flipping wraps, use a wide spatula. This helps keep them intact. - Cook wraps seam-side down first. This secures the filling and prevents spills. - Avoid soggy wraps by not overfilling them. Leave space at the edges. - Lightly brush olive oil on the outside. This adds crispness and flavor. - Add fresh herbs like basil or cilantro for a burst of flavor. - Try spices like cayenne for heat or cumin for depth. - Serve with dipping sauces like ranch, salsa, or a creamy garlic sauce. - A squeeze of fresh lemon juice can brighten the dish. - Serve wraps on a rustic wooden board for a cozy look. - Slice them in half for easy eating and a nice display. - Garnish with fresh herbs, like parsley or chives, on top. - Pair wraps with a small bowl of dipping sauce for a fun touch. {{image_4}} You can switch proteins in your wraps. Turkey works great if you want leaner meat. Tofu is a good choice for a vegetarian option. It soaks up flavors well. For tortillas, try low-carb versions. They taste great and keep the wraps light. You can add a spicy kick to your wraps. Mix in hot sauce or jalapeños for heat. For a smoky flavor, use smoked paprika or chipotle powder. Think globally too! Try adding Mediterranean herbs for a fresh twist. Or, use Mexican spices for a zesty flair. For a vegan wrap, use plant-based cheese. There are many great options available. You can also add more veggies for crunch. Bell peppers, zucchini, or avocados work well. These additions keep the wraps healthy and tasty. To keep your Cheesy Garlic Chicken Wraps fresh, place them in an airtight container. This helps prevent them from drying out. You can store them in the fridge for up to three days. After that, they may lose their taste and texture. If you want to save some wraps for later, freezing is a great option. Wrap each one tightly in plastic wrap, then place them in a freezer bag. This keeps air out and helps prevent freezer burn. You can store them for up to three months. To cook from frozen, remove the wraps from the freezer and let them thaw in the fridge overnight. You can also cook them directly in a skillet, adding a few extra minutes to the cooking time. When you're ready to enjoy your wraps, reheating them correctly is key. The best way to reheat is in a skillet over medium heat. This keeps the outside crispy while warming the inside. You can also use an oven, wrapping them in foil to avoid drying out. If you want extra crispiness, place them directly on the oven rack for the last few minutes. Enjoy your delicious Cheesy Garlic Chicken Wraps! Yes, you can prepare these wraps in advance. To meal prep, follow these tips: - Mix the chicken filling and store it in the fridge. - Wrap the tortillas without cooking them. - Keep the wraps in an airtight container. - Cook them just before serving for the best taste. If you want to change the protein, you have great options: - Use shredded turkey for a leaner choice. - Try shredded beef for a bolder flavor. - For a plant-based option, use tofu or chickpeas. Yes, these wraps can be frozen. Here’s how: - Assemble the wraps, but do not cook them. - Wrap each one in plastic wrap. - Store them in a freezer-safe bag or container. - To reheat, cook straight from frozen in a skillet. These wraps taste great with various dips: - Salsa adds a fresh and zesty touch. - Ranch dressing gives a creamy addition. - Try a yogurt-based dip for a cool contrast. - Guacamole or hummus also works well. In this article, we explored how to make Cheesy Garlic Chicken Wraps. From the main ingredients to the best tortilla options, we covered it all. You learned how to prepare the chicken mixture, assemble the wraps, and achieve perfect crispiness. I shared tips for flavor enhancements and storage options for leftovers, too. Finally, we discussed variations, including healthy and vegetarian choices. With these insights, you can create delicious wraps that suit your taste. Enjoy experimenting with flavors and impressing your friends and family!

Ingredients

Main Ingredients for Cheesy Garlic Chicken Wraps

– 2 cups cooked chicken, shredded

– 1 cup shredded mozzarella cheese

– 1/2 cup cream cheese, softened

– 2 cloves fresh garlic, minced

– 1 teaspoon dried oregano

– 1 teaspoon smoked paprika

– Salt and freshly cracked pepper

These main ingredients create a creamy, cheesy filling. The shredded chicken adds protein and heartiness. The mozzarella and cream cheese make it rich and gooey. Garlic gives it a strong flavor, while oregano and paprika add warmth and depth.

Tortilla Options

– 4 large flour tortillas

– Whole wheat tortillas for a healthier choice

You can use flour or whole wheat tortillas. Flour tortillas are soft and chewy. Whole wheat adds fiber and a nutty taste. Choose the size that fits your appetite. A larger tortilla holds more filling, while smaller ones are better for snacks.

Fresh Add-Ins

– 1 cup fresh spinach leaves

– 1/2 cup cherry tomatoes, halved

Adding fresh spinach makes your wraps colorful and healthy. Spinach adds a nice crunch and lots of nutrients. Cherry tomatoes bring sweetness and a pop of flavor. These add-ins make the wraps look great and taste even better.

Step-by-Step Instructions

Preparing the Chicken Mixture

To start, you need to mix the chicken mixture. In a medium bowl, combine these ingredients:

– 2 cups cooked chicken, shredded

– 1 cup shredded mozzarella cheese

– 1/2 cup cream cheese, softened

– 2 cloves fresh garlic, minced

– 1 teaspoon dried oregano

– 1 teaspoon smoked paprika

– Salt and pepper to taste

Use a spatula to blend everything together. Keep mixing until it feels creamy and smooth. This mixture should stick together well but not be too runny.

Assembling the Wraps

Next, lay your tortillas flat on a clean surface. You can use either flour or whole wheat. Now, take the chicken mixture and spread it down the center of each tortilla. Make sure to leave about an inch of space on each side. This space helps with folding later.

On top of the chicken, add fresh vegetables:

– 1 cup fresh spinach leaves

– 1/2 cup cherry tomatoes, halved

These veggies bring color and crunch. Once you add them, fold the sides of the tortilla inward. Then, roll it up tightly from the bottom. This keeps all the tasty filling inside.

Cooking the Wraps

It’s time to cook the wraps! Preheat a non-stick skillet over medium heat. While it heats, brush the outside of each wrap lightly with olive oil. This will help make them crispy.

Place the wraps seam-side down in the skillet. Cook for about 3-4 minutes on each side. You want them to turn golden brown and feel crispy. Once they are done, take them out and let them cool for a minute. Then, slice each wrap in half, and they are ready to serve!

Tips & Tricks

Cooking Tips

– When flipping wraps, use a wide spatula. This helps keep them intact.

– Cook wraps seam-side down first. This secures the filling and prevents spills.

– Avoid soggy wraps by not overfilling them. Leave space at the edges.

– Lightly brush olive oil on the outside. This adds crispness and flavor.

Flavor Enhancements

– Add fresh herbs like basil or cilantro for a burst of flavor.

– Try spices like cayenne for heat or cumin for depth.

– Serve with dipping sauces like ranch, salsa, or a creamy garlic sauce.

– A squeeze of fresh lemon juice can brighten the dish.

Presentation Ideas

– Serve wraps on a rustic wooden board for a cozy look.

– Slice them in half for easy eating and a nice display.

– Garnish with fresh herbs, like parsley or chives, on top.

– Pair wraps with a small bowl of dipping sauce for a fun touch.

Variations

Healthy Alternatives

You can switch proteins in your wraps. Turkey works great if you want leaner meat. Tofu is a good choice for a vegetarian option. It soaks up flavors well. For tortillas, try low-carb versions. They taste great and keep the wraps light.

Flavor Variations

You can add a spicy kick to your wraps. Mix in hot sauce or jalapeños for heat. For a smoky flavor, use smoked paprika or chipotle powder. Think globally too! Try adding Mediterranean herbs for a fresh twist. Or, use Mexican spices for a zesty flair.

Vegetarian or Vegan Options

For a vegan wrap, use plant-based cheese. There are many great options available. You can also add more veggies for crunch. Bell peppers, zucchini, or avocados work well. These additions keep the wraps healthy and tasty.

Storage Info

Storing Leftovers

To keep your Cheesy Garlic Chicken Wraps fresh, place them in an airtight container. This helps prevent them from drying out. You can store them in the fridge for up to three days. After that, they may lose their taste and texture.

Freezing Options

If you want to save some wraps for later, freezing is a great option. Wrap each one tightly in plastic wrap, then place them in a freezer bag. This keeps air out and helps prevent freezer burn. You can store them for up to three months. To cook from frozen, remove the wraps from the freezer and let them thaw in the fridge overnight. You can also cook them directly in a skillet, adding a few extra minutes to the cooking time.

Reheating Tips

When you’re ready to enjoy your wraps, reheating them correctly is key. The best way to reheat is in a skillet over medium heat. This keeps the outside crispy while warming the inside. You can also use an oven, wrapping them in foil to avoid drying out. If you want extra crispiness, place them directly on the oven rack for the last few minutes. Enjoy your delicious Cheesy Garlic Chicken Wraps!

FAQs

Can I make Cheesy Garlic Chicken Wraps ahead of time?

Yes, you can prepare these wraps in advance. To meal prep, follow these tips:

– Mix the chicken filling and store it in the fridge.

– Wrap the tortillas without cooking them.

– Keep the wraps in an airtight container.

– Cook them just before serving for the best taste.

What can I substitute for chicken in this recipe?

If you want to change the protein, you have great options:

– Use shredded turkey for a leaner choice.

– Try shredded beef for a bolder flavor.

– For a plant-based option, use tofu or chickpeas.

Are Cheesy Garlic Chicken Wraps freezer-friendly?

Yes, these wraps can be frozen. Here’s how:

– Assemble the wraps, but do not cook them.

– Wrap each one in plastic wrap.

– Store them in a freezer-safe bag or container.

– To reheat, cook straight from frozen in a skillet.

What dips pair well with these wraps?

These wraps taste great with various dips:

– Salsa adds a fresh and zesty touch.

– Ranch dressing gives a creamy addition.

– Try a yogurt-based dip for a cool contrast.

– Guacamole or hummus also works well.

In this article, we explored how to make Cheesy Garlic Chicken Wraps. From the main ingredients to the best tortilla options, we covered it all. You learned how to prepare the chicken mixture, assemble the wraps, and achieve perfect crispiness. I shared tips for flavor enhancements and storage options for leftovers, too. Finally, we discussed variations, including healthy and vegetarian choices. With these insights, you can create delicious wraps that suit your taste. Enjoy experimenting with flavors and impressing your friends and family!

- 2 cups cooked chicken, shredded - 1 cup shredded mozzarella cheese - 1/2 cup cream cheese, softened - 2 cloves fresh garlic, minced - 1 teaspoon dried oregano - 1 teaspoon smoked paprika - Salt and freshly cracked pepper These main ingredients create a creamy, cheesy filling. The shredded chicken adds protein and heartiness. The mozzarella and cream cheese make it rich and gooey. Garlic gives it a strong flavor, while oregano and paprika add warmth and depth. - 4 large flour tortillas - Whole wheat tortillas for a healthier choice You can use flour or whole wheat tortillas. Flour tortillas are soft and chewy. Whole wheat adds fiber and a nutty taste. Choose the size that fits your appetite. A larger tortilla holds more filling, while smaller ones are better for snacks. - 1 cup fresh spinach leaves - 1/2 cup cherry tomatoes, halved Adding fresh spinach makes your wraps colorful and healthy. Spinach adds a nice crunch and lots of nutrients. Cherry tomatoes bring sweetness and a pop of flavor. These add-ins make the wraps look great and taste even better. To start, you need to mix the chicken mixture. In a medium bowl, combine these ingredients: - 2 cups cooked chicken, shredded - 1 cup shredded mozzarella cheese - 1/2 cup cream cheese, softened - 2 cloves fresh garlic, minced - 1 teaspoon dried oregano - 1 teaspoon smoked paprika - Salt and pepper to taste Use a spatula to blend everything together. Keep mixing until it feels creamy and smooth. This mixture should stick together well but not be too runny. Next, lay your tortillas flat on a clean surface. You can use either flour or whole wheat. Now, take the chicken mixture and spread it down the center of each tortilla. Make sure to leave about an inch of space on each side. This space helps with folding later. On top of the chicken, add fresh vegetables: - 1 cup fresh spinach leaves - 1/2 cup cherry tomatoes, halved These veggies bring color and crunch. Once you add them, fold the sides of the tortilla inward. Then, roll it up tightly from the bottom. This keeps all the tasty filling inside. It’s time to cook the wraps! Preheat a non-stick skillet over medium heat. While it heats, brush the outside of each wrap lightly with olive oil. This will help make them crispy. Place the wraps seam-side down in the skillet. Cook for about 3-4 minutes on each side. You want them to turn golden brown and feel crispy. Once they are done, take them out and let them cool for a minute. Then, slice each wrap in half, and they are ready to serve! - When flipping wraps, use a wide spatula. This helps keep them intact. - Cook wraps seam-side down first. This secures the filling and prevents spills. - Avoid soggy wraps by not overfilling them. Leave space at the edges. - Lightly brush olive oil on the outside. This adds crispness and flavor. - Add fresh herbs like basil or cilantro for a burst of flavor. - Try spices like cayenne for heat or cumin for depth. - Serve with dipping sauces like ranch, salsa, or a creamy garlic sauce. - A squeeze of fresh lemon juice can brighten the dish. - Serve wraps on a rustic wooden board for a cozy look. - Slice them in half for easy eating and a nice display. - Garnish with fresh herbs, like parsley or chives, on top. - Pair wraps with a small bowl of dipping sauce for a fun touch. {{image_4}} You can switch proteins in your wraps. Turkey works great if you want leaner meat. Tofu is a good choice for a vegetarian option. It soaks up flavors well. For tortillas, try low-carb versions. They taste great and keep the wraps light. You can add a spicy kick to your wraps. Mix in hot sauce or jalapeños for heat. For a smoky flavor, use smoked paprika or chipotle powder. Think globally too! Try adding Mediterranean herbs for a fresh twist. Or, use Mexican spices for a zesty flair. For a vegan wrap, use plant-based cheese. There are many great options available. You can also add more veggies for crunch. Bell peppers, zucchini, or avocados work well. These additions keep the wraps healthy and tasty. To keep your Cheesy Garlic Chicken Wraps fresh, place them in an airtight container. This helps prevent them from drying out. You can store them in the fridge for up to three days. After that, they may lose their taste and texture. If you want to save some wraps for later, freezing is a great option. Wrap each one tightly in plastic wrap, then place them in a freezer bag. This keeps air out and helps prevent freezer burn. You can store them for up to three months. To cook from frozen, remove the wraps from the freezer and let them thaw in the fridge overnight. You can also cook them directly in a skillet, adding a few extra minutes to the cooking time. When you're ready to enjoy your wraps, reheating them correctly is key. The best way to reheat is in a skillet over medium heat. This keeps the outside crispy while warming the inside. You can also use an oven, wrapping them in foil to avoid drying out. If you want extra crispiness, place them directly on the oven rack for the last few minutes. Enjoy your delicious Cheesy Garlic Chicken Wraps! Yes, you can prepare these wraps in advance. To meal prep, follow these tips: - Mix the chicken filling and store it in the fridge. - Wrap the tortillas without cooking them. - Keep the wraps in an airtight container. - Cook them just before serving for the best taste. If you want to change the protein, you have great options: - Use shredded turkey for a leaner choice. - Try shredded beef for a bolder flavor. - For a plant-based option, use tofu or chickpeas. Yes, these wraps can be frozen. Here’s how: - Assemble the wraps, but do not cook them. - Wrap each one in plastic wrap. - Store them in a freezer-safe bag or container. - To reheat, cook straight from frozen in a skillet. These wraps taste great with various dips: - Salsa adds a fresh and zesty touch. - Ranch dressing gives a creamy addition. - Try a yogurt-based dip for a cool contrast. - Guacamole or hummus also works well. In this article, we explored how to make Cheesy Garlic Chicken Wraps. From the main ingredients to the best tortilla options, we covered it all. You learned how to prepare the chicken mixture, assemble the wraps, and achieve perfect crispiness. I shared tips for flavor enhancements and storage options for leftovers, too. Finally, we discussed variations, including healthy and vegetarian choices. With these insights, you can create delicious wraps that suit your taste. Enjoy experimenting with flavors and impressing your friends and family!

Cheesy Garlic Chicken Wraps

Indulge in these garlicky cheesy chicken wraps that are bursting with flavor! Made with creamy cheeses, tender chicken, and fresh veggies, these wraps are perfect for a quick meal or snack. With a crispy golden exterior and a savory filling, they're a hit for any occasion. Ready in just 25 minutes, you won't want to miss out! Click through to explore this delicious recipe and elevate your wrap game today!

Ingredients
  

2 cups cooked chicken, shredded

1 cup shredded mozzarella cheese

1/2 cup cream cheese, softened to room temperature

2 cloves fresh garlic, minced

1 teaspoon dried oregano for flavor

1 teaspoon smoked paprika for depth

Salt and freshly cracked pepper to taste

4 large flour tortillas (or whole wheat for a healthier option)

1 cup fresh spinach leaves, washed and dried

1/2 cup cherry tomatoes, halved for sweetness

Olive oil for brushing on the wraps

Instructions
 

In a medium mixing bowl, combine the shredded chicken, shredded mozzarella cheese, softened cream cheese, minced garlic, dried oregano, smoked paprika, and a pinch of salt and pepper. Use a spatula to mix everything until fully incorporated and creamy.

    Lay the flour tortillas flat on a clean, dry surface or a cutting board, ensuring they are fully opened.

      Evenly distribute the savory chicken mixture along the center of each tortilla, making sure to leave about an inch of space around the edges for easy folding.

        On top of the chicken mixture, add a handful of fresh spinach leaves and a few halved cherry tomatoes for a burst of color and freshness.

          Carefully fold the sides of each tortilla inward to contain the filling, then starting from the bottom, roll the tortilla tightly upwards, securing the ingredients inside.

            Preheat a non-stick skillet over medium heat. While the skillet heats, lightly brush the outer side of each wrap with olive oil, which will help them achieve a delightful crispiness.

              Place the wraps seam-side down in the skillet and cook for about 3-4 minutes on each side, or until they turn a golden brown and are crispy to the touch.

                Once cooked, remove the wraps from the skillet and let them cool for a minute before slicing each wrap in half for serving.

                  Prep Time: 15 minutes | Total Time: 25 minutes | Servings: 4

                    - Präsentationstipps: Arrange the wraps on a rustic wooden board, garnished with a sprinkle of fresh herbs like parsley or basil. Serve with a small bowl of salsa or a creamy dipping sauce on the side to enhance the flavor experience.