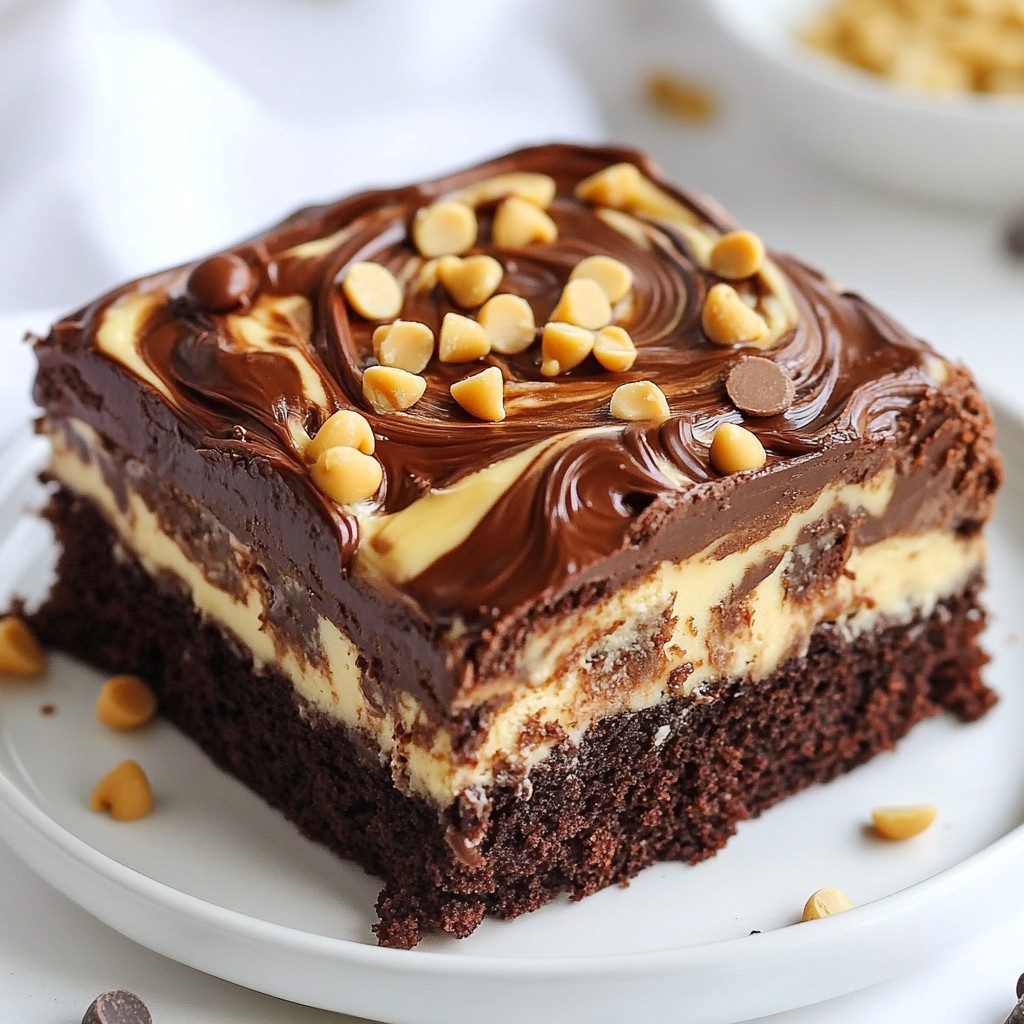
Get ready for a treat that combines two of life’s greatest joys: chocolate and peanut butter! In this guide, I’ll show you how to make a Chocolate Peanut Butter Earthquake Cake that’s rich, gooey, and bursting with flavor. Whether you're a baking pro or a kitchen novice, this cake is easy to make and is sure to impress. Let’s dive into the simple ingredients and steps that will have you craving every bite!
Why I Love This Recipe
- Decadent Flavor: This cake combines rich chocolate with creamy peanut butter, creating a flavor explosion that satisfies any sweet tooth.
- Easy to Make: With just a box cake mix and simple ingredients, this recipe is approachable for bakers of all skill levels.
- Perfect for Sharing: With 12 servings, it’s ideal for gatherings, parties, or a cozy family dessert night.
- Customizable Toppings: Add your favorite toppings like whipped cream or additional nuts for a personal touch that enhances presentation.
Ingredients
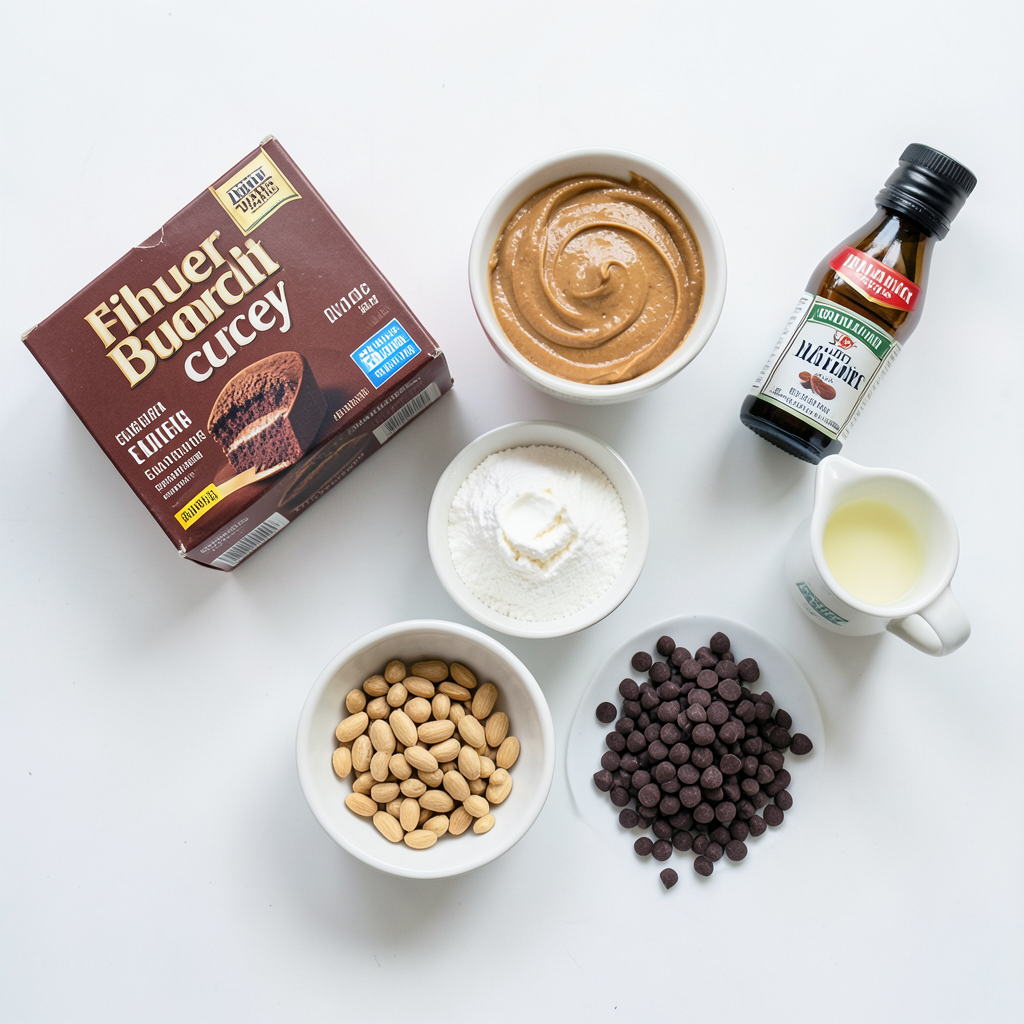
To make a delicious Chocolate Peanut Butter Earthquake Cake, gather the following ingredients:
- 1 box chocolate cake mix (plus extra ingredients as on the package)
- 1 cup creamy peanut butter
- 8 oz cream cheese, softened
- 1 cup powdered sugar
- 1 cup semi-sweet chocolate chips
- 1/2 cup chopped peanuts (optional)
- 1/4 cup milk (optional)
- 1 teaspoon vanilla extract
Each ingredient plays a key role in creating this cake's rich, sweet flavor. The chocolate cake mix serves as the base, while the creamy peanut butter adds a smooth texture and nutty taste. The cream cheese provides a rich, tangy swirl, enhancing the cake's overall taste. Don't forget the semi-sweet chocolate chips for extra chocolatey goodness! If you want a little crunch, add chopped peanuts. You can also use milk to adjust the cream cheese mixture for the perfect consistency. Finally, a splash of vanilla extract rounds out all the flavors nicely.
Step-by-Step Instructions
Preparation Steps
- Preheat your oven to 350°F (175°C).
- Grease and flour a 9x13 inch baking pan. This step helps the cake not stick.
- In a large bowl, follow the chocolate cake mix package instructions.
- Pour half of the batter into the prepared pan. Spread it evenly across the bottom.
Creating the Peanut Butter Swirl
- In another bowl, beat together the cream cheese, peanut butter, powdered sugar, and vanilla.
- Mix until it is smooth and creamy with no lumps.
- Spoon dollops of the peanut butter mixture on top of the chocolate batter.
- Use a knife or spatula to gently swirl this mixture into the batter. Create a marbled look without fully mixing.
Final Layers and Baking
- Carefully pour the rest of the chocolate cake batter over the swirled layer. Ensure the peanut butter mix is completely covered.
- Sprinkle chocolate chips and chopped peanuts over the top. This adds a tasty crunch.
- Place the pan in the oven and bake for 30-35 minutes.
- Check doneness with a toothpick. It should come out clean but may have a few crumbs. Avoid overbaking.
- Let the cake cool in the pan for 15 minutes. Then transfer it to a wire rack to cool completely.
These steps will help you make a delicious Chocolate Peanut Butter Earthquake Cake. Enjoy the process as much as the cake!
Tips & Tricks
Baking Tips
- Preventing sticking in the pan: Grease and flour your pan well. This step helps your cake slide out easily. You can also use parchment paper for extra protection. Place it on the bottom of the pan before adding batter.
- Ensuring even baking: Bake your cake in the center of the oven. This spot provides the best heat flow. Rotate the pan halfway through baking for consistent cooking. Use an oven thermometer to check your oven's accuracy.
Serving Suggestions
- Best ways to serve the cake: Enjoy your cake warm or at room temperature. This way, the flavors shine. Cut neat slices for a pretty presentation. Drizzle with melted chocolate for extra flair.
- Ideal accompaniments: Serve with whipped cream or a scoop of vanilla ice cream. These pair well with the rich flavors. Add a sprinkle of crushed peanuts on top for crunch.
Flavor Enhancements
- Adding extra toppings: Get creative! Try adding caramel sauce or berries for a fun twist. Chopped nuts also add a nice texture. Use toppings that you love to make it your own.
- Using different chocolate types: Experiment with dark chocolate or milk chocolate chips. Each type brings its own flavor. You can also mix in white chocolate for a sweet contrast.
Pro Tips
- Use Room Temperature Ingredients: Ensure that your cream cheese and eggs are at room temperature for easier mixing and a smoother batter.
- Don’t Overmix the Batter: Mix your cake batter until just combined to keep the cake light and fluffy. Overmixing can lead to a dense texture.
- Customize Your Toppings: Feel free to add other toppings like sprinkles, crushed Oreos, or even a drizzle of caramel for extra flavor and texture.
- Check for Doneness: Start checking your cake a few minutes before the suggested baking time. The cake should spring back when gently pressed in the center.
Variations
Dietary Substitutions
For those needing gluten-free options, many brands offer gluten-free chocolate cake mix. Look for ones with a good taste and texture. Always check the labels to ensure they meet your needs. You can also swap regular milk for almond or oat milk. This makes the cake vegan-friendly.
Flavor Variations
You can change up the nut butter! Try almond or cashew butter for a unique twist. They bring new flavors while keeping the cake creamy. Adding fruit can also enhance the taste. Chopped bananas or strawberries can add freshness and sweetness.
Presentation Variations
Serving this cake can be fun! You can cut it into squares for a casual look. Drizzle melted chocolate over the top before serving. This adds a rich touch. For festive events, sprinkle crushed peanuts or edible glitter on each slice. Use a scoop of ice cream for a delicious pairing!
Storage Info
Proper Storage Techniques
To keep your Chocolate Peanut Butter Earthquake Cake fresh, store it properly. First, let the cake cool completely after baking. Then, cover it with plastic wrap or aluminum foil. This helps keep the moisture in. If you have leftovers, place them in an airtight container. This will keep the cake soft and tasty. Store it at room temperature for up to three days. If you want to keep it longer, consider freezing it.
Freezing Instructions
To freeze the cake, make sure it is fully cooled. Cut it into slices for easy serving later. Wrap each slice in plastic wrap tightly. Then, place the wrapped slices in a freezer bag or container. This keeps the cake safe from freezer burn. You can freeze the cake for up to three months.
When you want to enjoy a slice, simply take it out. Let it thaw in the fridge overnight. If you’re in a hurry, you can thaw it at room temperature for a couple of hours. Once thawed, enjoy it as is or warm it up slightly in the microwave. This cake tastes great warm!
FAQs
Common Questions
Can I make this cake in advance? Yes, you can make this cake a day ahead. It stays fresh and tasty.
How long does the cake last? The cake lasts about 4 to 5 days at room temperature. Store it in an airtight container to keep it moist.
What to do if the cake sinks in the middle? If your cake sinks, it might be due to underbaking or too much moisture. Try baking it a bit longer next time.
Ingredient Substitutions
Can I use crunchy peanut butter instead? Yes, you can use crunchy peanut butter. It adds a nice texture to the cake.
Alternatives for powdered sugar? You can use coconut sugar or make your own powdered sugar by blending granulated sugar finely.
Serving and Pairing Questions
What drinks pair well with this cake? Milk or coffee pairs well with this cake. You could also try a rich hot chocolate.
Can this cake be served cold? Yes, you can serve this cake cold. It tastes great warm or at room temperature.
This blog post covered a delicious chocolate peanut butter cake. You learned about the key ingredients, like cake mix, peanut butter, and cream cheese, and how to prepare them step by step. We also shared tips for baking and serving your cake. You can explore variations for dietary needs and fun flavor twists. Storage tips help keep your cake fresh and tasty. Now, you have all the tools to create a show-stopping dessert everyone will love. Dive in, enjoy the process, and impress your friends or family with your baking skills!