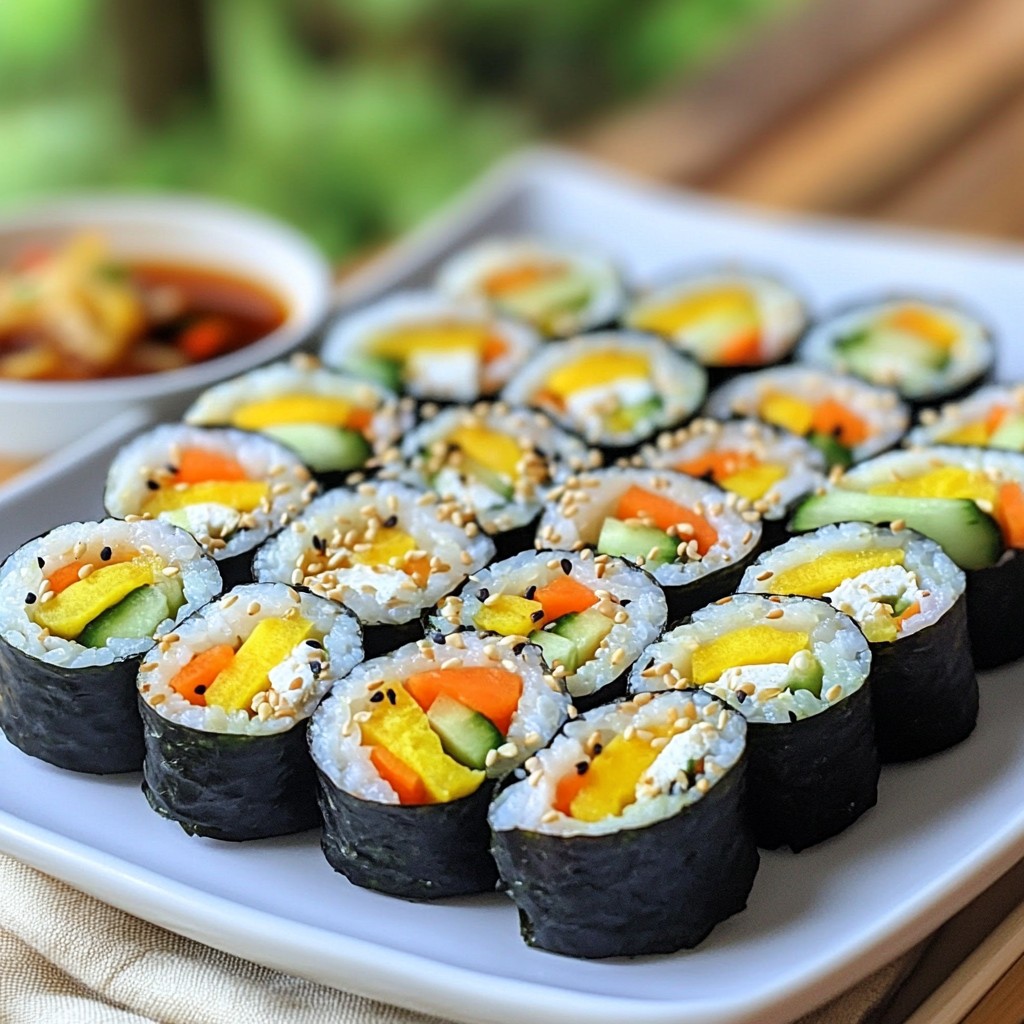
If you're craving a delicious snack that is both tasty and easy to make, look no further! I’m here to guide you through crafting classic kimbap rolls right from your kitchen. Packed with flavor and simple ingredients, this beloved Korean dish is perfect for lunch, a picnic, or a quick dinner. Let's dive into the essentials to create your own perfect kimbap rolls and impress your family and friends!
Why I Love This Recipe
- Deliciously Versatile: Kimbap is incredibly versatile, allowing you to customize the fillings to your liking, whether you prefer vegetables, proteins, or both.
- Perfect for Sharing: These bite-sized rolls are great for sharing at gatherings or picnics, making them a fun and interactive dish for everyone.
- Healthy and Wholesome: With fresh vegetables and wholesome rice, kimbap is not only tasty but also a nutritious option for a light meal.
- Easy to Make: Once you get the hang of rolling, kimbap is quite easy to prepare, making it a great dish for both beginners and experienced cooks alike.
Ingredients
Essential Ingredients for Kimbap
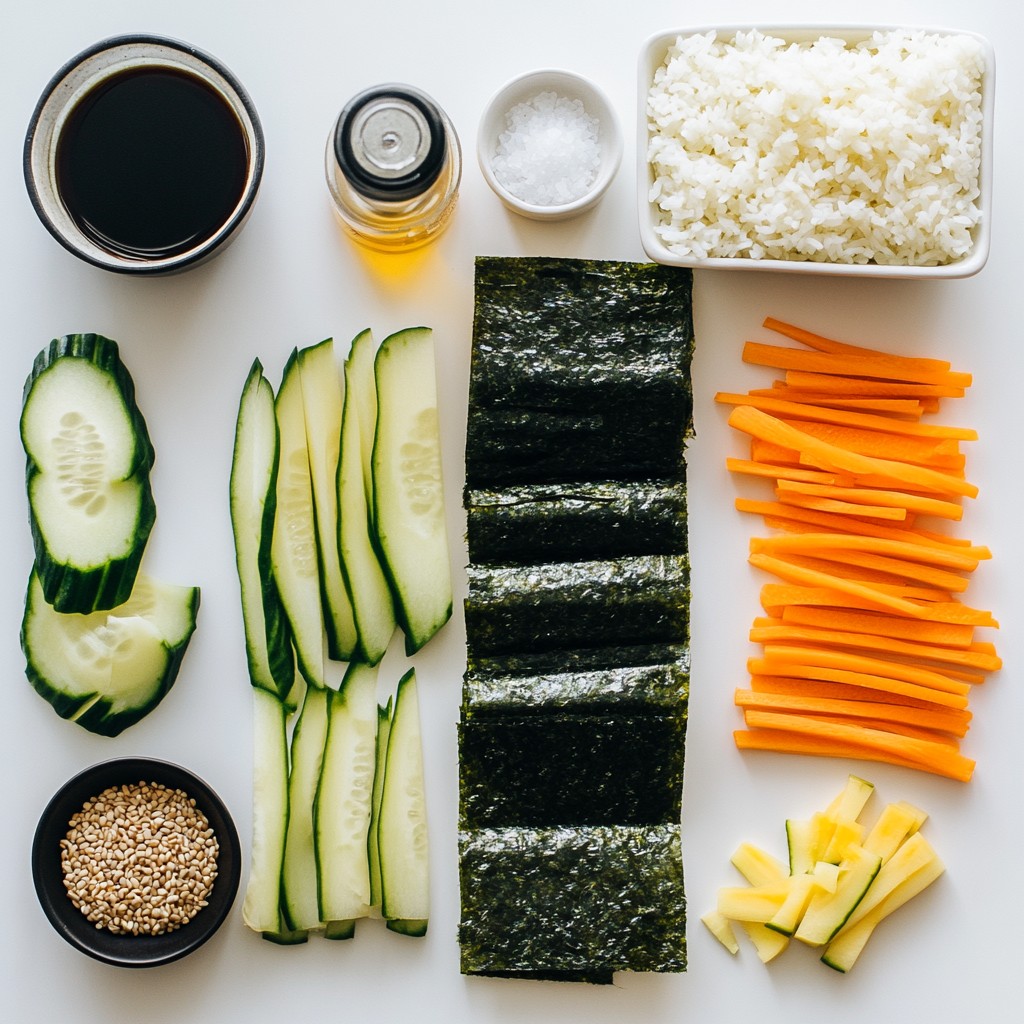
To make classic kimbap, you need these key ingredients:
- 2 cups short-grain rice, thoroughly rinsed
- 2 1/2 cups water
- 2 tablespoons sesame oil
- 1 tablespoon soy sauce
- 6 sheets of nori (seaweed)
- 1 medium cucumber, julienned
- 2 medium carrots, julienned
- 4 large eggs, beaten and made into thin omelets
- 5-6 ounces pickled radish (danmuji), cut into strips
- Salt, to taste
- Sesame seeds, for garnish
These ingredients create a balance of flavors and textures.
Optional Ingredients and Enhancements
You can add extra flavors to your kimbap with these options:
- Cooked meat like beef or chicken
- Avocado slices for creaminess
- Spinach or other leafy greens for color
- Cheese for a unique twist
- Different sauces for dipping
These enhancements allow you to personalize your kimbap.
Tools Needed for Preparation
To prepare kimbap, you will need a few handy tools:
- A medium saucepan for cooking rice
- A bamboo sushi mat or a clean surface for rolling
- A sharp knife for slicing
- A cutting board for prepping ingredients
- A mixing bowl for seasoning rice
These tools help make the process smooth and fun.
Step-by-Step Instructions
Preparing the Rice
Start by rinsing 2 cups of short-grain rice under cold water. This step removes excess starch. Place the rinsed rice in a medium pot and add 2 ½ cups of water. Bring this mix to a boil over medium-high heat. When it boils, cover the pot and lower the heat. Let it simmer for about 20 minutes. Once the water is gone, turn off the heat. Allow the rice to rest for 10 minutes with the lid on. This step makes the rice fluffy.
Seasoning the Rice
Once the rice is slightly cool, move it to a large bowl. Drizzle 2 tablespoons of sesame oil and 1 tablespoon of soy sauce over the rice. Add salt to taste. With a spatula or wooden spoon, gently fold these seasonings into the rice. Be careful not to mash the grains. You want each grain coated but intact.
Preparing the Fillings
While the rice cools, julienne one medium cucumber and two medium carrots into thin strips. In a skillet, heat a small amount of oil over medium heat. Sauté the carrots for about 3-4 minutes. They should be tender but still crisp. In a separate pan, cook 4 beaten eggs into a thin omelet. Once set, slice the omelet into strips. This adds a nice texture.
Assembling the Kimbap
Lay a sheet of nori, shiny side down, on a bamboo sushi mat. With slightly wet hands, take a handful of the seasoned rice. Spread it evenly over the nori, leaving about 1 inch at the top edge. This space helps seal the roll later.
Rolling Techniques
In the center of the rice, layer strips of cucumber, sautéed carrots, the sliced omelet, and pickled radish. Make it colorful and appealing. Now, start rolling from the edge closest to you. Use the bamboo mat to guide the roll. Tuck the filling in as you go and apply gentle pressure. When you reach the exposed edge, moisten it with a bit of water to seal the roll.
Cutting and Serving the Kimbap
Using a sharp knife, slice the roll into 1-inch pieces. Wipe the knife with a damp cloth after each cut for clean slices. Arrange the kimbap slices on a platter. To finish, sprinkle sesame seeds on top for added flavor and texture. Enjoy your homemade kimbap with pickled veggies and soy sauce for dipping!
Tips & Tricks
Perfecting Your Rice
To make great kimbap, you need perfect rice. Use short-grain rice. Rinse it well to remove excess starch. This helps the rice stick together. When cooking, use a 1:1.25 rice-to-water ratio. Bring the water to a boil, then lower the heat and cover. Let it cook for about 20 minutes. After cooking, let the rice rest for 10 minutes. This makes it fluffier and easier to handle.
Avoiding Common Mistakes
One common mistake is overcooking the rice. If it’s mushy, your kimbap will fall apart. Be gentle when mixing in the sesame oil and soy sauce. Overmixing can crush the rice. When rolling, don’t squeeze too hard. It should be tight but not squished. Finally, use a sharp knife to slice the rolls. A dull knife can squish the kimbap.
Presentation Tips for Serving
Presentation makes a big difference. Slice your kimbap into even pieces. Aim for 1-inch thick pieces. Arrange the slices on a colorful plate. Garnish with sesame seeds for added flair. You can also serve with pickled vegetables. A small bowl of soy sauce adds flavor and looks nice. For extra beauty, consider adding fresh greens or edible flowers. This makes your dish pop!
Pro Tips
- Use the Right Rice: Short-grain rice is essential for kimbap as it becomes sticky when cooked, allowing the rolls to hold together better.
- Keep Your Hands Wet: Damping your hands while handling the rice prevents it from sticking to your fingers, making the rolling process easier.
- Colorful Fillings: Be creative with your fillings! Adding different vegetables or proteins can enhance both the flavor and visual appeal of your kimbap.
- Slice with Care: Use a sharp knife to cut the kimbap, and wipe it between cuts to maintain clean edges and avoid squishing the rolls.
Variations
Vegetarian Kimbap Alternatives
You can easily make vegetarian kimbap. Just swap the protein with fresh veggies. Use ingredients like:
- Avocado slices
- Bell pepper strips
- Spinach leaves
- Tofu, grilled or fried
These ingredients add flavor and color. They make your kimbap healthy and vibrant.
Popular Protein Options
If you want protein, consider these options:
- Cooked chicken breast, shredded
- Sliced beef, marinated and grilled
- Cooked shrimp, peeled and deveined
- Tuna, mixed with a bit of mayo
These proteins add a savory touch to your kimbap. They also keep it filling and satisfying.
Regional Variations of Kimbap
Kimbap changes by region in Korea. Here are some fun examples:
- Jeonju Kimbap: This version includes more ingredients like beef, crab, and a sweet sauce.
- Gimbap from Busan: It often features fresh seafood, like octopus or fish.
- Traditional Kimbap: This is the classic version with vegetables and pickled radish.
Each variation brings a unique taste. Feel free to explore these styles in your kitchen.
Storage Information
How to Store Leftover Kimbap
After enjoying your kimbap, you may have some leftovers. Store them in an airtight container. Place a damp paper towel in the container to keep the rice moist. This way, the kimbap stays fresh for later. Refrigerate the container to keep the kimbap safe and tasty. It is best to eat it within two days for the best flavor.
Best Practices for Reheating
To reheat kimbap, avoid using a microwave if possible. Microwaving can make the rice hard. Instead, use a pan. Heat the pan over low heat and add a few drops of water. Cover the pan to create steam. This method keeps the kimbap soft. Heat for just a few minutes until warm. Enjoy your kimbap like it’s fresh!
Freezing Kimbap Rolls
If you want to keep kimbap for longer, freezing is a great option. Wrap each roll tightly in plastic wrap. Place the wrapped rolls in a freezer bag. Remove as much air as you can before sealing. This helps prevent freezer burn. Kimbap can stay in the freezer for up to a month. When you are ready to eat, thaw it in the fridge overnight. Then, reheat it as mentioned above.
FAQs
What is the traditional filling for kimbap?
The traditional filling for kimbap often includes pickled radish, carrots, and cucumber. You can also add eggs and spinach. These ingredients give kimbap its vibrant colors and flavors. The mix of textures makes each bite exciting and tasty.
Can I make kimbap ahead of time?
Yes, you can make kimbap ahead of time. Just prepare the rolls and wrap them tightly in plastic wrap. This keeps the rolls fresh and prevents them from drying out. Store them in the fridge until you’re ready to eat. Enjoy them within a day or two for the best taste.
Is kimbap the same as sushi?
Kimbap and sushi are not the same. Kimbap uses sesame oil for flavor, while sushi uses vinegar. The fillings also differ. Sushi often includes raw fish, while kimbap has cooked or pickled ingredients. Both are delicious but have unique tastes and styles.
How long does homemade kimbap last in the fridge?
Homemade kimbap lasts about 1 to 2 days in the fridge. After that, the rice may become hard, and the seaweed can get soggy. For the best taste and texture, eat your kimbap fresh.
Kimbap is a fun and tasty dish to make. We explored key ingredients, tools, and methods. Preparing the rice, seasoning, and filling helps create the best rolls. We also covered tips to avoid mistakes and improve your presentation. You can use different fillings for fun variations too. Finally, I shared how to store leftovers and answered common questions. Enjoy making your kimbap, and remember, practice makes perfect!