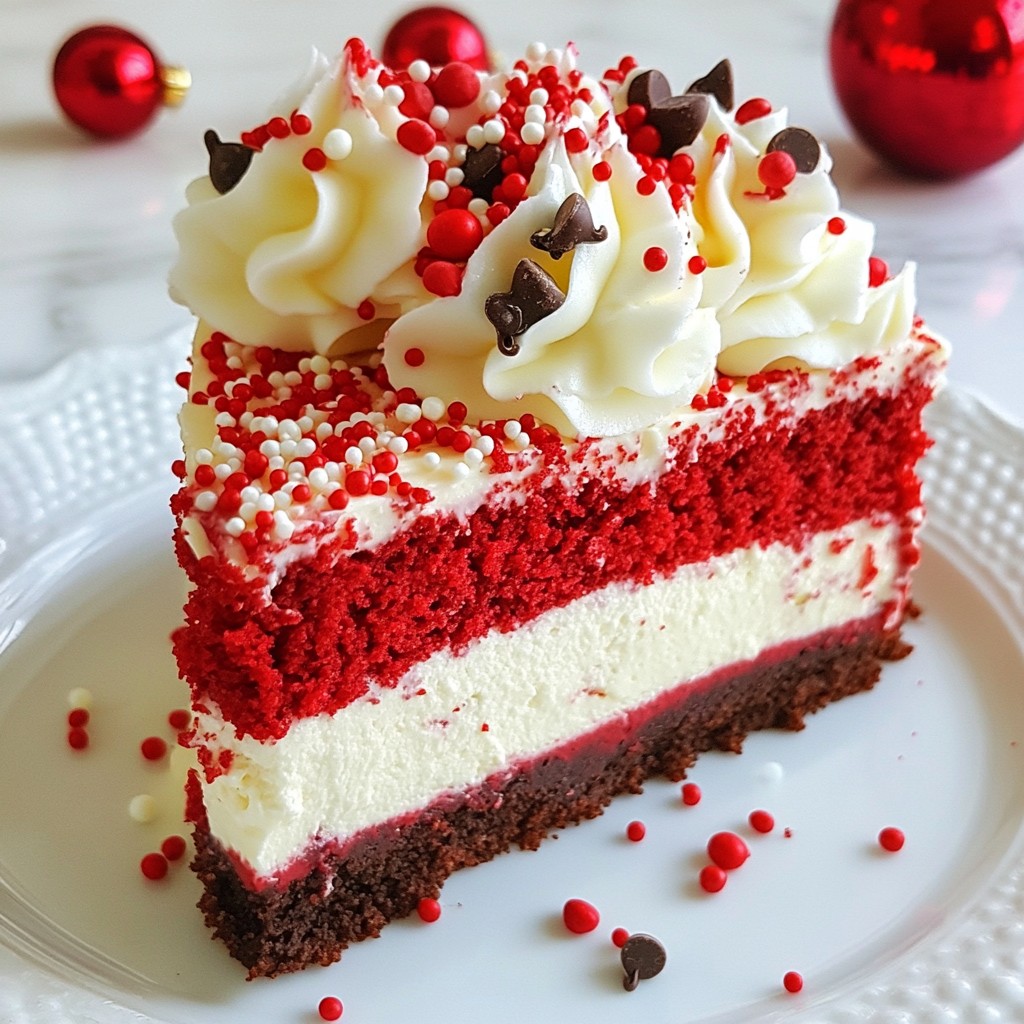
If you're looking for the ultimate festive treat, you’ve found it! This Festive Red Velvet Cheesecake combines the best of both worlds: rich, velvety cake and creamy cheesecake. Together, they create an irresistible dessert that will wow your friends and family. Whether you have a holiday party or just want to indulge, this recipe is simple and delicious. Let’s dive into the sweet details on how to make it!
Why I Love This Recipe
- Decadent Flavor: This cheesecake combines the rich flavors of red velvet and creamy cheesecake, creating an indulgent dessert experience that’s perfect for celebrations.
- Stunning Presentation: The vibrant red color and whipped cream topping make this cheesecake not only delicious but also a stunning centerpiece for any festive gathering.
- Easy to Make: Despite its impressive appearance, this recipe is straightforward and manageable, making it great for bakers of all skill levels.
- Perfect for Sharing: With enough servings to delight a crowd, this cheesecake is ideal for parties, holidays, or any occasion where you want to spread joy through dessert.
Ingredients
Complete List of Ingredients
- 2 cups red velvet cake mix
- 8 oz cream cheese, softened to room temperature
- 1 cup granulated sugar
- 1 cup sour cream
- 3 large eggs
- 1 teaspoon pure vanilla extract
- 1/4 cup unsweetened cocoa powder
- 1 cup heavy whipping cream
- 1 tablespoon powdered sugar (for whipping cream)
- 1/2 cup chocolate chips (optional, for decoration)
- Red and white sprinkles (for finishing touch)
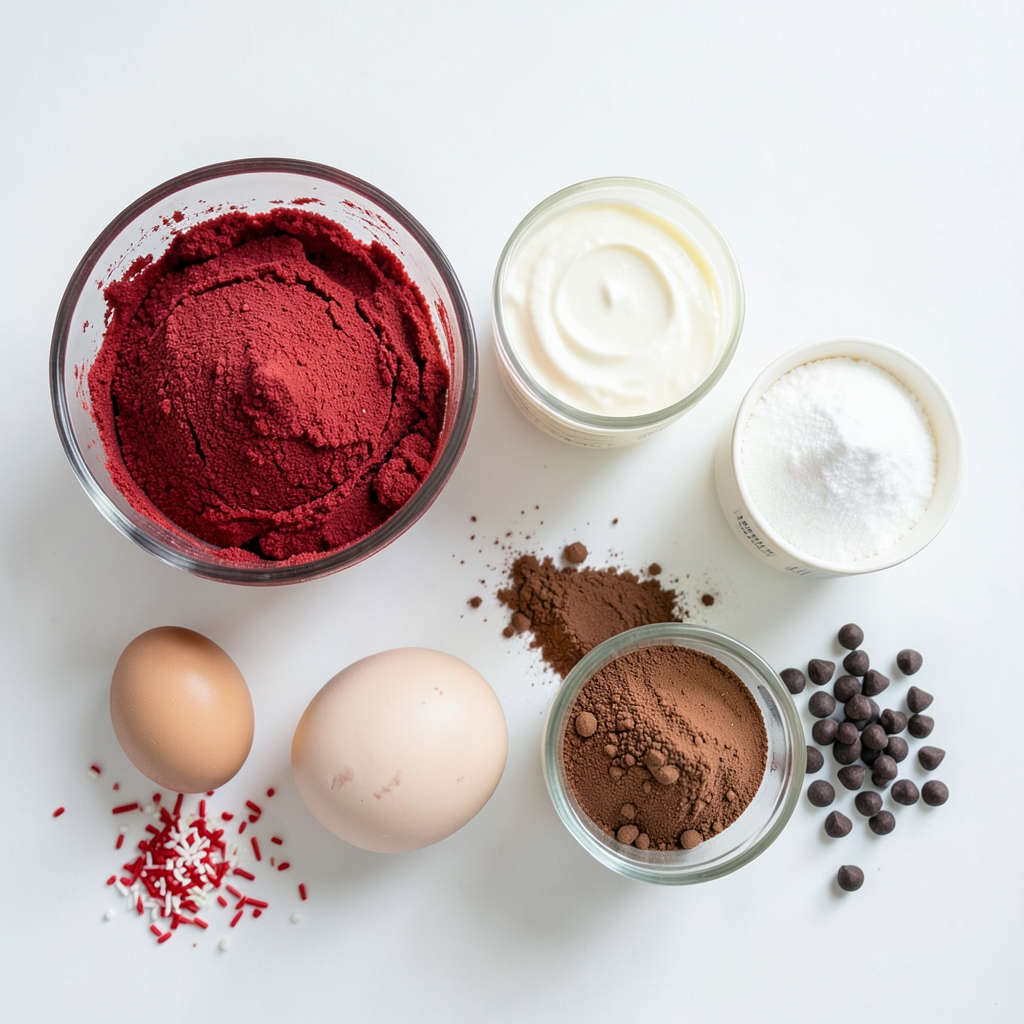
When making this festive red velvet cheesecake, you need quality ingredients. The red velvet cake mix gives the dessert its rich color and texture. The cream cheese is key for a smooth filling. Granulated sugar sweetens the cheesecake, while sour cream adds moisture and depth.
Don't forget the eggs! They bind everything together. Pure vanilla extract enhances the flavors, and unsweetened cocoa powder balances the sweetness. Heavy whipping cream is essential for the fluffy topping. The optional chocolate chips and sprinkles add a fun, festive touch.
Gather your ingredients before starting. This makes your baking process easier and more enjoyable. Each component plays a role in making this cheesecake a showstopper. Remember, fresh ingredients lead to the best results!
Step-by-Step Instructions
Preparing the Cake Layer
Preheating the Oven and Preparing the Pan First, preheat your oven to 350°F (175°C). Grab a 9-inch springform pan. Lightly grease it and line the bottom with parchment paper. This helps the cake come out easily after baking.
Mixing the Cake Batter In a large bowl, combine 2 cups of red velvet cake mix, 3 large eggs, 1/2 cup of water, and 1/4 cup of vegetable oil. Use an electric mixer on medium speed for about 2 minutes. You want the batter to be smooth and well mixed.
Baking the Cake Pour the red velvet batter into the prepared springform pan. Place it in the oven and bake for 25-30 minutes. Check if it’s done by inserting a toothpick in the center. If it comes out clean, the cake is ready. Let it cool completely on a wire rack.
Making the Cheesecake Filling
Creaming the Ingredients In a separate bowl, beat 8 oz of softened cream cheese with an electric mixer until smooth. Gradually add 1 cup of granulated sugar. Mix until the sugar is fully blended in.
Combining the Cheesecake Mixture Next, add 1 cup of sour cream, 3 large eggs, 1 teaspoon of pure vanilla extract, and 1/4 cup of unsweetened cocoa powder. Mix until just combined. Be careful not to overmix.
Assembling and Baking the Cheesecake
Pouring and Smoothing the Filling Once the red velvet cake is cool, pour the cheesecake filling over the top. Use a spatula to smooth the surface. Lightly tap the pan on the counter to release any air bubbles.
Baking and Cooling Process Lower the oven temperature to 325°F (160°C). Place the assembled cheesecake in the oven. Bake for 60-70 minutes. The edges should be set, but the center can still jiggle a bit. After baking, turn off the oven and leave the cheesecake inside for an extra hour to cool slowly.
Final Touches and Serving
Preparing the Whipped Cream In a chilled bowl, beat 1 cup of heavy whipping cream with an electric mixer until soft peaks form. Gradually add 1 tablespoon of powdered sugar while you whip. Keep going until you have stiff peaks.
Serving Suggestions and Presentation Ideas Carefully release the cheesecake from the springform pan. Spread the whipped cream generously on top. For a festive touch, add chocolate chips and sprinkle red and white sprinkles. Serve slices on dessert plates. You can drizzle chocolate sauce or raspberry coulis for extra flair, and a fresh mint leaf adds a nice pop of color!
Tips & Tricks
Tips for Perfecting the Cheesecake
Avoiding Common Cheesecake Mistakes To make a great cheesecake, follow these tips:
- Use room temperature cream cheese. Cold cream cheese can make lumps.
- Don't overmix the filling. Mix just until combined for a smooth texture.
- Avoid opening the oven too much. This can cool the oven and ruin the cheesecake.
Proper Cooling Techniques Cooling is key for a perfect cheesecake. Here’s how:
- After baking, turn off the oven. Leave the cheesecake inside for one hour. This helps it cool slowly.
- Once cool, cover it with plastic wrap. Chill in the fridge for at least four hours. Overnight is best for flavor.
Enhancing Flavor and Presentation
Using Alternative Flavors You can mix it up with flavors. Try these ideas:
- Add lemon zest for a citrus twist.
- Use almond extract instead of vanilla for a unique taste.
- Fold in crushed cookies for added texture.
Creative Decoration Ideas Decorating your cheesecake makes it special. Here are some fun ideas:
- Drizzle chocolate or caramel sauce on top.
- Add fresh berries for color and taste.
- Top with whipped cream and sprinkles for a festive look.
Pro Tips
- Check for Doneness: Use a toothpick to test the cheesecake; it should come out with a few moist crumbs, not wet batter.
- Room Temperature Ingredients: Ensure all ingredients, especially cream cheese and eggs, are at room temperature for a smoother batter.
- Cooling Tips: Let the cheesecake cool in the oven with the door slightly ajar to prevent cracking from temperature shock.
- Whipped Cream Perfection: For best results, chill your mixing bowl and beaters before whipping the cream to achieve fluffy peaks.
Variations
Flavor Variations
Chocolate Marble Cheesecake To make a chocolate marble cheesecake, mix melted chocolate into the cheesecake filling. Pour half of the filling over the red velvet layer. Then, swirl the leftover chocolate filling on top. This creates a fun and tasty pattern. It adds a rich chocolate flavor that pairs well with the red velvet.
Red Velvet Lava Cheesecake For a red velvet lava cheesecake, bake the cheesecake with some chocolate in the center. Create a small well in the filling before baking. Fill it with melted chocolate. When you cut into the cheesecake, the melted chocolate will ooze out. This gives a delightful surprise with every slice.
Presentation Variations
Individual Cheesecake Tarts You can make individual cheesecake tarts by using small tart pans. Press the red velvet cake mix into the bottom of each pan. Pour the cheesecake filling on top. Bake as usual. This makes serving easy and fun for parties. Plus, they look cute on the table.
Layered Dessert Cups Layered dessert cups are another fun way to present this cheesecake. In clear cups, alternate layers of red velvet cake, cheesecake filling, and whipped cream. Top with sprinkles or chocolate chips. These cups not only look pretty but also let everyone enjoy their own serving.
Storage Info
Proper Storage Techniques
- Refrigeration Guidelines: After chilling, cover the cheesecake tightly with plastic wrap. This keeps it fresh and prevents odors. Store it in the fridge for up to five days. Make sure it stays in a cool area, away from heat sources.
- Freezing Instructions: You can freeze slices for later. Wrap each slice in plastic wrap, then put it in a freezer bag. This method keeps the cheesecake fresh for up to three months. When you want to eat it, thaw slices overnight in the fridge.
Shelf Life of Cheesecake
- Expected Duration for Freshness: The cheesecake stays fresh in the fridge for about five days. If frozen, it remains tasty for three months. Always check for any changes in color or smell before eating. Enjoy your delicious dessert with confidence!
FAQs
What is the best way to serve red velvet cheesecake?
The best way to serve red velvet cheesecake is to make it look festive. I suggest garnishing it with fluffy whipped cream. You can add chocolate chips on top for extra richness. Finish with red and white sprinkles for a fun touch. This adds color and joy to your dessert table. You can also pair it with a drizzle of chocolate sauce or raspberry coulis. These sauces enhance the flavor and make it look fancy. Serve the cheesecake on pretty dessert plates for a special touch.
Can I make this cheesecake ahead of time?
Yes, you can make this cheesecake ahead of time. In fact, it tastes even better after it chills. I recommend making it a day before your event. This allows the flavors to blend and develop. After baking, cool the cheesecake at room temperature. Cover it with plastic wrap and put it in the fridge. It will stay fresh for up to five days. Just add the whipped cream and toppings right before serving.
How do I know when the cheesecake is done?
To know when your cheesecake is done, look for a few signs. The edges should be set, while the center is slightly jiggly. This jiggly part will firm up as it cools. You can also gently shake the pan; if it wobbles like jelly, it needs more time. If it wobbles too much, bake a bit longer. After baking, turn off the oven and let it cool inside. This helps prevent cracks.
This post covered how to make a tasty red velvet cheesecake. We explored each step, from the right ingredients to effective storage methods. Remember, avoiding mistakes and cooling the cake correctly are key for success. With the right tips, you can make delightful variations too. Use creative presentation ideas to impress your guests. Now, you can confidently bake this dessert to share with friends and family. Enjoy every bite of your delicious creation!