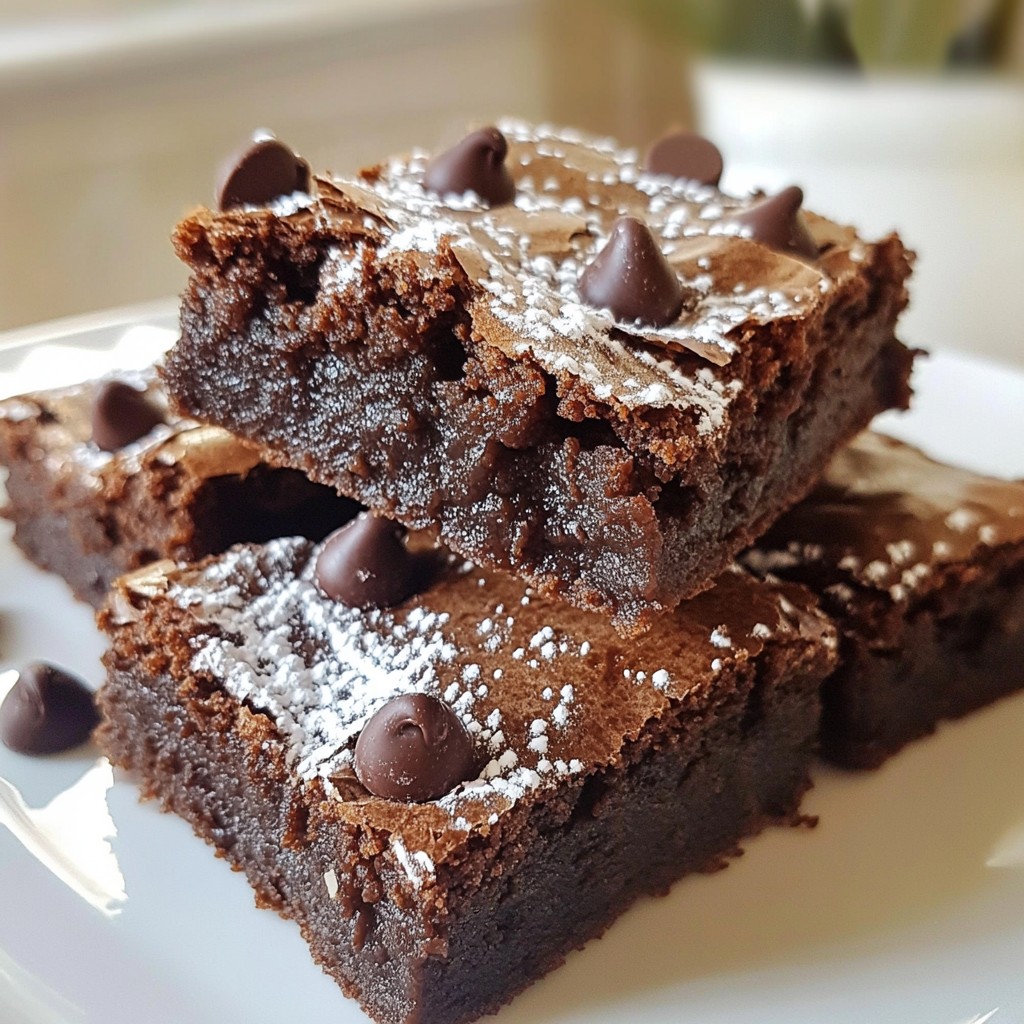
Are you looking for an easy and tasty treat that saves your sourdough discard? Look no further! I’m excited to share my recipe for fudgy sourdough discard brownies. These brownies are rich, chewy, and full of flavor. Plus, they make good use of what you might usually toss out. Let’s dive in and turn that leftover sourdough into a delightful dessert. Your taste buds will thank you!
Why I Love This Recipe
- Unique Flavor: The sourdough discard adds a subtle tang that enhances the richness of the brownies.
- Fudgy Texture: This recipe creates incredibly fudgy brownies that melt in your mouth, making them irresistible.
- Easy to Make: With simple ingredients and quick steps, these brownies are perfect for any baking level.
- Customizable: Add your favorite nuts or extra chocolate chips to make these brownies your own!
Ingredients
Key Ingredients for Fudgy Sourdough Discard Brownies
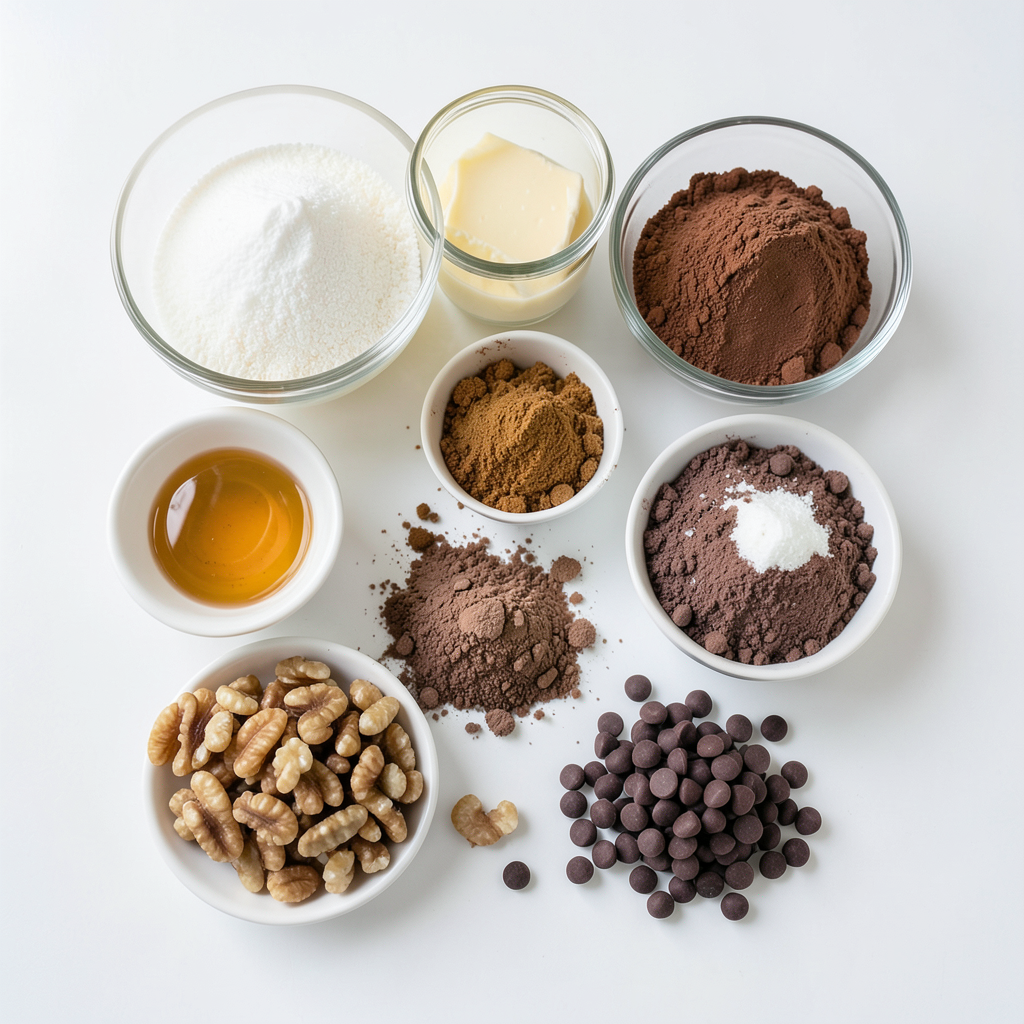
To make fudgy sourdough discard brownies, gather these key ingredients:
- 1 cup sourdough discard (unfed)
- 1/2 cup unsalted butter, melted
- 1 cup granulated sugar
- 1/2 cup brown sugar, packed
- 2 large eggs
- 1 teaspoon vanilla extract
- 1/2 cup all-purpose flour
- 1/3 cup unsweetened cocoa powder
- 1/2 teaspoon baking powder
- 1/4 teaspoon salt
- 1 cup chocolate chips (semi-sweet or dark)
These ingredients work together to create a rich and fudgy brownie. The sourdough discard adds a nice tang and depth of flavor.
Optional Add-Ins and Variations
You can make these brownies even more exciting with some optional add-ins:
- 1/2 cup chopped nuts (walnuts or pecans)
- A sprinkle of sea salt on top before baking
- Swirls of peanut butter or Nutella for added richness
These add-ins can enhance the texture and flavor. Feel free to get creative with what you love!
Ingredient Substitutions
If you lack some ingredients, here are some easy swaps:
- Use coconut oil instead of butter for a dairy-free option.
- Substitute brown sugar with coconut sugar for a different taste.
- Omit the eggs and use 1/4 cup of unsweetened applesauce for a vegan version.
These substitutions keep the brownies tasty and still fudgy. Try them out based on what you have in your kitchen!
Step-by-Step Instructions
Prepping the Oven and Pan
First, set your oven to 350°F (175°C). This temperature helps the brownies bake evenly. Next, grab a 9x9-inch baking pan. You can lightly grease it with butter or line it with parchment paper. Lining the pan makes it easy to remove the brownies later.
Mixing Wet Ingredients
In a medium bowl, mix the melted unsalted butter with granulated sugar and brown sugar. Use a whisk to blend until it looks smooth. This step helps create a rich brownie base. Then, add two large eggs one at a time. Make sure each egg mixes in well before adding the next. Finally, stir in a teaspoon of vanilla extract and one cup of sourdough discard. Keep mixing until everything is combined and smooth.
Incorporating Dry Ingredients and Chocolate Chips
In a separate bowl, whisk together the all-purpose flour, unsweetened cocoa powder, baking powder, and salt. Make sure to break any clumps of cocoa powder. This step helps the brownies rise nicely. Now, add the dry mixture to the wet mixture gradually. Stir gently just until combined. Be careful not to overmix; this keeps the brownies fudgy. Next, fold in one cup of chocolate chips. If you want some crunch, you can also add half a cup of chopped nuts.
Baking and Cooling Process
Pour the brownie batter into the prepared pan. Use a spatula to smooth the top. Bake in the preheated oven for 25 to 30 minutes. To check if they are done, insert a toothpick in the center. If it comes out with a few moist crumbs, they are perfect. Once baked, let the brownies cool in the pan for about 10 minutes. Then, move them to a wire rack to cool completely. After that, slice the brownies into squares and enjoy!
Tips & Tricks
Achieving the Perfect Fudgy Texture
To get that perfect fudgy texture, use the right amount of flour and cocoa powder. Too much can make the brownies dry. Use a kitchen scale for precision. The secret is to mix just until combined. Overmixing can lead to cake-like brownies. Bake until a toothpick has a few moist crumbs. This shows the brownies are fudgy and not overcooked.
Common Mistakes to Avoid
One common mistake is using fed sourdough instead of discard. This can alter the taste and texture. Avoid skipping the cooling time too. Cutting brownies too soon makes them fall apart. Also, do not skip the parchment paper. It helps in removing the brownies easily. Lastly, remember to measure your ingredients properly. Baking is a science!
Best Practices for Sourdough Discard Use
Use your sourdough discard within a week for the best flavor. Store it in the fridge in an airtight container. If you have extra discard, you can freeze it. Just thaw it before use. Mix it well to avoid lumps. Remember, your sourdough discard adds moisture and flavor. It gives your brownies a unique twist.
Pro Tips
- Use Room Temperature Ingredients: Ensure that your eggs and butter are at room temperature before mixing. This helps create a smoother batter and contributes to the fudgy texture of the brownies.
- Don’t Overmix: When combining the wet and dry ingredients, mix just until incorporated. Overmixing can lead to cakey brownies instead of the desired fudgy consistency.
- Test for Doneness: Insert a toothpick into the center of the brownies; if it comes out with a few moist crumbs, they are done. If it comes out clean, they may be overbaked.
- Storage Tips: Store the brownies in an airtight container at room temperature for up to 3 days, or refrigerate for longer freshness. You can also freeze them for up to 2 months!
Variations
Nut-Free Version
You can easily make these brownies nut-free. Just skip the nuts entirely. The brownies will still be rich and fudgy. If you want some crunch, try adding sunflower seeds. These seeds give a nice texture without the nut allergy risk.
Gluten-Free Substitution Options
To make these brownies gluten-free, swap the all-purpose flour with gluten-free flour. Look for a blend that works well in baking. I like using almond flour or oat flour for a tasty twist. Just remember to check the package for any added ingredients. This swap keeps your brownies just as delicious!
Flavor Enhancements (Mint, Espresso, etc.)
You can add fun flavors to your brownies. For a minty kick, mix in peppermint extract. Just a teaspoon can make a big difference! If you love coffee, try adding espresso powder. It enhances the chocolate flavor. You can also mix in a bit of orange zest for a fresh twist. Feel free to experiment with your favorite flavors!
Storage Info
How to Store Brownies for Freshness
To keep your fudgy brownies fresh, store them in an airtight container. This helps prevent them from drying out. Place a piece of parchment paper between layers if needed. Brownies stay best at room temperature for up to four days. If you want them to last longer, consider refrigerating them. Just remember to let them come to room temperature before serving.
Freezing Instructions for Longer Shelf Life
If you want to save some brownies for later, freezing works great. First, let them cool completely. Then, cut the brownies into squares. Wrap each piece tightly in plastic wrap. Place the wrapped brownies in a freezer-safe bag or container. They can stay in the freezer for up to three months. When you’re ready to enjoy them, just let them thaw at room temperature.
Reheating Tips for Best Taste
To bring back the warm, gooey texture of your brownies, you can reheat them. Simply place a brownie on a microwave-safe plate. Heat it for about 10-15 seconds. Check if it’s warm enough but avoid overheating. This keeps them moist and fudgy. You can also warm them in the oven. Preheat the oven to 350°F and place the brownies in for about 5-10 minutes. Enjoy them warm for the best flavor!
FAQs
Can I use fed sourdough instead of discard?
Yes, you can use fed sourdough. It adds a tangy flavor. Your brownies may rise a bit more, but they will still taste great. Just keep in mind that the texture might change slightly. Using fed sourdough can make the brownies a bit fluffier than using discard.
How do I know when the brownies are done?
Check your brownies at 25 minutes. Insert a toothpick into the center. If it comes out with a few moist crumbs, they are ready. If it’s too wet, bake for another 3-5 minutes. The edges should look firm, while the center may still be soft. This ensures that fudgy texture we love!
What can I do with leftover sourdough discard?
You can use it in many ways! Add it to pancakes or waffles for a tangy twist. Mix it in with muffins or cookies for added flavor. You can also use it in bread dough or even make sourdough crackers. The options are endless, and it helps reduce waste!
Can I double the recipe?
Yes, you can double the recipe! Just use a larger pan, such as a 9x13-inch. Make sure to adjust the baking time. Start checking for doneness at the same time, but it may take longer. Keep an eye on them to ensure they bake evenly. Enjoy your extra brownies!
These fudgy sourdough discard brownies bring delight with every bite. We explored key ingredients, mixing methods, and baking tips for success. Remember to watch for doneness and avoid overmixing for the best texture. You can customize these brownies through flavor variations or ingredient swaps to fit your needs. Store them properly to keep them fresh or freeze for later. Embrace your sourdough discard. Turn it into a delicious treat today!