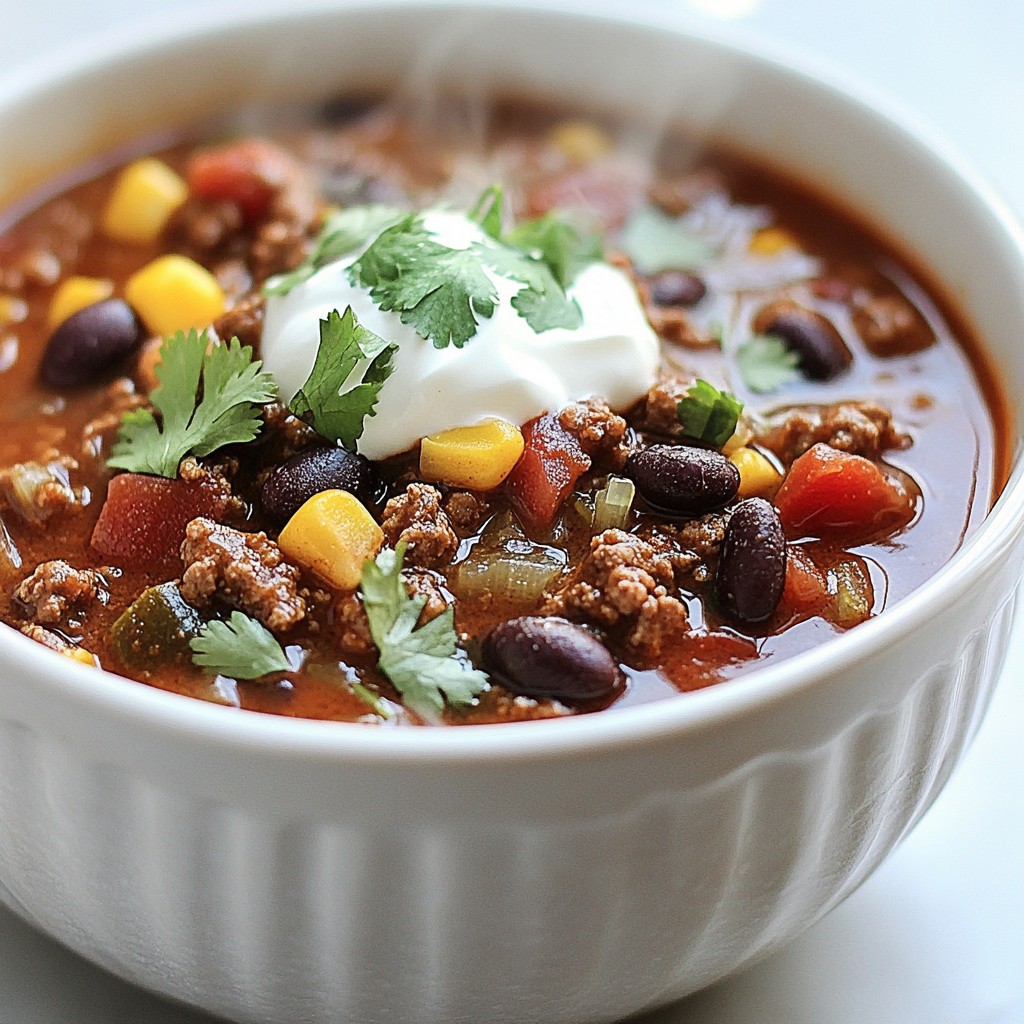
Looking for a warm and comforting dish that packs bold flavors? You’ve come to the right place! My Hearty Tex-Mex Beef and Bean Chili Delight Recipe is just the ticket. This simple yet delicious chili combines lean ground beef, beans, and vibrant spices that will make your taste buds sing. Ready to dive into a bowl of pure satisfaction? Let’s get cooking!
Why I Love This Recipe
- Bold Flavor Combination: This chili boasts a vibrant mix of spices and ingredients that create a rich, zesty flavor profile that is truly satisfying.
- Hearty and Filling: With protein from the beef and fiber from the beans, this dish is not only delicious but also incredibly filling, perfect for a family meal.
- Customizable Heat Level: The cayenne pepper can be adjusted to suit your personal heat preference, making it flexible for all taste buds.
- Easy to Prepare: This recipe is straightforward and perfect for weeknight dinners, as it comes together in just about an hour.
Ingredients
Main Ingredients
- 1 lb lean ground beef
- 1 can (15 oz) kidney beans, thoroughly drained and rinsed
- 1 can (15 oz) black beans, thoroughly drained and rinsed
- 1 can (14.5 oz) diced tomatoes with green chilies
Vegetables and Aromatics
- 1 medium onion, finely chopped
- 2 cloves garlic, minced
- 1 bell pepper (any color), diced into small pieces
Spices and Broth
- 2 tablespoons chili powder
- 1 teaspoon ground cumin
- 1 teaspoon smoked paprika
- ½ teaspoon cayenne pepper (adjust based on your heat preference)
- 1 cup beef broth
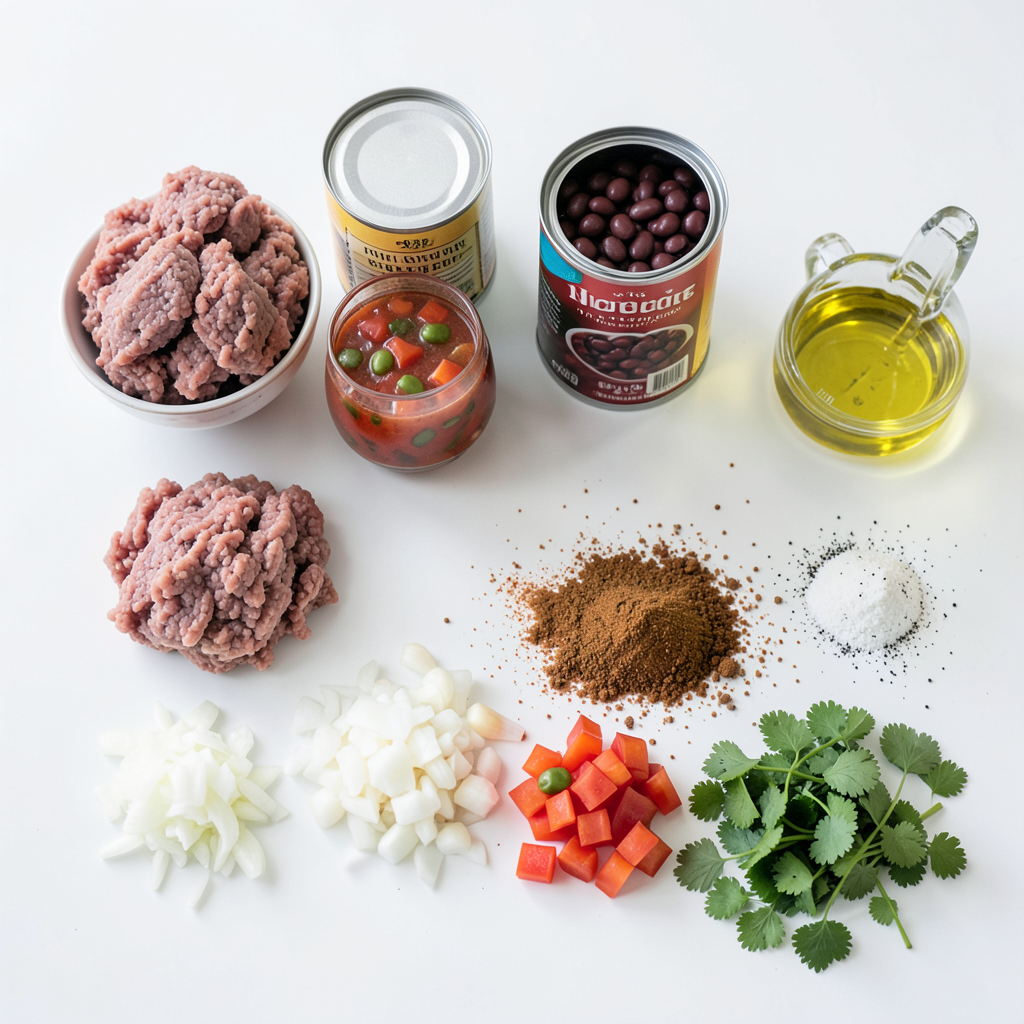
Gather these items before you start cooking. They are the base for a great chili. The lean ground beef gives it a hearty texture. Kidney beans and black beans add protein and fiber. Diced tomatoes with green chilies bring a nice tangy flavor.
Onions and garlic are key for a rich aroma. Bell peppers add sweetness and color. The spices like chili powder and cumin give warmth. Smoked paprika adds depth, and cayenne lets you control the heat. Beef broth helps to create a tasty base for your chili.
This mix of ingredients makes a comforting dish. You can serve it with sour cream and cheese for extra creaminess. Enjoy exploring these flavors!
Step-by-Step Instructions
Preparation Steps
To start, I heat olive oil in a large pot over medium heat. Once hot, I add the finely chopped onion and minced garlic. I sauté them for about 3-4 minutes. I wait until the onions turn translucent and smell good. Next, I stir in the diced bell pepper. I cook it for another 2-3 minutes until it softens.
Cooking the Beef
Now, I raise the heat to medium-high. I add 1 pound of lean ground beef to the pot. I break the beef into smaller pieces with a spoon. I cook it for about 5-7 minutes until it's browned all over. If there's extra fat, I drain it from the pot.
Combining and Simmering
Next, I sprinkle in the chili powder, cumin, smoked paprika, and cayenne pepper. I also add a good pinch of salt and freshly ground black pepper. I mix everything well to coat the beef and veggies with the spices.
Then, I pour in the diced tomatoes with green chilies, kidney beans, black beans, and 1 cup of beef broth. I stir everything together until it’s well mixed. I bring the chili to a boil, then lower the heat. I cover the pot and let it simmer for 30-40 minutes. I stir it occasionally to prevent sticking. This simmering time lets the flavors blend together nicely.
After simmering, I taste the chili and adjust the seasoning if needed. If I want it thicker, I uncover the pot and let it simmer for an extra 10-15 minutes. Once done, I serve the chili hot, garnished with fresh chopped cilantro. If I like, I can add sour cream and shredded cheese on top.
Tips & Tricks
Adjusting Heat Levels
You can change the heat of your chili by modifying cayenne pepper. If you want more heat, add more cayenne. For less heat, cut back on it. You can also swap cayenne for paprika for a milder flavor. Another option is to use fresh jalapeños instead. Just chop them up and add them to your mix.
Enhancing Flavor
Simmering time is key to great flavor. Letting your chili simmer for 30-40 minutes allows the spices to blend well. If you want to adjust seasonings, taste the chili after simmering. Add more salt or pepper if needed. You can even add a splash of lime juice for a fresh twist.
Serving Suggestions
Garnish your chili with fresh cilantro for a bright finish. You can also add a dollop of sour cream on top. This adds creaminess and balances the heat. Consider adding shredded cheese as well. A mix of cheddar and pepper jack works great.
Pro Tips
- Use Fresh Ingredients: Fresh vegetables and herbs can elevate the flavor of your chili, so opt for the freshest options available.
- Adjust the Spice Level: Customize the heat by adjusting the cayenne pepper to suit your taste, or add more spices gradually.
- Let it Simmer: Allowing the chili to simmer longer enhances the depth of flavor, so don’t rush this step!
- Garnish Creatively: Experiment with toppings like avocado, jalapeños, or corn chips for added texture and flavor contrast.
Variations
Bean Variations
You can switch up the beans in this recipe. Pinto beans or chickpeas work well. They add unique flavors and textures. If you want a vegetarian dish, skip the beef and use more beans. This keeps it hearty and filling.
Different Meat Options
You can also change the meat in your chili. Ground turkey or chicken is a great substitute. They both make the dish lighter but still tasty. If you’re feeling adventurous, try ground pork. It adds a nice richness to the chili.
Flavor Additions
Want to boost the flavor? Add corn or diced jalapeños to the mix. Corn gives a sweet crunch, while jalapeños add heat. You can also spice it up with your favorite hot sauce. Just a few drops can make a big difference!
Storage Info
Refrigeration Tips
Chili can last in the fridge for up to four days. Store it in an airtight container. This keeps it fresh and tasty. Let the chili cool down before sealing it. For best taste, eat it within two days.
Freezing Guidance
You can freeze chili for future meals. This is great for busy days! Use a freezer-safe container or bag. Leave some space at the top for expansion. Chili stays good in the freezer for up to three months.
To thaw, move it to the fridge overnight. For a quick option, use the microwave. Heat it in short intervals, stirring in between. You can reheat it on the stove, too. Just warm it slowly over low heat, stirring often. Enjoy your hearty chili anytime!
FAQs
How can I make this chili thicker?
To thicken your chili, try these tips:
- Cook longer without the lid. This lets steam escape.
- Add more beans, like pinto or chickpeas.
- Mix in some cornmeal or masa harina. This adds texture.
- Blend a portion of the chili, then mix it back in.
These easy steps will give your chili a heartier feel.
Can I make this chili in a slow cooker?
Yes, you can use a slow cooker! Here’s how:
- Brown the beef and veggies in a pan first. This adds flavor.
- Transfer everything to the slow cooker.
- Add all ingredients and mix well.
- Cook on low for 6-8 hours or high for 3-4 hours.
Your chili will be warm and tasty, perfect for any meal!
Is this chili spicy?
The heat level depends on your cayenne pepper use.
- Use ½ teaspoon for mild heat.
- For more spice, add more cayenne or chili powder.
- If you want a milder version, skip the cayenne.
You can also serve with sour cream. It helps cool down the heat!
This chili recipe combines tasty ingredients, simple steps, and helpful tips. You learned how to prepare lean beef, beans, and spices that create rich flavors. Adjust the heat as you prefer and explore different variations to suit your taste.
As you enjoy your chili, remember that there’s room for creativity. Use leftovers wisely, and don’t hesitate to try new twists. Happy cooking!