Meal-prep burrito bowls are a simple and tasty way to enjoy healthy meals all week. In this guide, I’ll share easy step-by-step instructions, ingredient tips, and fun variations to keep your bowls fresh and exciting. Whether you're a busy parent or a student, you’ll find everything you need to create delicious burrito bowls that fit your schedule. Ready to dive in? Let’s get cooking!
Why I Love This Recipe
- Flavorful Ingredients: This recipe combines a variety of vibrant vegetables and spices that create a delicious, hearty flavor in every bite.
- Meal Prep Friendly: These burrito bowls are perfect for meal prepping, allowing you to enjoy healthy meals throughout the week with minimal effort.
- Customizable: You can easily swap out ingredients or add your favorite toppings, making this dish versatile for any palate.
- Nourishing and Healthy: With wholesome components like brown rice, beans, and fresh veggies, these bowls provide balanced nutrition that keeps you energized.
Ingredients
Complete list of ingredients
To make meal-prep burrito bowls, gather these ingredients:
- 1 cup brown rice, uncooked
- 1 can (15 oz) black beans, rinsed and drained
- 1 cup corn kernels (frozen or fresh)
- 1 red bell pepper, diced
- 1 yellow bell pepper, diced
- 1 small red onion, diced
- 1 teaspoon ground cumin
- 1 teaspoon chili powder
- 1 tablespoon olive oil
- Salt and black pepper to taste
- 1 ripe avocado, sliced
- 1 cup cherry tomatoes, halved
- Fresh cilantro, chopped (for garnish)
- Lime wedges (for serving)
Notes on ingredient substitutions
You can swap some ingredients based on your taste. If you don’t have brown rice, use quinoa or white rice. Canned beans work great, but cooked lentils are a good choice too. For the bell peppers, any color will do. If you prefer, use zucchini or spinach instead. Don’t have cilantro? Try parsley or simply leave it out. The spices can also change. Add garlic powder or paprika for a different kick.
Nutritional information per serving
Each serving of these burrito bowls is packed with nutrients. Here’s a simple breakdown:
- Calories: about 380
- Protein: 12 grams
- Carbohydrates: 60 grams
- Dietary Fiber: 15 grams
- Fats: 12 grams
These bowls provide a good mix of protein, fiber, and healthy fats. They help keep you full and satisfied.

Step-by-Step Instructions
Cooking the brown rice
Start by rinsing 1 cup of brown rice under cold water. This helps remove any extra starch. Next, place the rinsed rice in a medium saucepan. Add 2 cups of water to the pan. Bring the water to a rolling boil. Once boiling, lower the heat to low. Cover the pan with a lid and let it simmer for about 40 minutes. The rice will absorb the water and become tender. When done, fluff the rice with a fork and set it aside.
Preparing and sautéing the vegetables
While the rice cooks, heat 1 tablespoon of olive oil in a large skillet over medium heat. Add 1 small diced red onion, and 1 diced red and yellow bell pepper. Sauté these veggies for about 5 to 7 minutes. Stir them occasionally until they become soft and smell great. Then, add 1 cup of corn and 1 can of black beans, rinsed and drained. Sprinkle in 1 teaspoon of ground cumin, 1 teaspoon of chili powder, and some salt and pepper to taste. Cook everything together for another 5 minutes. This step helps the flavors mix well.
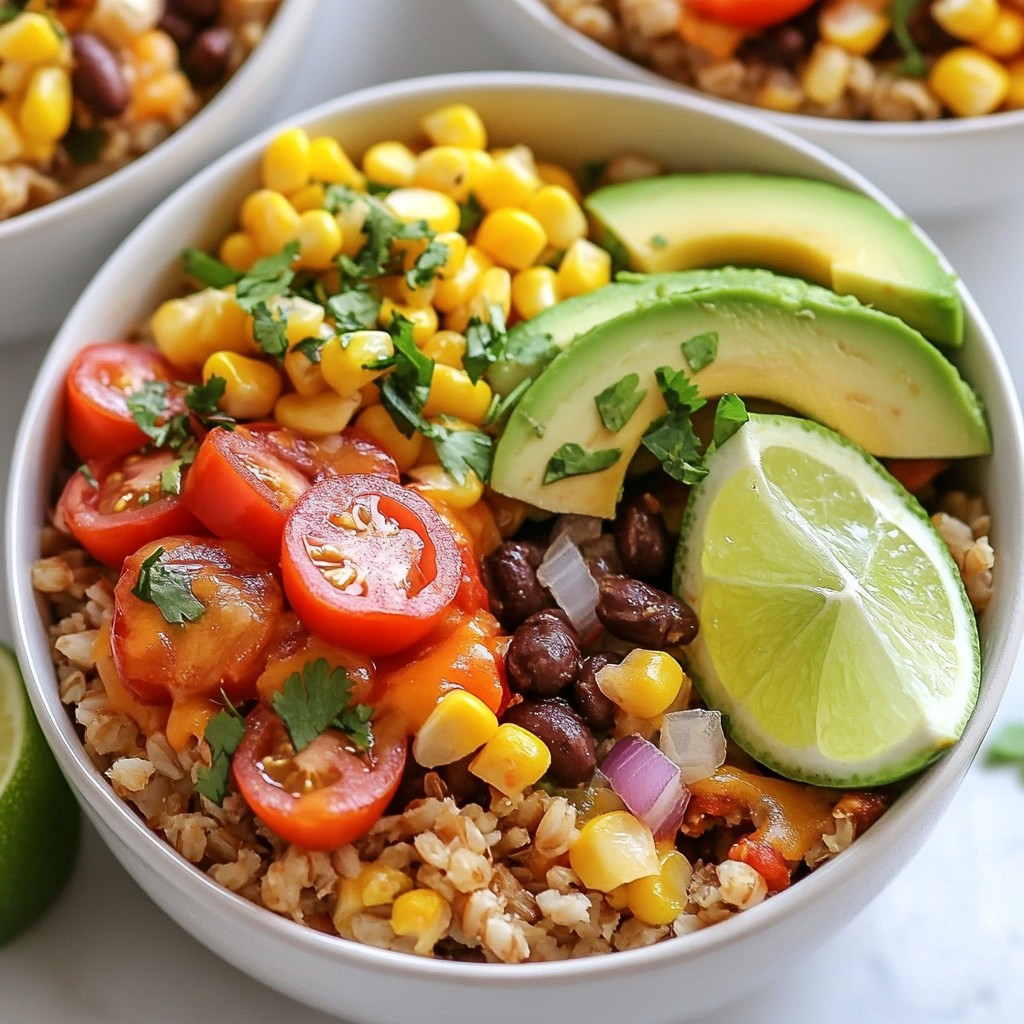
Assembling the burrito bowls
Grab your meal-prep containers. Start with a nice layer of the fluffy brown rice in each one. Next, evenly spread the sautéed vegetable and bean mix over the rice in each container. To add fresh elements, top the bowls with sliced avocado and halved cherry tomatoes. This not only makes them look good but adds fresh taste too. Finally, sprinkle each bowl with chopped cilantro for a burst of flavor. You can serve the burrito bowls right away or store them in the fridge for later. Just cover them tightly to keep them fresh.
Tips & Tricks
Best practices for meal prepping
Meal prepping saves time and makes life easier. Here are some tips to follow:
- Plan Ahead: Choose a day to prep your meals for the week.
- Use Quality Containers: Opt for sturdy containers that seal well.
- Label Your Meals: Write dates on containers to track freshness.
- Cook in Batches: Make larger portions of rice and beans for multiple meals.
- Keep It Simple: Choose recipes with similar ingredients for easy prep.
How to keep avocados fresh
Avocados can brown quickly, but I have some tricks to keep them fresh:
- Leave the Pit: If you slice an avocado, keep the pit in the unused half.
- Use Lemon Juice: Squeeze lemon or lime juice on the cut surface. This slows browning.
- Wrap Tightly: Use plastic wrap to seal the avocado tightly.
- Store in Water: Place the avocado half in a small bowl of water.
Flavor enhancements and spice adjustments
Enhancing flavors in your burrito bowls is easy. Here’s how to spice things up:
- Add More Spices: Increase cumin or chili powder for extra kick.
- Mix in Hot Sauce: Drizzle your favorite hot sauce over the top.
- Experiment with Herbs: Try adding cilantro or fresh parsley for freshness.
- Incorporate Lime Juice: A splash of lime juice brightens the flavors.
- Use Different Beans: Black beans are great, but pinto or kidney beans work too.
Pro Tips
- Cook Rice Perfectly: To achieve perfectly cooked brown rice, ensure you rinse it thoroughly to remove excess starch, which can make it gummy.
- Customize Your Veggies: Feel free to add or substitute other vegetables such as zucchini or spinach to suit your taste and make the dish even more nutritious.
- Avocado Storage: If you're meal prepping, consider storing the avocado separately to prevent browning. Add it just before serving for the best taste and texture.
- Flavor Boost: For an extra flavor boost, consider adding a splash of lime juice to the vegetable mix while cooking or drizzling it over the assembled bowls.
Variations
Protein options for added nutrition
You can boost your burrito bowls with protein. Here are some options:
- Grilled chicken: Cook it with spices for extra flavor.
- Ground turkey: Sauté with cumin and chili powder for a tasty twist.
- Shrimp: Quickly cook in a skillet for a light touch.
- Tofu: Marinate and bake for a plant-based protein.
Adding protein makes your meal heartier and more filling. Plus, it helps keep you energized throughout the day.
Vegan and vegetarian adaptations
If you prefer vegan or vegetarian options, you can easily adapt this recipe. Use plant-based protein sources, such as:
- Chickpeas: Add for a nutty flavor and extra fiber.
- Lentils: Cook until tender and mix in with the veggies.
- Seitan: This wheat-based protein works great in savory dishes.
For a full vegan experience, skip the avocado if you want to keep it lighter. You can also use a dairy-free sour cream or yogurt for creaminess.
Different grains or bases to use
You can switch up the base grain for variety. Here are some ideas:
- Quinoa: A protein-rich grain that adds a nutty taste.
- Cauliflower rice: A low-carb option to lighten the dish.
- Couscous: Quick to prepare and fluffy in texture.
Using different grains keeps meals exciting. You can also create a flavor theme by pairing grains with specific proteins or veggies. Enjoy mixing and matching!
Storage Info
How to store meal-prep burrito bowls
To keep your meal-prep burrito bowls fresh, store them in airtight containers. Make sure each bowl has a lid. This prevents spills and keeps your food tasty. You can place the bowls in the fridge for up to 4 days. If you plan to eat them later, avoid adding avocado or tomatoes until you are ready to serve. This keeps everything fresh and vibrant.
Freezing guidelines and reheating instructions
You can freeze your burrito bowls for longer storage. Just make sure they are in freezer-safe containers. Avoid using glass containers, as they can break. When you're ready to eat, take a bowl out of the freezer and let it thaw in the fridge overnight. To heat, simply microwave it for about 2-3 minutes. Stir halfway for even heating. If you like, add fresh toppings after reheating for extra flavor.
Recommended meal-prep containers
I recommend using glass or BPA-free plastic containers for meal prep. Glass containers are great because they don't stain and can go from oven to table. If you prefer plastic, choose ones labeled as microwave safe. Look for containers with separate sections to keep toppings separate until serving. This way, your meal stays fresh and looks great when you eat it!
FAQs
How long do meal-prep burrito bowls last?
Meal-prep burrito bowls can last up to four days in the fridge. This makes them perfect for a busy week. Store them in airtight containers to keep them fresh. If you notice any changes in smell or appearance, it’s best to toss them.
Can I make burrito bowls in advance?
Yes, you can make burrito bowls in advance. This recipe is great for meal prep. Cook the rice and sauté the veggies ahead of time. Assemble the bowls and store them in the fridge. They save time and taste great, even when reheated.
What can I add to make burrito bowls more filling?
To make burrito bowls more filling, consider adding protein. Grilled chicken, beef, or tofu work well. You can also add more beans or cheese for extra texture and flavor. Nuts and seeds add crunch too. Don't forget to add more veggies like spinach or zucchini for a healthy boost!
This article detailed how to create tasty meal-prep burrito bowls. We reviewed the essential ingredients, offered tips on cooking and assembling, and shared storage advice. I also highlighted several variations to keep your meals exciting.
Meal prep saves time and helps you eat well. Use these steps to make nutritious bowls that fit your needs. Enjoy your cooking and eating journey!