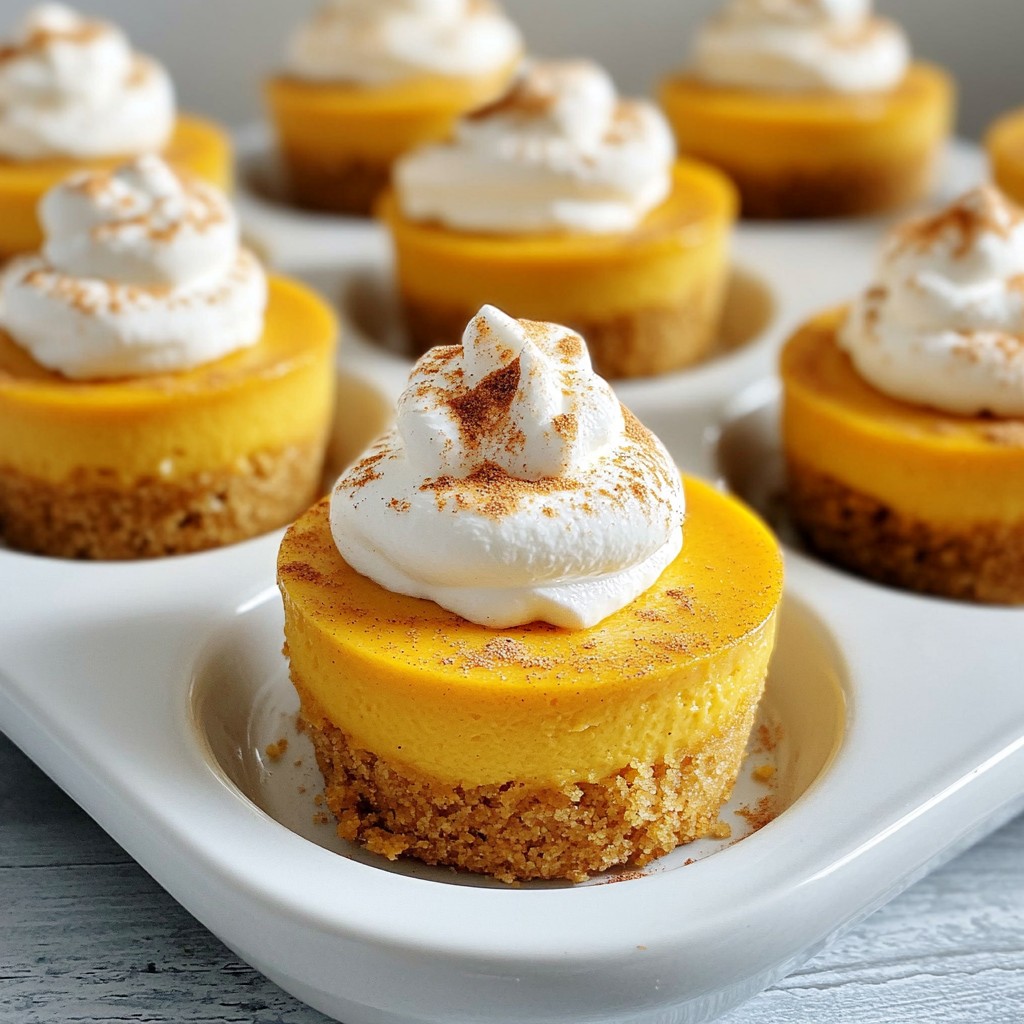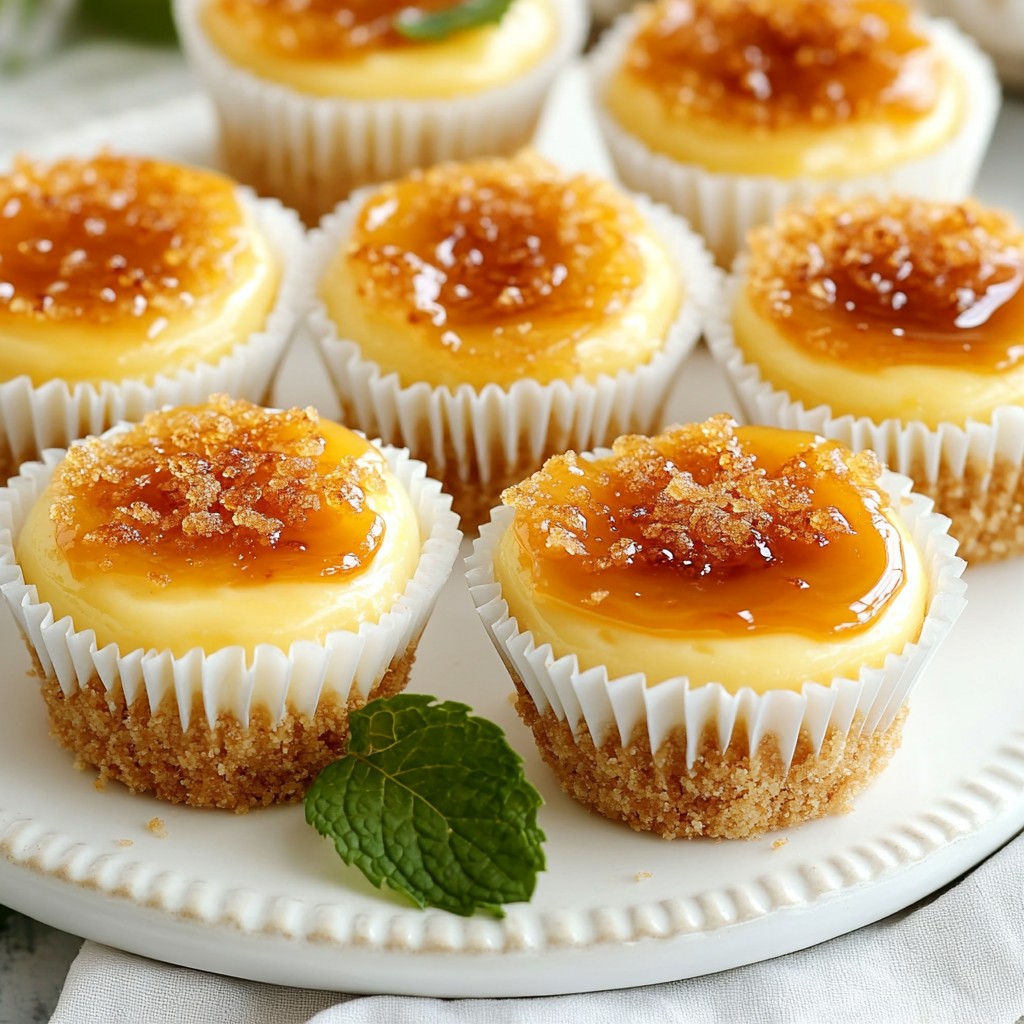
Craving a delicious dessert that’s both simple and elegant? Let me introduce you to mini crème brûlée cheesecakes! These tiny treats combine the rich flavor of cheesecake with that classic crème brûlée topping. Perfect for parties, they’re easy to make and even easier to impress your guests. Get ready to dive into this delightful dessert idea that will satisfy your sweet tooth and leave everyone wanting more!
Why I Love This Recipe
- Decadent Flavor: These mini cheesecakes combine the rich creaminess of classic cheesecake with the delightful caramelized sugar topping, creating a luxurious dessert experience.
- Perfect Portion: Individual servings make these mini cheesecakes ideal for parties, gatherings, or a special treat without the guilt of a whole cheesecake.
- Easy to Make: With simple ingredients and straightforward steps, this recipe is accessible even for novice bakers, ensuring success every time.
- Impressive Presentation: The caramelized sugar topping adds a stunning finish that will wow your guests and make your dessert table shine.
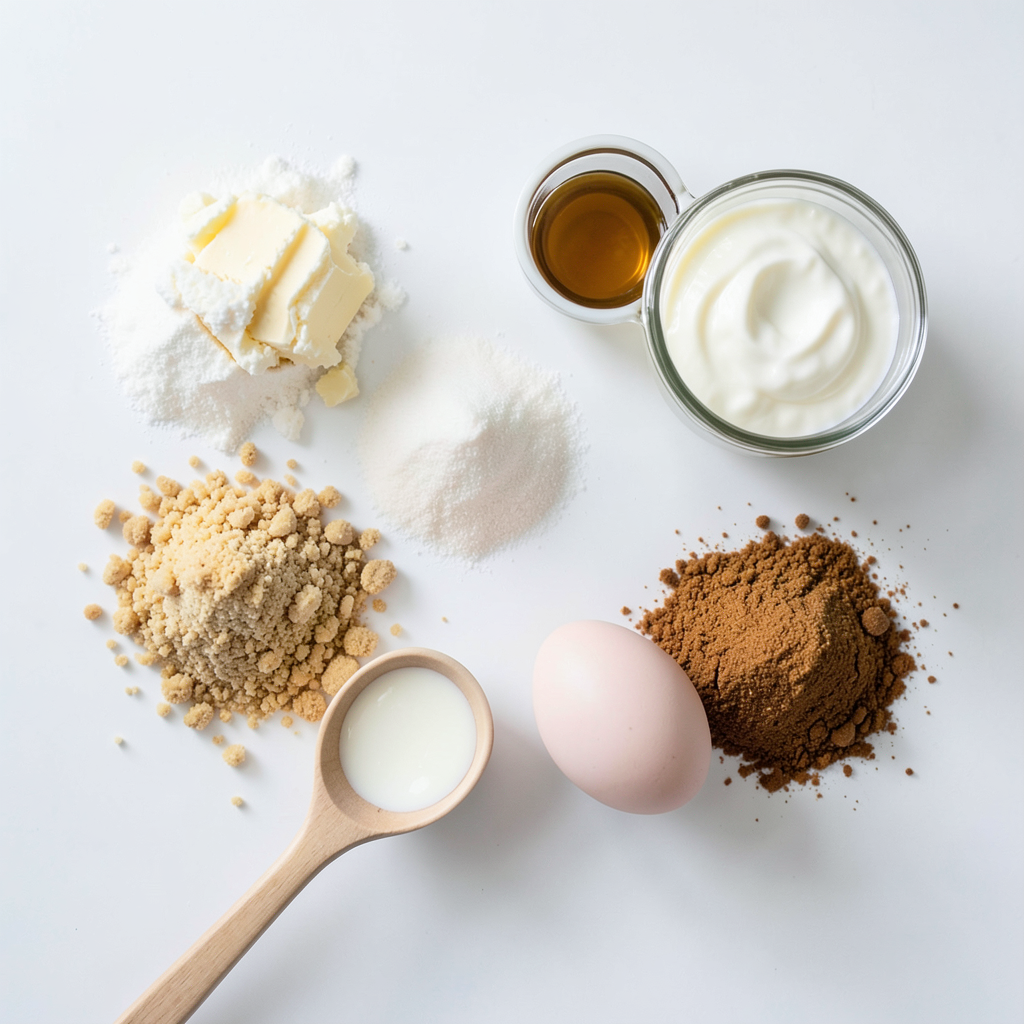
Ingredients
Main Ingredients
- 1 (8 oz) package of cream cheese, softened at room temperature
- 1/2 cup granulated sugar
- 2 large eggs, at room temperature
- 1/4 cup heavy cream
These main ingredients create a smooth and creamy filling. Cream cheese is the star, giving that rich flavor. Sugar sweetens the mix, and eggs help bind everything together. Heavy cream adds to the luscious texture.
Crust Ingredients
- 1 cup graham cracker crumbs
- 3 tablespoons unsalted butter, melted
- 2 tablespoons granulated sugar
For the crust, graham cracker crumbs offer a sweet crunch. The melted butter holds the crumbs together, while the sugar gives a touch of extra sweetness. This crust is key to balancing the rich filling.
Topping Ingredients
- 2 tablespoons brown sugar
The brown sugar topping creates that signature brûlée layer. It caramelizes beautifully, adding a delightful crunch. This topping makes each bite special, giving a perfect finish to the cheesecakes.
Step-by-Step Instructions
Preparation of the Crust
1. Preheat your oven to 325°F (163°C). This step is key for even baking.
2. In a medium bowl, mix together the graham cracker crumbs, melted butter, and 2 tablespoons of sugar. Stir until all crumbs are coated.
3. Press the crumb mixture firmly into the bottom of a lined muffin tin. This forms a solid crust. Bake for about 10 minutes until slightly golden. Let them cool for a few minutes.
Making the Cheesecake Filling
1. In a separate bowl, beat the softened cream cheese with a hand mixer until smooth. This takes a minute or two.
2. Gradually add in 1/2 cup of sugar. Mix until fluffy and combined.
3. Add the eggs one at a time, mixing well after each. Then stir in the vanilla and heavy cream until the batter is creamy.
Baking the Cheesecakes
1. Pour the cheesecake filling evenly over the cooled crusts in the muffin tin. Fill each cup about three-quarters full. This allows room for expansion.
2. Bake in the preheated oven for 18-20 minutes. They should be set but still jiggle slightly in the center.
3. After baking, let the cheesecakes cool to room temperature. Place them in the fridge for at least 4 hours to chill. This helps them firm up nicely.
Tips & Tricks
Achieving the Perfect Cheesecake Texture
To make your mini crème brûlée cheesecakes truly shine, use room temperature ingredients. This helps blend the cream cheese smoothly. Cold cream cheese can lead to lumps, and nobody wants that.
Bake the cheesecakes until they are slightly jiggly in the center. This means they are perfectly cooked. They will firm up as they cool and chill.
Caramelizing the Topping
When it comes to caramelizing the topping, you can choose between a kitchen torch or a broiler. A torch gives you more control. Hold it a few inches above the sugar for even browning. If you use a broiler, watch closely! The sugar can burn quickly.
For an even layer of brown sugar, sprinkle it lightly and evenly. Avoid clumps; they will burn faster.
Presentation Ideas
Plating your mini cheesecakes can make them stand out. Arrange them on a pretty platter. For an elegant touch, drizzle caramel or chocolate sauce around the cheesecakes.
Add fresh berries or mint sprigs on top for color and flavor. These small details make a big difference!
Pro Tips
- Chill for Best Results: Make sure to chill the mini cheesecakes for at least 4 hours, or overnight if possible. This helps the flavors to meld and the texture to set perfectly.
- Use Room Temperature Ingredients: Allow your cream cheese and eggs to reach room temperature before mixing. This ensures a smoother batter and prevents lumps.
- Don’t Overbake: Keep an eye on the cheesecakes while baking. They should be set around the edges but still have a slight jiggle in the center for a creamy texture.
- Caramelize Carefully: When using a kitchen torch, move it in a circular motion to evenly caramelize the brown sugar without burning it. If broiling, watch closely to prevent overcooking.
Variations
Flavor Add-ins
To make your mini crème brûlée cheesecakes even better, try adding flavor. You can use citrus zest. Lemon or orange zest brightens the taste. Just add a teaspoon to the cream cheese mix.
Another fun option is chocolate or coffee. For chocolate, mix in a half cup of melted chocolate. If you love coffee, add two teaspoons of instant coffee. These flavors give a twist to the classic recipe.
Alternative Crust Options
Switching up the crust can also change the game. Instead of graham cracker crumbs, use crushed Oreos. This adds a rich chocolate flavor. Simply replace the graham cracker crumbs with the same amount of crushed Oreos.
You can also use nut crusts. Almonds or pecans work well. Just grind them finely and mix with melted butter. This adds a nice crunch and flavor to your cheesecakes.
Serving Suggestions
When serving your mini cheesecakes, think about fun pairings. Drizzle with caramel sauce for a sweet touch. Chocolate sauce is also a great option for chocolate lovers.
Fresh fruits like strawberries or raspberries add brightness. They make the dessert look pretty, too. You can also top with mint leaves for a splash of color. These toppings enhance the flavor and make your dessert stand out.
Storage Info
Best Practices for Storage
To keep your mini crème brûlée cheesecakes fresh, store them in the fridge.
- Refrigeration guidelines: Place the cheesecakes in an airtight container. This helps prevent them from drying out or absorbing other smells from the fridge. Keep them chilled for up to 5 days.
- Freezing tips: You can freeze these treats for longer storage. Wrap each cheesecake tightly in plastic wrap. Then put them in a freezer-safe bag. They can last up to 3 months in the freezer. To enjoy, thaw them in the fridge overnight before serving.
Shelf Life of Cheesecakes
- How long they last in the fridge: Mini cheesecakes stay fresh for about 5 days when stored properly.
- Signs of spoilage: Look for changes in texture or smell. If the cheesecakes feel slimy or have an off smell, it's best to discard them. Always trust your senses for safe eating!
FAQs
Can I make these cheesecakes ahead of time?
Yes, you can make these cheesecakes ahead of time! Prepare them and chill them in the fridge. They stay fresh for about five days. This makes them perfect for parties or special events. Just remember to add the brown sugar topping right before serving. This keeps the crust crispy and delicious.
How do I know when the cheesecakes are done?
You can tell when the cheesecakes are done by looking for a slight jiggle in the center. The edges should look set and firm. If they look too wobbly, give them a few more minutes in the oven. Don't worry! They will firm up as they cool and chill.
Can I substitute ingredients?
Yes! You can easily swap out some ingredients. For a lighter version, use Greek yogurt instead of cream cheese. If you want a gluten-free crust, try almond flour or gluten-free cookies. You can also use egg substitutes, like flaxseed, for a vegan option. These swaps make the recipe flexible for different diets!
This blog post covered the key ingredients and steps to make a perfect cheesecake. You learned how to prepare the crust, mix the filling, and bake the cheesecakes. I shared tips for texture, topping caramelization, and creative variations.
Remember, good storage helps your cheesecake last longer. Using these ideas, you can enjoy a tasty dessert any time. Cheesecake is fun to make and even better to eat. Happy baking!