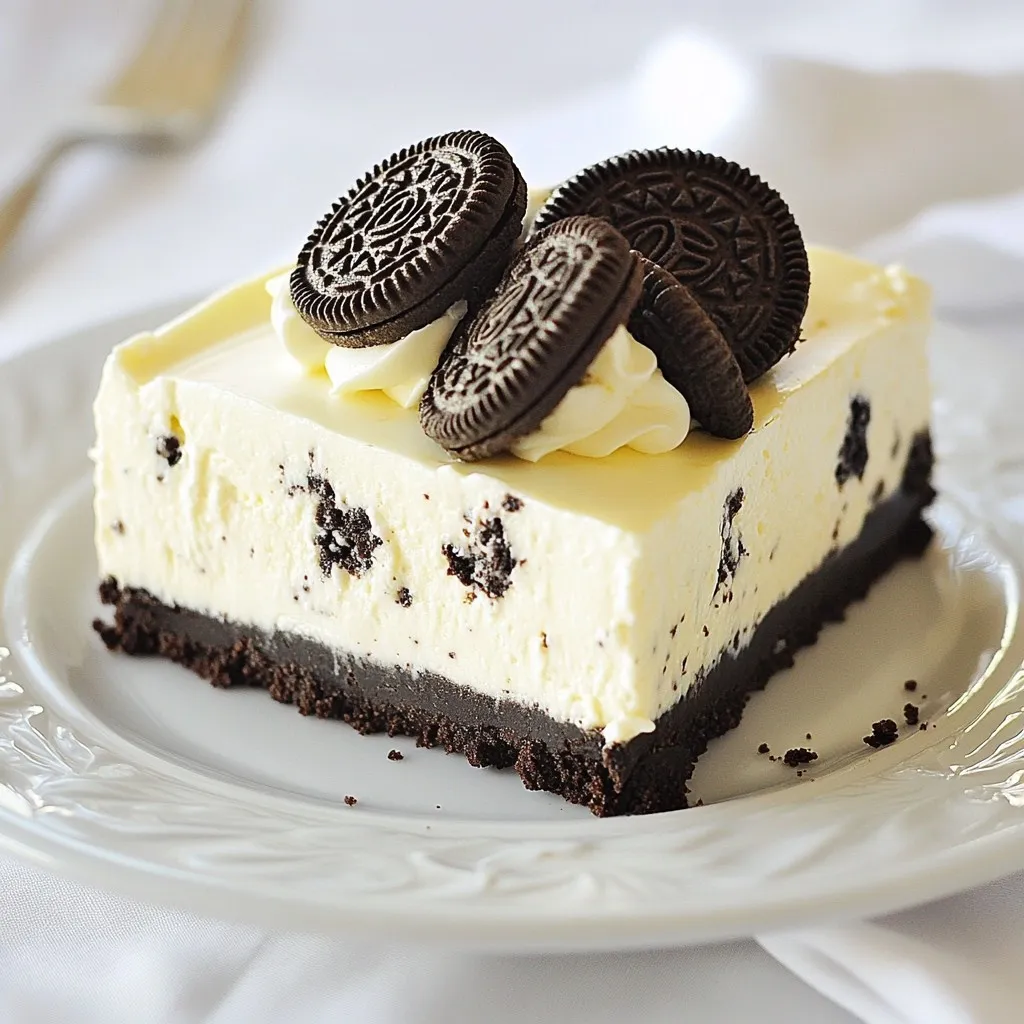
If you’re craving a sweet treat that’s easy to make, you’ve found it! This No-Bake Oreo Cheesecake recipe is the perfect dessert for any occasion. Packed with rich flavors and a creamy texture, it will impress your friends and family. You only need a few simple ingredients and no oven required. Let’s dive into this simple, delicious recipe that will have everyone asking for seconds!
Why I Love This Recipe
- Decadent Flavor: This cheesecake combines the rich taste of cream cheese with the beloved flavor of Oreos, creating a dessert that’s irresistible to chocolate lovers.
- No-Bake Convenience: Perfect for hot days or when you want a quick dessert, this no-bake cheesecake saves you the hassle of turning on the oven.
- Easy to Make: With simple ingredients and straightforward steps, this recipe is approachable for both novice and experienced bakers alike.
- Customizable: You can easily adapt the recipe by adding different toppings or mix-ins, making it a versatile dessert for any occasion.
Ingredients
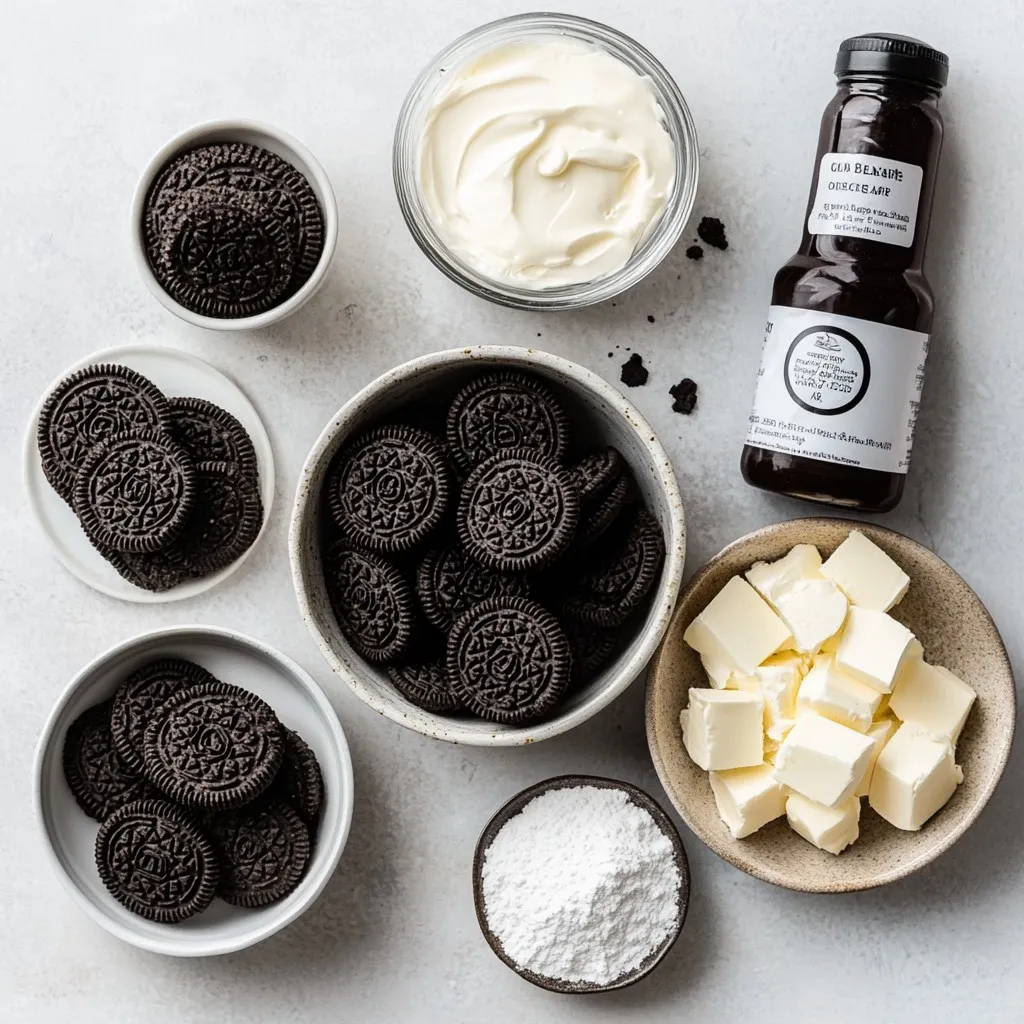
To make a No-Bake Oreo Cheesecake, gather these simple ingredients:
– 24 Oreo cookies, finely crushed
– 5 tablespoons unsalted butter, melted
– 2 cups cream cheese, softened
– 1 cup powdered sugar, sifted
– 1 teaspoon pure vanilla extract
– 1 cup heavy whipping cream, chilled
– 12 Oreo cookies, coarsely chopped (for filling and garnish)
These ingredients create a rich and creamy dessert. The crushed Oreos form a delightful crust. The cream cheese gives the cheesecake its smooth texture. Powdered sugar adds sweetness without grit. Heavy cream is key for a light and fluffy filling. Finally, coarsely chopped Oreos add crunch and flavor.
Make sure to use room-temperature cream cheese. This helps it blend easily. Chilled heavy cream whips better, giving your cheesecake its airy feel. When you gather these ingredients, you set the stage for a delightful treat. Enjoy each step as you create this delicious dessert.
Step-by-Step Instructions
Crust Preparation
To start, gather your ingredients. You need 24 Oreo cookies and 5 tablespoons of melted butter.
– Crush the Oreo cookies in a large bowl until they are fine crumbs.
– Add the melted butter and mix until all crumbs are coated.
– Press this mixture into the bottom of a 9-inch springform pan. Use your fingers or a measuring cup to flatten it evenly.
– Place the pan in the refrigerator to chill while you make the filling.
Cheesecake Filling
Next, we make the creamy filling. You will need 2 cups of softened cream cheese.
– In a large bowl, beat the cream cheese with an electric mixer. Mix until it is smooth and creamy.
– Gradually add in 1 cup of sifted powdered sugar and 1 teaspoon of pure vanilla extract.
– Continue mixing until everything is well blended.
Whipping the Cream
Now it’s time to whip the cream. You will need 1 cup of chilled heavy whipping cream.
– In a separate bowl, use an electric mixer to whip the heavy cream.
– Whip until stiff peaks form, which should take about 3 to 5 minutes.
– Be careful not to over-whip, or it will become grainy.
Final Assembly
Now, let’s combine everything.
– Gently fold the whipped cream into the cream cheese mixture using a spatula.
– Add 12 coarsely chopped Oreo cookies to the cheesecake filling. Fold them in carefully.
– Pour the filling over the prepared crust. Smooth the top with a spatula.
– Cover the cheesecake and refrigerate for at least 4 hours, or overnight for best results.
Tips & Tricks
Achieving the Perfect Texture
To get the right texture, avoid over-mixing the whipped cream. When you fold it in, use gentle motions. This keeps the mixture light and airy. If you mix too much, the whipped cream loses its fluffiness.
Chilled ingredients play a big role in achieving the perfect texture. Make sure your cream cheese and heavy cream are cold before you start. Chilling helps them blend smoothly. This ensures a creamy, rich filling that melts in your mouth.
Garnishing Suggestions
Garnishing can elevate your cheesecake’s look. Here are some ideas for topping:
– Crushed Oreo cookies add a nice crunch.
– Fresh whipped cream makes it look inviting.
– Drizzling chocolate sauce gives it a touch of luxury.
For a stunning presentation, serve the cheesecake on a decorative plate. Add dollops of whipped cream and a few whole Oreos on the side. This not only looks great but also adds to the flavor.
Pro Tips
- Use Room Temperature Cream Cheese: Ensure your cream cheese is at room temperature before mixing. This helps achieve a smoother filling without lumps.
- Chill the Bowl for Whipping Cream: For an even better whipped cream, chill your mixing bowl and beaters in the freezer for about 10 minutes before whipping. This keeps the cream cold and helps it whip up faster.
- Don’t Over-Mix: When folding the whipped cream into the cream cheese mixture, be gentle. Over-mixing can deflate the whipped cream, resulting in a denser cheesecake.
- Let it Chill Overnight: For the best results, allow your cheesecake to set in the refrigerator overnight. This enhances the flavors and ensures a firmer texture for slicing.
Variations
Different Flavors
You can change the flavor of your No-Bake Oreo Cheesecake to keep things exciting. Here are two fun ideas:
– Chocolate Oreo Cheesecake: Instead of using regular Oreos, use chocolate Oreos in the crust and filling. This adds a rich chocolate flavor. You can also mix in some melted chocolate for extra depth.
– Mint Oreo Cheesecake: Swap regular Oreos for mint Oreos. This will give your cheesecake a refreshing minty twist. You can even add a few drops of mint extract to enhance the flavor.
Healthier Alternatives
You can enjoy this delicious dessert while making healthier choices. Here are some options:
– Using Low-Fat Cream Cheese: Replace regular cream cheese with low-fat cream cheese. This cuts down on calories while still keeping a creamy texture.
– Gluten-Free Oreo Options: If you need a gluten-free version, look for gluten-free Oreos. They work just as well in the crust and the filling. This way, everyone can enjoy a slice!
Storage Info
How to Store Cheesecake
To keep your no-bake Oreo cheesecake fresh, store it in the fridge. Wrap it tightly in plastic wrap or place it in an airtight container. This keeps moisture out and keeps the cheesecake tasting great. If you want to save it for later, freezing is a good option. Cut the cheesecake into slices and wrap each piece in plastic wrap. Place them in a freezer-safe bag or container. This way, you can enjoy a slice anytime!
Shelf Life
In the fridge, your cheesecake will last about 5 days. Make sure to check for any signs of spoilage. If you see mold or if it smells off, it’s time to throw it away. If you freeze it, the cheesecake can last up to 2 months. Just remember, the texture may change slightly after freezing, but the taste will still be delicious!
FAQs
Can I use other types of cookies?
Yes, you can use different cookies! Here are some great options:
– Chocolate chip cookies
– Graham crackers
– Nutter Butter cookies
These cookies change the flavor but keep the fun. Just crush them the same way.
How long should I chill the cheesecake?
Chill the cheesecake for at least 4 hours. For the best taste, chill it overnight. This time lets the cheesecake set firmly and improves the flavor.
Is it possible to make this recipe vegan?
Yes, you can make a vegan version! Here are some tips:
– Use vegan cream cheese instead of regular cream cheese.
– Substitute heavy cream with coconut cream or a vegan whipping cream.
– Choose vegan cookies, like Oreos or specific brands that are dairy-free.
These swaps keep the cheesecake delicious while fitting a vegan diet.
This blog offered a detailed guide on making an Oreo cheesecake. We covered the key ingredients needed and walked through each step, from preparing the crust to adding the fluffy filling. Remember to chill your cheesecake to set properly and consider fun variations like chocolate or mint flavors.
With a few helpful tips, you can achieve the perfect texture and impress others with your presentation. Enjoy your cheesecake journe