If you're craving a sweet yet healthy treat, these No-Bake Peanut Butter Bars are your answer! This easy recipe combines tasty ingredients like natural peanut butter, honey, and rolled oats for a satisfying snack. With no baking required, you’ll enjoy a fun and quick kitchen project. Follow my step-by-step guide to create bars that are not just delicious but also perfect for any occasion—your taste buds will thank you!
Why I Love This Recipe
- Quick and Easy: This recipe takes just 10 minutes to prep, making it a perfect choice for busy days when you want something delicious without a lot of fuss.
- Nutritious Ingredients: With natural peanut butter, oats, and honey, these bars are packed with protein and fiber, providing a satisfying and healthy snack option.
- Customizable Flavors: You can easily modify the recipe by adding your favorite mix-ins like nuts or dried fruits, tailoring the bars to your personal taste.
- Perfect for Meal Prep: These bliss bars store well in the fridge, making them an ideal make-ahead option for snacks or desserts throughout the week.
Ingredients
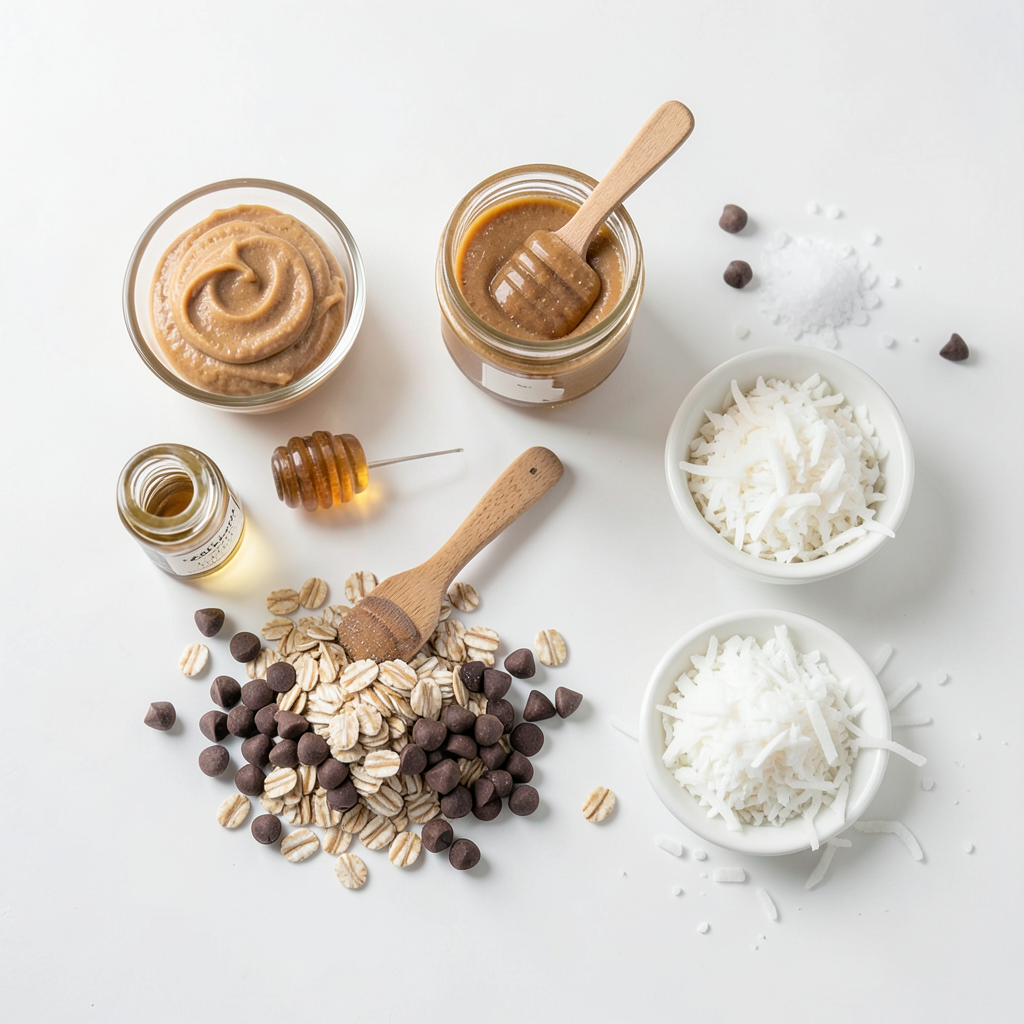
List of Ingredients
- 1 cup natural peanut butter
- 1/2 cup honey or maple syrup
- 1 teaspoon pure vanilla extract
- 2 cups rolled oats
- 1/2 cup chocolate chips
- 1/4 cup unsweetened shredded coconut
- A pinch of sea salt
Measurements
For this recipe, measure carefully to get the best taste. You need:
- 1 cup natural peanut butter, smooth or crunchy
- 1/2 cup honey for sweetness or maple syrup as a vegan option
- 1 teaspoon pure vanilla extract for flavor
- 2 cups rolled oats, use old-fashioned or quick oats
- 1/2 cup chocolate chips, dark for richness or semi-sweet for balance
- 1/4 cup unsweetened shredded coconut for texture
- A pinch of sea salt to enhance the flavors
If you prefer, you can swap honey for agave nectar. You can also try almond butter in place of peanut butter.
Equipment Needed
To make these bars, gather the following items:
- Mixing bowls for combining the ingredients
- An 8x8-inch baking dish to shape the bars
- Parchment paper to line the dish for easy removal
- A spatula to mix and press the mixture down
Having the right tools makes the process smooth and easy. Make sure everything is ready before you start!
Step-by-Step Instructions
Mixing the Base
Start by gathering your ingredients. In a medium-sized mixing bowl, add the peanut butter, honey, and vanilla. Use a sturdy spatula to mix these well. Keep stirring until you have a smooth and creamy mix. This base is the heart of the bars, so make sure it’s well combined.
Adding Dry Ingredients
Now, it is time to add the dry ingredients. Pour in the rolled oats, chocolate chips, shredded coconut, and a pinch of sea salt. Stir everything together until the oats are evenly coated. This step is key for a tasty bar. You want every bite to have a perfect mix of flavors.
Preparing the Dish
Next, prepare your baking dish. Take an 8x8-inch dish and line it with parchment paper. Make sure the paper hangs over the sides. This makes it easy to lift the bars out later. Once lined, spoon your peanut butter mixture into the dish. Use a spatula or your hands to press it down firmly. Aim for a smooth, even layer.
Chilling the Bars
Now, it’s time to chill the bars. Place your dish in the refrigerator for about 1 to 2 hours. This chilling time is important. It helps the mixture firm up and makes cutting easier later on. Patience is key here; trust me, it will be worth the wait.
Cutting the Bars
After the bars are set, carefully lift them out using the parchment paper. Place them on a cutting board. Use a sharp knife to cut them into your desired size. To get nice, even pieces, try using a ruler or just eyeball it. Enjoy your delicious no-bake peanut butter bars!
Tips & Tricks
Achieving the Perfect Texture
- Smooth vs. Crunchy Peanut Butter: Use smooth peanut butter for a creamy bar. It blends well and gives a nice texture. Crunchy peanut butter adds bits of peanuts. This gives a fun crunch but may change the feel of each bite. Choose what you like best!
- Choosing the Right Oats: Old-fashioned oats work great for this recipe. They give a hearty texture. Quick oats can also be used. They will make the bars smoother. Pick the type you prefer based on your taste.
Enhancing Flavor
- Suggestions for Additional Mix-ins: Try adding nuts or seeds for extra crunch. Dried fruits like raisins or cranberries add sweetness. You can also mix in some chia or flaxseeds for a nutrition boost.
- Flavor Variations: Add a dash of cinnamon for warmth. A drop of almond extract can bring a nice twist. Get creative! Each flavor can turn your bars into something new.
Serving Suggestions
- Best Ways to Enjoy the Bars: These bars are perfect as a snack or dessert. Enjoy them plain or with your favorite toppings. You can serve them with a dollop of yogurt for a treat.
- Pairing with Drinks or Fruits: Pair your bars with almond milk for a tasty combo. They also go well with fresh fruits like bananas or apples. This makes a balanced snack that's both filling and delicious!
Pro Tips
- Choose Your Peanut Butter: Select smooth peanut butter for a creamier texture, or opt for crunchy peanut butter to add delightful bits of peanuts for extra texture.
- Sweetness Adjustment: Feel free to adjust the sweetness by using more or less honey or maple syrup according to your taste preference.
- Chill Time: Ensure you allow enough chill time in the refrigerator for the bars to set properly; this will make slicing much easier.
- Storage Tips: Store the bars in an airtight container in the refrigerator to keep them fresh, and consider freezing them for longer storage.
Variations
Allergy-Friendly Options
You can easily adapt this recipe for special diets. If you want nut-free bars, use sunflower seed butter or soy nut butter. Both options work well and keep the bars creamy. For a gluten-free treat, choose certified gluten-free oats. This ensures everyone can enjoy these tasty bars.
Flavor Variations
Want to mix it up? Adding cocoa powder gives a nice chocolate twist. Just two tablespoons will do. You can also stir in dried fruits like raisins or cranberries. Sunflower seeds add a nice crunch and extra nutrition.
Customization Ideas
You can adjust the sweetness to fit your taste. Add less honey or maple syrup if you prefer it less sweet. For toppings, try drizzling melted chocolate or sprinkling crushed nuts. These simple changes let you create your perfect bar.
Storage Info
Best Storage Practices
To keep your no-bake peanut butter bars fresh, use airtight containers. This helps to lock in moisture and flavor. Store the bars in the refrigerator. The cool temperature will help them last longer.
Shelf Life
These bars stay fresh for up to one week. After this time, they may lose their flavor and texture. Watch out for signs of spoilage. If you see any mold or off smells, it's time to toss them.
Freezing Instructions
You can freeze these bars for longer storage. First, cut them into pieces. Wrap each piece tightly in plastic wrap. Then place them in an airtight container or freezer bag. To thaw, remove the bars from the freezer and let them sit in the fridge overnight. This keeps them tasty and easy to enjoy later.
FAQs
Can I use a different sweetener?
Yes, you can! If you want to swap honey or maple syrup, try agave nectar or brown rice syrup. Both options work well and keep the bars sweet. You can also use powdered sugar for a quick fix. Just remember, each sweetener has a unique taste. Adjust the amount to suit your preference.
How long do no-bake peanut butter bars last?
These bars stay fresh for about a week when stored properly. Keep them in an airtight container in the fridge. If you notice any strange smells or colors, it’s time to toss them. For longer storage, freeze them and enjoy later!
Can I make these bars vegan?
Absolutely! To make these bars vegan, use maple syrup instead of honey. Choose dairy-free chocolate chips for a fully vegan treat. You can also use a nut butter like almond or cashew for a different twist. Simple swaps make these bars fit any diet.
What can I add to enhance nutrition?
To boost nutrition, consider adding seeds like chia or flaxseeds. They add fiber and omega-3s. You can also mix in protein powder for a protein boost. Dried fruits like raisins or cranberries add natural sweetness and extra vitamins. Get creative and enjoy the health benefits!
You now have a complete guide to making delicious no-bake peanut butter bars. We covered ingredients, measurements, and tools needed. I shared step-by-step instructions for mixing, chilling, and cutting the bars. You also learned tips for flavor and texture, plus variations for diet needs.
These bars are easy to make and perfect for any occasion. Enjoy experimenting with flavors and sharing them with friends and family. Keep this recipe handy, and delight in your tasty treats!