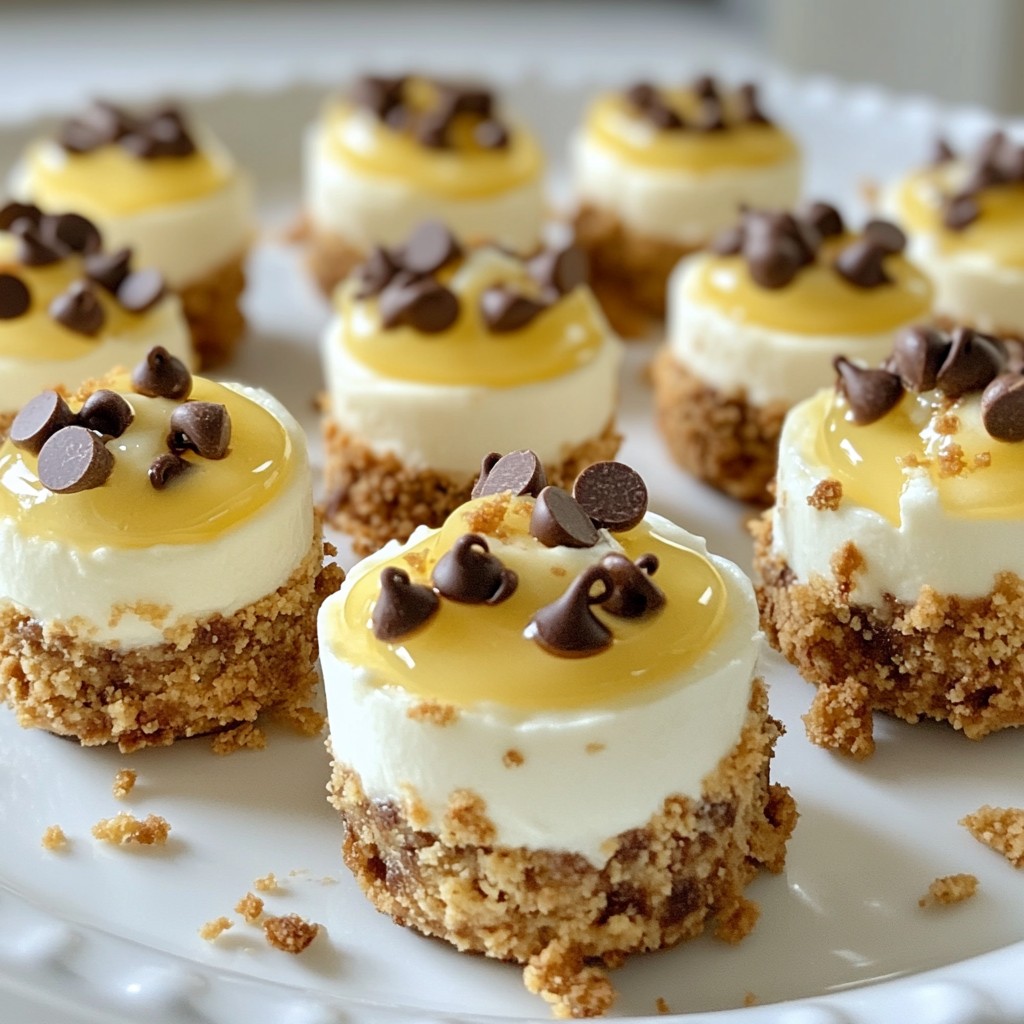
Do you love sweet treats but hate the fuss of baking? I get it! That’s why I’m excited to share my No-Bake Peanut Butter Cheesecake Bites recipe. These delightful bites are creamy, rich, and super easy to make. With just a handful of ingredients, you can whip up a tasty snack that will impress everyone. Ready to dig in? Let’s create these mouthwatering bites together!
Why I Love This Recipe
- Easy Preparation: These no-bake cheesecake bites come together in just 15 minutes, making them a quick and effortless dessert option.
- Decadent Flavor: With the rich combination of creamy peanut butter and smooth cream cheese, every bite is a delightful indulgence.
- Customizable: You can easily modify the recipe by adding your favorite toppings or mix-ins, such as crushed nuts or different chocolate chips.
- Perfect for Sharing: These bite-sized treats are ideal for gatherings, making them a hit at parties or family get-togethers.
Ingredients
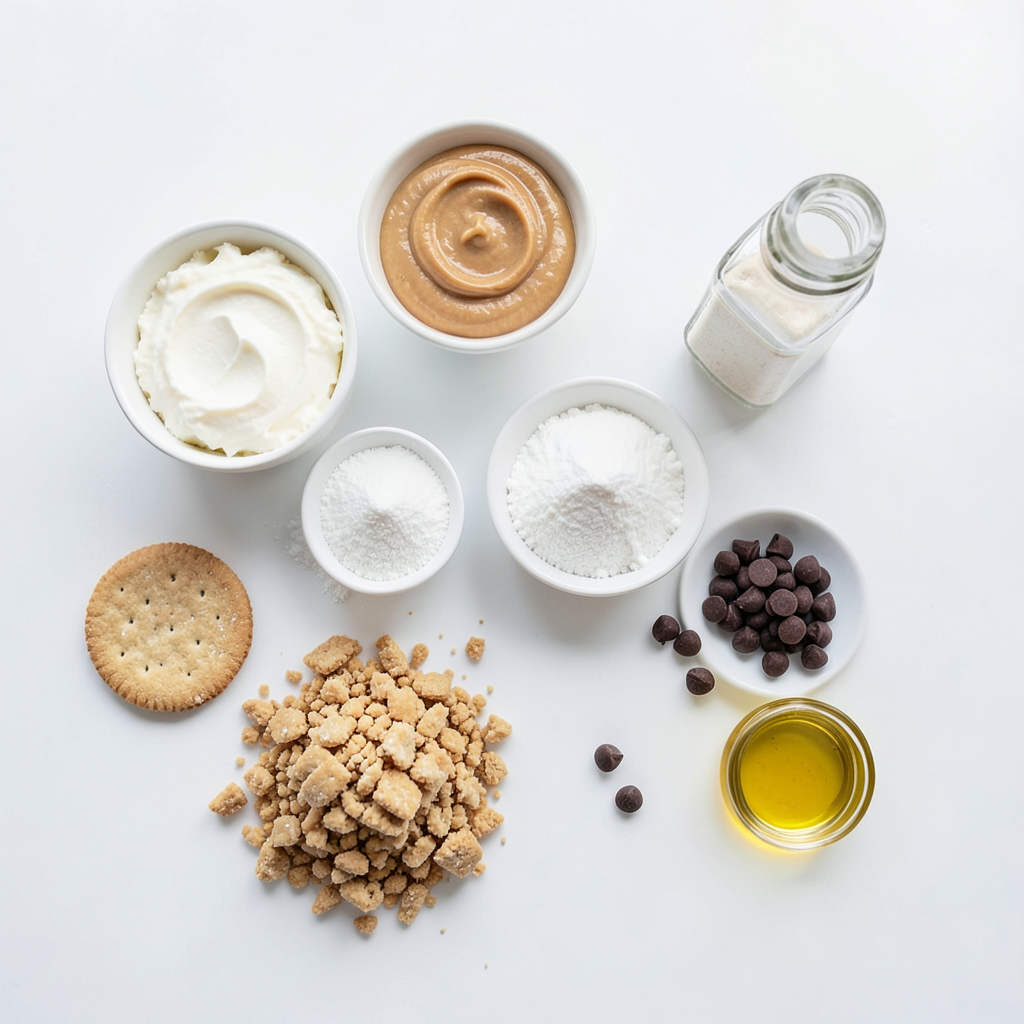
Main Ingredients
- 1 cup cream cheese, softened
- 1/2 cup creamy peanut butter
- 1/4 cup powdered sugar, sifted
- 1 teaspoon pure vanilla extract
Additional Components
- 1/2 cup graham cracker crumbs
- 1/4 cup mini chocolate chips (reserve some for topping)
- 1 tablespoon coconut oil, melted
Optional Garnishes
- Crushed graham crackers
- Extra peanut butter drizzle
Gathering these ingredients is easy. First, you need cream cheese. It gives our bites a rich base. Next, creamy peanut butter adds a smooth, nutty taste. Then, we use powdered sugar, which sweetens the mix just right. Finally, a splash of pure vanilla extract rounds out the flavor.
For the crunch, graham cracker crumbs are essential. They offer texture and a hint of sweetness. Mini chocolate chips add fun bursts of chocolate in every bite. Don't forget coconut oil. It creates a lovely drizzle that binds the bites together.
If you want to make your bites even prettier, consider garnishing with crushed graham crackers. An extra drizzle of peanut butter will not only look good but taste great too!
Step-by-Step Instructions
Preparing the Creamy Base
To start, combine the cream cheese and peanut butter in a big bowl. Use a hand mixer to blend them well. Mix until the texture is smooth and creamy. No lumps should be left. Next, add the sifted powdered sugar and vanilla extract. This makes the base sweet and flavorful. Keep mixing until everything is combined.
Incorporating Textures
Now it’s time to add some crunch! Gently fold in the graham cracker crumbs. This gives your bites a nice texture. Then, add the mini chocolate chips. Make sure to mix them well into the creamy base. You want a bit of chocolate in each bite.
Shaping the Bites
Line a baking sheet with parchment paper. This helps with easy removal later. Scoop out small amounts of the mixture, about 1 tablespoon each. Roll them into balls, around 1 inch wide. Place each ball on the baking sheet. They should be evenly spaced out.
Drizzling and Chilling
To add a nice touch, melt the coconut oil in a small microwave-safe bowl. Heat it in short bursts to avoid overheating. Drizzle the melted coconut oil over each cheesecake bite. Then, sprinkle some reserved mini chocolate chips on top. This makes them look even better. Transfer the baking sheet to the fridge. Chill for at least 2 hours, or until firm.
Tips & Tricks
Perfecting the Texture
To avoid lumps in your mixture, make sure your cream cheese is soft. I let mine sit out for about 30 minutes. Then, blend the cream cheese with peanut butter well. Use a hand mixer for a smooth consistency. If you fold in the graham cracker crumbs gently, you keep the mix creamy.
For evenly shaped bites, scoop out the mixture with a tablespoon. Roll them between your hands to form balls. Keep them about one inch wide. This size makes them perfect for popping in your mouth!
Enhancements for Flavor
To boost the peanut flavor, add more creamy peanut butter. You can try adding an extra 1/4 cup. This makes the bites even richer and more satisfying.
Customizing with different mix-ins can be fun! Think about adding chopped nuts, or dried fruit. You can also try swapping mini chocolate chips for white chocolate or butterscotch. Each choice gives a new twist to your bites.
Presentation Suggestions
For creative serving ideas, use a decorative platter. Arrange the bites in rows or circles for a beautiful display. You can also add a sprinkle of crushed graham crackers on top for flair.
Using garnishes makes your bites look even more inviting. A drizzle of extra peanut butter adds a delicious touch. You can even use fresh fruit, like sliced strawberries, for a pop of color.
Pro Tips
- Use Room Temperature Ingredients: Allow your cream cheese and peanut butter to reach room temperature for a smoother blend, resulting in a creamier texture for your cheesecake bites.
- Experiment with Flavors: Try adding a pinch of sea salt or a swirl of caramel sauce to the mixture for an extra layer of flavor that complements the peanut butter and chocolate.
- Chill for Firmness: For the best texture, ensure the bites chill long enough to become firm; this helps them hold their shape when served.
- Storage Tips: Keep the cheesecake bites in an airtight container in the fridge for up to a week, making them a perfect make-ahead treat for gatherings.
Variations
Flavor Variations
You can switch up the flavors in these bites. A chocolate peanut butter version is a great idea. Just add cocoa powder to the mixture. This gives a rich, deep taste. You can also add fruit flavors. Try mixing in mashed banana or pureed strawberries. These fruits add a fresh twist and vibrant taste.
Dietary Adjustments
Need a vegan option? Use dairy-free cream cheese and peanut butter. You can swap powdered sugar for maple syrup or coconut sugar. For gluten-free bites, choose gluten-free graham crackers. This way, everyone can enjoy them without worry of allergies.
Seasonal Twists
Make these bites special for holidays. Add peppermint extract for a festive touch in winter. In fall, mix in pumpkin spice for autumn vibes. You can adapt these bites for birthdays too. Use colorful sprinkles on top or a fun shape for kids. Everyone will love them no matter the occasion!
Storage Info
Short-Term Storage
To keep your no-bake peanut butter cheesecake bites fresh, store them in the fridge. Place them in an airtight container to avoid drying out. They will stay fresh for about one week. This way, you can enjoy quick treats anytime.
Freezing Tips
If you want to save some bites for later, you can freeze them. First, place the cheesecake bites on a baking sheet in a single layer. Freeze them for about two hours. Once firm, transfer them to a freezer-safe container. When you want to enjoy them, thaw in the fridge for a few hours before serving. This keeps them creamy and tasty.
Containers for Storing
Use airtight containers for storing your cheesecake bites. Glass or plastic containers work well. Make sure to label the containers with a date to track freshness. This helps you know when to enjoy your delicious treats!
FAQs
How long do the no-bake cheesecake bites need to set?
The no-bake cheesecake bites need to set for at least 2 hours. This time allows them to firm up nicely. You want them to feel solid to the touch when ready. If you have time, leaving them in the fridge longer enhances their taste.
Can I substitute ingredients for a dairy-free version?
Yes, you can make these bites dairy-free. Use vegan cream cheese and a nut butter that suits your taste. Almond or cashew butter can work well. Sweeten with a dairy-free powdered sugar alternative too.
How do I know when the cheesecake bites are ready to serve?
You know the bites are ready when they are firm to the touch. They should hold their shape well. Take them out of the fridge, and give them a gentle squeeze. If they feel solid, they are good to go!
Can these bites be made in advance for a party?
Yes, these cheesecake bites are great for making ahead. You can prepare them one or two days in advance. Just keep them in the fridge until it's time to serve. This way, you save time and stress on party day.
What other toppings can I use besides chocolate chips?
You can top the bites with many fun things! Try crushed nuts for crunch or sprinkles for color. Drizzling caramel or honey adds sweetness and flair. Fresh fruit pieces, like raspberries or strawberries, can add a nice touch too.
Making no-bake cheesecake bites is easy and fun. You learned about the key ingredients, like cream cheese and peanut butter, and how to blend them. We covered shaping, chilling, and adding your favorite mix-ins. You also discovered tips for perfecting texture and fun ways to present them.
As you try different flavors and variations, remember to customize these bites to fit your taste. Enjoy these yummy treats at any gathering or snack time!