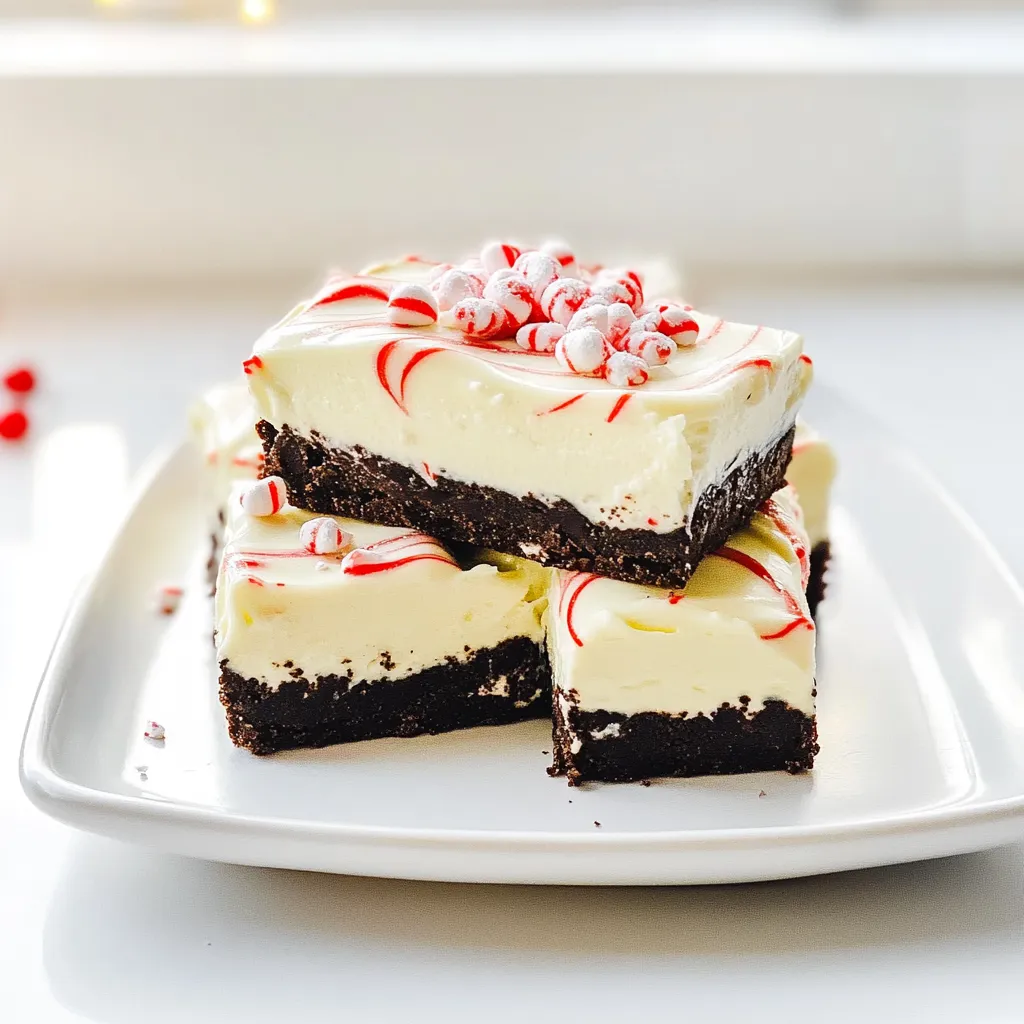
Get ready to delight your taste buds with No Bake Peppermint Oreo Bars! This easy holiday treat combines crunchy Oreos, smooth cream cheese, and a hint of peppermint for the perfect dessert. You won’t need an oven, just some simple ingredients and a few steps. Whether you’re hosting a party or surprising your family, these bars are sure to impress. Let’s dive into this festive recipe!
Ingredients
To make No Bake Peppermint Oreo Bars, you need simple and tasty ingredients. Here’s what you will need:
– 24 Oreo cookies, finely crushed
– ½ cup unsalted butter, melted
– 8 oz cream cheese, softened to room temperature
– 1 cup powdered sugar
– ½ teaspoon peppermint extract
– 1 cup whipped topping (like Cool Whip)
– 1 cup white chocolate chips, melted
– 1 tablespoon crushed peppermint candies (for garnish)
These ingredients blend perfectly to create a rich and creamy treat. The crushed Oreos form a delicious crust, while the cream cheese adds a smooth and fluffy layer. White chocolate gives it a sweet finish, and peppermint candies add that festive crunch.
Using these fresh ingredients ensures the best flavor. Always measure carefully for great results. If you want to switch things up, try using other cookies or toppings. Each change can give you a new twist on this classic holiday treat. Enjoy the process and get ready for some yummy bars!
Step-by-Step Instructions
Preparation of Oreo Crust
First, combine the crushed Oreos and melted butter in a medium bowl. Stir well until every crumb is coated. This step is key for a tasty crust. Next, line a 9×9 inch baking pan with parchment paper. Press the Oreo mixture firmly into the bottom. Use the back of a measuring cup or your fingers to pack it tightly. A good crust gives the bars strength and flavor.
Cream Cheese Mixture
In a large bowl, beat the softened cream cheese with a hand mixer on medium speed. Mix until it is smooth and creamy. Then, gradually add the powdered sugar. Mix thoroughly after each addition. It helps to create a sweet and creamy base. Stir in the peppermint extract. Finally, gently fold in the whipped topping. This makes the mixture fluffy and light. Make sure there are no lumps for the best texture.
Final Assembly
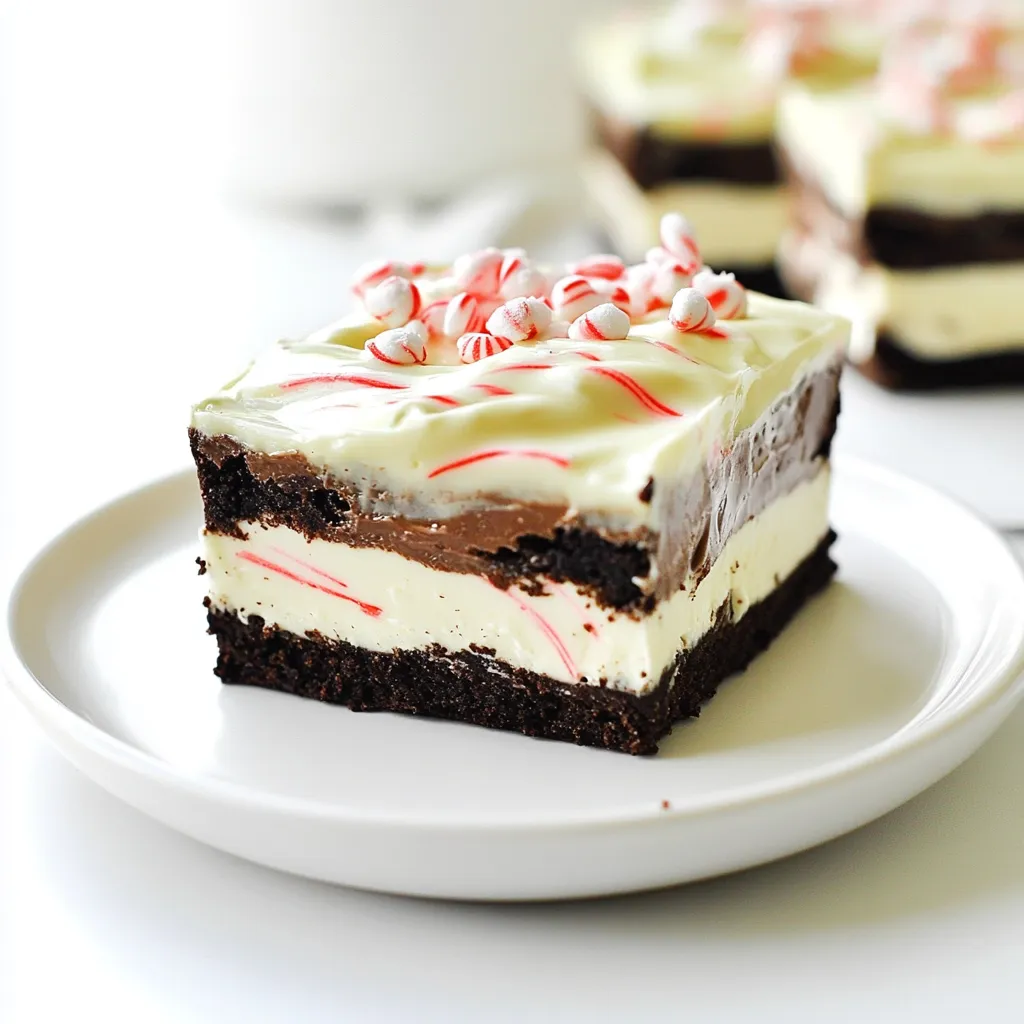
Now, carefully spread the cream cheese mixture over the Oreo crust. Use a spatula to create an even layer. Drizzle the melted white chocolate over the cream cheese. Use a spatula or knife to swirl the chocolate into the cream cheese. This adds a beautiful marbled effect. Then, sprinkle the crushed peppermint candies on top. This gives a festive touch and adds crunch. Place the pan in the refrigerator. Chill for at least four hours to set. Once firm, lift the bars out using the parchment paper. Cut into squares, about 2 inches in size. Enjoy your tasty holiday treat!
Tips & Tricks
Perfecting the Oreo Crust
Compacting the crust is key. It helps your bars hold their shape. Press the mixture firmly into the pan. Use a measuring cup or your fingers for the best results. If you want a change, try using graham crackers instead of Oreos. They add a different flavor and texture.
Achieving the Best Cream Cheese Layer
Using room temperature cream cheese is a must. It mixes easier and gives a smooth layer. To avoid lumps, mix on low speed first. Gradually add powdered sugar while blending. Scrape the bowl often to get everything mixed well. This ensures a creamy and fluffy filling.
Presentation Suggestions
Arrange the bars neatly on a festive platter. You can sprinkle crushed peppermint around the edges for color. For an extra touch, add mini candy canes on top. They look cute and add a fun twist. This makes your bars stand out at any holiday gathering.
Variations
Chocolate Mint Version
You can easily change the flavor of your bars. To make a chocolate mint version, add a chocolate pudding mix to the cream cheese layer. This will give your bars a rich, chocolatey taste. Mix in 1 small box of instant chocolate pudding with the cream cheese and sugar. The result will be creamy and full of flavor. It’s a fun twist for chocolate lovers.
Healthier Alternatives
If you want a healthier option, use low-fat cream cheese and sugar substitutes. This will cut down on calories without losing flavor. Choose a sugar substitute that you like, such as stevia or erythritol. The bars will still taste great, and you can enjoy them without the guilt. Remember, even small changes can make a big difference.
Custom Toppings
You can get creative with toppings for your bars. Instead of crushed peppermint candies, try using different crushed candies or nuts. For a sweet crunch, use crushed peanuts or toffee bits. For a fruity twist, sprinkle crushed raspberries or strawberries on top. This way, you can personalize your bars and surprise your friends with new flavors. The options are endless!
Storage Info
Refrigeration Guidelines
To store leftovers, place the bars in an airtight container. Make sure they are well sealed to keep them fresh. You can also layer wax paper between the bars to prevent sticking. Keep the container in the fridge. This helps maintain their creamy texture and flavor.
Freezing Instructions
If you want to freeze the bars, cut them into squares first. Wrap each square tightly in plastic wrap. Then, place them in a freezer-safe bag or container. When you want to enjoy them, thaw the bars in the fridge overnight. They will retain their taste and texture if done right.
Shelf Life
These bars stay fresh in the fridge for up to one week. For the best taste, aim to eat them within the first few days. If frozen, they can last up to three months. Enjoy them while they are at their best!
FAQs
Can I use low-fat ingredients?
Yes, you can use low-fat ingredients. However, this may change the texture and taste. Low-fat cream cheese can make the bars less creamy. The flavor may not be as rich, but they will still be tasty. You can also use low-fat whipped topping. The bars will still set well, but expect a slight change in taste.
How long do these bars need to chill?
These bars need to chill for at least four hours. Chilling is key for the bars to set properly. If you don’t chill them long enough, they may be too soft. A longer chill time can help enhance the flavors. If you can wait overnight, the bars will taste even better!
Can I make these bars in advance?
Absolutely! You can make these bars a day or two ahead of time. Just store them in the fridge after they chill. This saves time when you have guests. If you want to prepare even further ahead, consider freezing them. Just remember to thaw them in the fridge before serving.
You learned how to make delicious Oreo Peppermint Bars. We covered the ingredients needed, step-by-step instructions, and valuable tips. Feel free to try variations or healthier options, too. Remember to store your bars properly so they stay fresh. Making these treats can bring joy to any gathering or celebration. With minimal effort, you’ll impress your friends and family. Enjoy creating these tasty desserts and share them with others!