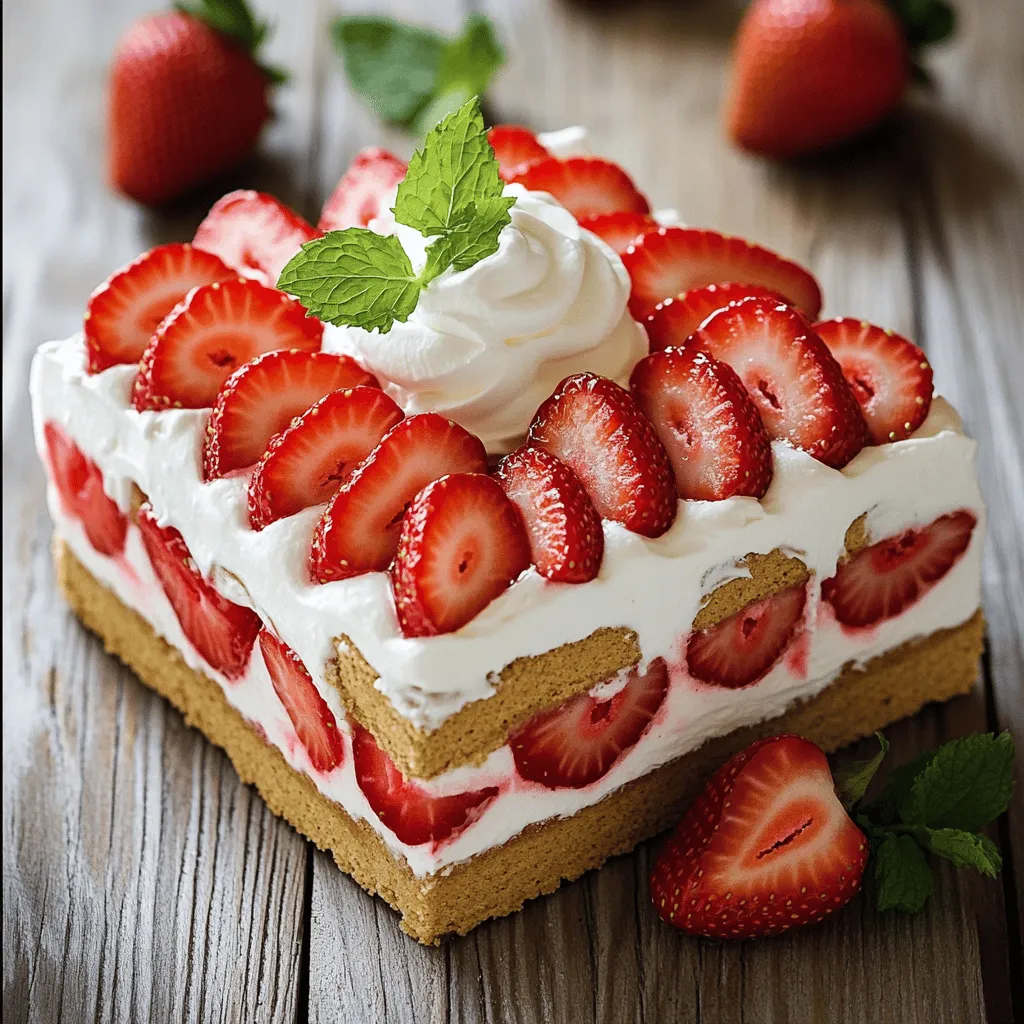
Get ready for a sweet treat with my No-Bake Strawberry Shortcake Icebox Cake Delight! This dessert is easy to make and bursting with fresh flavor. You only need a few simple ingredients, like strawberries and graham crackers. Follow my step-by-step guide and impress your friends and family. Whether you want a fun summer snack or an elegant dish for a gathering, this cake will wow everyone. Let’s dive into this delightful dessert!
Ingredients
Fresh Strawberries
You need two cups of fresh strawberries for this cake. Make sure they are ripe and sweet. First, hull the strawberries. Then, slice them thinly. This helps them mix well with the cream. Toss them with a tablespoon of granulated sugar. Let them sit for about 10-15 minutes. This process, called maceration, brings out their juicy flavor.
Graham Crackers
You will use one package, which is about 14 ounces, of graham crackers. These create a tasty base for your cake. They add a nice crunch and balance the creaminess. Lay them in a single layer across the bottom of your baking dish. Make sure they cover the entire base.
Heavy Whipping Cream
Two cups of heavy whipping cream are key for the cake’s fluffy texture. This cream whips up light and airy. Use an electric mixer to whip it. It’s best to whip on medium speed. Gradually add in half a cup of powdered sugar and one teaspoon of pure vanilla extract. Whip until you see stiff peaks. This takes about 3-5 minutes.
Additional Ingredients (Sugar, Vanilla Extract, Mint)
You will need some sugar and vanilla extract for flavor. The granulated sugar sweetens the strawberries. The powdered sugar sweetens the whipped cream. The vanilla extract adds depth to the cream. Finally, fresh mint leaves make a great garnish. They add color and a refreshing taste when you serve the cake.
Step-by-Step Instructions
Prepare the Strawberries
Start by hulling and slicing your fresh strawberries. Place them in a medium bowl. Add the granulated sugar and gently toss the strawberries. This step lets the strawberries release their juices. Let this mixture sit for 10-15 minutes. You’ll see a nice syrup form, which adds flavor to the cake.
Make the Whipped Cream
In a large mixing bowl, pour in the heavy whipping cream. Use an electric mixer to whip it on medium speed. As it thickens, slowly add the powdered sugar and vanilla extract. Keep whipping until you see stiff peaks. This should take around 3-5 minutes. Your whipped cream should be light and fluffy.
Assemble the Cake Layers
Grab a 9×13-inch baking dish for your cake. Start with a single layer of graham crackers. Make sure they cover the bottom completely. Next, spread a thick layer of whipped cream over the graham crackers. Smooth it out with a spatula. Now, add a layer of the macerated strawberries, distributing them evenly.
Repeat this layering. Add another layer of graham crackers, then whipped cream, and strawberries. Keep going until you finish with a top layer of whipped cream. For a nice touch, decorate with any leftover strawberries.
Refrigerate for Flavor Development
Once your cake is assembled, cover the dish tightly with plastic wrap. Place it in the fridge for at least 4 hours. For the best flavor, let it chill overnight. This waiting time allows the graham crackers to soften and flavors to blend. Enjoy the ease of this no-bake treat!
Tips & Tricks
Achieving Perfect Whipped Cream
To make the best whipped cream, use cold heavy cream. Cold cream whips better and faster. Start mixing on medium speed. Gradually add powdered sugar and vanilla. This will make the cream sweet and tasty. Whip until stiff peaks form. Be careful not to overwhip, or it can turn grainy. Perfect whipped cream will be light and fluffy.
Layering Techniques
For great layers, start with graham crackers. Lay them flat in the dish to cover the base. This gives a strong foundation. Next, spread whipped cream evenly over the crackers. Use a spatula to push it into the corners. After that, add a layer of strawberries. Make sure to spread them out well. Repeat this process until you reach the top. End with whipped cream and decorate with strawberries. This will create a colorful and tasty treat.
Presentation Tips
To make your icebox cake look fancy, slice it into squares. Place each piece on a dessert plate. Drizzle some strawberry syrup around each slice. This adds color and flavor. Lastly, add fresh mint leaves on top for a pop of green. This will make your cake look as good as it tastes!

Variations
Berry Mix Variations
You can switch up the berries in this cake. Instead of just strawberries, try blueberries, raspberries, or blackberries. Mixing these berries gives a burst of color and flavor. Use about 2 cups of your favorite berries, sliced or whole. You can also combine different berries for a fun twist. The sweet and tart notes will blend perfectly with the creamy layers. This mix adds excitement and makes the cake even more appealing.
Dairy-Free Options
If you need a dairy-free version, you can replace heavy cream with coconut cream. Chill a can of coconut milk overnight, then scoop the solid cream from the top. Whip this coconut cream with powdered sugar and vanilla. It creates a rich and creamy texture similar to traditional whipped cream. You can also use dairy-free graham crackers. Check the labels to ensure they fit your needs. This way, everyone can enjoy this delicious cake!
Gluten-Free Alternatives
To make this cake gluten-free, opt for gluten-free graham crackers. Many brands offer tasty alternatives that work well. You can also use crushed gluten-free cookies or even a nut-based crust. Just make sure the other ingredients are gluten-free too. This way, you keep the same great taste while catering to gluten sensitivities. Enjoy this cake without worry!
Storage Info
Best Practices for Refrigeration
To keep your No-Bake Strawberry Shortcake Icebox Cake fresh, wrap it well. Use plastic wrap or aluminum foil to cover the dish. This prevents drying out and keeps the cake flavorful. Always store it in the fridge. The cool temperature helps keep the layers intact.
How Long It Keeps
This icebox cake keeps well in the fridge for about 3-4 days. After that, the graham crackers may get too soft. If you notice any off smells or colors, it’s best to toss it.
Freezing Tips
You can freeze the icebox cake, but it’s not ideal. If you choose to freeze it, slice it first. Wrap each slice in plastic wrap, then place them in a freezer-safe bag. This way, you can enjoy a piece anytime. Just remember to thaw it in the fridge for a few hours before serving.
FAQs
Can I use frozen strawberries?
Yes, you can use frozen strawberries. Just let them thaw first. Drain any excess liquid. This helps avoid a soggy cake. Frozen strawberries can also add a nice chill to your dessert.
What can I substitute for graham crackers?
If you don’t have graham crackers, try vanilla wafers or digestive biscuits. Both options work well and add a different flavor. You can even use crushed cookies for a fun twist.
How do I make this ahead of time?
You can make this icebox cake a day ahead. Assemble it and let it chill overnight. This gives the flavors time to blend and the cake to set. The longer it sits, the better it tastes!
In this blog post, we explored how to create a delicious strawberry cake. We discussed fresh strawberries, graham crackers, and whipped cream, plus simple steps for preparation. You learned tips to make perfect whipped cream and layer your cake like a pro. We also covered variations for different diets and storage methods to keep your cake fresh. Remember, with these steps, you’ll make a treat everyone loves. Enjoy your cake-making journey!