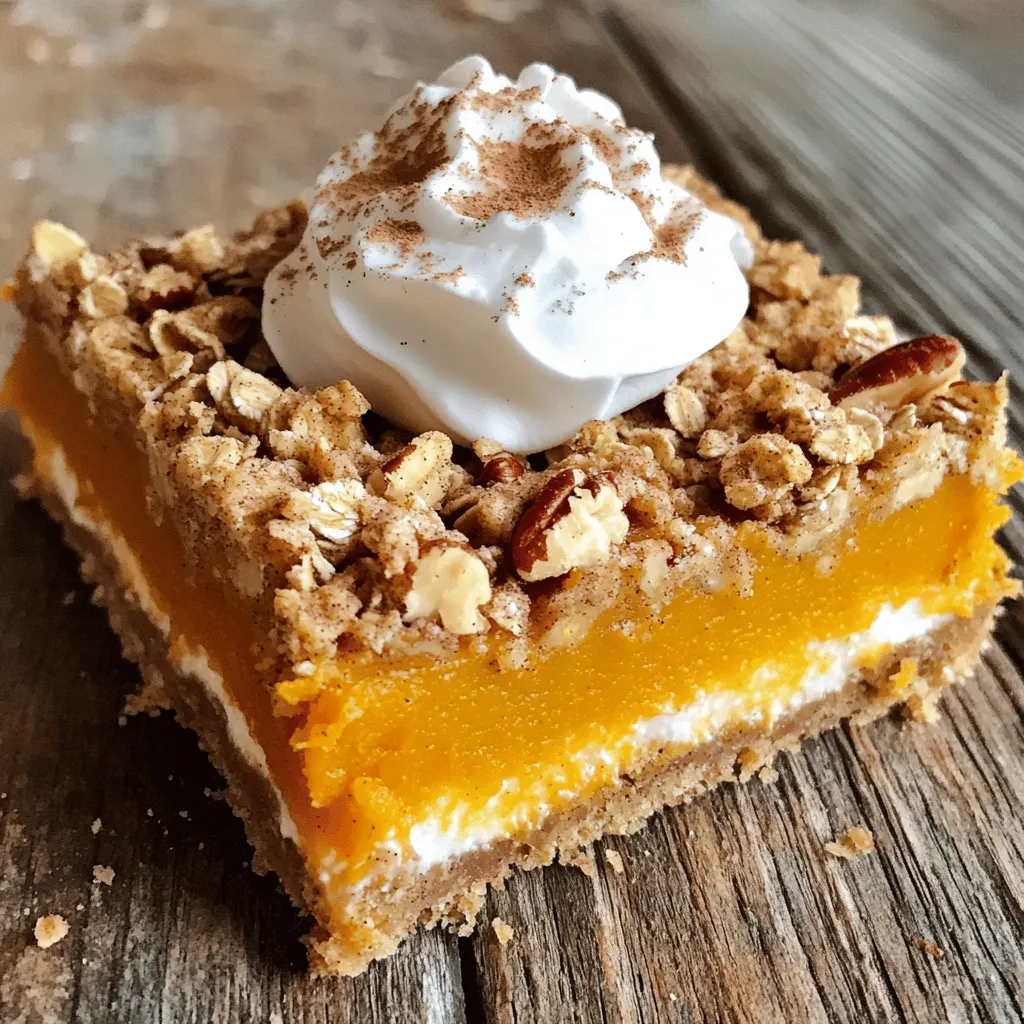
Fall is here, and that means it’s time for pumpkin treats! Are you ready to bake something sweet and warm? I’m excited to share my Pumpkin Crunch Squares recipe. This easy dessert combines a rich pumpkin filling with a crunchy topping that will make your taste buds dance. Perfect for cozy gatherings or a sweet snack, these squares are sure to please everyone. Let’s dive into the delicious details and gather our ingredients!
Ingredients
List of Ingredients
– 1 cup all-purpose flour
– 1 cup rolled oats
– 1/2 cup brown sugar, packed
– 1/2 cup unsalted butter, melted
– 1/2 teaspoon baking powder
– 1/2 teaspoon ground cinnamon
– 1/4 teaspoon ground nutmeg
– 1/4 teaspoon salt
– 1 can (15 oz) pumpkin puree
– 1 cup sweetened condensed milk
– 2 large eggs, at room temperature
– 1 teaspoon vanilla extract
– 1/2 cup chopped pecans (optional)
– Whipped cream, for serving
The ingredients for pumpkin crunch squares create a perfect blend of flavors. You need simple items that work well together. The all-purpose flour and oats form a hearty base. Brown sugar adds sweetness and depth. Butter gives richness, while baking powder helps the crust rise.
The spices, cinnamon and nutmeg, make it taste like fall. The pumpkin puree brings a creamy texture. Sweetened condensed milk adds extra sweetness and creaminess. Eggs help bind everything. The vanilla extract gives a nice aroma. If you love nuts, add chopped pecans for crunch.
Metric Conversions
– 1 cup all-purpose flour = 125 grams
– 1 cup rolled oats = 90 grams
– 1/2 cup brown sugar = 110 grams
– 1/2 cup unsalted butter = 115 grams
– 1/2 teaspoon baking powder = 2 grams
– 1/2 teaspoon ground cinnamon = 1.5 grams
– 1/4 teaspoon ground nutmeg = 0.5 grams
– 1/4 teaspoon salt = 1.5 grams
– 1 can (15 oz) pumpkin puree = 425 grams
– 1 cup sweetened condensed milk = 300 grams
– 2 large eggs = about 100 grams
– 1 teaspoon vanilla extract = 5 grams
– 1/2 cup chopped pecans = 60 grams
These conversions help if you prefer measuring in grams. You can easily switch between cups and grams.
Ingredient Substitutions
You can change some ingredients if needed. Use whole wheat flour for a nuttier taste. For a gluten-free option, try almond flour or oat flour. If you want less sugar, use coconut sugar or maple syrup.
For a dairy-free version, use coconut oil instead of butter. Substitute the sweetened condensed milk with a dairy-free option, like almond milk mixed with a thickener.
Feel free to experiment with the spices. More cinnamon or a hint of ginger adds a nice twist. Just remember, these squares are all about balance. Keep the flavors in harmony for the best result.
Step-by-Step Instructions
Preparation
– Preheat your oven to 350°F (180°C) and grease a 9×13 inch baking dish.
– In a large bowl, mix 1 cup of all-purpose flour, 1 cup of rolled oats, and 1/2 cup of packed brown sugar.
Making the Crust
To make the crust, pour in 1/2 cup of melted unsalted butter. Use a fork or your hands to mix until it looks like coarse crumbs. Take half of this crumb mixture and press it into the bottom of the greased dish. Set the rest aside for later.
Preparing the Pumpkin Filling
– In a different bowl, add 1 can (15 oz) of pumpkin puree, 1 cup of sweetened condensed milk, and 2 large eggs (beaten).
– Mix in 1 teaspoon of vanilla extract, 1/2 teaspoon of ground cinnamon, 1/4 teaspoon of ground nutmeg, and 1/4 teaspoon of salt. Stir until it is smooth.
– Carefully pour this pumpkin mix over the crust. Use a spatula to spread it evenly.
Baking Instructions
– Sprinkle the reserved crumb mixture on top of the pumpkin layer. If you like, add 1/2 cup of chopped pecans for extra crunch.
– Bake for 30-35 minutes. The top should turn golden brown, and a toothpick inserted in the center should come out clean.
– Let the squares cool in the dish for 15-20 minutes before cutting them into squares.
Tips & Tricks
Tips for Perfecting Pumpkin Crunch Squares
– Adjusting spices to taste: Start with the basic spices. You can add more cinnamon or nutmeg if you want a stronger flavor. Taste the pumpkin mix before you pour it into the crust. Make it yours!
– Achieving the right texture: The crust should feel crumbly but hold together. If it feels too dry, add a little melted butter. If it’s too wet, add a bit of flour or oats. Keep it balanced for the best crunch.
Serving Suggestions
Serve your Pumpkin Crunch Squares warm or at room temperature. A dollop of whipped cream on top makes them special. You can also sprinkle a bit of cinnamon for extra flavor. For a fun twist, add some caramel sauce or chocolate drizzle.
Storing Leftovers
To store leftovers, keep them in an airtight container. They last for about three days at room temperature. If you want to keep them longer, refrigerate them for up to a week. You can also freeze the squares for up to three months. Just wrap them well to avoid freezer burn. Enjoy your fall treat!
Variations
Vegan Pumpkin Crunch Squares
You can make vegan pumpkin crunch squares easily. Start by swapping eggs for flax eggs. Mix one tablespoon of flaxseed meal with three tablespoons of water. Let it sit for five minutes to thicken. Use coconut oil instead of butter for a rich taste. For the sweetened condensed milk, use a store-bought vegan version or make your own using coconut milk and sugar. This keeps the creamy texture while being animal-friendly.
Gluten-Free Options
If you need a gluten-free version, simply switch to gluten-free flour. Almond flour or oat flour works well. Both add a nice flavor and texture. When using almond flour, blend it with a bit of cornstarch for better results.
– Alternative flour suggestions:
– Almond flour
– Oat flour
– Coconut flour (use less, as it absorbs moisture)
Adding Chocolate or Other Mix-ins
For a chocolatey twist, stir in chocolate chips into the pumpkin filling. Dark or semi-sweet chips add depth. You can also add dried fruit, like cranberries or raisins, for a sweet chew. Chopped nuts, such as walnuts or pecans, can enhance the crunch. Just remember to mix lightly to keep the filling smooth. Enjoy experimenting with flavors!
Storage Info
Room Temperature Storage
You can keep Pumpkin Crunch Squares at room temperature. Place them in a covered container. They will stay fresh for about two days. Enjoy them while they are soft and tasty!
Refrigeration Tips
For longer storage, put the squares in the fridge. They will last about a week. Make sure to cover them well. This keeps them moist and flavorful. When you want to eat them, simply take them out and enjoy!
How long they last in the fridge
In the fridge, Pumpkin Crunch Squares stay good for up to seven days. This makes it easy to prepare them in advance for guests or special occasions. Just remember to keep them sealed to avoid drying out.
Freezing Pumpkin Crunch Squares
You can freeze Pumpkin Crunch Squares for later. Cut them into squares and wrap each one tightly in plastic wrap. Then place them in a freezer bag. They can last for up to three months in the freezer. When you’re ready to eat, let them thaw in the fridge overnight. They will taste just as good as fresh!
FAQs
What can I use instead of sweetened condensed milk?
You can use evaporated milk for a similar texture. If you want a dairy-free option, try coconut milk. It adds a nice flavor. You can also mix almond milk with a sweetener to mimic the taste. This works well for those with dietary needs.
Can I make this recipe ahead of time?
Yes, you can. Prepare the pumpkin crunch squares a day in advance. Just store them in the fridge after they cool. This allows the flavors to blend well. When you’re ready to serve, warm them slightly in the oven. Top with whipped cream right before serving for a fresh touch.
How can I enhance the flavor of my pumpkin crunch squares?
To enhance the flavor, add more spices like ginger or cloves. A pinch of nutmeg can also elevate the taste. You can mix in chocolate chips or dried fruit for extra sweetness. Toasted pecans add a nice crunch and a deeper flavor too. Enjoy experimenting with what you have!
This article covered how to make delicious Pumpkin Crunch Squares. We discussed key ingredients and steps to create a tasty treat. I shared tips to perfect your baking and options for variations, like vegan and gluten-free.
In the end, this dessert is simple and rewarding. You can enjoy it fresh or stored for later. Get creative with your flavors and share with friends. Enjoy your baking adventure!