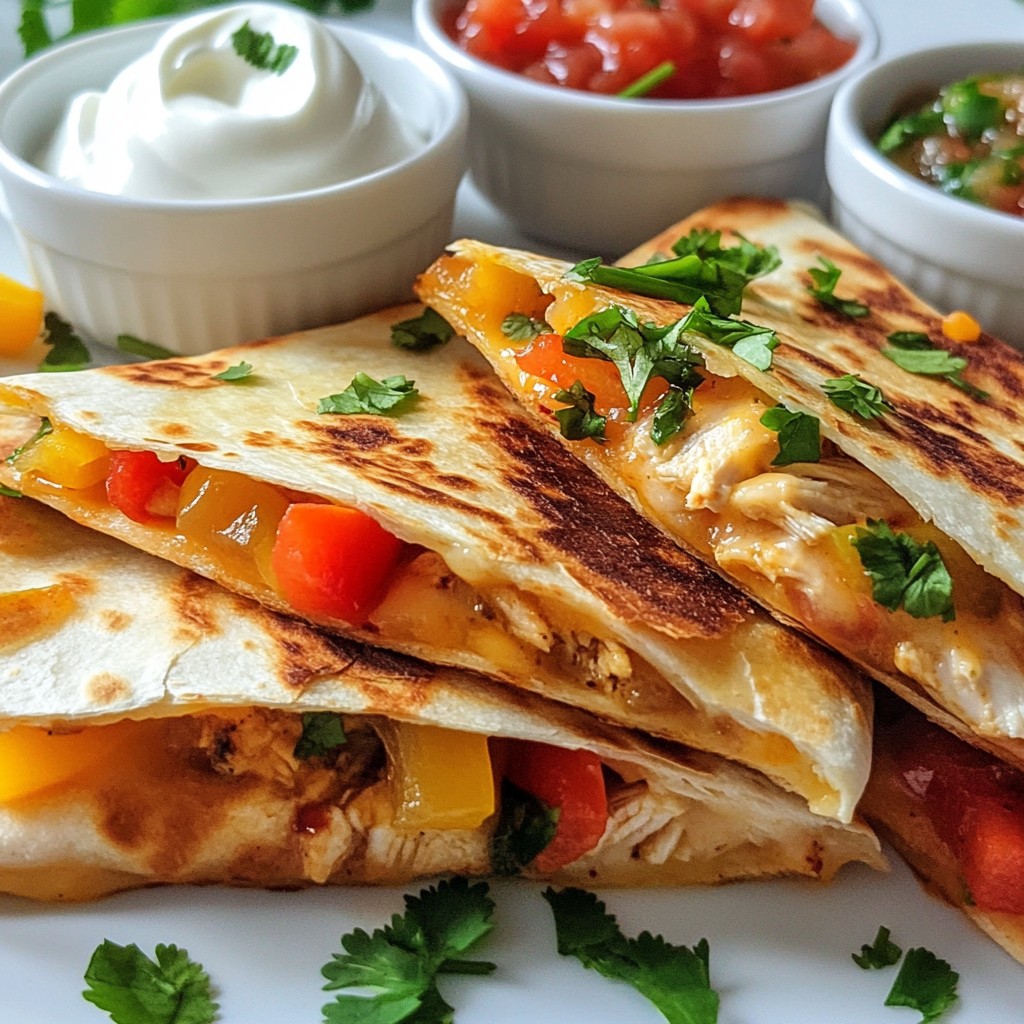
Are you ready to spice up your dinner with a tasty twist? My Savory Tex-Mex Chicken Quesadillas with Peppers are bursting with flavor and easy to make! With simple ingredients like cooked chicken, colorful peppers, and melted cheese, you can whip up a meal that brings everyone to the table. Follow along for quick tips, step-by-step instructions, and variations to suit any taste. Let’s dive in!
Why I Love This Recipe
- Quick and Easy: This recipe comes together in just 30 minutes, making it perfect for busy weeknights or last-minute gatherings.
- Flavor Packed: The combination of spices and sautéed veggies creates a burst of flavors that will impress your taste buds.
- Customizable: Feel free to swap out the chicken for beef, beans, or veggies to cater to your dietary preferences.
- Fun to Eat: Quesadillas are always a hit at parties, and they’re easy to dip in your favorite sauces like salsa and sour cream!
Ingredients
Main Ingredients
- 2 cups cooked chicken, shredded
- 1 cup assorted bell peppers (red, yellow, and green), sliced
- 1 cup shredded cheese (cheddar or a Mexican cheese blend)
- 1 medium onion, thinly sliced
- 2 cloves garlic, minced
Seasonings and Oil
- 1 teaspoon ground cumin
- 1 teaspoon smoked paprika
- Salt and pepper, to taste
- 2 tablespoons olive oil
Tortillas and Garnishes
- 4 large flour tortillas
- Fresh cilantro, chopped (for garnish)
- Sour cream and salsa (for serving)
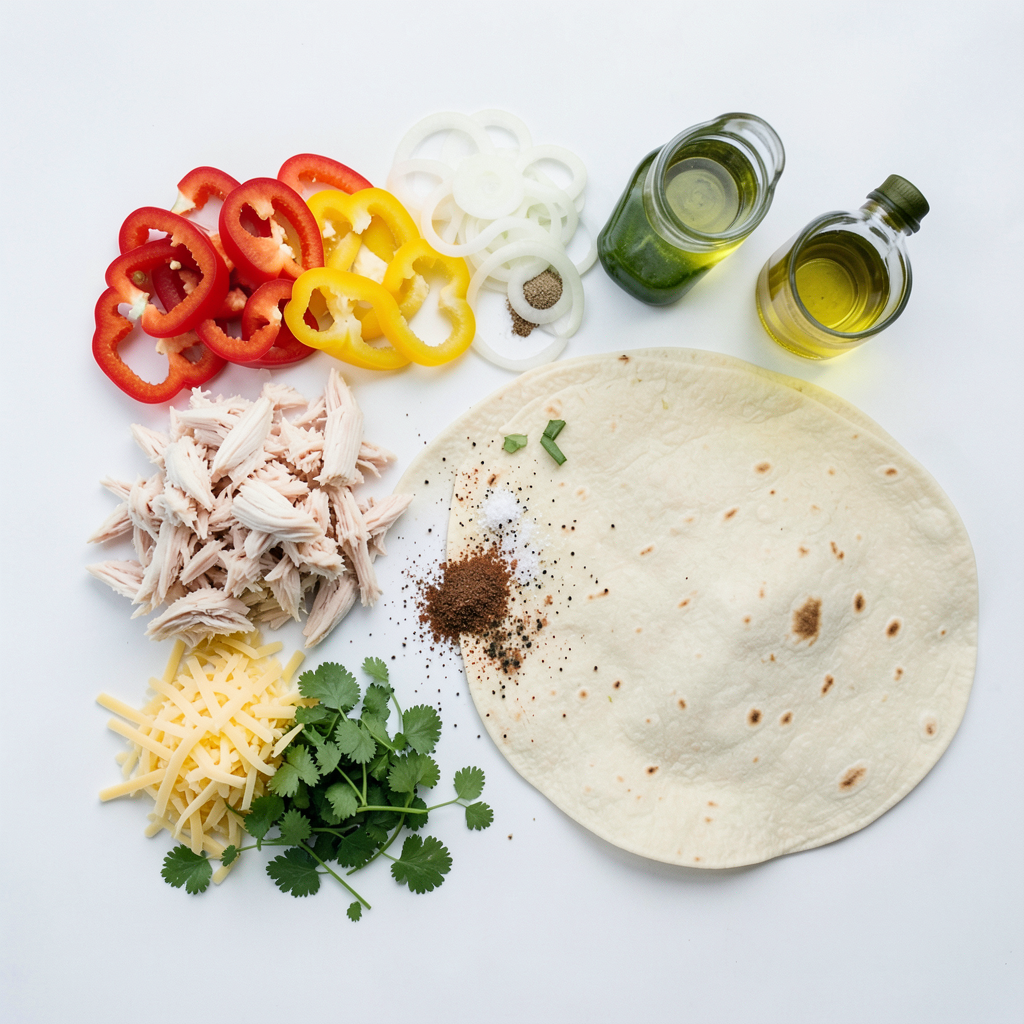
The main ingredients of this dish are simple yet packed with flavor. Cooked chicken adds protein and heartiness. The assorted bell peppers bring color and a sweet crunch. Shredded cheese melts perfectly, adding to the richness. Onion and garlic provide depth to each bite.
The seasonings are key for that Tex-Mex taste. Ground cumin gives a warm, earthy note. Smoked paprika adds a hint of smokiness. Salt and pepper enhance all the flavors without overpowering them.
For the tortillas, choose large flour ones for easy folding. The fresh cilantro at the end brightens the dish. Sour cream and salsa make perfect dips, adding creaminess and zing. These ingredients come together to create a warm and tasty meal that everyone will love.
Step-by-Step Instructions
Preparing the Vegetables
1. Sautéing onions: Start by heating 2 tablespoons of olive oil in a large skillet over medium heat. Add the sliced onions. Sauté them for about 5 minutes. You want them to be soft and translucent. Stir them gently to prevent burning.
2. Adding garlic and bell peppers: Next, toss in 2 minced cloves of garlic and 1 cup of assorted sliced bell peppers. I love using red, yellow, and green for color. Sprinkle in 1 teaspoon of ground cumin and 1 teaspoon of smoked paprika. Season with salt and pepper to taste. Keep sautéing for another 5 to 7 minutes. Your peppers should be tender and vibrant.
3. Seasoning with spices: The spices add warmth and depth to the dish. Make sure everything is well mixed as you cook. This blend brings the Tex-Mex flavor to life.
Preparing the Chicken Mixture
1. Combining vegetables with shredded chicken: Once the veggies are ready, transfer them to a mixing bowl. Add 2 cups of shredded chicken. Mix everything well, ensuring the chicken is coated with the flavorful spices and veggies. This mixture is key to the taste of your quesadillas.
Cooking the Quesadillas
1. Assembling the quesadilla: Wipe the skillet if needed and return it to medium-low heat. Place one large flour tortilla in the skillet. Spread about 1/4 cup of shredded cheese over half of the tortilla. Next, add a generous portion of the chicken and pepper mixture on top of the cheese.
2. Cooking on stovetop (including timing): Fold the tortilla over to make a half-moon shape. Press down gently. Cook for about 3 to 4 minutes until the bottom is golden and crispy. Carefully flip the quesadilla. Cook for another 3 to 4 minutes until the other side is golden brown and the cheese has melted.
3. Cutting and serving the quesadilla: Once cooked, take the quesadilla out of the skillet. Let it rest for a minute before cutting it into wedges. Repeat this with the remaining tortillas and chicken mixture. Serve the quesadillas warm and enjoy!
Tips & Tricks
Sautéing Techniques
To avoid burning vegetables, keep your heat at medium. Stir the onions often. This helps them turn soft without browning too quickly. When you add the garlic and peppers, keep stirring. This way, the garlic won’t burn while the peppers cook.
To achieve perfectly tender peppers, sauté them for about 5-7 minutes. Watch for their vibrant color and slight softness. This lets the natural sweetness shine through. If they turn mushy, you’ve cooked them too long.
Cheese Tips
For the best melting cheese, I recommend using cheddar or a Mexican cheese blend. These cheeses melt well and add great flavor. When you layer cheese, spread about 1/4 cup evenly over half of the tortilla. This ensures every bite has that gooey goodness.
Distributing cheese evenly helps it melt all at once. Avoid piling it too high in one spot. This way, the cheese melts smoothly and binds the filling together.
Presentation Tips
To plate quesadillas attractively, slice them into wedges. Arrange them in a circle or fan shape on a platter. This makes them look inviting.
For garnishing ideas, sprinkle chopped cilantro on top. The fresh color adds a nice touch. Serve with bowls of sour cream and salsa nearby. This allows everyone to dip and enjoy their quesadillas.
Pro Tips
- Use Fresh Vegetables: Fresh bell peppers and onions will enhance the flavor and texture of your quesadillas, making them more vibrant and delicious.
- Don't Overstuff: While it might be tempting to load up your quesadilla, too much filling can make it difficult to cook evenly and can lead to a mess when flipping.
- Experiment with Cheese: Try mixing different types of cheese for a unique flavor profile. A combination of cheddar, Monterey Jack, and pepper jack can add depth and spice.
- Rest Before Cutting: Allow the quesadilla to rest for a minute after cooking. This helps the cheese set slightly, making it easier to cut into wedges without spilling the filling.
Variations
Alternative Proteins
You can switch up the protein in your quesadillas. Instead of chicken, you could use beef or shrimp. Both give a unique flavor and texture. Just cook the beef until it is brown and tender. For shrimp, sauté them until they turn pink.
If you want a vegetarian option, try using black beans or grilled mushrooms. They add great taste and help fill the quesadilla nicely.
Additional Fillings
Adding more to your quesadilla can make it even better. You can mix in beans or corn for more flavor. Black beans are rich in protein and fiber. Sweet corn adds a nice crunch and sweetness.
Other vegetables work well too. Try spinach, zucchini, or mushrooms. Just make sure to sauté them first to bring out their flavors.
Cheese Variations
Cheese is key to a great quesadilla. You can experiment with different cheese blends. Cheddar cheese melts well and tastes sharp. A Mexican blend adds a nice kick with various flavors.
If you want to go dairy-free, there are many options available. Look for vegan cheese made from nuts or soy. These can melt nicely and add creaminess to your quesadillas.
Storage Info
Refrigerating Quesadillas
To store your leftover quesadillas, let them cool first. Place them in an airtight container. Make sure to add parchment paper between layers to prevent sticking. Seal the container tightly to keep them fresh. This way, your quesadillas stay tasty for the next day.
Freezing Instructions
- Step 1: Allow quesadillas to cool completely.
- Step 2: Cut them into wedges for easy storage.
- Step 3: Wrap each wedge in plastic wrap to prevent freezer burn.
- Step 4: Place the wrapped wedges in a freezer bag. Squeeze out as much air as possible before sealing.
- Step 5: Label the bag with the date. This helps you keep track of freshness.
For reheating, remove the quesadillas from the freezer. Let them thaw in the fridge overnight. Then, reheat on a skillet over medium heat for 3-4 minutes on each side. You can also use an oven at 350°F (175°C) for about 10-15 minutes.
Shelf Life
In the fridge, your quesadillas can last about 3 to 4 days. In the freezer, they stay good for up to 2 months. Always check for any signs of spoilage before eating. Proper storage helps keep your quesadillas delicious and safe!
FAQs
How do I customize my quesadilla fillings?
You can make your quesadillas unique. Add your favorite ingredients.
- Protein Options: Try beef, shrimp, or beans for variety.
- Veggies: Add mushrooms, zucchini, or corn for extra flavor.
- Spices: Mix in jalapeños for heat or fresh herbs for freshness.
- Cheese: Experiment with pepper jack, gouda, or a vegan cheese for a twist.
Can I make quesadillas in advance?
Yes, you can prepare quesadillas ahead of time. This saves time on busy days.
- Prep: Cook the filling and let it cool.
- Assemble: Put together the quesadillas and wrap them well.
- Store: Keep them in the fridge for up to two days.
What is the best way to reheat quesadillas?
Reheating correctly keeps quesadillas tasty and crispy.
- Stovetop Method: Heat in a skillet over medium heat. Cook for 3-4 minutes on each side.
- Oven Method: Preheat the oven to 350°F. Bake for about 10-15 minutes.
- Microwave Method: Use for quick reheating, but it may make them soggy. Add a paper towel to help absorb moisture.
You now know the key ingredients for making delicious quesadillas. Cooked chicken, bell peppers, and spices are your main stars. Don’t forget the cheese, tortillas, and garnishes to elevate your dish. Cooking requires a few simple steps, which include sautéing vegetables and assembling your quesadilla.
Remember, you can customize your fillings and even store extras for later. Experiment with different proteins and cheese blends to create your perfect meal. Enjoy the process of cooking, and have fun with your quesadilla adventures!