Get ready to impress your guests with a delicious St. Patrick’s Day Brownie Trifle! This easy and fun dessert brings together rich brownie layers, fluffy whipped cream, and creamy pudding. You’ll love how simple it is to make and how festive it looks on your table. Join me as I share my favorite tips, tricks, and fun variations to make this trifle the star of your celebration!
Why I Love This Recipe
- Decadent Layers: This trifle combines rich brownies, creamy pudding, and fluffy whipped cream, creating a dessert that's both indulgent and satisfying.
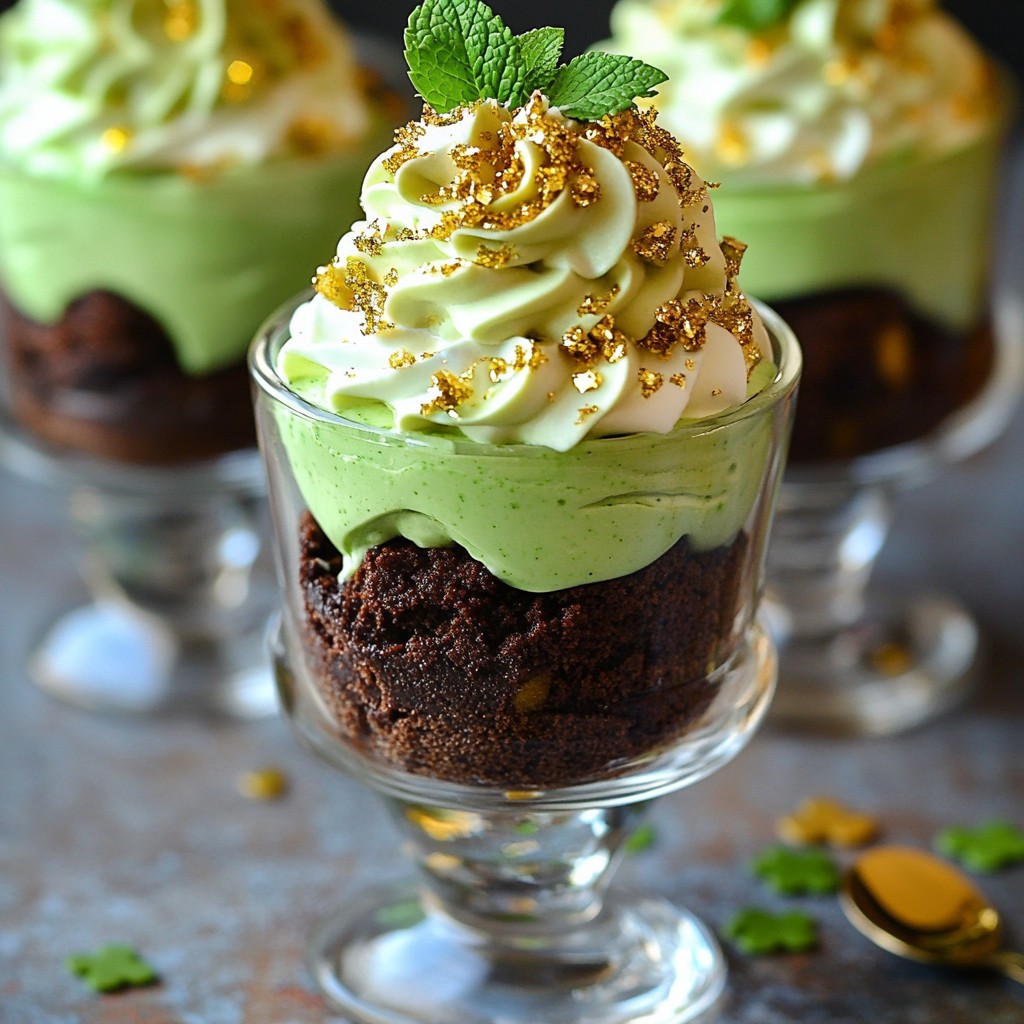
- Festive Presentation: Serving it in a clear dish showcases the beautiful layers, making it a stunning centerpiece for any St. Patrick's Day celebration.
- Easy to Assemble: With simple components and straightforward layering, this dessert is perfect for anyone, from beginners to experienced bakers.
- Minty Freshness: The addition of mint chocolate chips and green-colored whipped topping gives this trifle a refreshing twist that’s perfect for the holiday.
Ingredients
Essential Ingredients for St. Patrick’s Day Brownie Trifle
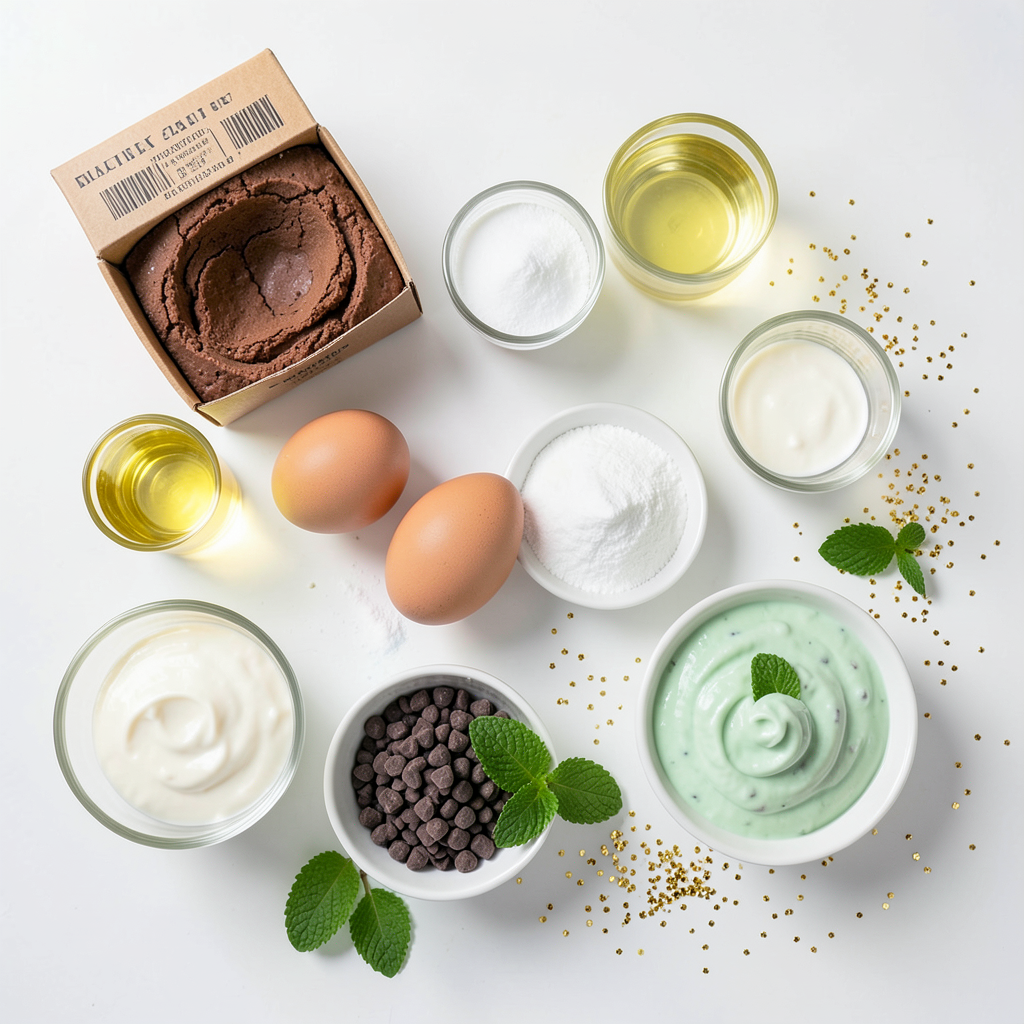
To make a St. Patrick’s Day Brownie Trifle, you need a few key ingredients. Each one plays an important role in creating layers of flavor and fun.
- Brownie mix and baking necessities
- 1 box (18.4 oz) brownie mix
- 1/2 cup vegetable oil
- 2 large eggs
- 1/4 cup water
These ingredients form the base of your dessert. The brownie mix gives you rich, chocolatey layers.
- Whipped cream and pudding ingredients
- 2 cups heavy cream
- 1/2 cup powdered sugar
- 1 teaspoon vanilla extract
- 2 cups creamy mint chocolate or vanilla pudding
The whipped cream adds a light fluffiness. The pudding gives a creamy texture and minty flavor.
- Festive garnishes
- 1 cup mint chocolate chips
- 2 cups green-colored whipped topping
- Fresh mint leaves for garnish
- Edible gold glitter (optional)
Garnishes make your trifle look special. They add color, texture, and a touch of fun for St. Patrick's Day.
By choosing these ingredients, you set the stage for a delightful treat that everyone will enjoy. Each layer builds on the last, making your trifle a tasty masterpiece.
Step-by-Step Instructions
Preparing the Brownies
First, preheat your oven to 350°F (175°C). In a large bowl, mix the brownie mix with vegetable oil, eggs, and water. Make sure to combine everything well. This step is key for a good texture.
Next, grease a 9x9-inch baking dish. Pour the brownie batter into it and spread it evenly. Bake for 20-25 minutes. Check with a toothpick; it should come out clean. Once done, take the brownies out and let them cool completely in the pan. This cooling step is very important for cutting them easily later.
Making the Whipped Cream
While the brownies cool, it’s time for the whipped cream. Grab a medium bowl and pour in the heavy cream. Use a hand mixer to beat it until soft peaks form. This will make your cream light and fluffy.
Now, add in the powdered sugar and vanilla extract. Beat it all together for a few more seconds. This will give your cream a nice sweet flavor.
Assembling the Trifle
Once your brownies are cool, carefully remove them from the dish. Cut them into bite-sized squares. This will help with layering.
Now, pick a clear trifle dish or dessert cups. Start layering with brownie pieces at the bottom. Spoon a layer of mint chocolate pudding over the brownies. Spread it evenly to cover them.
Add a generous layer of your whipped cream next. Smooth it out to make it look nice. Sprinkle a layer of mint chocolate chips on top of the whipped cream. This adds extra chocolate flavor.
Repeat the layers. Keep adding more brownie pieces, pudding, whipped cream, and chips until you fill your dish. Finish with a final layer of whipped cream.
For the last touch, top the trifle with green-colored whipped topping. Add fresh mint leaves for garnish. If you want, sprinkle some edible gold glitter on top for a festive look. This makes it perfect for St. Patrick’s Day!
Tips & Tricks
Perfecting Your Brownies
To get the best brownies, start with the right mix. I use an 18.4 oz box of brownie mix. This gives me rich and fudgy brownies. Mix it well with vegetable oil, eggs, and water. Follow the package instructions for the best results.
Bake them at 350°F for 20-25 minutes. Check doneness with a toothpick. It should come out clean. If you overbake, the brownies can dry out. After baking, let them cool completely. This step is key for easy cutting. Use a sharp knife to cut into small squares.
Achieving Fluffy Whipped Cream
Making whipped cream can be simple if you follow a few steps. Start with cold heavy cream for the best texture. Beat it with powdered sugar and vanilla extract. Stop as soon as you see soft peaks form. Overbeating can lead to a grainy texture.
Adjust the sweetness as needed. You can add more powdered sugar if you want it sweeter. This way, you control the flavor and make it just right for your trifle.
Layering for Visual Appeal
Layering is what makes this trifle special. Use a clear trifle dish so everyone can see the beautiful layers. Start with a layer of brownie squares, then add pudding. Smooth it out nicely for a neat look.
Next, add the whipped cream layer. Make it thick and fluffy. After that, sprinkle mint chocolate chips on top. Repeat the layers until your dish is full. Finish with a final layer of whipped cream. This makes it look stunning.
To enhance the look, use fresh mint leaves and optional gold glitter for a festive touch. This adds a fun and playful element to your St. Patrick's Day dessert.
Pro Tips
- Use Quality Ingredients: For the best flavor, opt for high-quality cocoa powder and chocolate chips. This will enhance the richness of your brownie trifle.
- Chill the Cream: Make sure your heavy cream is well-chilled before whipping. This helps achieve a better volume and stability in your whipped cream layer.
- Layering Technique: When layering, be sure to spread each layer evenly for a beautiful presentation. Use a spatula to smooth out the layers and make them visually appealing.
- Make Ahead: You can prepare the brownies and pudding a day in advance. Just assemble the trifle a few hours before serving to keep it fresh and delightful.
Variations
Flavor Alternatives for Pudding
You can switch up the pudding flavors for fun. Try chocolate or vanilla pudding instead of mint chocolate. You can also add a splash of peppermint extract for a stronger mint taste. For whipped cream, mix in cocoa powder or instant coffee for new flavors. Just add a little at a time and taste it. This way, you can find the flavor you love best.
Dietary Modifications
For gluten-free brownies, pick a gluten-free brownie mix. Many stores offer great options that taste just as good. If you want a dairy-free version, use coconut cream instead of heavy cream. You can also find dairy-free pudding mixes. Check labels to ensure they fit your needs. This way, everyone can enjoy the trifle!
Decorative Variations
Make your trifle stand out with fun decorations. Use chocolate shavings or colorful sprinkles to add excitement. You can also use themed sprinkles for special events. Edible glitter adds a festive touch too! Fresh fruit like strawberries or raspberries can add a nice pop of color. Get creative and make your trifle unique!
Storage Info
Storing Leftovers
To keep your St. Patrick’s Day Brownie Trifle fresh, use airtight containers. You can store the trifle in a large dish or individual cups. Make sure to cover them well with plastic wrap or a lid. This helps keep the layers from drying out. If you have leftover whipped cream, store it separately. It stays fluffier this way.
Freezing Options
Yes, you can freeze the trifle, but it’s best to freeze the layers separately. Brownies freeze well, but the whipped cream and pudding can change texture. If you freeze the trifle, use a freezer-safe container. Thaw it in the fridge overnight before serving. For best results, eat it within a month.
Shelf Life
The trifle lasts about 3 to 4 days in the fridge. Check for any changes in smell or texture. If it looks watery or has a sour odor, it’s best to throw it away. Keeping it covered helps it last longer. Always enjoy your dessert while it’s fresh for the best taste!
FAQs
Can I make St. Patrick’s Day Brownie Trifle a day ahead?
Yes, you can make the trifle a day ahead. This will save you time. Just layer the brownies, pudding, and whipped cream. Cover it well with plastic wrap. Chill it in the fridge overnight. The flavors will blend nicely. Just add the green topping right before serving. This keeps it fresh and pretty.
What type of brownie mix is best for this trifle?
I recommend using a rich, fudgy brownie mix. Store-bought mixes save time and taste great. If you prefer homemade, use your favorite recipe. Make sure it’s not too cake-like. A dense brownie will hold up well in the trifle. It adds a nice texture with each bite.
How can I make this recipe less sweet?
To reduce the sweetness, use less powdered sugar in the whipped cream. You can also cut back on the pudding mix. Another option is to use dark chocolate chips. They have less sugar and add depth. You can also choose unsweetened cocoa for the brownies. This keeps the flavors bold without being overly sweet.
In this blog post, we explored how to create a festive St. Patrick’s Day Brownie Trifle. We covered essential ingredients, step-by-step instructions, and handy tips. You learned about flavor variations, storage info, and answers to common questions.
This trifle is easy and fun to make, perfect for celebrations. With simple tweaks, you can impress your guests. Enjoy creating your own delightful dessert this season!