Looking for a festive and easy treat? St. Patrick’s Day Crack Toffee is just what you need. This simple recipe combines salty and sweet flavors for a delightful snack that is sure to impress. You’ll learn how to make this tasty toffee with just a few ingredients and simple steps. Plus, I’ll share tips and variations to make it your own. Let’s dive into this festive recipe together!
Why I Love This Recipe
- Festive Flavor: This St. Patrick’s Day Crack Toffee combines sweet and salty flavors, making it an irresistible treat for the holiday.
- Easy to Make: With simple ingredients and straightforward instructions, this recipe is perfect for bakers of all skill levels.
- Customizable: You can easily switch up the toppings, using different colors of M&M’s or even nuts, to suit your taste and occasion.
- Shareable Treat: This recipe yields about 24 pieces, making it great for sharing at gatherings or gifting to friends and family.
Ingredients
List of Ingredients
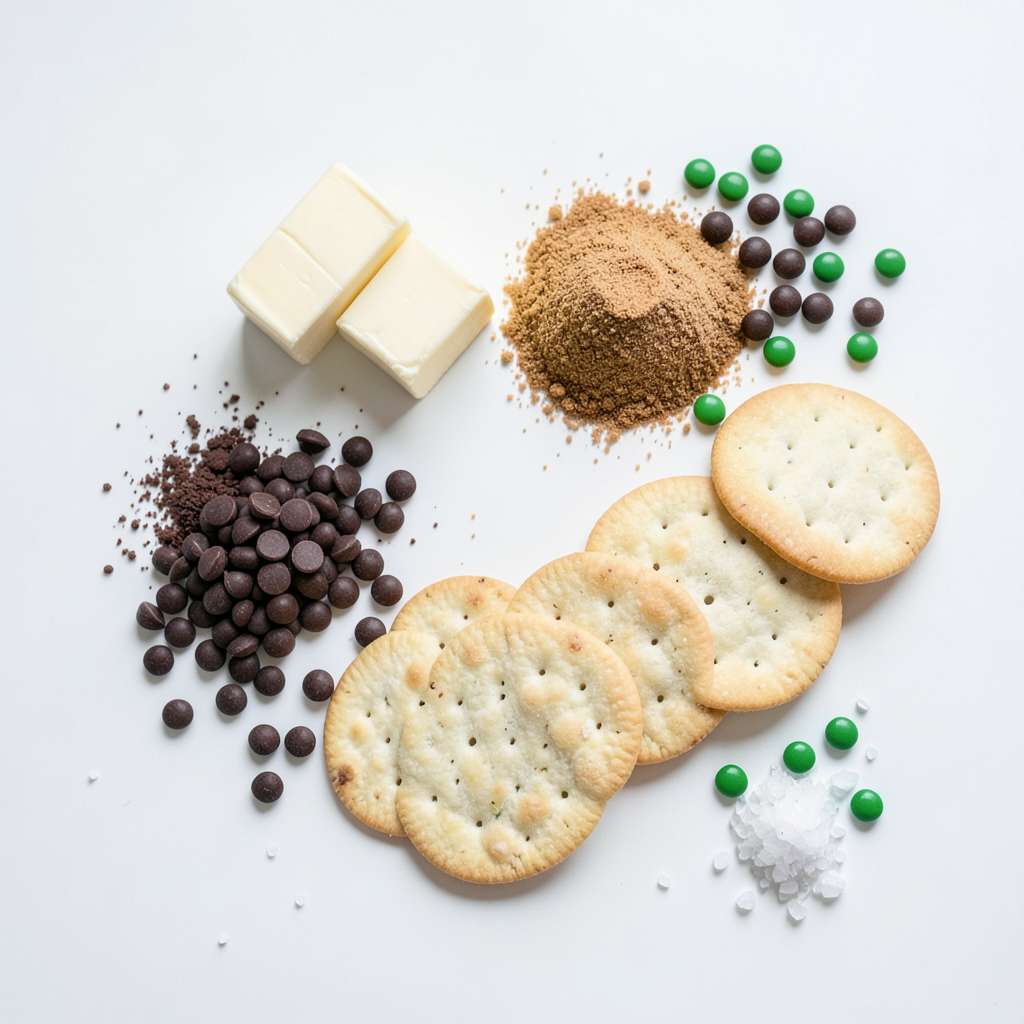
To make St. Patrick's Day Crack Toffee, you need:
- 1 cup unsalted butter (2 sticks)
- 1 cup packed brown sugar
- 2 cups saltine crackers (about 40 crackers)
- 1 cup semi-sweet chocolate chips
- 1/2 cup green M&M’s (for decoration)
- Sea salt (for flavor)
Ingredient Substitutions
You can swap some ingredients if needed:
- Use margarine instead of butter for a dairy-free option.
- Brown sugar can be replaced with coconut sugar for a different taste.
- If you don’t have saltine crackers, try graham crackers.
- Dark chocolate chips work well if you prefer a richer flavor.
- Instead of green M&M’s, you can use any fun candy for a colorful twist.
Importance of Quality Ingredients
Using high-quality ingredients makes a big difference in taste. Fresh butter adds a creamy flavor. Good chocolate melts smoothly and tastes rich. The saltine crackers should be crisp to hold up well. Quality brown sugar enhances the caramel notes in the toffee. Each ingredient contributes to the overall flavor, so choose wisely!
Step-by-Step Instructions
Preheating and Preparing the Baking Sheet
Start by preheating your oven to 350°F (175°C). This step warms up the oven so your toffee cooks evenly. Next, grab a baking sheet and line it with parchment paper. This paper keeps the toffee from sticking and makes cleanup easier.
Arranging Saltine Crackers
Now, take your saltine crackers. You will need about 40 of them. Arrange them in a single layer on the lined baking sheet. Try to cover as much of the sheet as you can. This helps ensure every bite has toffee.
Preparing the Butter-Sugar Mixture
In a medium saucepan, add 1 cup of unsalted butter and 1 cup of packed brown sugar. Set the heat to medium. Stir as the butter melts. Once it melts, let it boil for 3 minutes without stirring. This creates a smooth toffee base.
Baking and Applying the Chocolate
Carefully pour the hot butter-sugar mixture over the crackers. Use a spatula to spread it evenly. Place the baking sheet in the oven. Bake for 5 to 7 minutes. Watch closely until the mixture is bubbly and the crackers turn golden.
Immediately take it out and sprinkle 1 cup of semi-sweet chocolate chips on top. Let them sit for a minute to soften. Then, use a spatula to spread the melted chocolate over the toffee.
Cooling and Breaking the Toffee
While the chocolate is still warm, add 1/2 cup of green M&M’s on top. Gently press them down so they stick. Let the toffee cool at room temperature for about 30 minutes. For best results, put it in the fridge for 1 hour to firm up.
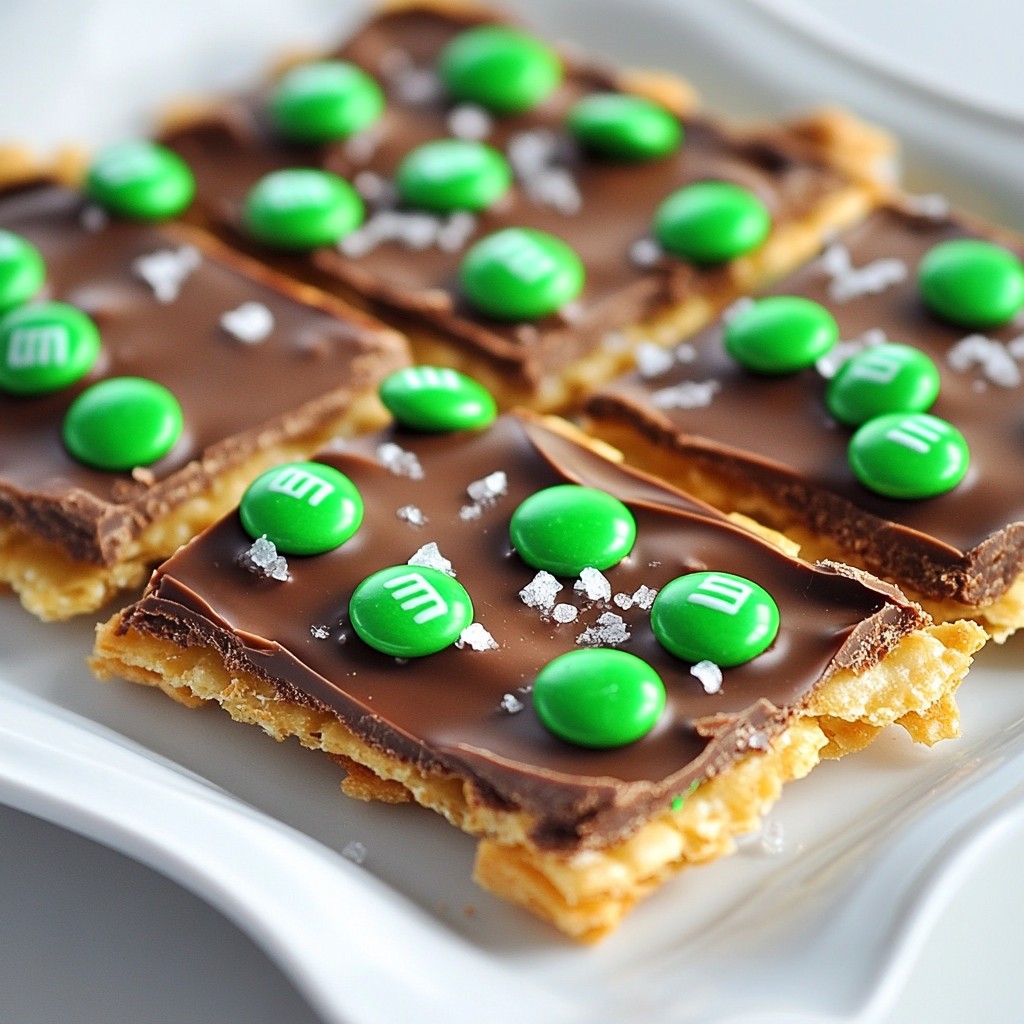
When it's completely chilled, break the toffee into bite-sized pieces. Finish by sprinkling a light touch of sea salt on top. This extra touch enhances the flavor and makes your toffee even more special.
Tips & Tricks
How to Ensure Even Coating
To coat your saltine crackers evenly, spread them out on the baking sheet in one layer. Cover as much of the sheet as you can. When you pour the hot butter-sugar mix, use a spatula to spread it quickly. This helps every cracker get toffee.
Avoiding Common Mistakes
One common mistake is stirring the butter-sugar mix too long. Stir only until the butter melts. This mix should boil gently for three minutes. If you don’t watch the oven closely, the toffee can burn. Keep an eye on it, especially in the last minutes.
Best Practices for Flavor Enhancements
You can add fun flavors to your toffee. Try using dark chocolate chips instead of semi-sweet for a richer taste. Add a pinch of cinnamon or a splash of vanilla extract to the butter-sugar mix. These tweaks give your toffee a unique twist while keeping the classic charm.
Pro Tips
- Use Fresh Ingredients: Always use fresh unsalted butter and new packages of saltine crackers for the best flavor and texture in your toffee.
- Watch the Baking Time: Keep an eye on the toffee while it bakes; it can go from perfectly golden to burnt in a matter of seconds.
- Experiment with Toppings: Feel free to mix other toppings like chopped nuts or different colored M&M’s to customize your St. Patrick’s Day treat!
- Storage Tips: Store the finished toffee in an airtight container at room temperature to keep it fresh and crunchy for longer.
Variations
Adding Different M&M Colors
You can change the look of your St. Patrick’s Day Crack Toffee by using different M&M colors. Instead of green, try yellow or orange for a bright touch. You can even mix them all together! This adds fun and makes your treat pop with color. I love using red, white, and blue for holidays like the Fourth of July. The options are endless.
Incorporating Nuts or Dried Fruits
Adding nuts or dried fruits gives your toffee extra flavor and crunch. Chopped walnuts or pecans work great. Almonds add a nice touch too. If you prefer sweetness, try dried cranberries or chopped apricots. Just sprinkle them on top of the chocolate before it hardens. This step makes your treat not just tasty, but also visually appealing.
Flavoring Options for Chocolate
Want to change things up? Flavor your chocolate! You can add a splash of peppermint extract for a minty twist. Or try almond extract for a nutty flavor. Mix in a little cinnamon for warmth or espresso powder for a coffee kick. These small changes can make a big difference in taste. It’s all about what you love!
Storage Information
Recommended Storage Method
To keep your St. Patrick’s Day Crack Toffee fresh, store it in an airtight container. Make sure to separate layers with parchment paper to avoid sticking. This method keeps the toffee crispy and tasty.
How Long It Lasts
If stored properly, this treat lasts about one week at room temperature. You can also keep it in the fridge to enjoy it for up to two weeks. Just remember to let it sit out for a few minutes before eating, so it softens slightly.
Freezing Instructions
You can freeze this toffee to enjoy later. Wrap it tightly in plastic wrap, then place it in a freezer bag. It can stay in the freezer for up to three months. When you want to eat it, let it thaw in the fridge overnight.
FAQs
What is St. Patrick’s Day Crack Toffee?
St. Patrick’s Day Crack Toffee is a sweet and crunchy treat. It combines saltine crackers, butter, brown sugar, and chocolate. You bake it until bubbly and golden. Then, you top it with chocolate and green M&M’s. This toffee is fun and festive for St. Patrick’s Day.
Can I make this recipe in advance?
Yes, you can make St. Patrick’s Day Crack Toffee in advance. It stores well for up to a week. Keep it in an airtight container at room temperature. This way, you can enjoy it fresh and ready for your celebration.
What other toppings can I use?
You can get creative with toppings! Here are some ideas:
- Chopped nuts like pecans or walnuts
- Dried fruits such as cranberries or raisins
- Different chocolate types like white or dark chocolate
- Sprinkles for added color
Feel free to mix and match to suit your taste.
Is there a gluten-free version of this recipe?
Yes, you can make a gluten-free version. Use gluten-free crackers instead of saltines. Many brands offer tasty gluten-free options. Make sure to check the labels for gluten-free certification. This way, everyone can enjoy this treat!
This blog post guides you through making St. Patrick’s Day Crack Toffee. You learned about quality ingredients, step-by-step baking, and tips for success. We explored fun variations and helpful storage tips too. The recipe is simple and fun, perfect for sharing. Don’t hesitate to try new flavors or toppings. Enjoy every crunchy, sweet bite you create!