Craving a sweet yet simple treat? You’re in the right place! In this blog post, I’ll show you how to make delightful Strawberry Shortcake Cupcakes. With fresh strawberries and fluffy whipped cream, these cupcakes offer a fresh twist on a classic dessert. Perfect for any occasion, they’re easy to whip up in your kitchen. Let’s dive into the tasty details and bake some smiles!
Why I Love This Recipe
- Deliciously Light: These strawberry shortcake cupcakes are light and fluffy, making them a perfect dessert for any occasion.
- Fresh Ingredients: The use of fresh strawberries ensures vibrant flavor and texture in every bite.
- Easy to Make: This recipe is simple enough for bakers of all skill levels, with straightforward steps to follow.
- Beautiful Presentation: With whipped cream and fresh strawberries on top, these cupcakes are as visually appealing as they are tasty.
Ingredients
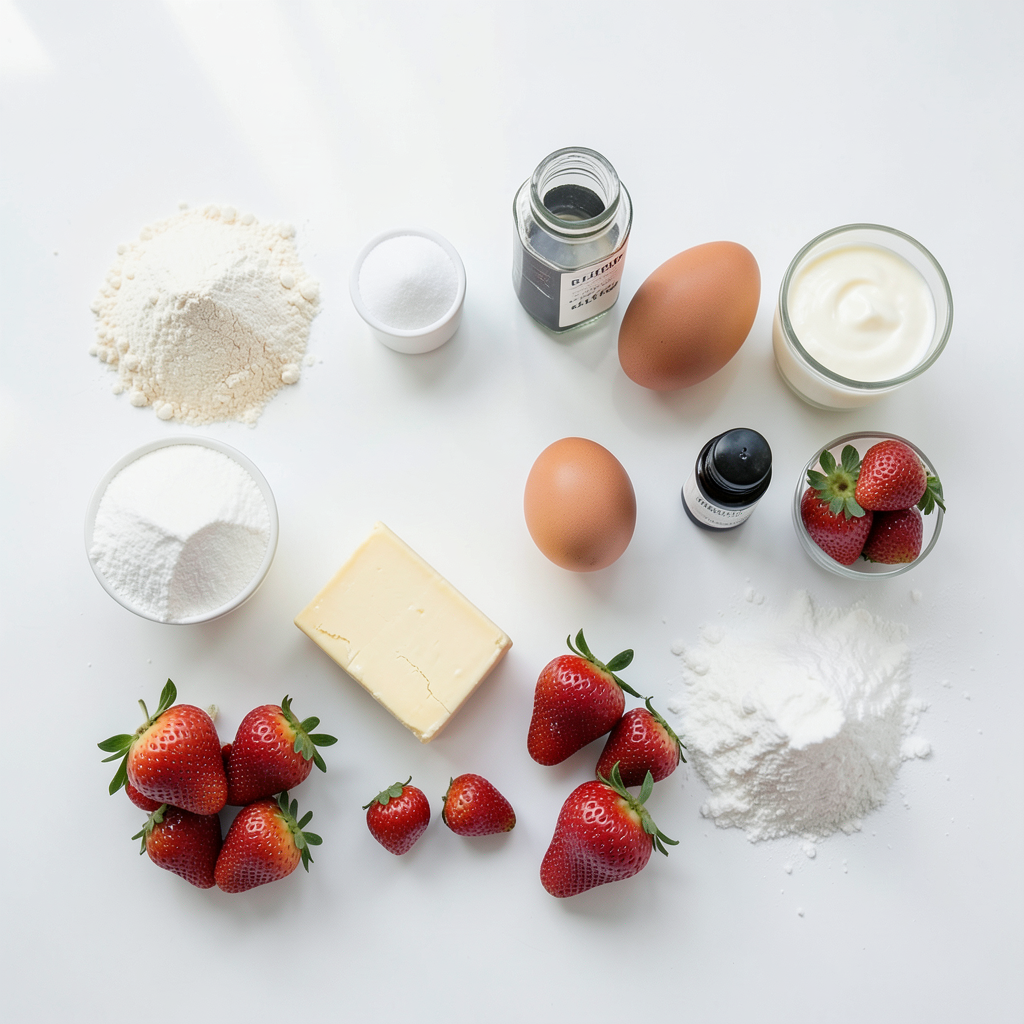
List of Ingredients
- 1 ½ cups all-purpose flour
- 1 teaspoon baking powder
- ½ teaspoon baking soda
- ¼ teaspoon salt
- ½ cup unsalted butter, softened to room temperature
- ¾ cup granulated sugar
- 2 large eggs, at room temperature
- 1 teaspoon pure vanilla extract
- ½ cup buttermilk, at room temperature
- 1 cup fresh strawberries, hulled and chopped
- 1 cup heavy cream, chilled
- 3 tablespoons powdered sugar
- Additional fresh strawberries for topping
Measurement & Preparation Tips
When measuring flour, use the spoon and level method. This keeps your cupcakes light. For butter, make sure it’s at room temperature to mix well. Eggs should also be at room temperature. This helps them blend better into the batter. For buttermilk, you can make a quick substitute using milk and vinegar if needed. Just mix ½ cup of milk with 1 teaspoon of vinegar and let it sit for a few minutes.
Quality Tips for Fresh Ingredients
Always choose ripe strawberries for the best flavor. Look for bright red berries with no dark spots. For butter, use unsalted to control salt levels in your recipe. Fresh eggs give better texture and taste. When buying heavy cream, check the expiry date. Fresh cream whips better and gives a lighter topping. Always use high-quality vanilla extract for the best aroma and flavor in your cupcakes.
Step-by-Step Instructions
Prepping the Oven and Cupcake Pan
First, preheat your oven to 350°F (175°C). This ensures even baking. Next, line a standard cupcake pan with paper liners. These liners help your cupcakes come out easily. They also make cleanup a breeze.
Mixing Dry Ingredients
In a medium bowl, whisk together the all-purpose flour, baking powder, baking soda, and salt. Make sure everything blends well. Set this dry mix aside. You will need it later.
Creaming Butter and Sugar
In a large bowl, cream the softened butter and granulated sugar. Use a hand mixer for this step. Beat them together until the mix is light and fluffy, about 3-4 minutes. This step adds air to your batter.
Combining Wet and Dry Ingredients
Add the eggs to the butter mix, one by one. Beat well after each egg. Then stir in the vanilla extract. Gradually mix in the dry ingredients and buttermilk. Start with a third of the dry mix, then add half the buttermilk. Repeat this until everything is combined. Your batter should be slightly lumpy.
Folding in Strawberries
Gently fold the chopped strawberries into the batter. Use a spatula for this. Be careful not to crush them. You want to keep the fresh strawberry pieces intact.
Baking and Cooling Process
Evenly fill the cupcake liners with the batter. Fill them about two-thirds full. This allows them to rise nicely. Bake in the oven for 18-20 minutes. Check with a toothpick; it should come out clean. Let the cupcakes cool in the pan for about 10 minutes. Then transfer them to a wire rack to cool completely.
Whipping Cream for Topping
While the cupcakes cool, prepare the whipped cream. In a mixing bowl, whip the chilled heavy cream. Use an electric mixer for best results. Whip until soft peaks form. Gradually add the powdered sugar. Keep whipping until medium peaks form.
Filling and Garnishing Cupcakes
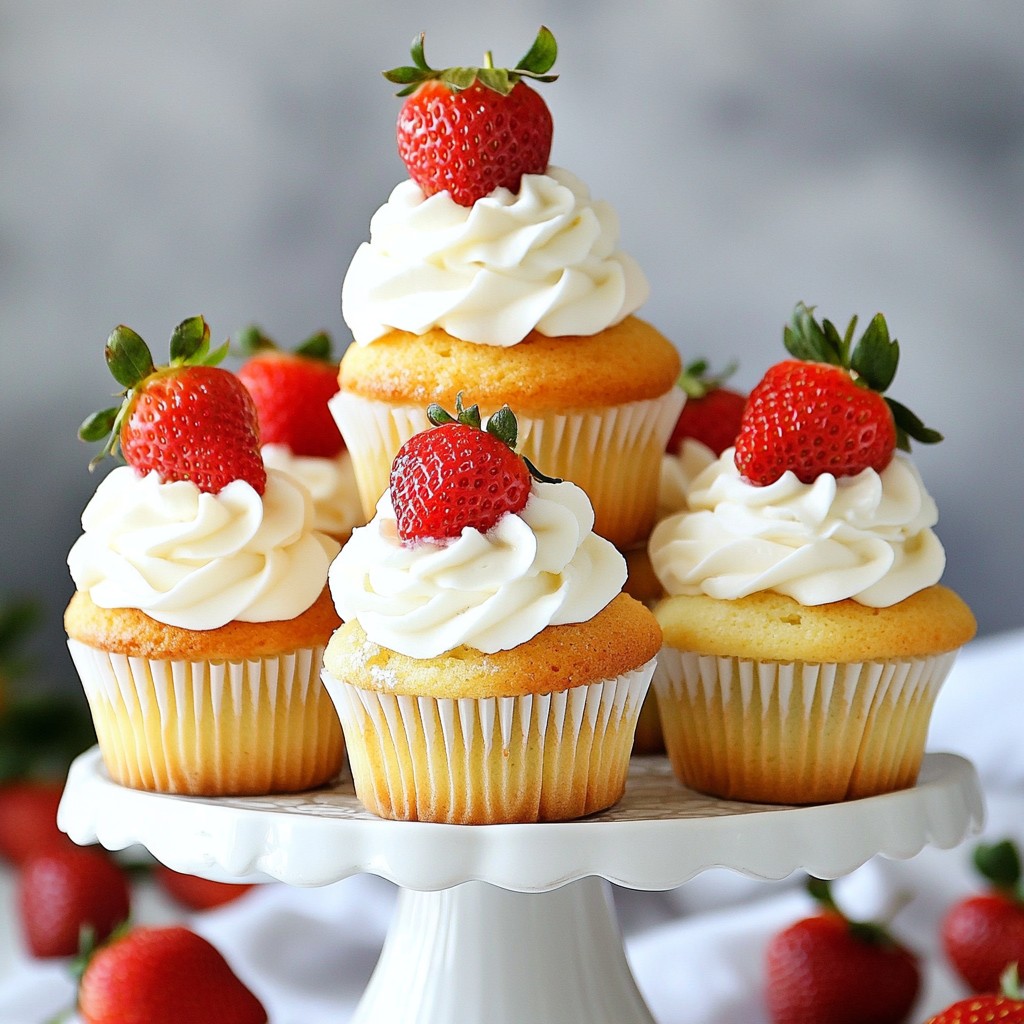
Once the cupcakes are cool, remove a small part from the center of each. Use a small knife or cupcake corer. Fill each cavity with whipped cream and some extra strawberry pieces. Finally, pipe or dollop more whipped cream on top. Garnish with a fresh strawberry for a lovely finish. Enjoy your delightful strawberry shortcake cupcakes!
Tips & Tricks
Common Mistakes to Avoid
When making strawberry shortcake cupcakes, some common mistakes can ruin your treats.
- Overmixing the batter: This can make your cupcakes tough. Mix just until combined.
- Skipping room temperature ingredients: Cold eggs and buttermilk can lead to uneven mixing. Always use room temperature items.
- Filling liners too full: Overfilling can cause cupcakes to spill over. Fill them two-thirds full for the best rise.
- Not cooling properly: Let cupcakes cool completely before adding whipped cream. Otherwise, the cream can melt.
How to Achieve Perfect Whipped Cream
Perfect whipped cream makes these cupcakes shine. Here’s how to get it right:
- Chill your tools: Use a cold mixing bowl and beaters. This helps the cream whip faster.
- Start slow: Begin mixing on low speed. Gradually increase to medium speed.
- Watch for soft peaks: Whip until soft peaks form, then slowly add powdered sugar. This gives sweetness while maintaining texture.
- Don’t overwhip: Stop when you see medium peaks. Overwhipping can turn the cream into butter.
Ensuring Even Cupcake Baking
Even baking is key for great cupcakes. Follow these tips:
- Use an oven thermometer: Make sure your oven is at the right temperature. This helps all cupcakes bake evenly.
- Rotate the pan: If your oven has hot spots, rotate the pan halfway through baking. This ensures even cooking.
- Space cupcakes apart: Leave space between each cupcake in the pan. This allows for better airflow and even baking.
Pro Tips
- Use Room Temperature Ingredients: Ensure that your butter, eggs, and buttermilk are at room temperature. This allows for better emulsification, resulting in a lighter and fluffier cupcake.
- Don’t Overmix the Batter: When combining the dry and wet ingredients, mix just until incorporated. Overmixing can lead to dense cupcakes, so keep the batter slightly lumpy.
- Chill Your Cream: For the best whipped cream, make sure your heavy cream is chilled. This helps achieve the perfect texture and stability when whipping.
- Use Fresh Strawberries: Fresh, ripe strawberries not only enhance the flavor but also provide a beautiful red color. Avoid using frozen strawberries as they can make the batter too moist.
Variations
Gluten-Free Strawberry Shortcake Cupcakes
You can make gluten-free strawberry shortcake cupcakes by swapping all-purpose flour for gluten-free flour. Look for a blend that works well in baking. Follow the same steps to mix and bake. The texture may be a little different, but the taste will be just as delightful.
Chocolate Strawberry Cupcakes
For a twist, try chocolate strawberry cupcakes. Use a chocolate cake mix instead of the vanilla. Add cocoa powder to your dry mix, about 1/3 cup will do. Fold in chopped strawberries as usual. This adds a rich flavor that pairs perfectly with the berries.
Dairy-Free Options
Dairy-free options are easy! Use a dairy-free butter substitute. For buttermilk, mix almond milk with a splash of vinegar. The whipped cream can be made with coconut cream instead of heavy cream. Chill the coconut cream and whip it until fluffy. This keeps the cupcakes light and tasty without dairy.
Storage Info
How to Store Cupcakes
To keep your strawberry shortcake cupcakes fresh, store them in an airtight container. This helps them stay moist and tasty. You can keep them at room temperature for up to two days. If you want to keep them longer, place them in the fridge. Just remember to let them sit out for a bit before serving, so they can warm up.
Tips for Keeping Toppings Fresh
For the whipped cream topping, it is best to add it right before serving. Whipped cream can lose its fluffiness if it sits too long. If you need to prepare it ahead of time, store it in the fridge in a separate container. Make sure to cover it tightly to prevent it from absorbing other smells.
Freezing Instructions for Cupcakes
You can freeze these cupcakes if you want to save some for later. To do this, let the cupcakes cool completely. Then, wrap each one in plastic wrap. Place them in a freezer-safe bag or container. They can last for up to three months in the freezer. To enjoy, simply thaw them in the fridge overnight. Add fresh toppings before serving for the best taste.
FAQs
How long do strawberry shortcake cupcakes last?
Strawberry shortcake cupcakes stay fresh for about three days. Store them in an airtight container at room temperature. For longer storage, refrigerate them. They may last up to a week in the fridge, but the texture might change.
Can I use frozen strawberries?
Yes, you can use frozen strawberries. Thaw them first and drain any excess liquid. This helps keep the batter from getting too wet. Chopping them into smaller pieces makes it easier to mix into the batter.
What can I substitute for buttermilk?
You can mix one tablespoon of lemon juice or vinegar with milk to make buttermilk. Let it sit for about five minutes. This will give you a similar tangy flavor and acidity that buttermilk provides.
Can I make the whipped cream ahead of time?
You can make the whipped cream a few hours before serving. Keep it in the fridge until you're ready to use it. If you whip it too early, it might lose its fluffiness. Adding a bit of powdered sugar helps it hold its shape.
What is the best way to serve these cupcakes?
Serve the cupcakes at room temperature for the best taste. Arrange them on a pretty plate or a tiered stand. Garnish with fresh strawberries and mint leaves for a nice touch. This makes them look great and adds extra flavor.
This post covered all you need for perfect strawberry shortcake cupcakes. We discussed the key ingredients and how to measure them right. I shared step-by-step instructions to help you bake and garnish each one. We explored helpful tips to avoid common mistakes. Plus, I gave ideas for variations and storage.
Remember, with care and practice, you can master these treats. Enjoy your baking journey!