WANT TO SAVE THIS RECIPE?
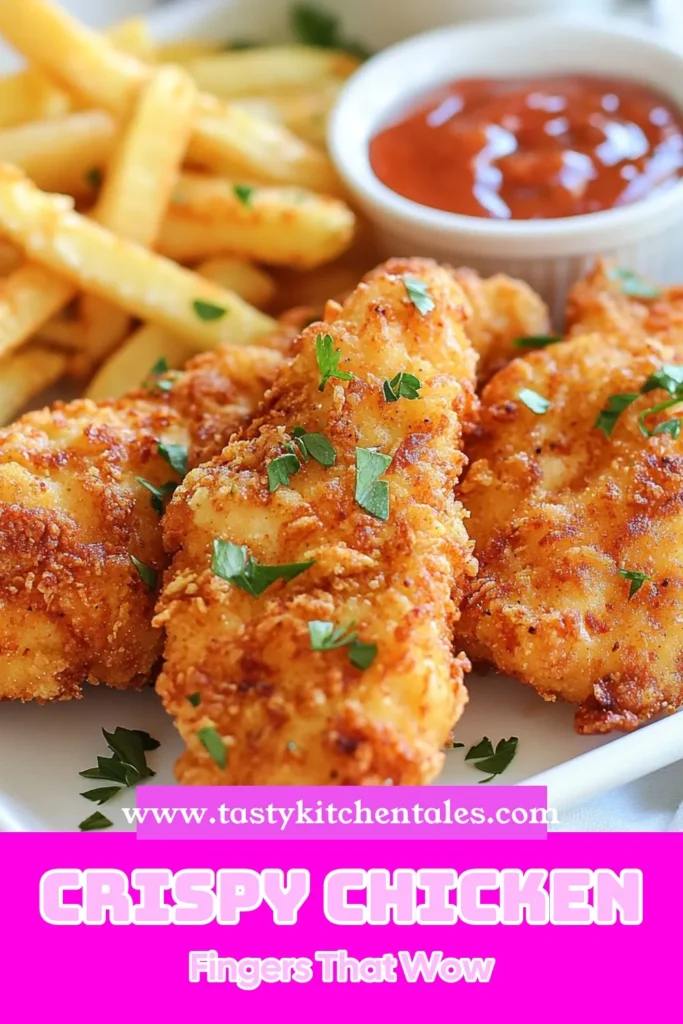
Are you craving the crispy, golden taste of Raising Cane’s Chicken Fingers? You’re in luck! I am sharing my easy and tasty copycat recipe that will satisfy your cravings right at home. With simple ingredients like buttermilk and a special spice mix, you’ll whip up tender chicken in no time. Follow my step-by-step guide and soon you’ll have the perfect meal that rivals your favorite restaurant. Let’s dive into this delicious adventure!

Why I Love This Recipe
- Perfectly Crispy: The coating on these chicken fingers is incredibly crispy, providing a satisfying crunch with every bite.
- Flavorful Marinade: Soaking the chicken tenders in buttermilk and hot sauce infuses them with rich flavor and tenderness.
- Customizable Heat: The recipe allows you to adjust the cayenne pepper according to your spice preference, making it suitable for everyone.
- Fun for Everyone: These chicken fingers are a hit with both kids and adults, making them perfect for any gathering or family meal.
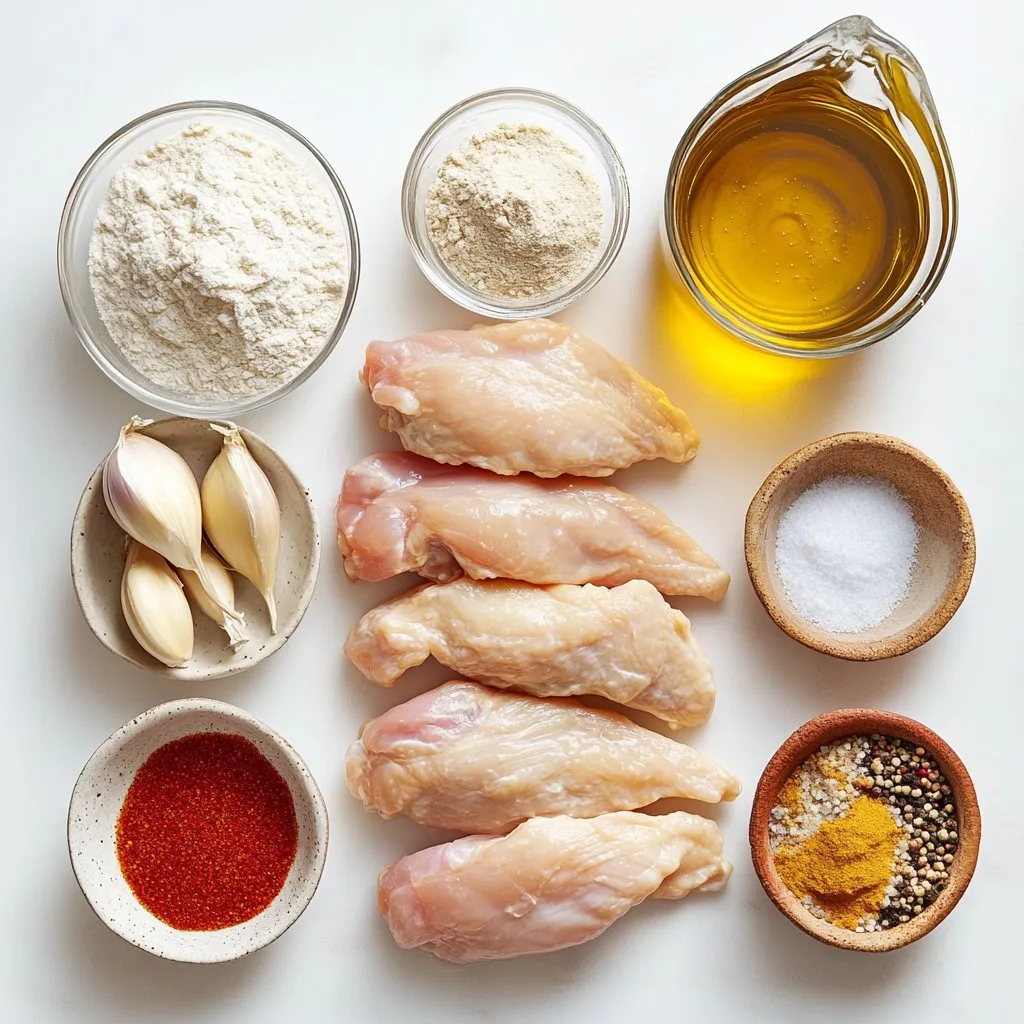
Ingredients
Main Ingredients
– 1 lb chicken tenders
– 1 cup buttermilk
– 1 cup all-purpose flour
Seasoning Mix
– 1 teaspoon paprika
– 1 teaspoon garlic powder
– 1 teaspoon onion powder
– 1 teaspoon salt
– 1/2 teaspoon black pepper
– 1/2 teaspoon cayenne pepper (adjust based on your spice level)
Additional Components
– 1 tablespoon hot sauce (optional for extra kick)
– Oil for frying
These ingredients are key to making your chicken fingers crispy and tasty. The chicken tenders provide a great base. Buttermilk adds moisture and flavor. The all-purpose flour is essential for that crunchy coating.
The seasoning mix is where the magic happens. Each spice plays a role. Paprika gives color and a slight smoky taste. Garlic powder and onion powder add depth. Salt and pepper enhance all the flavors. Cayenne pepper brings heat but can be adjusted to fit your taste.
If you want a spicy kick, add the hot sauce to the buttermilk. This step helps the flavors soak into the chicken. Lastly, choose a good oil for frying. Oil with a high smoke point, like vegetable oil, works best for frying these chicken fingers.
Gather these ingredients, and you’re ready to start your cooking adventure!
Step-by-Step Instructions
Preparing the Chicken
Marinating the chicken is key. Start by mixing the buttermilk and hot sauce in a bowl. You can skip the hot sauce if you want a milder flavor. Add the chicken tenders, ensuring they are fully submerged. Cover the bowl with plastic wrap and refrigerate. I suggest marinating for at least 1 hour. For the best flavor, leave it overnight.
Making the Coating
Next, prepare the coating. In a separate bowl, combine the flour, paprika, garlic powder, onion powder, salt, black pepper, and cayenne pepper. Use a whisk to mix these dry ingredients well. Good mixing is crucial to ensure every bite is seasoned evenly.
Cooking the Chicken
Now, heat the oil in a deep skillet. Pour in about an inch of oil and set the heat to medium-high. Keep an eye on it! The oil is ready when a drop of batter sizzles and bubbles. Carefully remove the chicken from the buttermilk, letting the excess drip off. Dredge each tender in the flour mixture, making sure they are fully coated.
Fry the chicken tenders in small batches. This prevents overcrowding. Cook them for 5-7 minutes on each side. They should turn golden brown and reach an internal temperature of 165°F (75°C) to be safe to eat. Once done, transfer the chicken to a wire rack or paper towels to drain excess oil.
Tips & Tricks
Achieving Perfect Crispiness
To get that crunchy texture, focus on your coating technique. Start by ensuring each chicken tender is well-coated in the seasoned flour mix. This extra layer will give you that desired crunch.
Next, adjust your frying temperature. The oil needs to be hot enough, around 350°F (175°C). If it’s too cool, the chicken soaks up oil and becomes soggy. If too hot, the outside burns while the inside stays raw. Always monitor the oil’s temperature carefully.
Flavor Enhancements
To boost flavor, you can add more spices to your mix. Try onion powder, garlic powder, or even some cayenne for heat. Marinating the chicken tender in buttermilk is key. For a great flavor, let it sit for at least one hour. If you have time, marinate overnight for even more taste.
Equipment Recommendations
Choosing the right frying pan makes a big difference. A deep skillet or a cast-iron pan works best. These help distribute heat evenly.
You’ll also need a few tools for perfect frying. A thermometer ensures the oil is at the right temperature. A wire rack helps drain excess oil after cooking. These small choices lead to crispy, delicious chicken fingers.
Pro Tips
- Marinate for Maximum Flavor: Allowing the chicken to marinate overnight in buttermilk not only tenderizes the meat but also infuses it with deep flavor.
- Double Dipping for Extra Crunch: For an even crunchier coating, after the first dredge in flour, dip the chicken back into buttermilk and coat it in flour again.
- Maintain Oil Temperature: Keep an eye on the oil temperature while frying. If it gets too hot, the chicken will burn on the outside before cooking through. Aim for around 350°F (175°C).
- Serve Immediately: For the best texture and taste, serve the chicken fingers right after frying. They are crispiest when hot!
Variations
Different Chicken Cuts
You can use different chicken cuts for this recipe. Chicken breasts or thighs work great. Just remember that thighs add more flavor and moisture. If you use breasts, they may be less juicy.
You can also choose frozen chicken. Frozen tenders are easy and quick. Just make sure to thaw them completely before marinating. Fresh chicken tends to taste better, but frozen is a good time-saver.
Flavor Twists
Adding different spices gives your chicken a unique flavor. You can try paprika, cumin, or even Italian herbs. If you like heat, add extra cayenne. This spice can bring a nice kick to your dish.
Another idea is to use different marinades. You can mix in some lemon juice or garlic for a fresh twist. Experiment with different flavors that you enjoy.
Gluten-Free Options
If you need a gluten-free option, use alternate flours. Almond flour or chickpea flour works well for coating. These options give a nice crunch too.
For binding, you can swap buttermilk for dairy-free milk or a plant-based yogurt. These alternatives keep the chicken moist while ensuring everyone can enjoy it.
Storage Info
Storing Leftovers
After enjoying your chicken fingers, store leftovers right away. Place them in an airtight container. This keeps them fresh and tasty. Make sure they cool down before sealing. You can refrigerate them for up to three days. For best quality, eat them sooner rather than later.
Reheating Tips
To keep your chicken fingers crispy, use an oven. Preheat it to 375°F (190°C). Place the chicken fingers on a baking sheet. Heat them for about 10-15 minutes. Flip them halfway for even crispiness. Avoid the microwave, as it can make them soggy.
Freezing Instructions
If you want to save chicken fingers for later, freezing works well. First, let them cool completely. Then, wrap each piece in plastic wrap. Place them in a freezer-safe bag. Remove as much air as possible to prevent freezer burn. They can last up to three months in the freezer.
To enjoy them again, thaw them in the fridge overnight. This method helps maintain taste and texture. You can also use the microwave for quick thawing, but be careful not to cook them.
FAQs
What’s the best way to marinate chicken for frying?
Marinating chicken helps add flavor and tenderness. For best results, soak your chicken in buttermilk for at least one hour. If you have more time, let it marinate overnight. This longer soak really boosts the taste. Adding hot sauce gives it an extra kick, but it’s optional. Remember to cover your bowl tightly with plastic wrap to keep the chicken fresh!
Can I use different oils for frying?
Yes, you can use different oils for frying. Common choices include vegetable oil, canola oil, and peanut oil. These oils have high smoke points, making them safe for frying. Each oil has a slight flavor, but they won’t overpower your chicken. If you want a unique taste, try using coconut oil or avocado oil. Both are great options too!
How long do these chicken fingers last in the fridge?
These chicken fingers last about three to four days in the fridge. Make sure to store them in a sealed container. This keeps them fresh and safe to eat. If you want them to last longer, you can freeze them. Just remember to wrap them well to prevent freezer burn. When you’re ready to eat them, simply reheat until hot!
You learned how to make delicious chicken fingers from scratch. We covered key ingredients, from chicken tenders to spices. You now know the steps for marinating, coating, and frying. Remember to store any leftovers properly to keep them fresh.
Experiment with different spices and chicken cuts to find your favorite dish. With practice, you’ll achieve perfect crispiness each time. Enjoy your tasty chicken fingers and share them with friends and family for some good time
Crispy Chicken Finger Delight
Deliciously crispy chicken tenders marinated in buttermilk and coated with seasoned flour for a perfect crunch.
Prep Time 15 minutes mins
Cook Time 15 minutes mins
Total Time 30 minutes mins
Course Main Course
Cuisine American
Servings 4
Calories 400 kcal
- 1 lb chicken tenders
- 1 cup buttermilk
- 1 tablespoon hot sauce (optional)
- 1 cup all-purpose flour
- 1 teaspoon paprika
- 1 teaspoon garlic powder
- 1 teaspoon onion powder
- 1 teaspoon salt
- 1/2 teaspoon black pepper
- 1/2 teaspoon cayenne pepper
- Oil for frying
In a medium mixing bowl, whisk together the buttermilk and hot sauce, if using. Add the chicken tenders, ensuring they are submerged. Cover and refrigerate for at least 1 hour, or overnight for more flavor.
In a separate bowl, combine the flour, paprika, garlic powder, onion powder, salt, black pepper, and cayenne pepper. Whisk until evenly mixed.
In a deep skillet or frying pan, pour in about an inch of oil and heat over medium-high. The oil is ready when a drop of batter sizzles.
Remove the chicken from the buttermilk, letting excess drip off. Dredge each tender in the seasoned flour mixture, coating thoroughly.
Carefully add the coated chicken tenders to the hot oil, frying in small batches. Cook for 5-7 minutes on each side until golden brown and cooked through, with an internal temperature of 165°F (75°C).
Transfer the cooked chicken fingers to a wire rack or paper towels to drain excess oil.
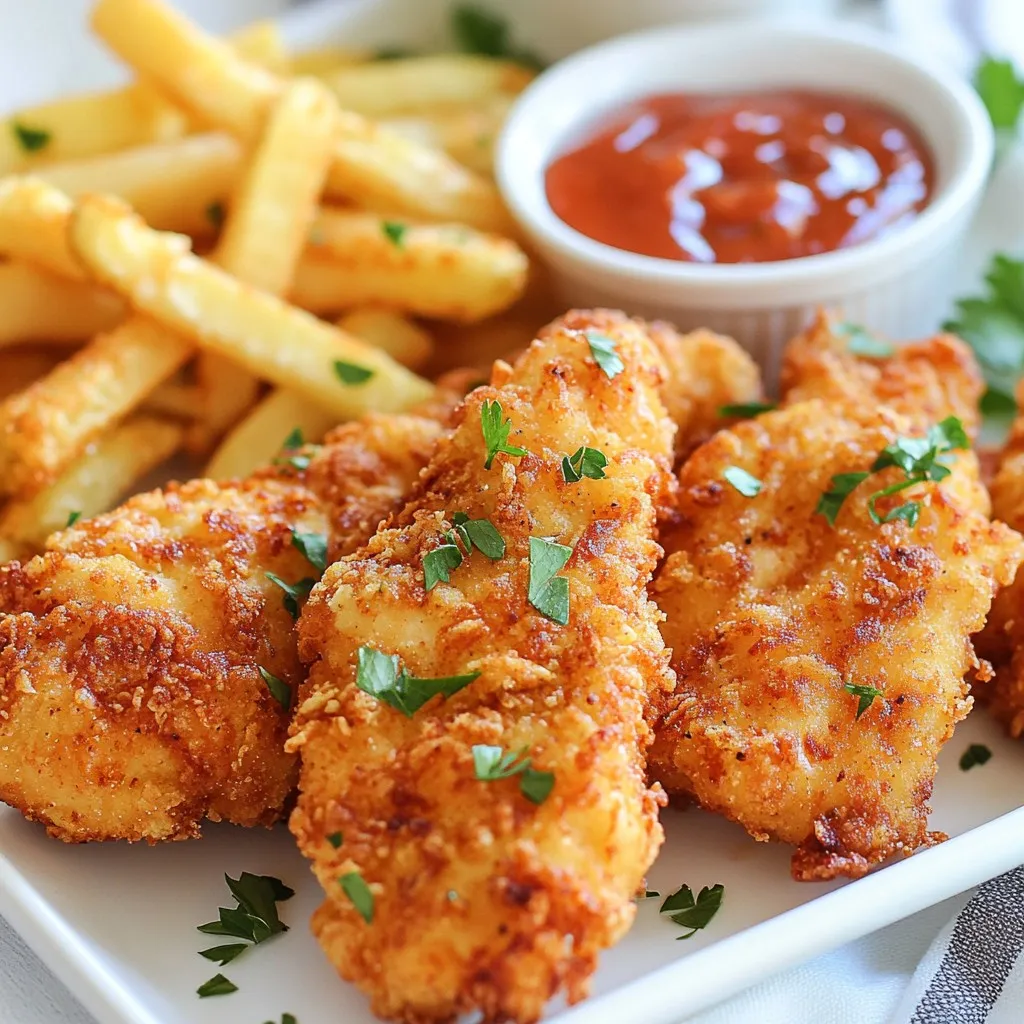
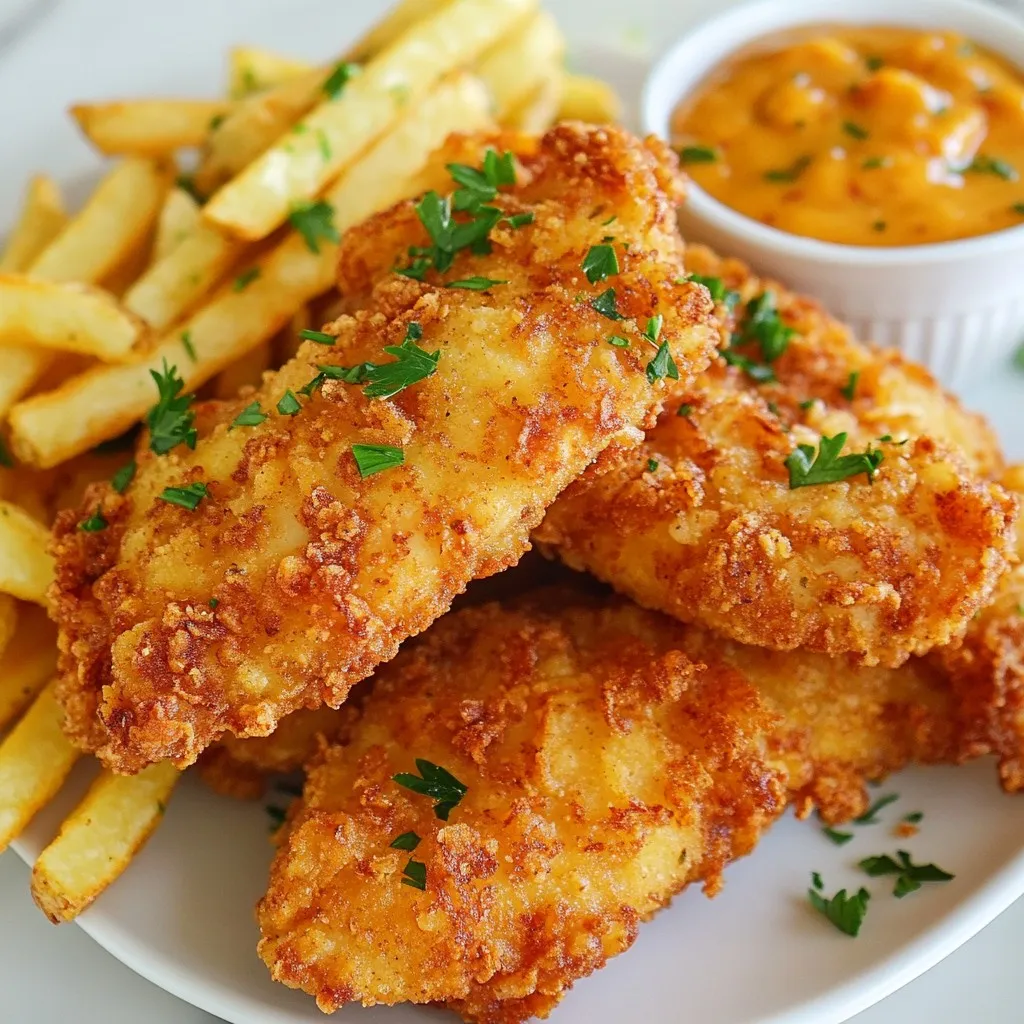
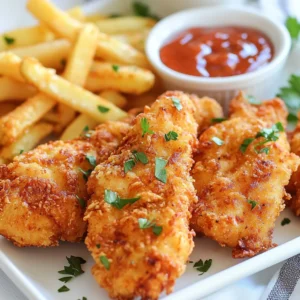
For a delightful presentation, serve with crinkle-cut fries and a tangy dipping sauce.
Keyword appetizer, chicken, crispy, fried
WANT TO SAVE THIS RECIPE?